 01-19-2017, 02:37 PM
|
#31
|
|
Member
|
|
Join Date: Dec 2013
Location: Meridian ID
Posts: 379
|
|
|
Member
Join Date: Dec 2013
Location: Meridian ID
Posts: 379
|
I did not have to cut up anything except the wiring all I did was cut The Wire an inch and a half or so before the plug. I then extended the wires long enough to put them up in the empty holes above the radio. To do this I solder the wires and use heat shrink tape to make the best connection possible.
The only one I didn't do anything with was the window lock. I don't think any of us use the window lock anyway. All I did was take it and tuck it underneath of the center console and taped it to the wiring harness there.
|

|
 Reply With Quote Reply With Quote
|
|
01-21-2017, 03:24 PM
|
#32
|
|
Junior Member
|
|
Join Date: Jan 2017
Location: Virginia
Posts: 9
|
|
|
Junior Member
Join Date: Jan 2017
Location: Virginia
Posts: 9
|
looking real good man! Love the look of those duratracs on it!
|
|
|
Reply With Quote
|
|
01-22-2017, 10:39 AM
|
#33
|
 |
Member
|
|
Join Date: Dec 2013
Location: Aurora, Ohio
Posts: 69
|
|
|
Member
Join Date: Dec 2013
Location: Aurora, Ohio
Posts: 69
|
Quote:
Originally Posted by airdreams1

I did not have to cut up anything except the wiring all I did was cut The Wire an inch and a half or so before the plug. I then extended the wires long enough to put them up in the empty holes above the radio. To do this I solder the wires and use heat shrink tape to make the best connection possible.
The only one I didn't do anything with was the window lock. I don't think any of us use the window lock anyway. All I did was take it and tuck it underneath of the center console and taped it to the wiring harness there.
|
I'll keep this mod in mind fir the future, but for right now I don't mind where the buttons are, and i like the stock look. I appreciate the info though!
Quote:
Originally Posted by tdg1x07
looking real good man! Love the look of those duratracs on it!
|
Thanks! I love the duratracs! They really give the 4runner a more aggressive look
__________________
'86 4Runner "El Chapo"
'85 Extra cab
|
|
|
Reply With Quote
|
|
03-15-2017, 08:59 PM
|
#34
|
|
Member
|
|
Join Date: Dec 2013
Location: Aurora, Ohio
Posts: 69
|
|
|
Member
Join Date: Dec 2013
Location: Aurora, Ohio
Posts: 69
|
Engine Rebuild??
I believe I have developed a head gasket leak. After driving I noticed coolant steaming out between the head and the block. So, I know I will be doing a head gasket repair. Also, I have low compression on cylinder 2 (I forget the numbers) I believe it is leaky valve seal because the pressure stayed the about same after a wet compression test. Next, I found that I had low compression in cylinder 2 during diagnosis of a misfire. I found out that the misfire was because the exhaust valve on cylinder 2 was completely closed when it should have been open. adjusted the valve and misfire fixed. 5,000 miles after the misfire was fixed, it happened again, and it was the same thing, exhaust valve on cylinder 2 was closed.
What could be the cause of the valve closing? Along with the head gasket and valve seals, what should I replace? The timing chain looks fine, it looks as if it did wear against the block slightly at one point, but there are plastic guides on there now that are completely intact, so my assumption is that the timing chain is fine.
Someone recommended that I put a new head on with all new valves, springs,cam, rocker, etc...But, if I put a fresh, rebuilt head on there, should I pull the motor and inspect/rebuild the lower half?
extra info: 1986 22re. 195,000 miles.
engine related maintenance I have performed in the last 9 months or so:
cleaned upper and lower intakes and throttle body, new gaskets installed, new PCV valve
new plugs, wires, distributor, cap, and rotor
cleaned IACV, new thermostat
new exhaust manifold and gasket
fresh coolant
regular oil changes
valves adjusted, new valve cover gasket
new fuel injectors
I'm sure I'm missing more.
I hope this helps inform you what my plan of attack should be on this repair. Thanks in advance.
Side note, I will be graduating soon, so the 4runner might become my main project for an offroad rig. My dream would be SAS on 37s, front and rear lockers, 5.29 gears, bumpers, winch, sliders, etc... money, money, money...
__________________
'86 4Runner "El Chapo"
'85 Extra cab
|
|
|
Reply With Quote
|
|
03-16-2017, 02:06 PM
|
#35
|
|
Member
|
|
Join Date: Sep 2013
Location: Nor Cal
Posts: 312
|
|
|
Member
Join Date: Sep 2013
Location: Nor Cal
Posts: 312
|
Well if you want to keep the rig for a while I'd say pull the engine. You are so far into the engine at that point I think it would be totally worth it.
|
|
|
Reply With Quote
|
|
03-16-2017, 03:02 PM
|
#36
|
|
Junior Member
|
|
Join Date: Mar 2017
Location: California
Posts: 25
Real Name: Eli
|
|
|
Junior Member
Join Date: Mar 2017
Location: California
Posts: 25
Real Name: Eli
|
Pull the engine. Thats a nice ride
Sent from my iPhone using Tapatalk
|
|
|
Reply With Quote
|
|
03-16-2017, 07:25 PM
|
#37
|
|
Member
|
|
Join Date: Dec 2013
Location: Aurora, Ohio
Posts: 69
|
|
|
Member
Join Date: Dec 2013
Location: Aurora, Ohio
Posts: 69
|
Quote:
Originally Posted by Cali 4runner
Well if you want to keep the rig for a while I'd say pull the engine. You are so far into the engine at that point I think it would be totally worth it.
|
That's what I was thinking. Do it right the first time.
Quote:
Originally Posted by eli.sanchez.3344
Pull the engine. Thats a nice ride
|
Thanks! Looks like that's gonna be the approach I'm going to take.
__________________
'86 4Runner "El Chapo"
'85 Extra cab
|
|
|
Reply With Quote
|
|
03-31-2017, 09:24 AM
|
#38
|
|
Member
|
|
Join Date: Dec 2013
Location: Aurora, Ohio
Posts: 69
|
|
|
Member
Join Date: Dec 2013
Location: Aurora, Ohio
Posts: 69
|
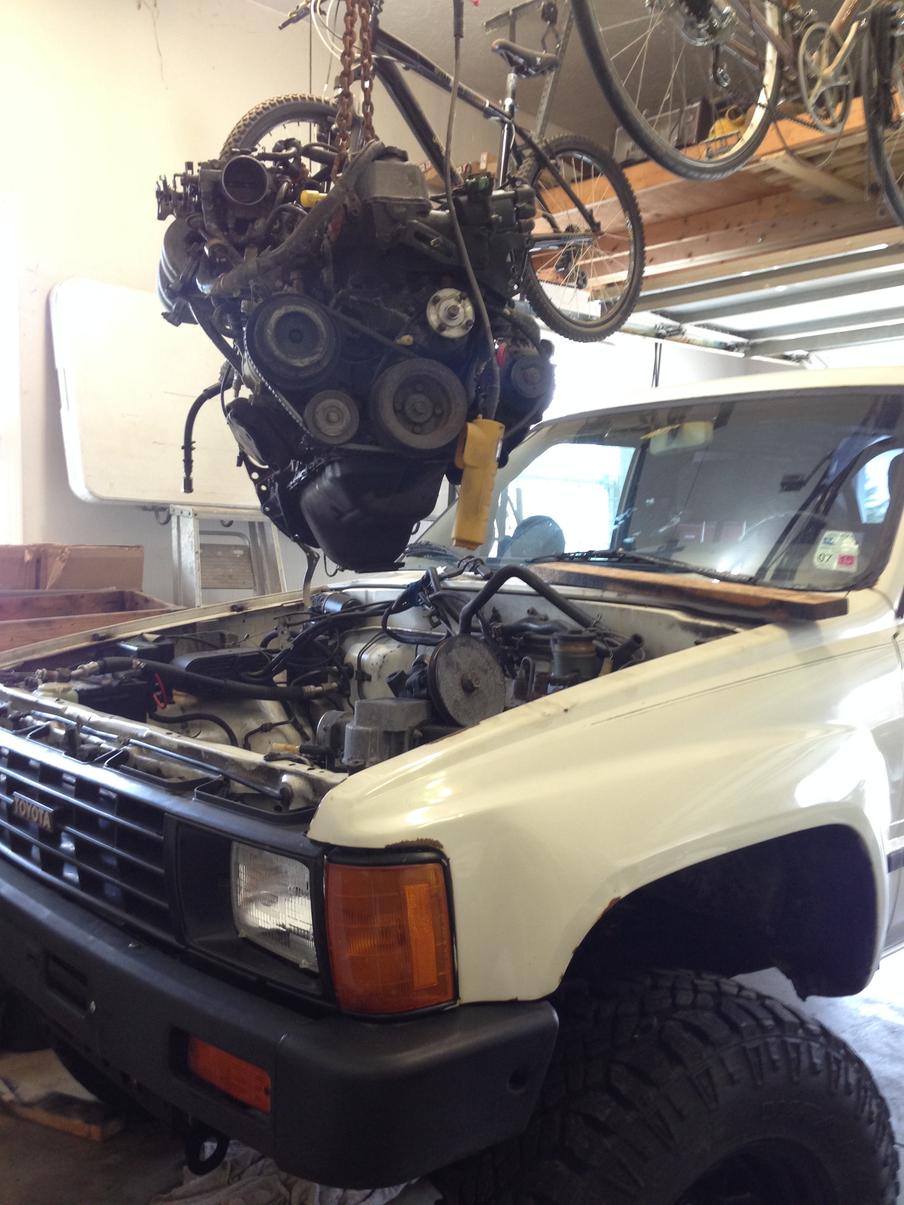
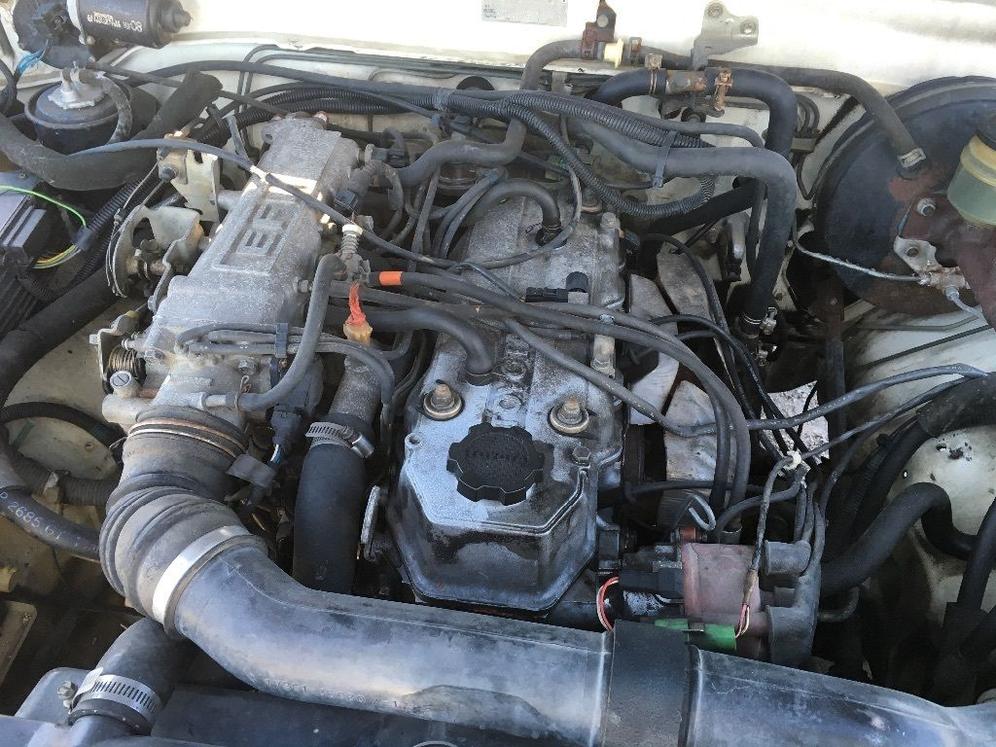
So, I decided to pull the motor the Friday before spring break. With a week off for spring break, I thought this would be the perfect time for the rebuild.
My plan is to clean up the engine and engine bay really well, paint and refresh everything I can, without going too crazy. I'll be putting a new head on and cam in from Engnbldr. Think I'm leaning towards the 261 cam, anyone have any opinions?? I'm also going to be having the block inspected.
Using our harbor freight hoist to pull out the engine. Did it by myself, worked great.
got every disassembled and organized by the end of the first day.
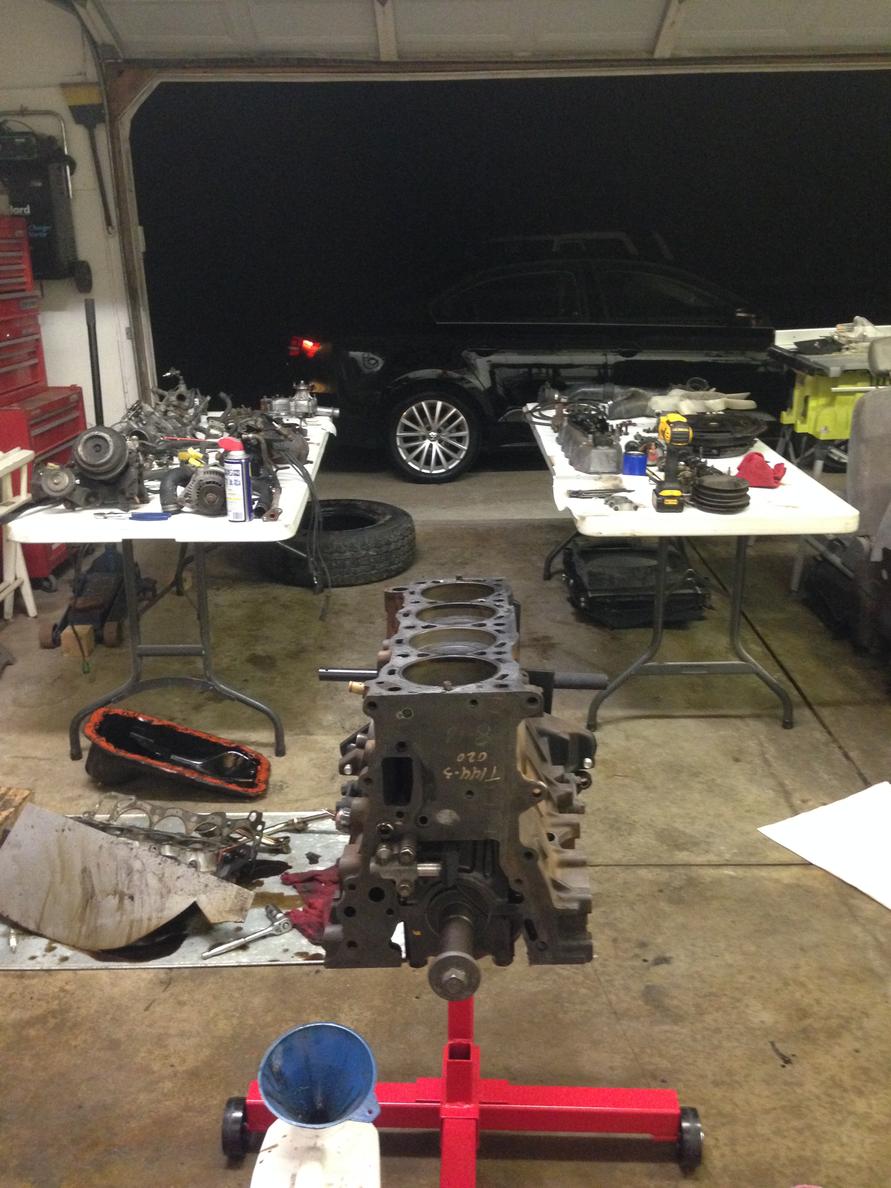
The block is at the machine shop now, waiting to hear back on whether I need to bore out the cylinders or just hone it. In the meantime, I'll be doing a lot of cleaning.
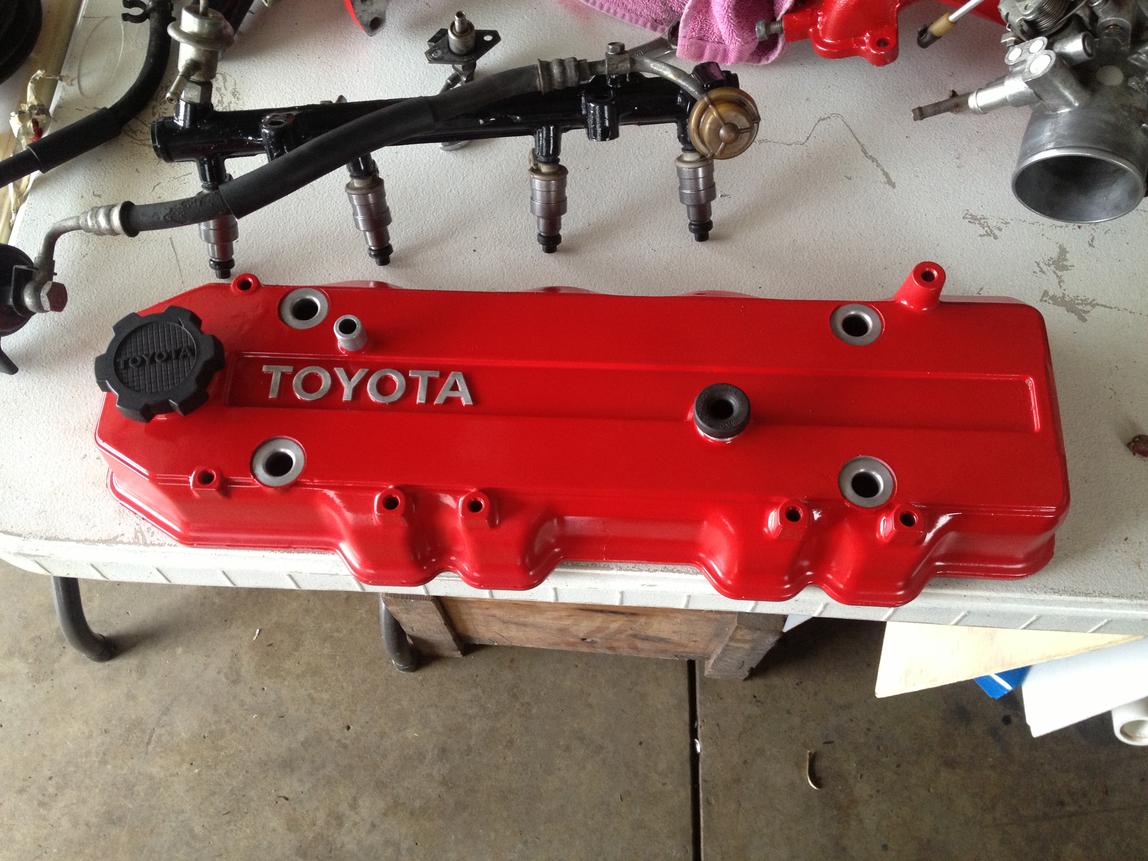
I'll leave a little shot of the valve cover here..
__________________
'86 4Runner "El Chapo"
'85 Extra cab
|
|
|
Reply With Quote
|
|
04-03-2017, 12:45 PM
|
#39
|
|
Member
|
|
Join Date: Sep 2013
Location: Nor Cal
Posts: 312
|
|
|
Member
Join Date: Sep 2013
Location: Nor Cal
Posts: 312
|
Dude right on! I want to do this as soon as I have a decent work space. Haha
|
|
|
Reply With Quote
|
|
06-20-2017, 10:26 PM
|
#40
|
|
Member
|
|
Join Date: Dec 2013
Location: Aurora, Ohio
Posts: 69
|
|
|
Member
Join Date: Dec 2013
Location: Aurora, Ohio
Posts: 69
|
__________________
'86 4Runner "El Chapo"
'85 Extra cab
|
|
|
Reply With Quote
|
|
06-20-2017, 10:37 PM
|
#41
|
|
Member
|
|
Join Date: Dec 2013
Location: Aurora, Ohio
Posts: 69
|
|
|
Member
Join Date: Dec 2013
Location: Aurora, Ohio
Posts: 69
|
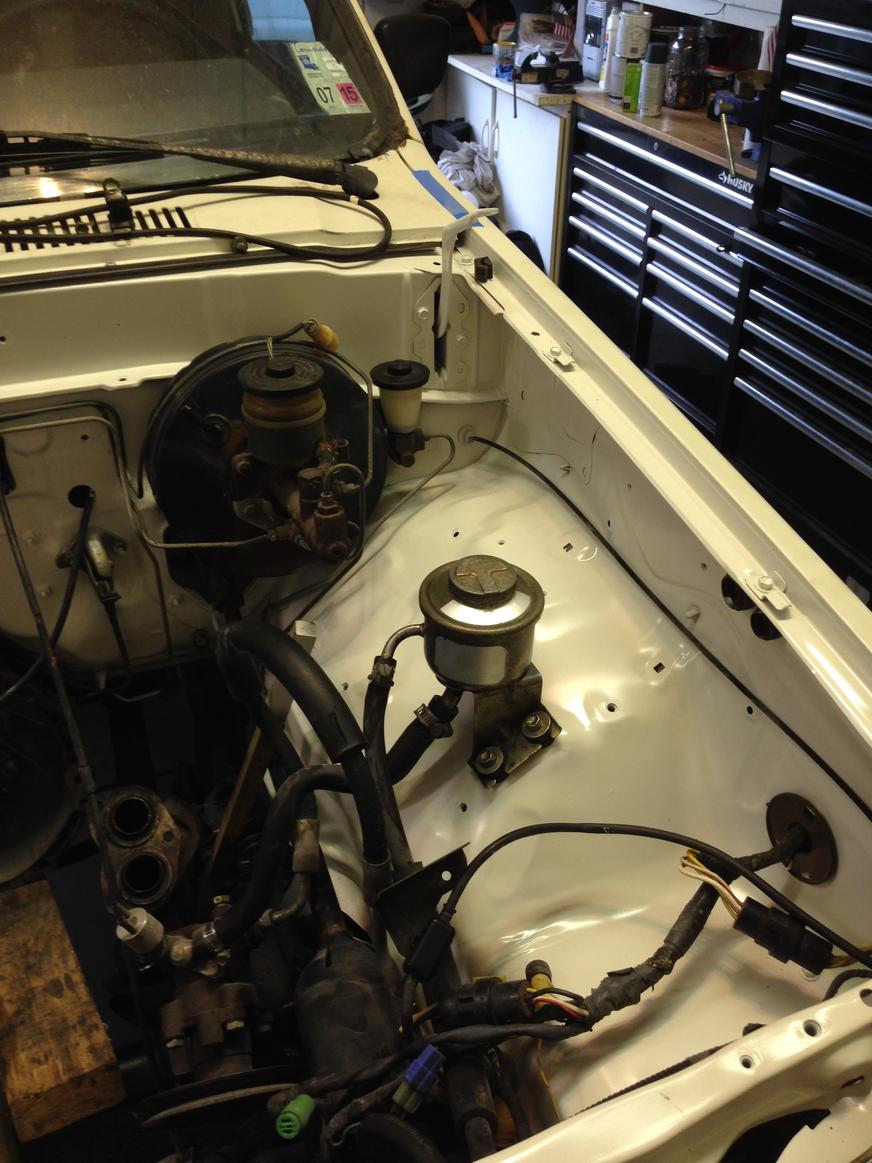
cleaned up the front end too.

finally, the before and after shot...

Other than losing about 3 qts of oil in about 30 seconds on initial start up because the machine shop forgot to replace one of the oil galley plugs, the whole rebuild went pretty smooth, and she is running great! Unfortunately I have one small leak from the rear main seal housing, but ill address that a little later.
__________________
'86 4Runner "El Chapo"
'85 Extra cab
|
|
|
Reply With Quote
|
|
06-27-2017, 08:48 PM
|
#42
|
|
Member
|
|
Join Date: Sep 2013
Location: Nor Cal
Posts: 312
|
|
|
Member
Join Date: Sep 2013
Location: Nor Cal
Posts: 312
|
Looks great!!!
Sorry about the oil loss especially after it was so shiny
|
|
|
Reply With Quote
|
|
06-28-2017, 11:48 AM
|
#43
|
|
Junior Member
|
|
Join Date: Jun 2017
Location: Colorado Springs, CO
Posts: 12
|
|
|
Junior Member
Join Date: Jun 2017
Location: Colorado Springs, CO
Posts: 12
|
Quote:
Originally Posted by jsmith7
Attachment 256730
cleaned up the front end too.
Attachment 256733
finally, the before and after shot...
Attachment 256735
Attachment 256732
Other than losing about 3 qts of oil in about 30 seconds on initial start up because the machine shop forgot to replace one of the oil galley plugs, the whole rebuild went pretty smooth, and she is running great! Unfortunately I have one small leak from the rear main seal housing, but ill address that a little later.
|
Looks awesome!
|
|
|
Reply With Quote
|
|
07-12-2017, 09:52 PM
|
#44
|
|
Member
|
|
Join Date: Dec 2013
Location: Aurora, Ohio
Posts: 69
|
|
|
Member
Join Date: Dec 2013
Location: Aurora, Ohio
Posts: 69
|
Quote:
Originally Posted by Cali 4runner
Looks great!!!
Sorry about the oil loss especially after it was so shiny
|
Quote:
Originally Posted by jkCOtoy
Looks awesome!
|
Thanks, guys!
__________________
'86 4Runner "El Chapo"
'85 Extra cab
|
|
|
Reply With Quote
|
|
11-25-2017, 02:35 PM
|
#45
|
|
Member
|
|
Join Date: Oct 2012
Location: Wichita, Kansas
Posts: 62
|
|
|
Member
Join Date: Oct 2012
Location: Wichita, Kansas
Posts: 62
|
Updates
any updates i really like your build . just picked up a 89 in the same color
|
|
|
Reply With Quote
|
 Posting Rules
|
You may not post new threads
You may not post replies
You may not post attachments
You may not edit your posts
HTML code is On
|
|
|
|


 Linear Mode


