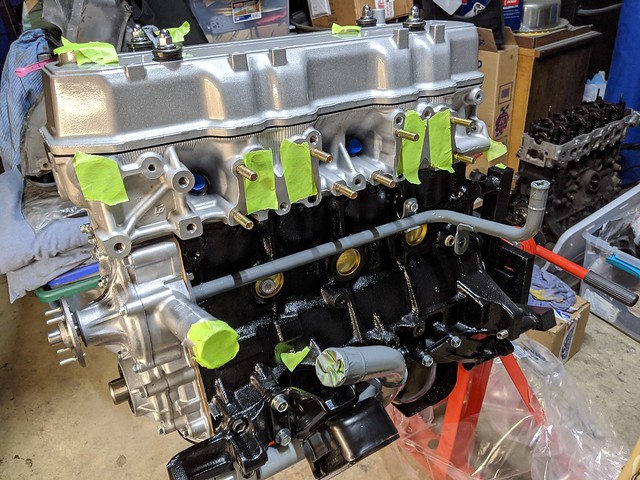
This is right before I put the engine back in, with the finished front axle area painted, rear engine bay factory white paint, painted brake booster black, and brake/clutch lines reinstalled:
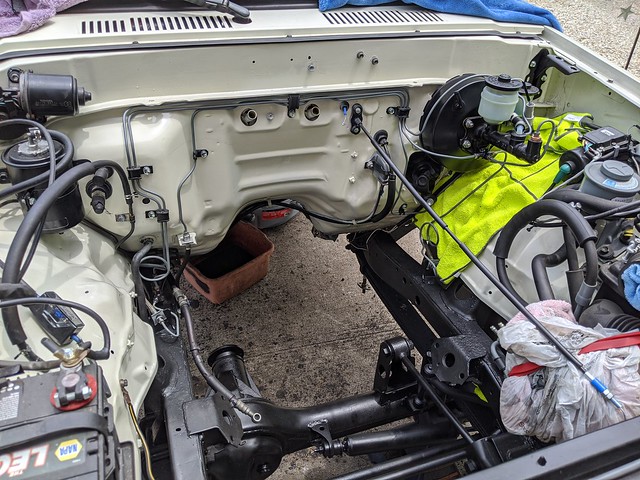
Engine installed, this was a late night photo after cramming this in one night after work. It went in fairly easily, just a bit of jockeying with the load leveler to get the motor mount bolt holes lined up. I put in new OEM motor mounts and hardware, naturally. Ready to tackle the transmission install next.

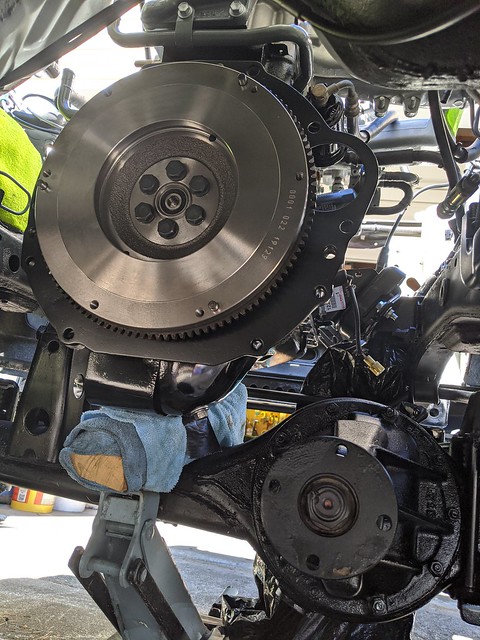
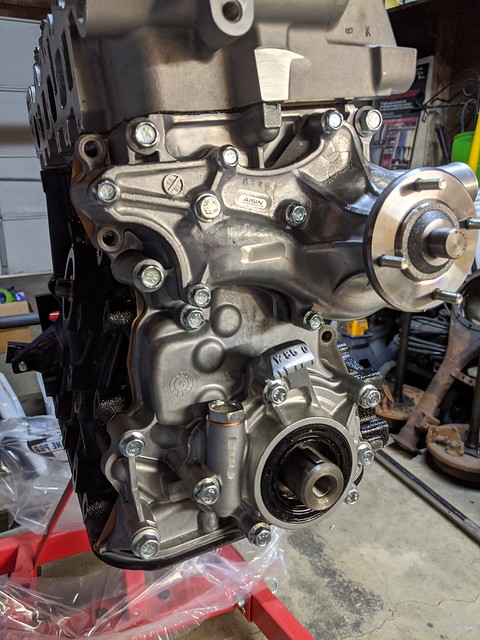
Next was the back plate, new flywheel and Aisin clutch kit. First time ever installing clutch components, so I was careful to use Loctite on the flywheel bolts and torque per FSM specification. I used a breaker bar on the crank bolt/frame rail to hold the crankshaft while torquing the flywheel bolts which worked well.


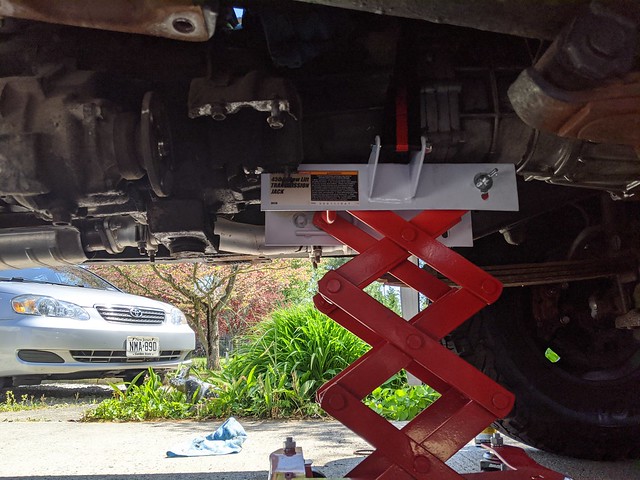
Next up, getting the transmission in. This wasn't as bad as I thought, and took about an hour of maneuvering with the tranny lift and some brute force with my knees to get it aligned right. The biggest issue here is the dust shield for the front driveshaft. I couldn't get the tranny to sit properly on the jack given the width of the plate it sits on, so it was always off center (hence the knee shoves). But once in, I got the easy bolts in, then the tranny to block brace bolts. Lastly, the top two transmission bolts, which were easy with the help of this specialized 17mm 18" ratcheting box wrench that could angle the head. This tool I bought after struggling on removal with all other methods outlined online (3' extensions with wobbles, go in through tranny opening in cab, etc). None of those methods worked until I bought that tool and it was worth the $30 easily.
Clutch slave cylinder in and lines attached:

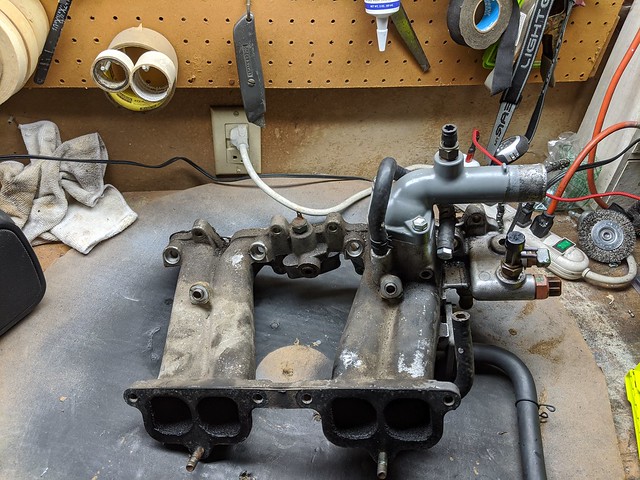
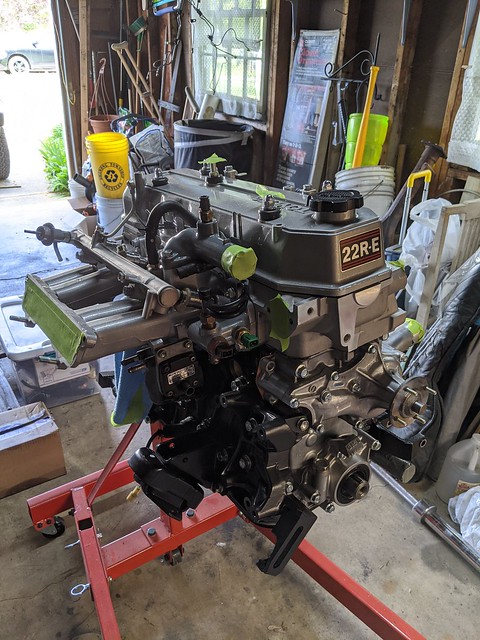
Back to the engine, getting the wiring settled and the vacuum lines before getting the plenum on:


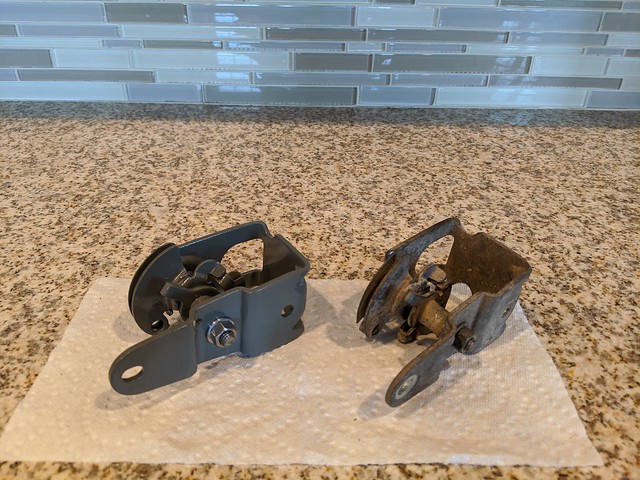
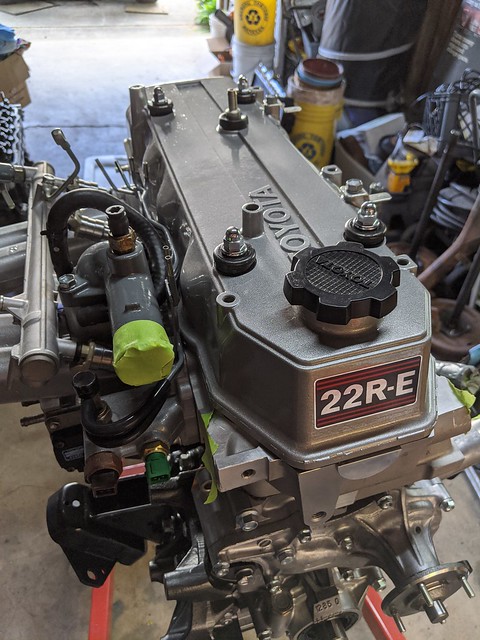
Plenum on with the painted throttle bracket assemblies. Really starting to come together now!

Fast forward a bit, and everything is all assembled. Poured in just about 5 quarts of 10w-30 break-in oil, bled the brakes and clutch, filled the coolant with a spill-free funnel. Ready for a first start.


So following the break-in procedure from Yota1, I primed the oil pump with the coil/EFI fuse removed until the Oil Light went out. Then I reconnected those and cycled the key to ON with the fuel jumper in place to pressurize the fuel lines. It took a few cranks but then started right up. It was definitely idling a bit high, but my first focus was leaks, mainly fuel. I smelled some fuel so checked the rail, but it turned out, the 4th injector in the rear was dripping fuel. Now I had installed the injectors/rail into the manifold awhile back, so this meant ... tear off the plenum again and removing all the vacuum lines. Turns out, I pinched the o-ring so I replaced it and properly eased it back in, lubing with motor oil:

On the next start, the fuel issue was addressed, and began to see some coolant leaks. Here were the three things I had to tighten, surprisingly:
1. A/C temp sensor on thermostat housing. I thought this was cranked down but apparently not enough. Had to really tighten it a few cycles to get it to stop leaking.
2. Temp gauge sensor between 3rd and 4th cylinder on intake manifold. Again, this was tight, but not tight enough.
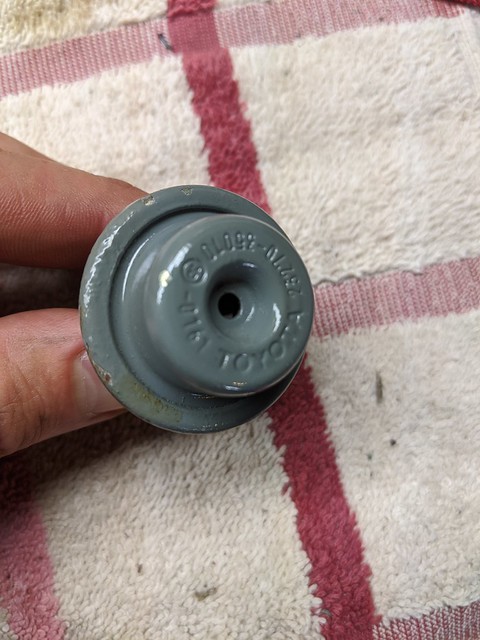
3. Bi-valve plastic vacuum valve above the cold start switch where the two short vacuum lines run to. This one was nerve-wracking since the thread alignment was in a good spot prior to tightening to accommodate the vacuum lines. After cranking it down, it was facing rear. I pushed it a bit more so the short vacuum lines wouldn't be too kinked and got it to a good place. More importantly, the leak was fixed and I didn't strip out the brass threads or manifold.
After this I could focus on timing which posed the second problem. I did an initial non-jumped adjustment of the distributor but I had to retard it back to the top of the bolt range to get to 12 degrees, which shouldn't have been the case as it should sit mid-way in the slot if I inserted it correctly. So I went and inserted a jumper to drop the idle down to set it to 5 degrees, and the jumper had no effect. Scratching my head, I read that if the TPS wasn't properly adjusted, and thought the throttle plate was open and not at IDL, it would not jump down. TPS had been adjusted and I didn't want to go through that nonsense again especially with the throttle body on the truck. But I checked the throttle body, and noticed that the throttle plate wasn't contacting the stop screw. Turns out I hadn't adjusted the throttle cable properly, and loosened it up enough to get the plate to settle and have just enough slack in the line. Once this was done, the jumper properly lowered the idle down, and I was able to set timing to 5 degrees, with the distributor landing in the middle of the bolt slot range as expected.
Last issue was an o2 sensor code via the check engine light. This was a new o2 heated densor sensor which I had working prior and wired up properly (for my LCE header), so I was a bit confused. Did I damage it when it was sitting out of the exhaust pipe? I also noticed I had a small exhaust leak near the pipe that houses the o2 sensor and connects to the catalytic converter. Turns out, I had placed the washers for the o2 sensor below the o2 sensor plate (so between the o2 sensor plate and the gasket), and this was causing the exhaust leak and the o2 sensor code. I swapped it around, tightened it down and the exhaust leak plus the o2 sensor code went away.
Next in the break in process was the 20 minutes of revving between 1500 and 2000 rpms to break in the cam. Since I have a DLX, I don't have a tachometer, and just used my timing light which had a tach, and manually pulled the throttle plate standing in front of the engine. Tedious, but I got it done. Coolant was finally burped and no more bubbles in the spill-free funnel, so I was ready for a first drive ... after I attach the driveshafts (newly rebalanced, u-joints replaced, sandblasted and painted). That took another hour, what a pain it is tightening those bolts, especially the front drive shaft to transfer case.
First drive went great, no major issues. I have yet to have any temperature issues at all, and no more leaks to be seen. In the past week, I've already driven the 500 miles needed before the first oil change and valve adjustment. The top has come off and the weather has been good so I've been enjoying the random local low speed drives. I made sure to exercise the transmission/clutch and not go above 3500 RPMs or 55 MPH. I'll be doing the valve adjustment and oil change this weekend.
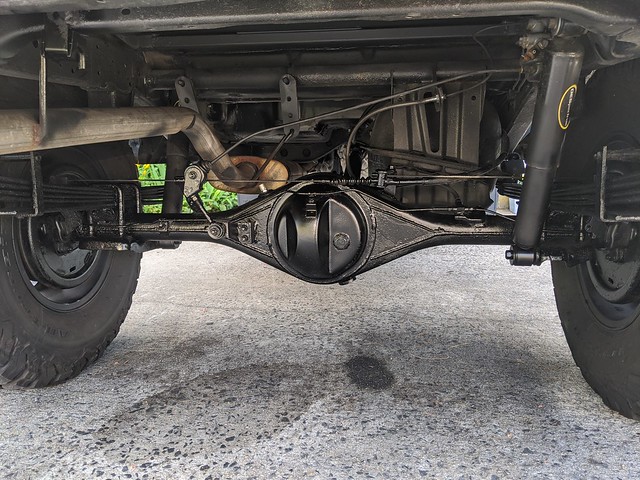
A few other cosmetic things as well. My rear axle and assorted parts were the most rusted parts on the truck and it looked horrible in comparison to everything else. I have a spare axle and backing plates, that I'm going to restore off the truck (proper sandblast, primer, paint) and put new leaf springs on as well. But temporarily, I wanted to get it looking passable and spent another week after work wire wheeling the hell out of axle, Eastwood Rust Encapsulator and Extreme Chassis Black paint. It came out better than I thought, and now I don't wince when looking at it from behind.
Before:

After:
I had my skidplate powder coated awhile back, so I install that as well with new hardware. I've never had a skidplate on my '85 4Runners before but I like the look as it doesn't hang down too far.

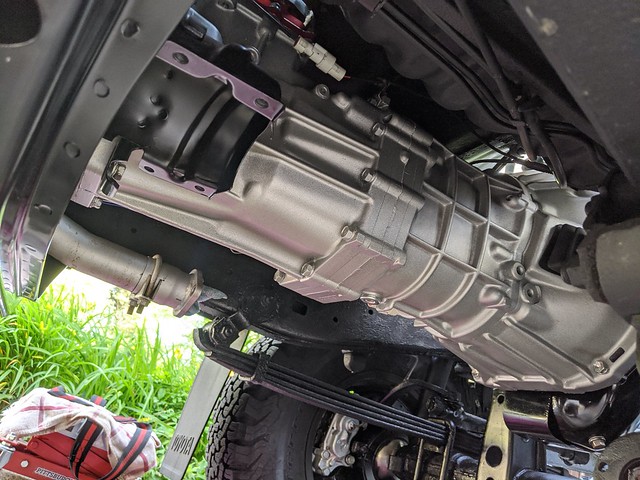
A nice shot down the undercarriage showing the newly rebuilt driveshafts, tranny, etc. Have a bit of cleaning to do from a paddle board trip I took last weekend:

I then went ahead and did some front grille and bumper painting. I used gloss black on the headlight surrounds, and was able to find a close match on the gray (Nissan Grey from DupliColor) for the inner headlight bezels. They were really faded so it was a much needed item to address. I used DupliColor Trim & Bumper paint on the plastic bumper ends and it looks good. I also painted the bolt ends (8 of them) satin black along with the bumper, bumper insert, and valance. This time, I used Krylon Fusion Satin Black, and it's the best rattle can black I've used. Too bad I didn't discover this brand/model before I started all this a year ago.


So a lot of progress, and I'm super happy with where I stand now. What's next?
1. A/C install - I have most of the parts, hardware, I'm not too sure off. I've got all new Denso parts (evaporator, condenser, dryer, expansion valve) and sourced some of the discontinued hoses from a seller on eBay. With the top off, it's not a huge priority, but I'd like to get it in so I can take it somewhere to get converted from R12 and charged.
2. New TPS install - I had a new OEM TPS but didn't install because my original checked out. I'm having a slight rumble at idle occasionally, and figured I'd put this in and see what happens. It was dumb not to do this prior to installation of everything, but I trusted the multimeter.
3. Rear Bumper OEM - I can't source a stock one, and the previous owner replaced the rear floor, which removes the stock bumper bracket mounts. I'm going to be talking to a machine shop to have them build me some brackets and a flat rear bumper that can connect to the frame rails. Once this is done, I'm going to order an OEM fiberglass bumper from toyotafiberglass, and put this on the solid bumper as a skin. I know the stock bumper is mainly for looks with it's original mount points on the rear floor, which to me is pointless in the event of an accident. So I think this modification will serve better overall by integrating it with the frame rails. Still need to source some of the strange brackets that connect the end caps to the rear to the side pieces, but this should complete it cosmetically.
4. Rear axle area restoration - As mentioned, I have a spare rear axle in much better shape. I'm going to have it sandblasted along with a spare 3rd member housing and then paint it. I'll also be ordering new stock leaf springs, associated hardware/components, drum brake parts, and assembling this off the truck. It's not high on my list right now so I may push this until autumn.
5. Front axle rebuild - last on the list, and will be pushed until autumn earliest but most likely next spring. I haven't decided if I'm going to do this myself, given the knuckle alignment issues without the SST. I've seen videos on people making their own SST for shimming the knuckle, but not sure if I want to tackle this. Regardless, the knuckles definitely leak and I want to get that addressed and also sandblast and paint all the steering components on the front too.


 Definitely lucked out, but paid for it too.


 .
.


 Linear Mode


