Jono.ful's Backcountry Assault Vehicle

Jono.ful

New member
2012 Toyota 4Runner SR5 w/ Upgrade Package (Canada)

delivery day, july '12...
IMG_20120717_194804_zpse1cb224f.jpg~original


and it didn't take long to for things to go sharply downhill from there. As it sits today (Sept/20)...
IMG-20200916-183700.jpg


mods to date...
suspension
front
Total Chaos UCA with poly bushings
Total Chaos LCA stock length, dual shock compatible
Total Chaos alignment tab gussets
Total Chaos spindle gussets
Bamf BMC plates
Elka 2.5" custom length remote reservoir coilovers with clickers, Eibach 750lb springs
Offroad Solutions high angle inner CV boot
EMF adjustable uniballs
sway bar delete
rear
MetalTech 4x4 adjustable upper links
adjustable panhard bar, with angle correction bracket
Custom adjustable high offset lower links
Total Chaos lower link skids
MetalTech 4x4 3” bump stop drop bracket
MetalTech 4x4 extended stainless brake lines
Elka 2.5" custom length remote reservoir struts with clickers
MetalTech 4x4 300lb/104lb progressive rate long travel springs
sway bar delete
EMI Keith panhard correction bracket

armour
(sorry, we spell words funny here....and apologize lots. sorry!)
Outpost Offroad Trail Edition sliders
Hefty Fabworks single swing out rear bumper
Addicted Offroad front hybrid plate bumper
Hefty Fabworks full steel skid plate package

wheels and tires
FN Wheels Countersteer X 17x8
Ultra Wheels 198 Bolt 17x9
Goodyear MTR LT285/70/17 D range
Goodyear Duratrac LT285/70/17 D range, studded

offroad and expedition equipment
Camelback Metalgear full length roof rack with additional cross member
Warn VR10000-S
Warn wireless controller
Air Zenith OB2 air compressor
Viair 2 gallon remote tank
Gobi ladder
incorporated rear storage drawers
Wild Coast roof top tent
ARB awning
Axia universal mounts
Koplin chainsaw mount
Safari Airmax Snorkel

electricial
Redarc bcdc1225d dc to dc charger
OTRATTW and CH4X4 auxiliary switches
Pelfreybilt fuse panel bracket
2x Blue Sea 7713 remote high current relay
3x Blue Sea thermal circuit breakers
3x Blue Sea 7721 Mega fuse holders
Blue Sea 5026 ST blade fuse block 12 circuit
Blue Sea 1830 State of Charge battery monitor
1awg cable, Thomas&Betts terminal lugs
Pelfreybilt group 31 battery cage
220ah 12v system, Optima BlueTop D31M, 2x D34M house battery bank, Optima YellowTop D27F starting battery
Stanley 500 watt inverter
2x Raptor LED battery terminals R5BTDMP
DC Power Engineering XP 270 amp high output alternator
lighting
1x Seward Offroad 40” LED bar, combo pattern (forward facing roof top)
2x Rigid Industries D2, flood pattern w/ amber lenses (ditch lights)
CBI Offroad Fab ditch light brackets
2x Rigid Industries A-Series, low power cool white (under hood)
2x Lightforce 240 Blitz, 50 watt HID, yellow spot/combo, crystal blue combo, clear spot lenses (grille)
2x Rigid Industries A-Series, low power, amber (drl/turn indicator)
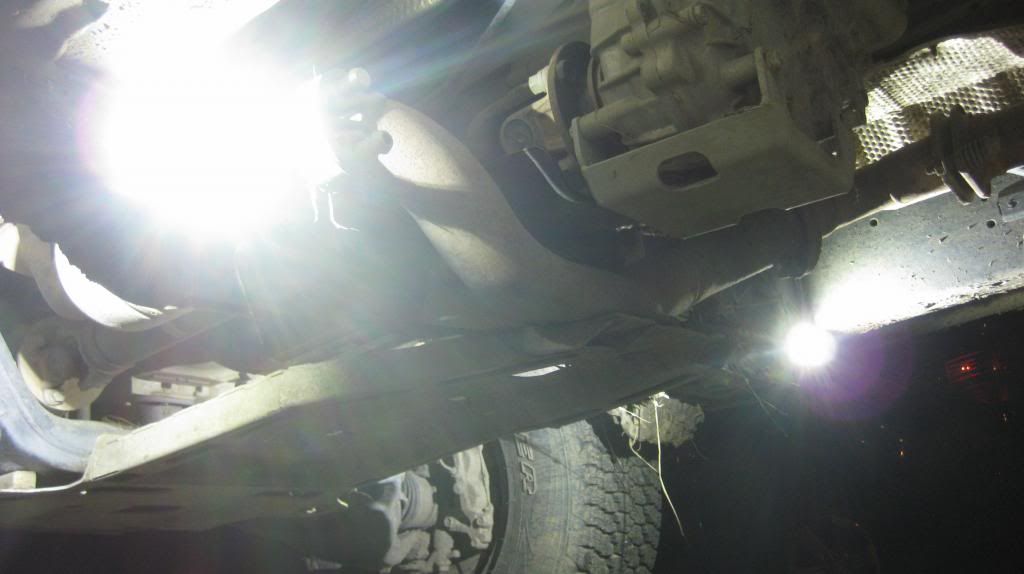
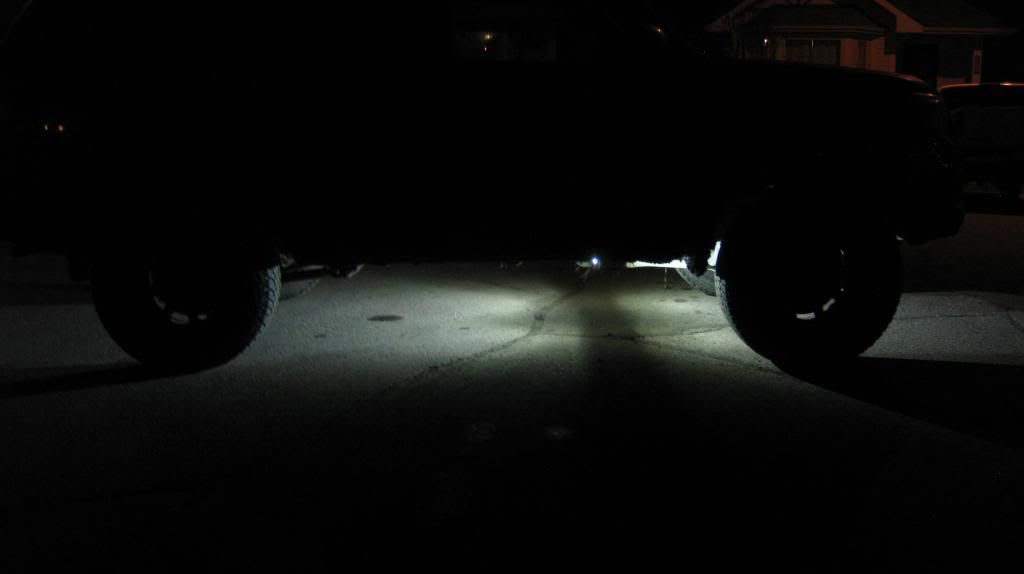
6x Rigid Industries A-Series, high power, cool white (rock lights)
2x Rigid Industries D2 flush mount, fog pattern (fog lights)
Morimoto Mini bixenon projector, “gatling gun” shrouds
Morimoto white 55 watt ballasts
Phillips 55 watt ds2 HID bulbs, 4300k

power/driveline
TRD cold air intake
Magnaflow 18” muffler
Harrop elocker A11114
Nitro 4.56 gears

comms/entertainment
Mangowalk 4” FM antenna
Kenwood excelon DMX1057XR
Kicker 12” sub, enclosed box
Concept 600 watt mono amp
Kenwood TM-D710G Dual Band FM radio
Comet Dualband 2M/70cm 18" antenna

gone but not forgotten...
Kenwood dnn990
Uniden Bearcat 880
Bilstein 5100/5160
Eibach 14"x3" 650lb springs
MetalTech 250lb/105lb progressive rate long travel springs
Metaltech adjustable lower links
OME 885 springs
Bilstein 5160
OME 889 springs
ARB skid plates
SuperWinch LP8500 with wireless
Viair 275c
Rigid Industries 20” SR spot pattern
Goodyear Silent Armor LT285/70/17 D range
Radflo ET coilovers and LT rear shocks, King 14x3 700lb sorings
Blue Sea ML-ACR

in the mail/on the drawing board
Doug Thorley long tube headers (awaiting installation)
Y-pipe
Method Racing 105
Whole wack of 12v stuff (under construction)
35's
 
Last edited:
Register to hide this ad
Suspension

new OME 885 next to the stock springs for reference
IMG_20121116_150624_zpse5d2c765.jpg~original


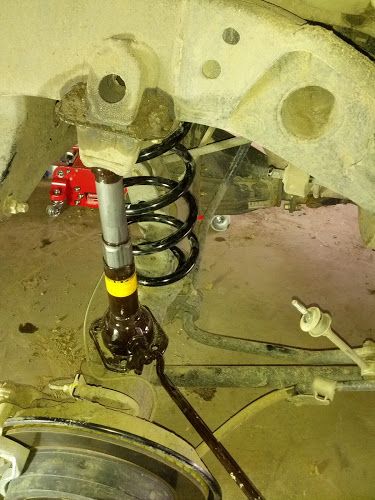
make use of the stock bottle jack to flex out the rear axle, after disconnecting the rear sway bar end link in order to help seat the new springs
IMG_20121117_143632.jpg~original


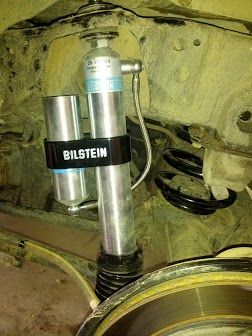
Bilstein 5160 rear shock installed with optional billet reservoir clamp
IMG_20121117_141952.jpg~original


New Total Chaos upper control arms next to the stock units
IMG_20130120_123952_zps7fedc8f8.jpg~original


installed
IMG_20130120_140517_zps727e4ae7.jpg~original


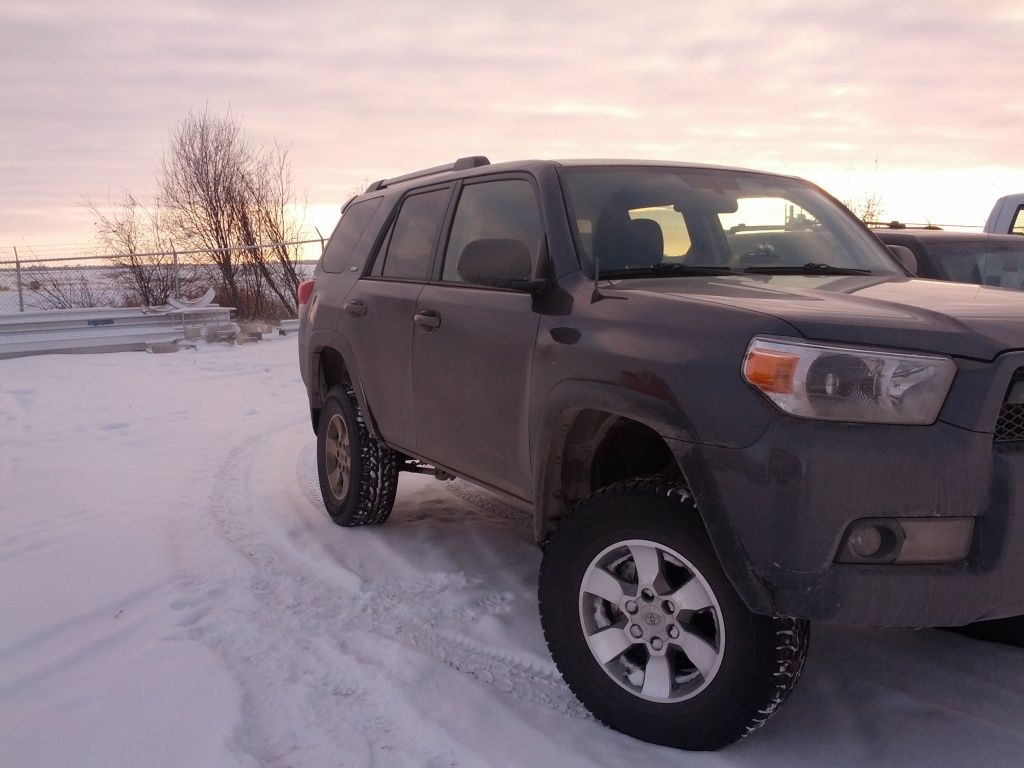
ride height with the 5100 set to 0” shortly after installation
IMG_20121122_152050_zps926d2706.jpg~original


next to a Ford Raptor at work some time later, IIRC the 5100's were set to 1.75”
IMG_20130618_155730_zps33e1ab0f.jpg~original


before too long, I began to reach the limits of what the Bilsteins could handle and I had found that the OME springs sagged quite badly.
new components were ordered for version 2.0. a few parts were delayed shipping for whatever reason, but eventually things started arriving
IMG_20140515_190955_zpsbaowsmd5.jpg~original


new vs old OEM/OME/Bilstein
IMG_20140519_125053_zps7c14858c.jpg~original

IMG_20140523_123424_zps217c659b.jpg~original


With the additional weight of my bumpers, it was necessary to upgrade the mid rate springs from Eibach and Metaltech I had been running for a couple years. I went with 700lb King springs in 14x3 for the front, and I stayed with Metaltech's progressive rate springs in the rear, but changed to the 300/104lb spring rate to handle the additional load.
20170516_093822_zpsivcf6ktf.jpg~original


after a few months of use, I found the Johnny Joints MetalTech uses on their rear 4-link kit difficult to access for the purpose of greasing. The straight oem zerk fittings were replaced with 90° fittings. I'd suggest for anyone who has this kit to switch these prior to installing the arms as it makes maintenance much easier.
2015-05-10%2015.08.28_zpsxe2umwfb.jpg~original


As with any lifted truck that sees regular trail use, alignments can be a spot of major contention. Getting stock alignment specs back after changing suspension components is challenging, and offroading and even potholes can knock everything back out of spec in a hurry. To aide in keeping my truck in spec, I added the Total Chaos alignment tab gussets. Install was straightforward, but requires TIG welding.
2014-12-29103559_zps6ab9874d.jpg~original

2014-12-29104405_zps3a19f30b.jpg~original

2014-12-29120920_zps5dec1239.jpg~original


One of the issues with IFS in a lifted application is premature boot wear caused by the fins on the OEM plastic boots rubbing as a result of the altered suspension geometry. Running at or near 3” of lift puts the cv boots at the limit. Offroad Solutions offers high angle boots with a revised fin design and are constructed of sillicone, which is soft and very flexible relative to the OEM boot, or even the neoprene boots found on some generic NAPA cv shafts. In order to install these new boots on a tri lobe tulip, the inner mounting surface must be retained from the original boot, and the new unit is mounted over top of it.
The best way to properly space out the fins after installation of the boot on the shafts seems to be to completely install the cv and new boot back into the differential and wheel hub with the outer clamp on the inner boot loose, space the fins so that they do not touch, and then tighten the clamp. This is done so that the boot does not hold vacuum as you adjust the position of the outer clamp.
Toyota cv with new boot installed, but notice that the fins are too close together. This is before the boot was adjusted on the truck.
2016-10-25%2016.29.09_zpsam9nbyxf.jpg~original
 
Last edited:
Armour

removal of the OEM skids after a recent trip. The effects of the lack of adequate drainage holes quickly became evident
IMG_20121116_090023.jpg~original


freshly installed ARB skid plate package
IMG_20121116_090044.jpg~original

IMG_20121116_090050.jpg~original


first impressions of the ARB setup were positive, and they served me reasonably well for a couple seasons of offroading, but before too long it was apparent that the ARB's were not up to the task of more strenuous trips.
Relatively minor impacts to the skids produced some significant deflection, and required a BFH to fix.
IMG_0493_zps18fbbc92.jpg~original

IMG_0494_zps26a2321d.jpg~original


Like many others who run the ARB's, my crossover pipe on the exhaust contacted the skids
IMG_0496_zpsc1f54348.jpg~original


I initially spaced the plates lower using a few washers, but as this is a low hanging spot, I found that the rear mount ARB uses bent easily and necessitated a different solution. I traced the shape of the ARB bracket on to 4x4x1/4” angle iron, which solved the crossover pipe problem, but exacerbated the bending in the trans skid.

Outpost Offroad sliders arrived from MetalTech 4x4
IMG_20130605_175433_zps8b1cd123.jpg~original


for whatever reason, there are several differences in each trim line between US and Canadian models. Chief among these, in my model year Canadian SR5 trucks have colour keyed door handles, but black plastic trim, and Trail Edition style rocker panels. After taking some measurements, I determined with the help of MetchTech that the TE sliders would fit perfectly on my truck.
Rather than powder coat these, I decided to use a spray on bedliner product. Results were poor, and I ended up redoing the coating with industrial enamel paint.
Mounting was straightforward and made easy with the assistance of a set of jack stands
IMG_0438_zpsaae33a35.jpg~original

IMG_0441_zpsbde2c2dc.jpg~original

IMG_0446_zps7db320f8.jpg~original


since installing, these have served me very well, and I use them regularly as a hi lift point without issue. I would absolutely suggest against bedliner products or expensive powder coating if you plan to wheel your truck however. Sliders get banged up quickly, and rattle can is the least expensive and easiest repair.

Front and rear plate bumpers were always part of my long term plan, it was nearly three and a half years before I ordered them however. When I bought my truck, the only aftermarket front bumper option was from Shrockworks, and rear bumpers were not yet available. I'm glad I waited though, because in the interim great offerings from companies like CBI, 4x4Labs, Renegade, Pelfrybilt, and many others have come to market, allowing anyone to pick an option for their personal tastes. I decided on an [MENTION=93260]Addicted[/MENTION] Offroad hybrid front, and Hefty Fabworks single swing out rear. Due to some delays in production on my rear bumper, Chris from Hefty Fabworks also offered me a full set of their skid plates at a reduced cost, which proved to be too good a deal to pass up.

After getting everything home and unwrapped...
20161013_215802_zpsqzuf84ca.jpg~original


completing the installation alone was challenging, but manageable with a set of jack stands
2016-10-14%2011.34.31_zpsuewpvpka.jpg~original


and a 4wd badge from a 40 series Land Cruiser for good measure...
20161019_182345_zpsbfmuwqla.jpg~original


The front bumper from Addicted Offroad required quite a bit more work, since I intended to mount different lighting options than those offered. Because of the angles of the OEM bumper skin, I found the front plastic significantly more difficult to measure prior to cutting than the rear. Mocking up the Rigid flush mount D2 and A-series was not especially challenging per se, but since this bumper ships unpainted, it had to be put on and taken off the truck a couple times during the process, and then again to be painted.
Getting it mounted up for the first time. Minor cutting of the lower headlight support bracket is necessary on the 2010-13 models, but not on the '14+
20161017_154503_zpsy0c15mot.jpg~original


test fitting the winch and Lightforce 240's
20161017_155809_zpsb3ikzhqu.jpg~original


and the finished product
2016-10-20%2016.32.32_zpscm8omljm.jpg~original


The new skids were painted a close approximation of TRD red, and the installation – although devoid of instruction from Hefty Fabworks – was uneventful. The only issue I ran into was that the rear mounting hole on the transfer case skid did not have a corresponding threaded hole on the frame. I'm not sure if this was unique to my truck, but I managed to get a nut inside the frame rail and threaded onto the bolt using a pair of medical foreceps.
I did have a few reservations about my colour choice, but it is relatively subtle from every angle except for perhaps under the truck.

Finished installation
2016-10-17%2013.26.50_zps5rqrlrto.jpg~original
 
Last edited:
Offroad and Expedition Equipment

I was given a SuperWinch LP8500 for Chrismas long before I ever had the plate bumpers, so this necessitated a creative solution to mount it. I started with a SuperWinch plate, but after pulling off the bumper skin, it was clear that the plate wouldn't fit as is, so minor modification was required. I was able to re-purpose some c-channel brackets to tie the plate back to the frame rails, then had the brackets gusseted. I also made use of 2x 5,000 axle u-bolts around the aluminum bumper structure.
IMG_20140314_134704_zps6ef29def.jpg~original


Everything bolted up perfectly and it looked nearly like a factory option after getting the bumper skin reinstalled
IMG_20140314_180537_zpse09c4c4d.jpg~original


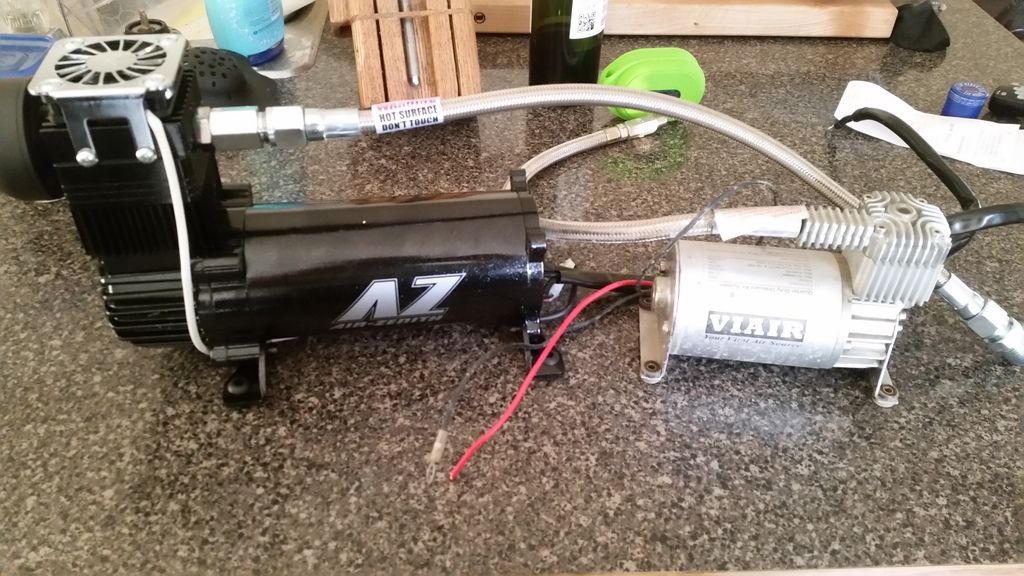
my version 1.0 air system consisted of a Viair 275c compressor and a 2 gallon tank. With the small foot print offered by the compressor, it was an easy job to find space under the hood to mount everything up
IMG_0023_zps2c58b71b.jpg~original

IMG_0019_zps55272279.jpg~original


while this setup served me pretty well for a couple years, other under the hood mods eventually demanded more space, and I had to move the tank and compressor elsewhere. It was at this point that I decided I also wanted the option to run air tools, which would mean either a bigger tank, or a bigger compressor. I opted for option 2 and picked up an Air Zenith OB2, which proved to be significantly larger than the little Viair 275c it would be replacing
20150513_203354_zps9i05stfr.jpg~original


This time, I mounted the compressor vertically in front of the air box in the traditional secondary battery location
2015-05-15%2014.54.00_zpsdn3sq7j5.jpg~original


it was a tight squeeze
20150516_201306_zpsp2claisi.jpg~original


the tank was relocated to the rear, where I had recently removed the 3rd row seats in preparation for another project
2015-05-31%2018.40.30_zpsb267dmdu.jpg~original


presently I have the compressor pulled out again, and my intention is to put it in the back with the tank to free up space in the engine bay for a washer bottle relocate kit. Pics to follow...

Next came the storage drawers. There are a lot of cool options on the market for drawer systems, a few are only ridiculously expensive (instead of ludicrously expensive). I may go that route eventually, but we had undergone a kitchen reno here at the farm, and I had drawer boxes sitting around from that which I decided to utilize to make my own drawer system.
I had previously taken out the 3rd row seats, and put down Dynamat and a base of 3/4” mdf
20150529_171834_zpsveons6zv.jpg~original


the whole thing was kept fairly simple. I used heavy duty drawer slides from the hardware store, and ordered paddle latches from Essentra Industrial Supply (If I were doing this again though, I'd get larger latches), some aluminum angle, a rubber treadmill mat from wal-mart, plastic roadie case corners off ebay, and then painted the inside with Krylon stone finish. It was all put together using construction adhesive and 3” deck screws, and several metal corner braces, no squeaks at all. Plenty of space for my recovery gear, some safety equipment, essential tools, and my sticker collection. Much more useful than the 3rd row seats
2016-11-14%2015.55.57_zps8si2otyd.jpg~original


the air tank resides in a stash compartment (opens with a piano hinge under the rubber mat) in front of the drawers and behind the seats, the compressor will go here too eventually
20160711_172825_zps4tfjocv5.jpg~original


I added a Gobi ladder after breaking a tail light while using it as a step to climb up to the roof. The ladder is also a perfect spot for a Koplin chainsaw mount that I acquired at Cabela's. A word of warning though, only add bar oil to your saw immediately before use, since they seem to leak when left in a vertical position in the mount, and you're going to have a bad day cleaning bar oil off your truck if you fill it right full before even leaving home (Koplin also makes a saw boot which can be used in conjunction with this mount, and would catch leaking oil or fuel and protect the blade if you didn't have a guard already)
20160608_161456_zps7vqcji3o.jpg~original

20160608_161502_zpsvknnrsxy.jpg~original


One of the memebers in our local club here turned me on to Axia Alloys mounts. These little things solve all sorts of problems, and I use them to mount my roof top tent and awning to my roof rack, and they are certainly robust enough for mounting light bars or just about anything else as well
2016-05-12%2016.33.28_zpsiwe5mk3m.jpg~original

2016-05-12%2015.54.47_zpsyb8nch2z.jpg~original


When it finally came time to install my new bumpers, I ran into problems with my SuperWinch LP8500. It is possible to run an integrated solenoid winch with the Addicted Offroad bumper, but you would have to cut up the grille to do so, and I wasn't willing to sacrifice my Satoshi to make it work. I suspect something like a Warn Zenon 10 – with the solenoid located above the spool instead of directly on the motor - would work as well, but I opted for a Warn VR10000-S, since it will only see use sparingly. My one beef with the new Warn is that they did not include grade 8 mounting hardware, and I broke a bolt installing the damn thing. The other minor piss off is that the hawes fairlead from Warn will only fit on this bumper upside down.
Solenoid mounted to the lower grille support
2016-10-25%2016.30.44_zpsrcpd0iau.jpg~original


I picked up my snorkel as part of the Total Automotive group buy.
MXU7pLyh.jpg

It took forever to get here, but the instructions were easy to follow and the installation was a snap. Aligning the template for the cutout and bolt holes.
hFDc52qh.jpg

Cutting a gaping hole in the fender is not for the faint of heart, but the extra water fording ability and appearance are worth it IMO
HFMAkTwh.jpg
 
Last edited:
electrical

***a word about dual battery setups and wiring in general: I am an industrial electrician, and while the concept behind designing and wiring a dual battery system is not complicated, if you plan to do it yourself be sure that you thoroughly research every aspect before you undertake the design. Incorrect connection and/or incorrect use of a dual battery system can lead to serious shocks, and damage or destruction of your vehicle. If you are certain that you need the extra power, but are not completely confident, purchase a manufactured kit rather than piecing together your own, and be sure to read the instructions completely and carefully. Proceed with caution and do so at your own risk.***

to construct my dual battery setup, I relied heavily on components from Blue Sea Systems, who manufacture electrical components for marine environments that are much more harsh that what I am likely to encounter off road. At the heart of the system is a Blue Sea ML-ACR (#7622), a Blue Sea State of Charge monitor (#1830), Blue Sea fuse block (#5026), and the Pelfreybilt fuse panel bracket.

this combination of components offers automatic voltage sensing and charging control, with the ability for local and remote control of connect/disconnect functions, the ability to lock the system in a disconnected position, real time information about battery charge including status and voltage, battery health, current draw, charge remaining at current usage, programmable alarms for low voltage and high current, as well as the ability to control another relay on an alarm condition. The Blue Sea fuse block allows for easy power distribution, and the Pelfreybilt bracket keeps everything organized. These components were chosen because they are rugged and capable of safely handing an intermittent 700 amp draw in 5 minute intervals, which is important during a difficult recovery using a winch – though the rest of the system is set up to cut out long before I get to that point. The interconnects between the charge relay, batteries, and power distribution are handled by Blue Sea 100 amp thermal re-settable circuit breakers and 1 gauge extra hard usage welding cable. Everything wrapped in wire weave for a near factory appearance. (the yellow and green wires are for the State of Charge controller which I hadn't yet installed in this photo)
xafZrMyh.jpg


I have made use of OTRATTW Contura Vswitches throughout my built, but this is one place where I would be inclined to go a different route if I were to do it all over again. There is nothing wrong with the OTRATTA switches, but some of the newer Toyota-style push buttons or even touch screens are way cooler. Anyway.....
IMG_20140401_150224_zpskxeijvak.jpg~original

IMG_20140401_154828_zps438c39d8.jpg~original

IMG_0057_zps3db68164.jpg~original


the last component of the dual battery setup would be the batteries themselves. Here, I chose an Optima Blue Top marine grade group 31 and a Yellow Top group 27. these are topped off with Raptor LED terminals from ebay. Here is how the engine bay sits now (Sept/17)
o6oa6Ush.jpg

In the near future, I will be adding a 270 amp alternator from DC Power Engineering, and another high current relay from Blue Sea to handle low voltage protection for my starting battery
 
Last edited:
lighting

installation of my lighting setup has been accomplished progressively since I bought my truck. I have not encountered any major hurdles, with the exception of using the Rigid A-Series ambers as drl/turn indicators. In this application, the OEM flasher relay from toyota is not compatible with LED's. Because the internal resistance of the LED's is lower than that of the 2 amp bulbs that Toyota uses, it is necessary to use a resistor to raise the resistance of the flasher circuit back up to a level where the truck does not think there is a bulb is burnt out. Failing to accommodate this will cause hyperflash (double time blinking of the turn indicators). A 6 ohm resistor wired in parallel with each A-Series LED accomplishes this. The standard is to use a 50 watt wire wound resistor, but these have been reported to get quite hot, to the point of melting plastic. I opted to go with 100 watt resistors, since they are physically larger, and capable of dissipating heat more effectively. I chose to mount them on the inner surface of the lower headlight support, which puts them in the air stream of the radiator, and ensures plenty of cooling airflow. Note the high temp wire used to connect them into the flasher circuit. Each connection is cut, soldered, and heat shrunk, rather than using t-taps – which could melt, should this circuit get hot.
2016-10-25%2016.30.15_zpsjhsqjg2d.jpg~original


other lighting...
retrofit in progress
IMG_20121102_154545_zpsd51167cb.jpg~original


...and the outcome, minor horizontal misalignment which is more noticeable with the hi-beams on
IMG_20121103_202831_zpseae70dee.jpg~original


Rigid 20” SR, spot pattern
IMG_20130526_185809_zps76d0169e.jpg~original

2016-11-02%2020.20.53_zpsublodkkw.jpg~original


Rigid A-Series high power, cool white. Rock light mock up on front/back of transmission cross member
IMG_0013_zpsa4df79d6.jpg~original

IMG_0010_zps912966f3.jpg~original

IMG_0006_zps41d29e8b.jpg~original


Rigid D2/20”SR/lo-beam
IMG_0059_zps25c991db.jpg~original


Underhood lighting – Rigid A-Series low power, cool white, controlled with a pin switch wired in series
20150703_221457_zpsauuprdny.jpg~original

20150703_221450_zpsspvpohhm.jpg~original


Seaward Offroad 40” bar on the front of my Camelback Metal Gear rack (before the faring went on)
IMG_20140611_064255_zpsxxaqug9d.jpg~original


Rigid A-Series low power amber drls and D2 flood pattern (amber lenses) on cbi ditch light brackets
2016-10-19%2018.14.58_zpsoeya0dsh.jpg~original


and the big Lightforce Blitz 240's, 50 watt HID wearing yellow combo lenses
2016-10-27%2019.20.23_zpshsm0ghbp.jpg~original

2016-10-27%2019.19.57_zpsmqnd9kgf.jpg~original


...not shown – Rigid D2 flush mount fogs, don't seem to have an output photo

plenty more build and wheeling photos can be found on my photobucket
 
Last edited:
Looking forward to meeting you and the rest of the TEAOA group! Sick build. Did you get rid of your other build thread?
 
I usually don't post in build threads (unless I need to) but this is a very good thread! Well thought out and your reasoning for changing components is sound. Good job!
 
Looking forward to meeting you and the rest of the TEAOA group! Sick build. Did you get rid of your other build thread?

I did, the original one is still on the teaoa.ca forum. I don't get out with those guys as much as I'd like anymore as I'm back working up north, but hopefully I'll be back home in Edmonton for the summer.
 
I usually don't post in build threads (unless I need to) but this is a very good thread! Well thought out and your reasoning for changing components is sound. Good job!

Thanks Greg, my truck isn't flashy (at least I don't think so anyway) but everything does it's job.
 
Fantastic Rig!!

Thanks for sharing your build. I have now owned my first 4Runner (5th Gen) for less then a week and I just dreamed and dreamed of doing half the things you have done to your rig. Very inspirational to say the least!

Motoman
 
Last edited:
recent changes:
-Safari Snorkel
-King front springs
-Metaltech rear spring upgrade
-dual battery v2.0
-Pelfreybilt fuse panel install
-re/re mega fuse holders with Blue Sea breakers
-Blue Sea State of Charge controller install


...coming soon(ish)
34's! likely Grabber X3's
hard shell RTT
Blue Sea RBS (#7700)
 

Members online

Forum statistics

Threads
278,316
Messages
3,554,120
Members
248,016
Latest member
Advally Service

Trending content

Back
Top