After tons of research on what others before me had done to fix their ailing CD player on the 3rd gen 4runner, I picked up a Scion T1807 head unit off of ebay for dirt cheap (~$32 shipped). I don’t have an ipod, but a SanDisk Sansa instead, so the ipod controllability through the HU wasn’t an important factor in my choice of HU. I would have liked to have had the color changing screen capability, but that can be dealt with in other ways.
After digging through tons of threads on multiple forums (here, YotaTech, Scionlife, IH8mud, spyderchat, and others I can’t recall), I couldn’t find any write-up by someone who had put a Scion HU into a 3rd gen 4Runner. There were a few who said they had done it, but no real details.
I have learned a lot from this forum, and here is my chance to give back. So, here it is!
NOTE - The Aux input section of this write-up should work on all other Scion HU’s with Aux input capability. T1806, and T1808 are others I know of; T1804 and T1805 were previously listed as capable, and they do NOT have this feature. Sorry to those I might have mislead!!!
I wanted to use the Aux input capability of the stereo without having to spend to ~$50 on the different ready-made cables out there. I have a few Belkin audio cables I’ve purchased at Wal-Mart for other things, and I have been happy with them. They’re inexpensive, well-made, have gold plated contacts, and SHIELDED! The last part is important if you don’t want to inherit noise into your system. The 1/8” mini-plug to RCA cable was a great match for this application, as it is 7’ long, and has two separately DOUBLE shielded wires inside of the silicone sheath. All that for less than $5; hard to beat!
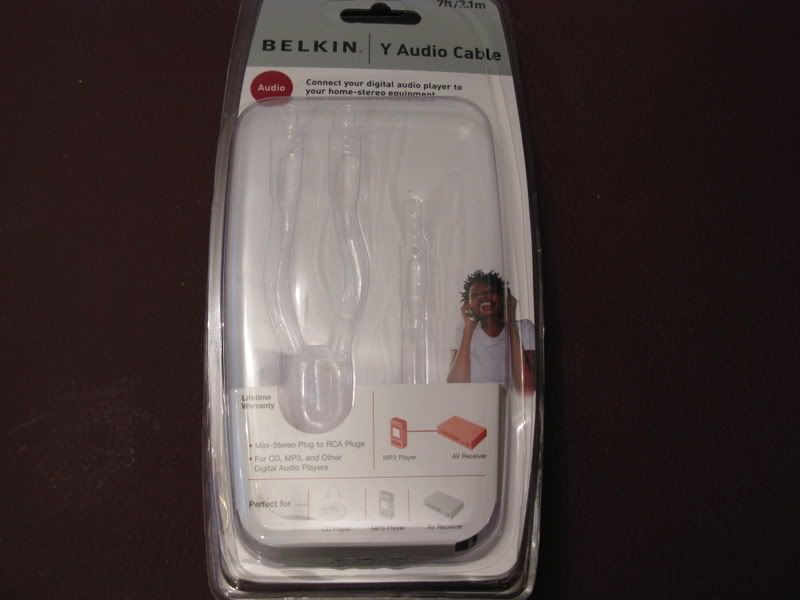
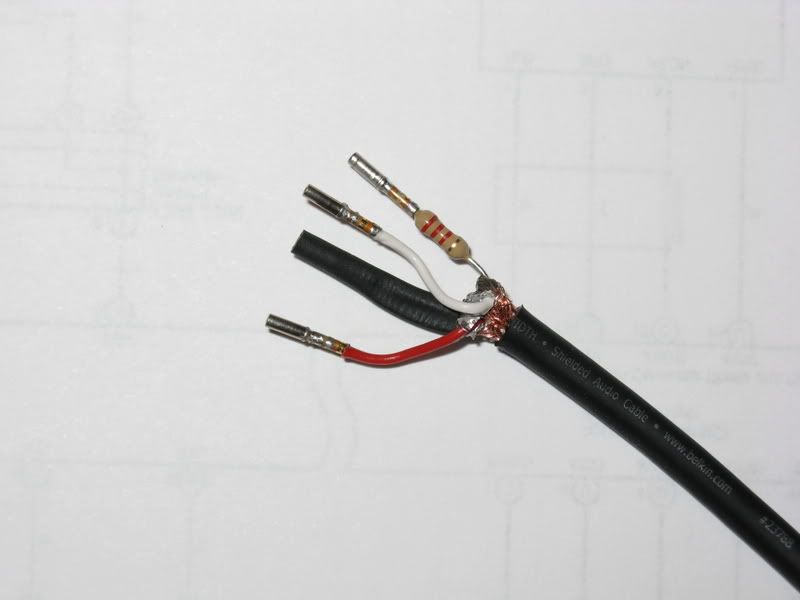
The first thing I did was to cut the RCA ends off a little above the Y split in the cable. I then cut about 1” off of the black sheathing to expose the two wires. The braided outside copper jacket will be used as the ground terminal, and the two jacketed wires (one white, one red) inside of the braid are our positive L and R inputs. There is a Mylar shield inside of the copper braid which needs to be removed also. The white wire is for Left, and the Red wire is for Right (to remember, Red and Right both begin with R). My research found that a 2.2k Ohm resistor was needed to tell the stereo that the Aux input was available for use. I purchased a 5 pack of 5% 1/4 watt resistors at my local Radio Shack for only $1.
Item # 271-1325 at Radio Shack.
Here is a factory diagram of the plugs that go in to the back of the stereo. (shamelessly stolen from another forum, but I can’t recall where!)
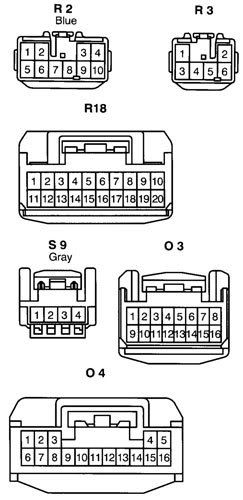
Plugs R2 and R3 are the ones used to connect the stereo to the vehicle (note – R2 was not blue in my rig, and R3 is for the rear speakers). Next is the wiring diagram for the Scion stereo, and note it mentions which plugs are used for each connection.
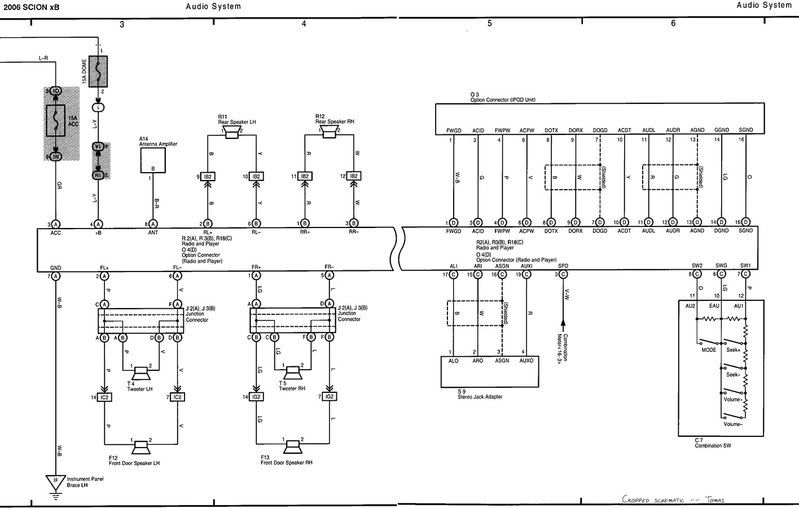
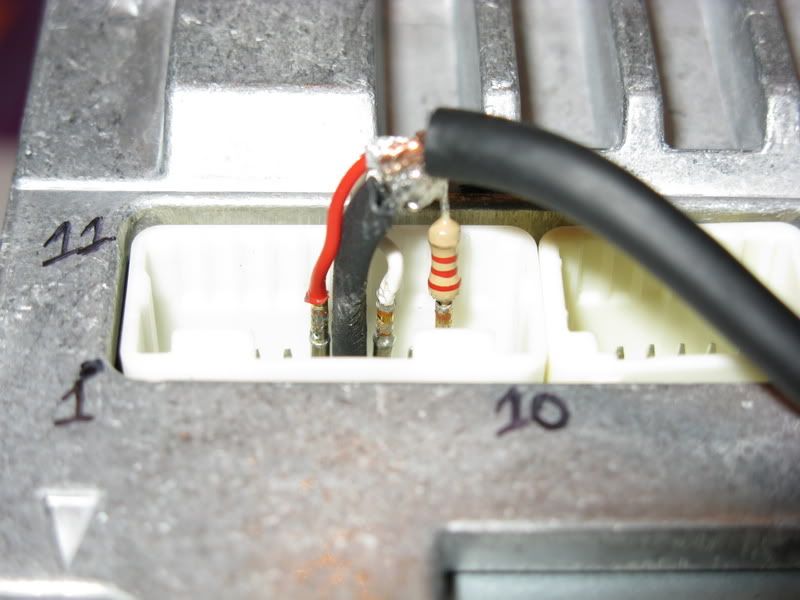
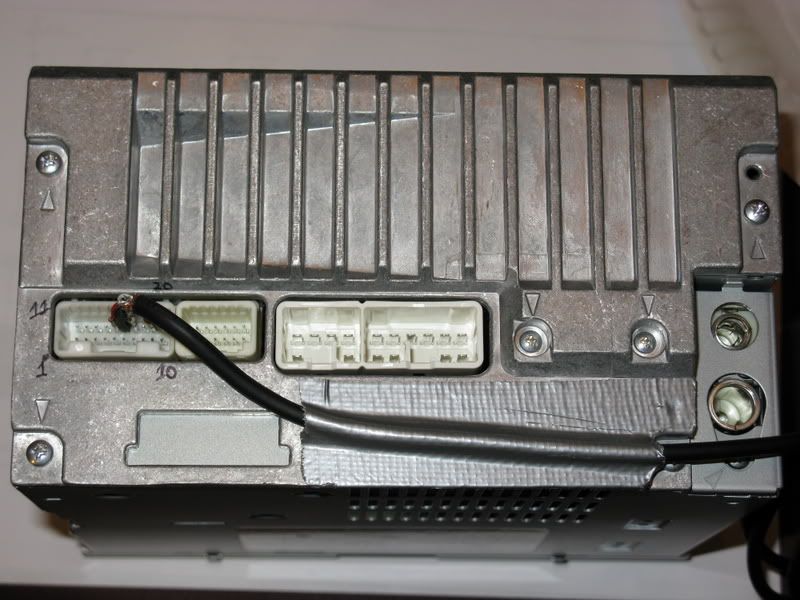
(again, shamelessly stolen from another forum, but I can’t remember which one!) We will be using the socket on the back of the stereo for R18 to hook up the Aux cable. Since the plug diagram shows the plug as you would be looking into it, and the receptacles on the stereo are upside down, the pin numbering for R18 on the back of the stereo is the same as the diagram except the top and bottom rows are flip-flopped (you’ll see how I numbered the corners on the back of the stereo in a later pic).
The 2.2k Ohm resistor will be wired between the ground (ASGN, pin 16) and the aux input detector (AUXI, pin 19) pins. Since I didn’t buy the factory harness that plugs into the back of the stereo, I needed to either hard wire the cable into the stereo (which is what I had planned to do), or find some pin sockets to use. Upon opening up the stereo for inspection, the pins I needed to use are the ones located on the underside of the 90 degree bend in the connector, so it was next to impossible to get at them without de-soldering the harness connector from the circuit board.
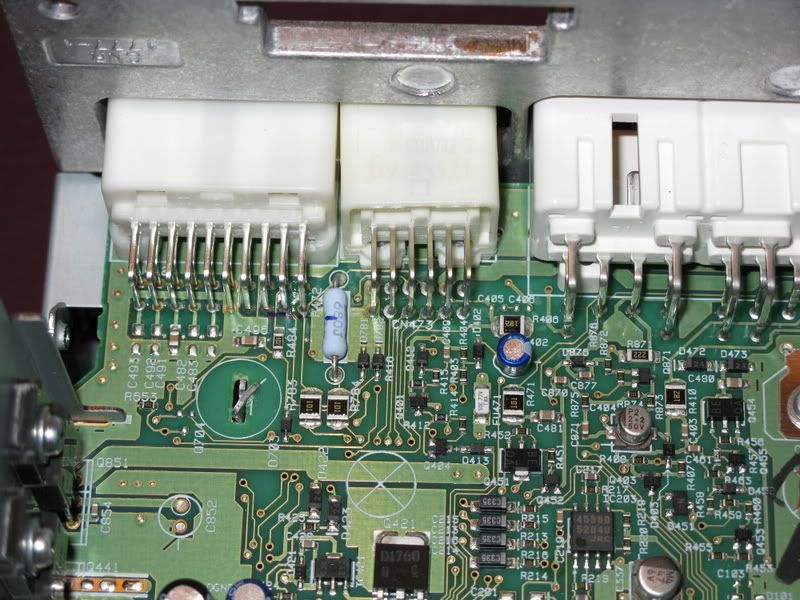
I had some Cannon plug pin sockets lying around from a past project, and they happened to fit the pins on the back of the stereo quite nicely (and tightly too), so I decided to use them (they’re good enough for fighter jets, so I’m sure they’re good enough for this! ;-))
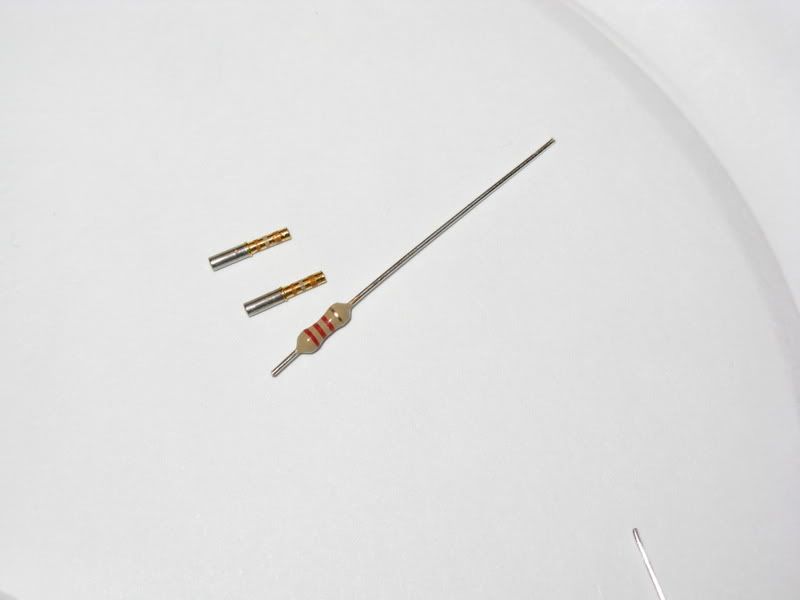
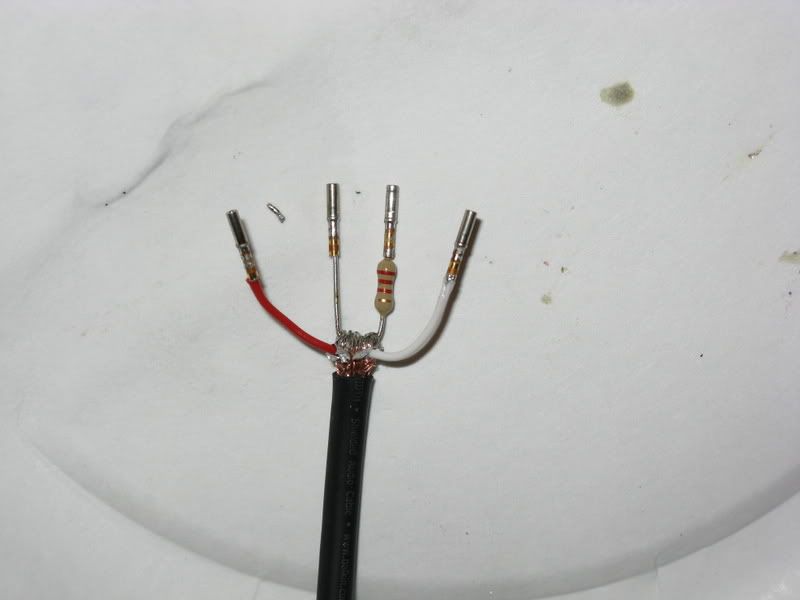
I soldered the shortened resistor lead right into one of the pin sockets, and soldered the other lead for the ground connection into a pin socket as well. That way I could bend the leads into a U shape and then solder the mass of copper braid a little more easily. One thing to be VERY careful of here is that the jacketing used in this cable melts pretty easily, more than most I’ve worked with. Don’t get it too hot, just enough to melt the solder, and don’t keep the heat on it for too long either. I wasn’t happy with the outcome the first time I tried because the black outside jacket melted into the copper braid, so I cut it all off and started over. Here is a picture of the pin sockets all soldered on.
Once complete, I put some heat shrink tubing over the ground lead, since it is mostly exposed bare metal, and since it will be in between the two positive leads when everything is all plugged in. Finally, I used some good ‘ole Duct Tape for a cable strain relief on the back of the stereo (what mod isn’t complete without a little Duct Tape?).