turbodb's Build and Adventures

Both my Haynes manual, and the FSM didn't mention simply loosening bushings, nor have the instructions from various lift resellers that I've seen.
It is pretty subtle, but its there. "Stabilize suspension" - That's Japanese for all the bolts should be loose until the suspension is on the ground, has been bounced and maybe even rolled back and forth a bit.

From the front shock section (SA-52):

Code:
2. DISCONNECT SHOCK ABSORBER FROM LOWER
SUSPENSION ARM
(a) Loosen
the bolt and remove the shock absorber lower nut
and washer.
Torque: 135 N·m (1,400 kgf·cm, 101 ft·lbf)
[COLOR="Red"]HINT:
At the time of installation, after stabilizing the suspension,
torque the bolt.[/COLOR]
(b) With lowering the lower suspension arm, remove the bolt
and disconnect the shock absorber.
3. REMOVE SHOCK ABSORBER AND COIL SPRING
Remove the 3 nuts, shock absorber and coil spring.
Torque: 64 N·m (650 kgf·cm, 47 ft·lbf)

All other suspension sections have a similar "torque after stabilizing suspension" wording too.

-Charlie
 
It is pretty subtle, but its there. "Stabilize suspension" - That's Japanese for all the bolts should be loose until the suspension is on the ground, has been bounced and maybe even rolled back and forth a bit.

From the front shock section (SA-52):

Code:
2. DISCONNECT SHOCK ABSORBER FROM LOWER
SUSPENSION ARM
(a) Loosen
the bolt and remove the shock absorber lower nut
and washer.
Torque: 135 N·m (1,400 kgf·cm, 101 ft·lbf)
[COLOR="Red"]HINT:
At the time of installation, after stabilizing the suspension,
torque the bolt.[/COLOR]
(b) With lowering the lower suspension arm, remove the bolt
and disconnect the shock absorber.
3. REMOVE SHOCK ABSORBER AND COIL SPRING
Remove the 3 nuts, shock absorber and coil spring.
Torque: 64 N·m (650 kgf·cm, 47 ft·lbf)

All other suspension sections have a similar "torque after stabilizing suspension" wording too.

-Charlie
Oh, sure - for re-installation, I totally get that torquing when siting on the ground is the right way to go. I meant that I'd never heard of simply loosening bolts in order to be able to get full movement of the axle - that still seems like it wouldn't work to me. But, I've never tried it, so it's something to experiment with next time. I mean, it's "on the way" to removing them (as I've generally done) anyway. :wink2:
 
It is pretty subtle, but its there. "Stabilize suspension" - That's Japanese for all the bolts should be loose until the suspension is on the ground, has been bounced and maybe even rolled back and forth a bit.

From the front shock section (SA-52):

Code:
2. DISCONNECT SHOCK ABSORBER FROM LOWER
SUSPENSION ARM
(a) Loosen
the bolt and remove the shock absorber lower nut
and washer.
Torque: 135 N·m (1,400 kgf·cm, 101 ft·lbf)
[COLOR="Red"]HINT:
At the time of installation, after stabilizing the suspension,
torque the bolt.[/COLOR]
(b) With lowering the lower suspension arm, remove the bolt
and disconnect the shock absorber.
3. REMOVE SHOCK ABSORBER AND COIL SPRING
Remove the 3 nuts, shock absorber and coil spring.
Torque: 64 N·m (650 kgf·cm, 47 ft·lbf)

All other suspension sections have a similar "torque after stabilizing suspension" wording too.

-Charlie

Charlie's the man! Good work sir.
 
Slowly Turning the 4Runner into a Tacoma...New LBJs and OTREs
April 23, 2019.

It's been a busy few weeks getting the 4Runner whipped into shape mechanically. As I've said before - I knew there were a few things to do when I bought it, and I felt like it was easily accounted for in the purchase price of the vehicle.

The last of those mechanical things was one that I wanted to do out of an abundance of caution - preemptively replace the lower ball joints (LBJs). These are a part that's known to fail - and catastrophically - on 3rd gen 4Runners, and since I had no idea when (or if) the previous owner last replaced them, I figured that it'd be good to get mine into a "known" state.


That, and I wanted to perform a little experiment - I wanted to install some 1st gen Tacoma LBJs on the 4Runner. :spy:

"Why?" You may ask, "would you ever want to do that?"

My answer would be twofold:
  1. Convenience. Because the LBJs are a known failure point, whenever I'm out on an adventure, I like to carry a set of trail spares. These are just my original Tacoma LBJs - which, while used, are definitely be in good enough shape to get me home. And, if I could carry those Tacoma LBJs with me when I'm in the 4Runner, that's more convenient than having a second set to lug around there.
  2. Curiosity (and a possibly better part; but mostly curiosity). I've heard a rumor that the Tacoma LBJs are stronger (or at least beefier) than the 4Runner variant. Not by much, but a little. Before this experiment I had no idea if that was the case, so I figured this would be a good way to find out.
As one does - having already made the decision - I figured a bit of research was in order to try to understand if it would work. And - of course - I discovered that switching out to Tacoma LBJs wasn't a single-part swap, and that there could be a side effect.
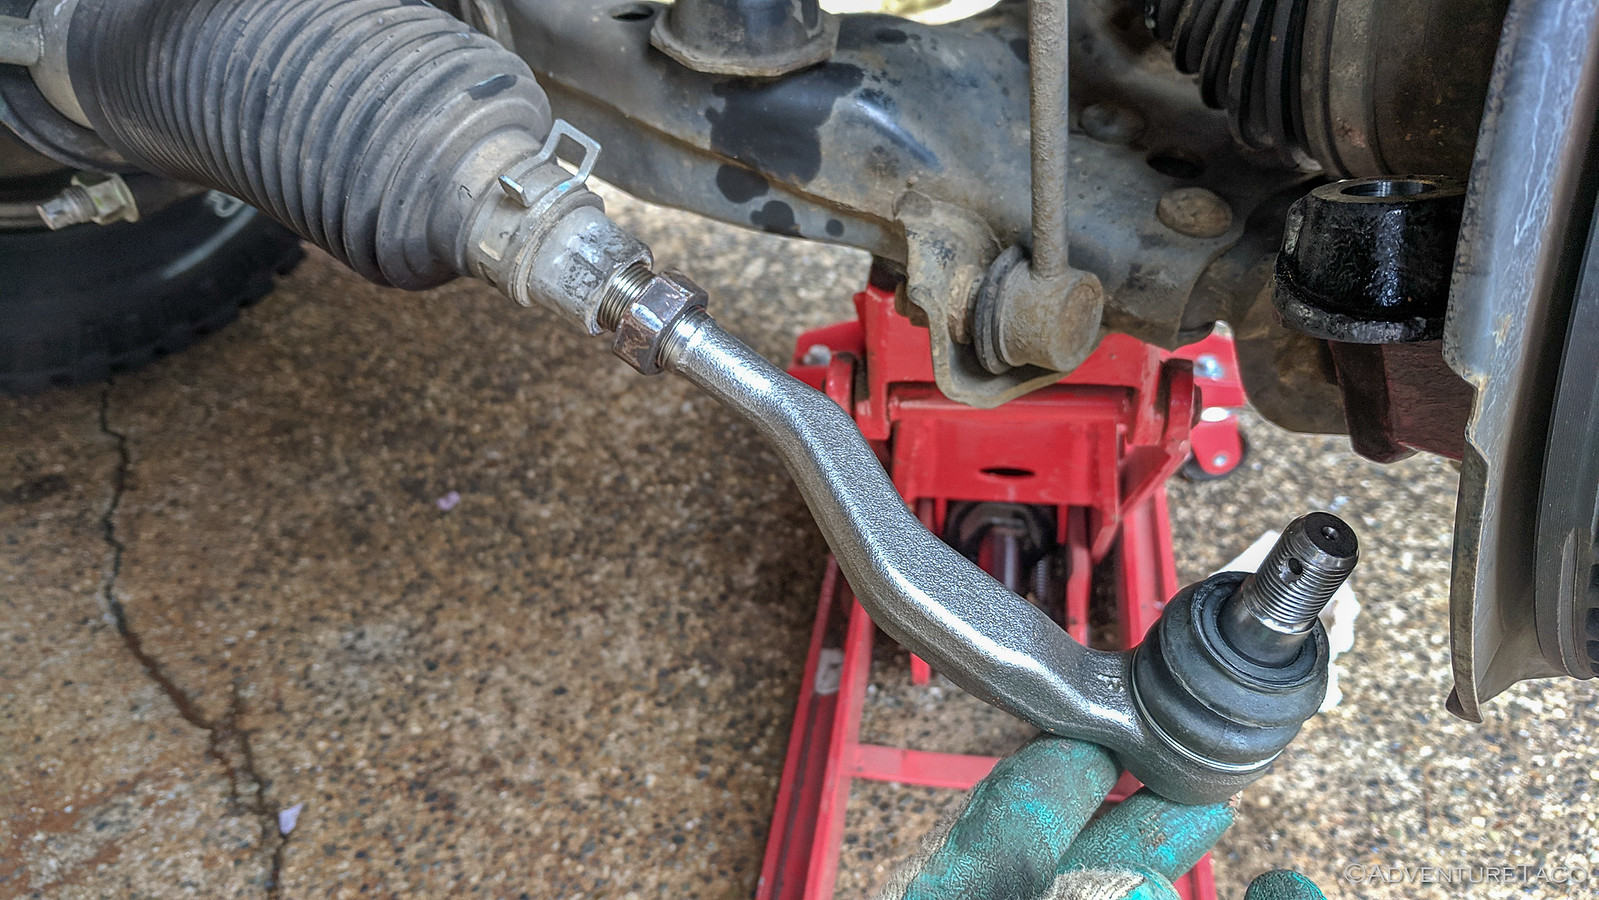
  • To swap the LBJs, I'd also need to replace the outer tie rod ends (OTREs) since the joint between the two is slightly different between the Tacoma and 4Runner.
  • Word on the street was that turning radius could be affected due to OTRE interference/contact with the sway bar at full lock (or rather, limiting full lock).
Both seemed reasonable to me - after-all, new OTREs just meant a few more bucks into the bottomless black hole of truck costs, and the turning radius of the 4Runner is already so much better than the Tacoma that even if I lost a bit of radius, I'd still feel like it was amazing.

It's settled then.

So, I gathered the requisite parts. The LBJs were easy - I knew I was going with OEM there, since the aftermarket ones generally lead down a road to trouble. I ordered a left and right using the following part numbers since these come with new bolts as well, where the other part numbers don't (L: 43340-39585; R: 43330-39815). For the OTREs, I'd heard from Zane [MENTION=8729]Speedy[/MENTION]tech7 that I could get Japanese made 555 versions in ACDelco Professional boxes for about half the price of OEM (L: 45047-39175;R: 45046-39295), so I ordered a left (ACDelco: 45A0832) and a right (ACDelco: 45A0833) as well.

Everything arrived, and proceeded to gather dust for a month in the living room. Tough life when trips and adventures get in the way!


Now, an astute reader may notice a couple things in that photo. First, those specific LBJ part numbers do in fact come with new bolts. Second, that passenger (right) OTRE doesn't look like any 555 part I've ever seen. In fact, I'm told it's a Mevotech - which I've never heard of but is apparently reasonably high quality as well.

I contemplated and balanced my OCD of having two different OTREs on the 4Runner with the common sense knowledge that these parts would work just fine, and eventually decided to install everything and not go to the trouble of tracking down an actual 555 part to replace the Mevotech.

And with that, I gathered the necessary tools to do the job:
  • 14, 19, 21, 22, and 24mm sockets - to remove the lug nuts, LBJ from the lower control arm (LCA), and OTRE from the LBJ.
  • A pair of 8" and 10" adjustable wrenches to loosen the OTRE jam nut.
  • An impact wrench to make removal of castle and other nuts easier.
  • OTC 6295 Front End Service Set - to easily separate the LCA, LBJ, and OTRE.
  • A torque wrench for re-installation of critical components.
  • And of course a floor jack and jack stands.
My first order of business after jacking up the truck and taking off the wheel, was to take a couple of measurements between stationary components on the truck and the dust shield - I knew I was going to need an alignment when this was all done, but I hoped I could get things "mostly" realigned by keeping the measurement consistent in the transition from old to new.


Then, it was time to get out my favorite tool in the shop - the Uga-Uga - a Milwaukee Mid-Torque Impact Wrench. This thing makes me feel young again it works so well, so I use it as much as I can. In this case, to remove the castle nut holding the OTRE and LBJ together.


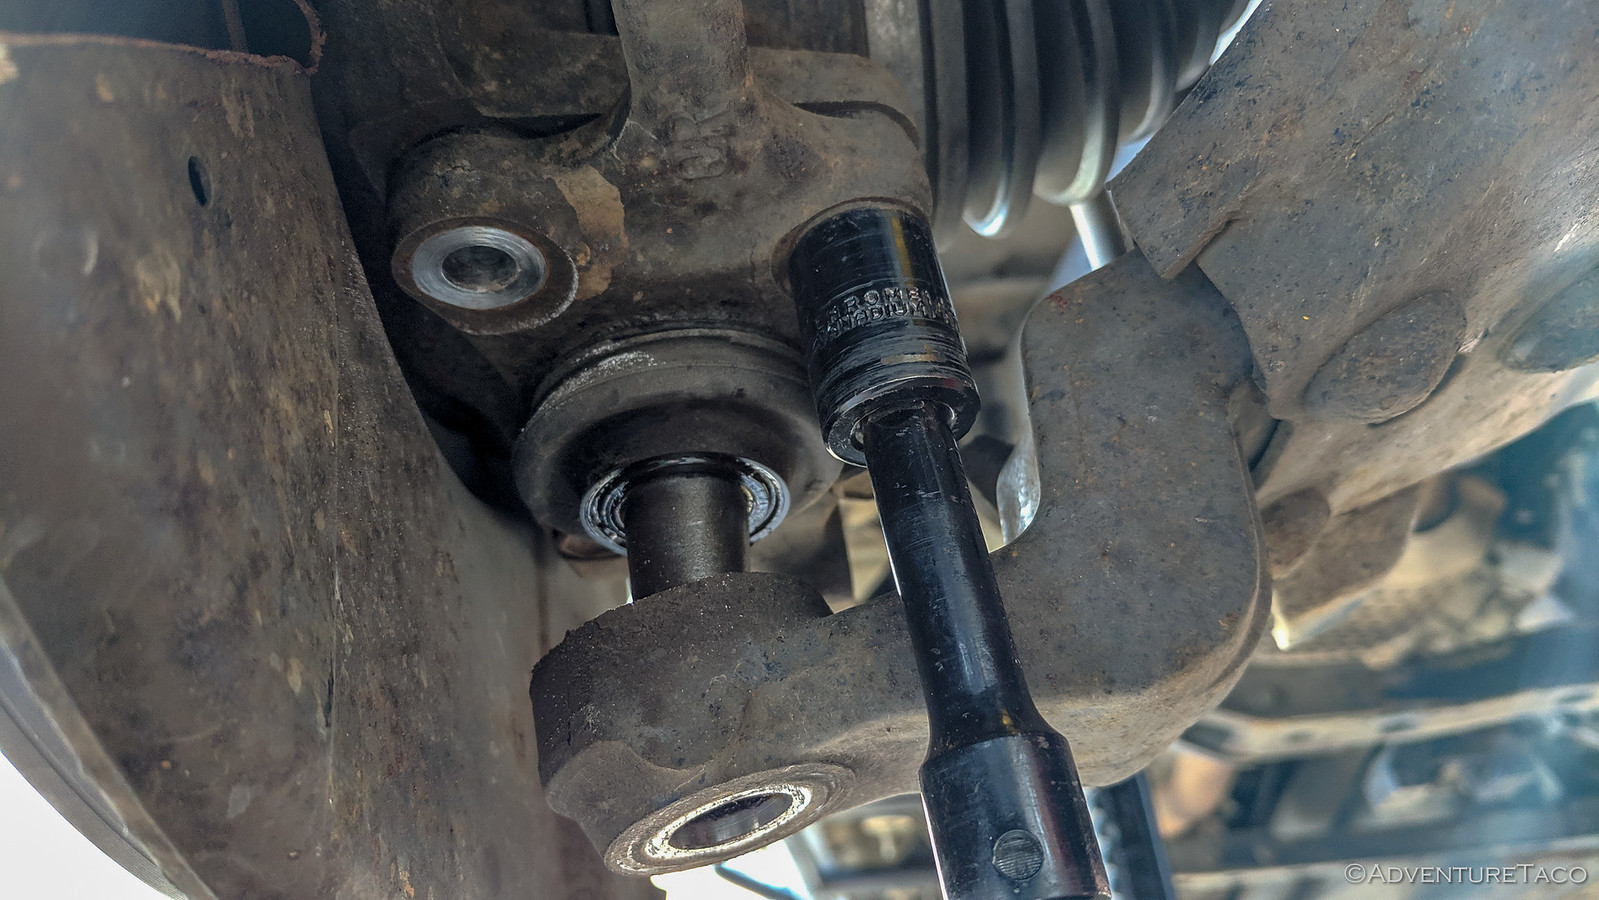
Next, the smaller Pittman Puller in the OTC 6295 Front End Service Set makes quick work of separating the OTRE and LBJ. A hint here for anyone who doesn't know - leave the castle nut loosely threaded onto the OTRE when you do this, and it will keep the joint from exploding when it's pressed out.


The final step in removing the OTRE is loosening the jam nut that secures it to the inner tie rod. This was by far the hardest part for me since I was unable to use the Uga-Uga - thereby making me feel each and every one of the years that constitute my age. I even had to resort to some penetrating fluid and a bit of heat; these were clearly on there too tight!


From there, the only thing left to do is remove the LBJ from the LCA. I started by removing the castle nut in the same was as I had the one on the OTRE - Uga-uga and then the larger Pittman Puller from the OTC kit.


That leaves just the four, 14mm bolts to remove from the LBJ - assuming you still have all four, since they have been known to work their way out, a key component to failure!


With everything apart, I was excited to take a look at the standard equipment from the 4Runner and compare it to that from the Tacoma. Would the Tacoma LBJs really be heftier than the 4Runner, or was it all just internet bunk?


What you can see reasonably clearly - I believe - is that the ball joints in both 4Runner and Tacoma LBJs are the same! But, we can't bust the internet myth entirely - on close inspection, it's clear that the stud on the Tacoma OTRE that connects it to the LBJ is in fact bigger than it's 4Runner counterpart.

Assuming - as the internet tells us - that size does matter :gossip:, the Tacoma assembly may be slightly stronger, just not in a way that's likely to make much difference - since if the ball joint goes, I don't think any size OTRE connection is going to keep your wheel from eating your fender.

Just sayin'.

OK, from here, everything is reasonably straight-forward. And yes, I know it was up to this point as well - but there is one twist at this point - we'll get to that when installing the OTREs.

Start by installing the new Tacoma LBJs - they bolt right in using the new bolts. I also recommend just a bit of blue Loctite (242), for good measure. Torque the four, 14mm bolts to 59 ft-lbs and the castle nut to 103 ft-lbs + any slight additional tightening necessary to insert the cotter pin (Note: these are Tacoma torque specs, since this is a Tacoma part).


Now, it's time for the OTREs. The strange bit here is that in order to get them to fit without interfering - at all, as far as I can tell - with the sway bar links, is that you have to install them on the opposite side of the 4Runner than you do on the Tacoma. That is, what goes on the driver side of the Taco goes on the passenger side of the Runner.

It's weird, yes. But it works. And I've learned not to argue when it works.


Get the OTRE threaded in until your measurements to the dust shield match those that you got before anything was disassembled. They'll never match exactly, but if you're close enough, it'll be fine to get to the alignment shop. Toque the castle nut to 67 ft-lbs and the jam nut "good and tight, but not so tight that the next guy will need a torch."

Trust me on that one, too tight makes a guy feel weak. I mean, that's what I've heard anyway.

With that - well, and re-installation of the wheel (89 ft-lbs on those lug nuts) - I was done! My 4Runner had new parts and I now had the comfort of knowing that even more of the two trucks were the same - one less thing for me to remember when I go to order parts in the future!
 
Building a Roof Rack - Measure Once, Drill, Swear; Measure Twice...

May 3-5, 2019.

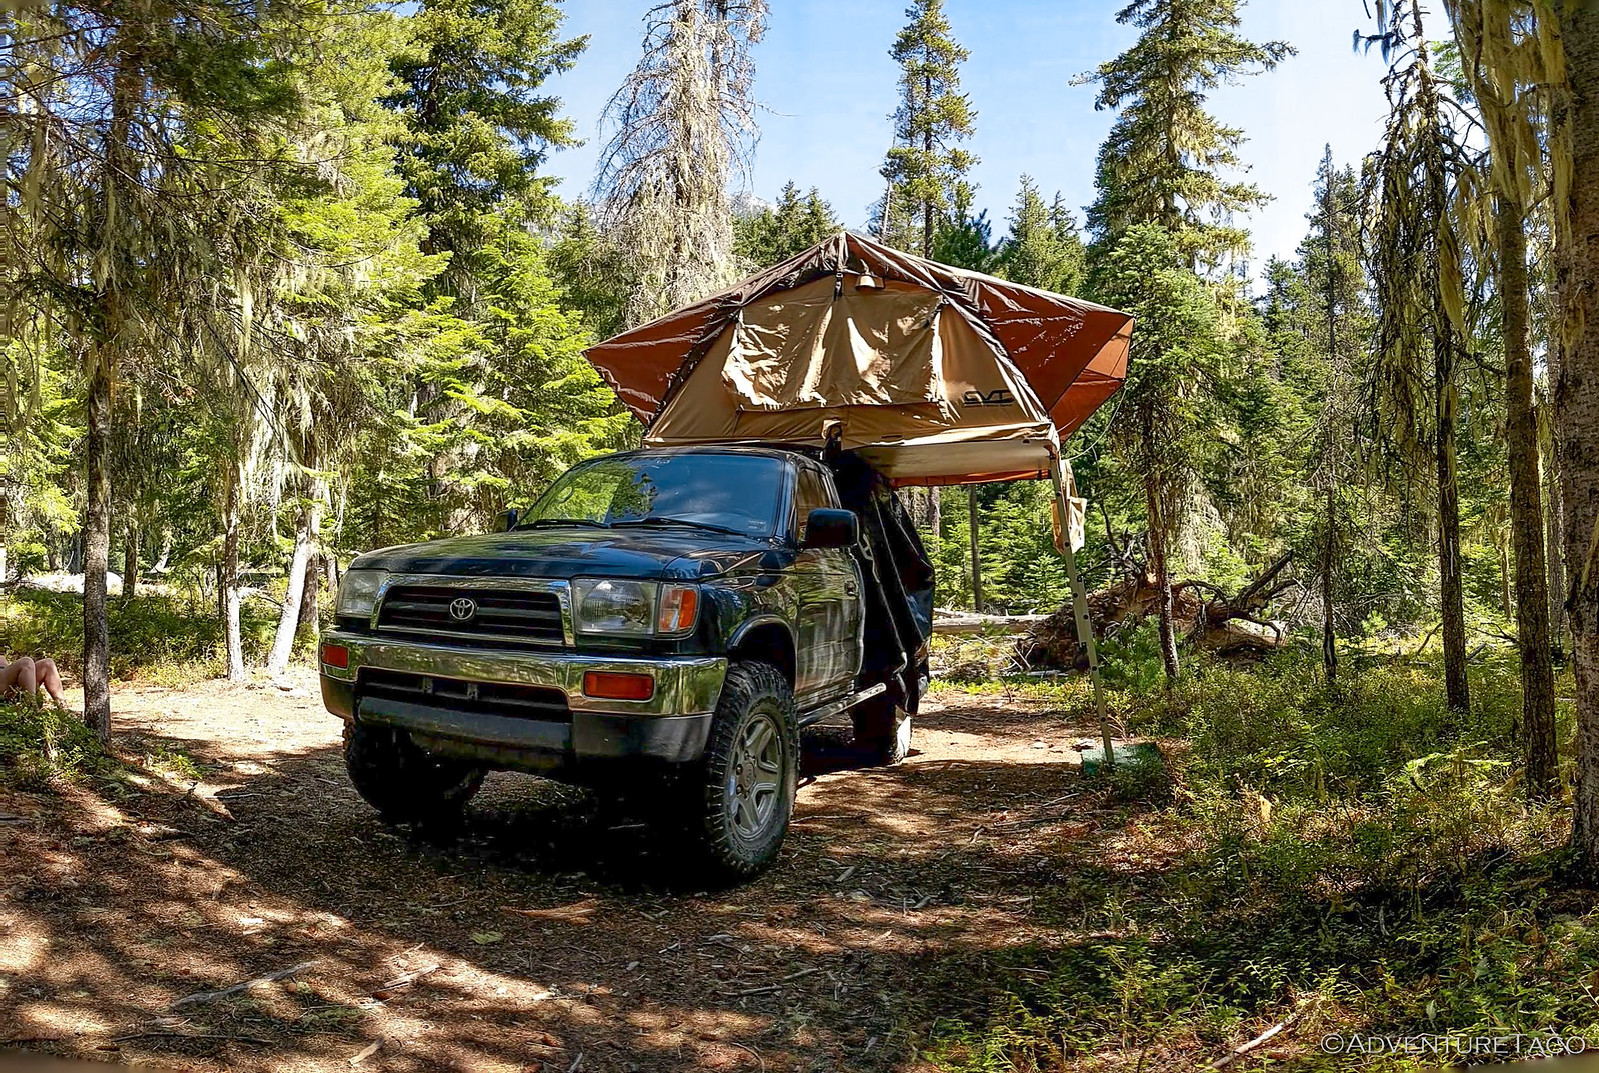
If you're going to turn a 4Runner into a family adventure vehicle to replace the Tacoma, one thing is for sure - it's going to need a way to carry the CVT [MENTION=178140]Cascadia[/MENTION] Tents Mt. Shasta that we sleep in every night. With an Exped Megamat 10 Duo, it's some of the most comfortable sleep I've had, really.

So with most of the mechanical work done for now, I figured the next bit of work was to figure out the roof rack situation. I generally start with a mid-level design for these kinds of projects, but this time I just wasn't feeling it for some reason - ending up at essentially this.
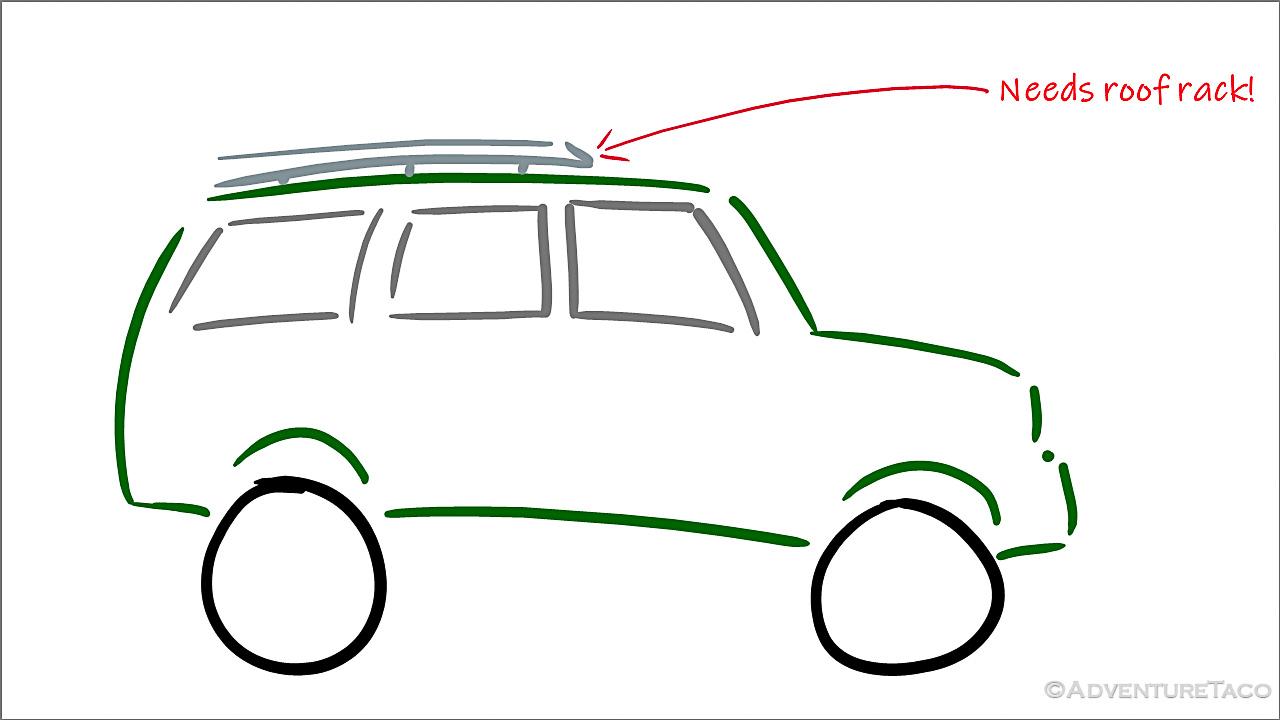

I started by doing something that I maybe should have done before even buying the 4Runner - some research to see if the roof rails from 1997 were even rated to hold the weight of a modern day roof top tent (RTT). To my relief, the OEM crossbars are rated at 165 lbs of dynamic load, and all the aftermarket racks I could find out there had load ratings of 200-300 lbs, meaning that the rails attached to the roof using five of these riv-nut looking anchors were probably strong enough.


Whew. That was going to have been an expensive lesson if we'd been unable to use the tent!

At this point, I had two options - buy something or build something. I wanted a rack just large enough for the tent (not a full-length rack) and in the few-hundred dollar range. And, from a design perspective, I knew I wanted something reasonably sleek - I didn't want to see big bulky bars running around up on the roof.

A quick look around showed that I didn't really love the designs or prices of the few after-market options. Prinsu always seems to have nice designs, but I could nearly purchase another 4Runner for the price. The only possible option I really found was Rocky Mountain Racks - the design of their Antero half-rack along the lines of what I was thinking - alas, they no longer made it, opting to focus solely on the full-length model.

So that brought me to build. And really, if you know me at all, you know that's the option I preferred anyway. The only problem was: how to do it? I knew that it'd have to be relatively light given the load limit on the roof and that ruled out my usual steel construction - it would need to be aluminum.

My very first order of business then was to order some 1"x2" extruded aluminum cross-bars that would build up the base I could mount the tent to. Since these would be the heart of the system, I figured it would be a good idea to have them take up space in the living-room-truck-part-storage-area for 6 months or so. Note: @mrs.turbodb didn't agree that this was a good idea.
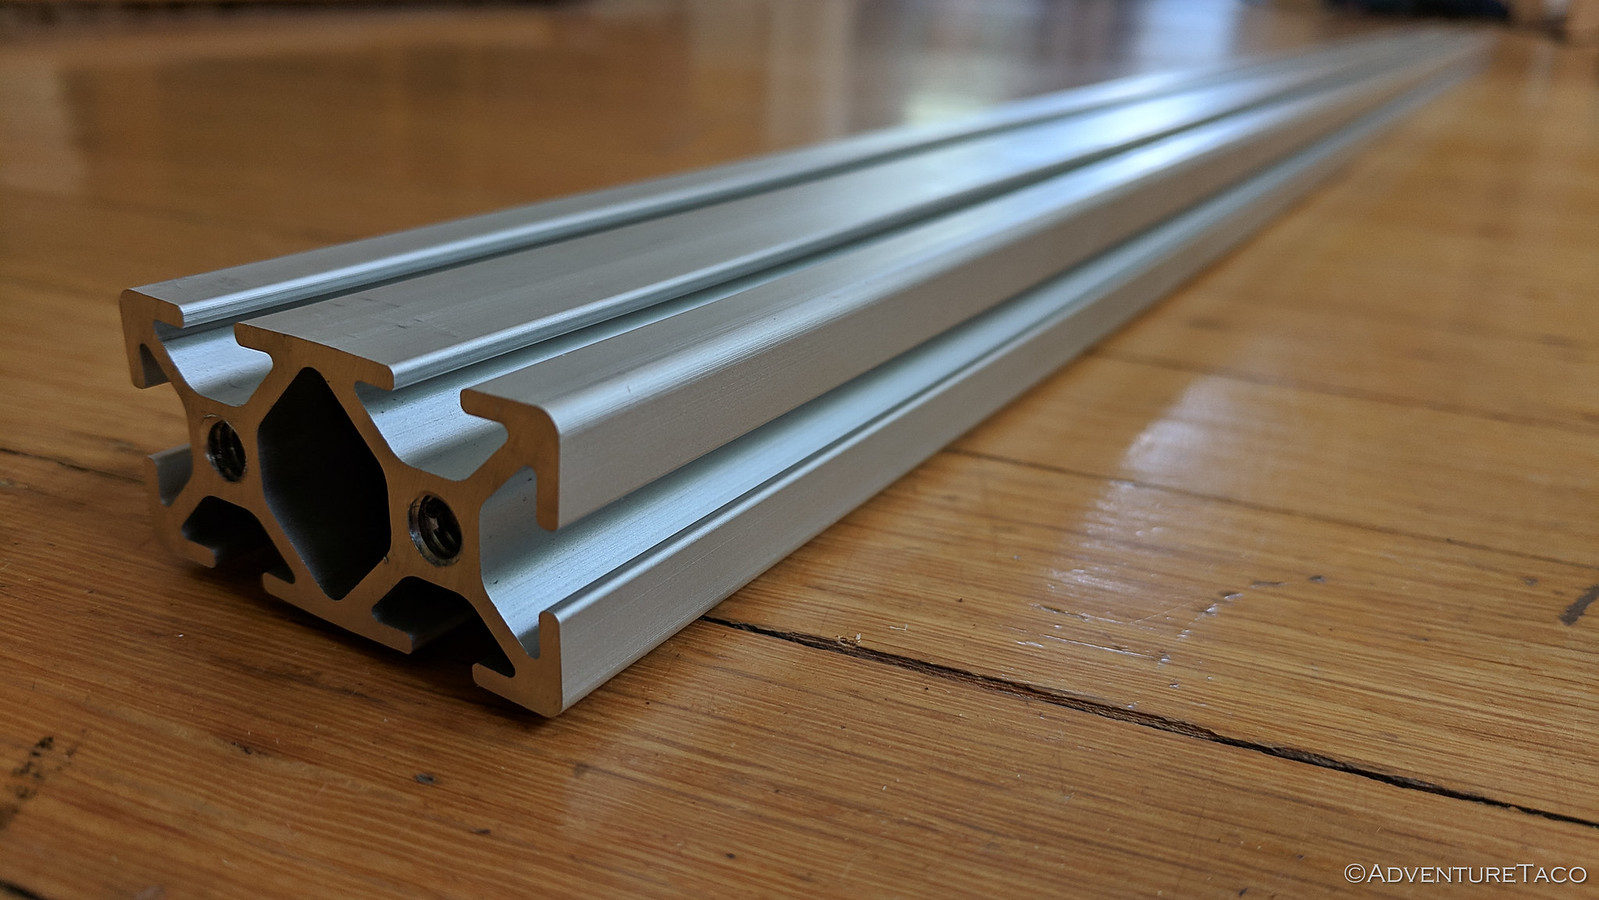

Next, I'd need to figure out how to attach it to the roof. I thought about trying to bend some aluminum for the feet, but ultimately decided that it'd be easier for me to weld up some steel feet. All I needed to do was to figure out the exact right angle to make the top (which would attach to the aluminum cross bars) and bottom (which would attack to the roof rails), and then somehow make sure those angles were correct even after the heat of welding.

A challenge if I ever heard one... And yes, I fully realize that may simply show my lack of experience - don't burst my bubble.

At any rate, I eventually realized that if I placed a block of wood on the roof rails, and then placed a level across the roof of the truck (itself held off the roof by approximately 2" blocks), that I could trace the line where the level crossed the wood. That line, in conjuction with the bottom of the block on the roof rail would be the two angles I needed for my brackets.

Of course, in my excitement and celebration of intelligence, I took exactly no photos. So, here's a diagram.


Next, it was time for me to gather the materials. I didn't have any good flat bar laying around, but I did have a length of 2.5" angle that was 0.25" thick, so I figured I could get the pieces I wanted out of that for a total cost of free. Nice.
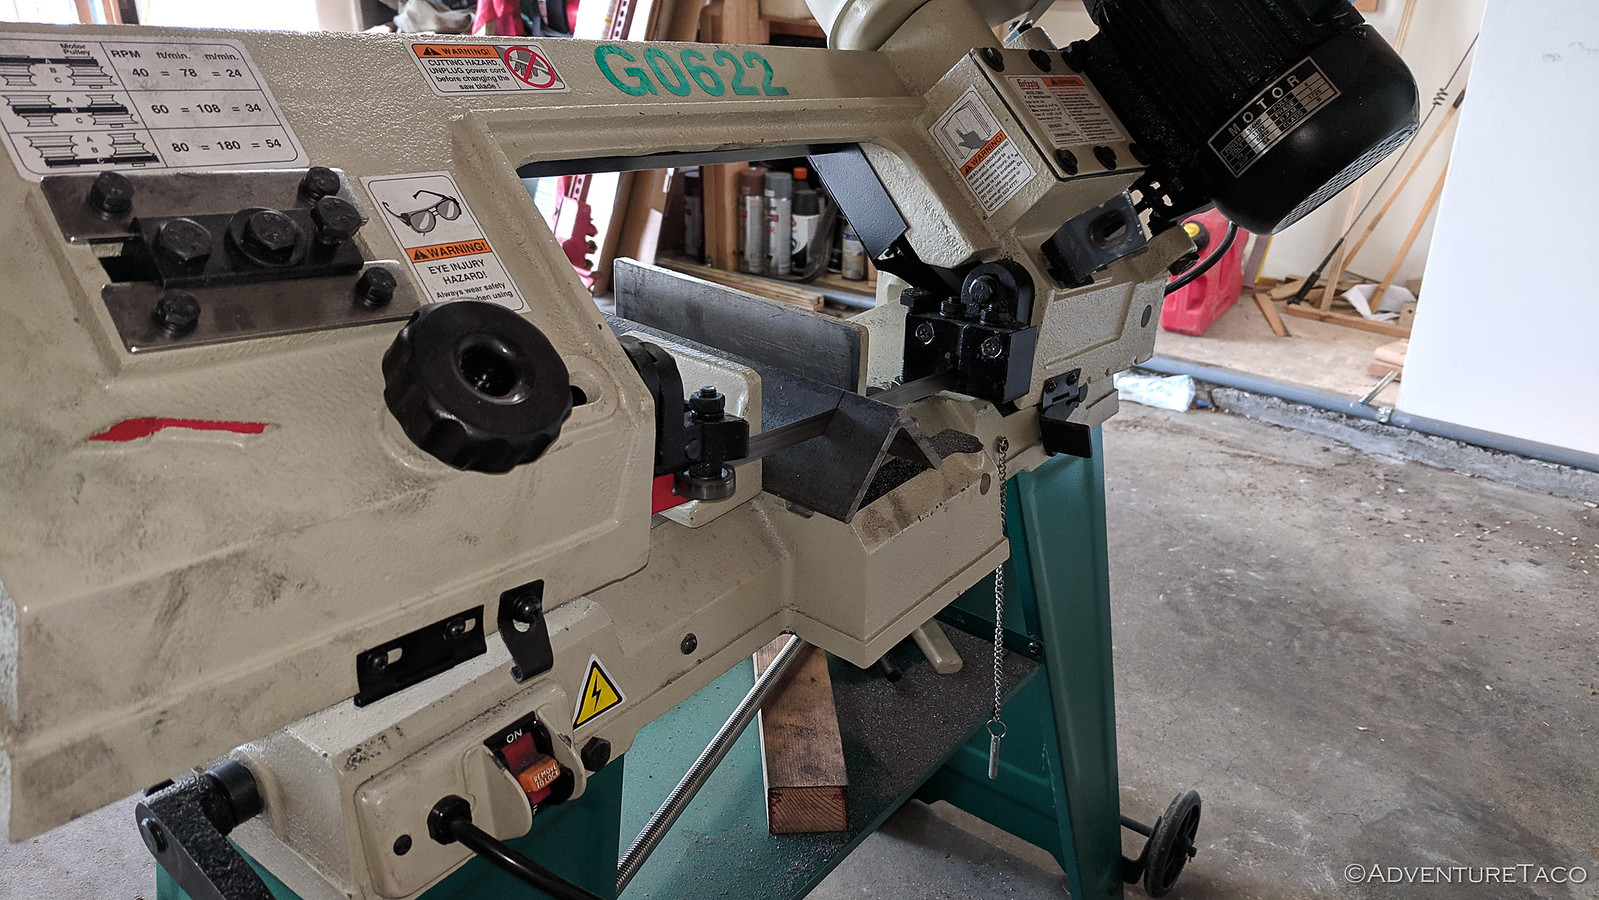

With all my little bracket pieces in hand, I knew the main challenge was going to be welding them up in a way that they maintained the correct shape. I'd need some sort of jig. So I laid everything out on a piece of rect tube, using the piece of wood I'd drawn the angles of the roof on and the corners I'd cut off the piece of angle to a jig.

A few tacks and it was ... ugly. But also hopefully functional
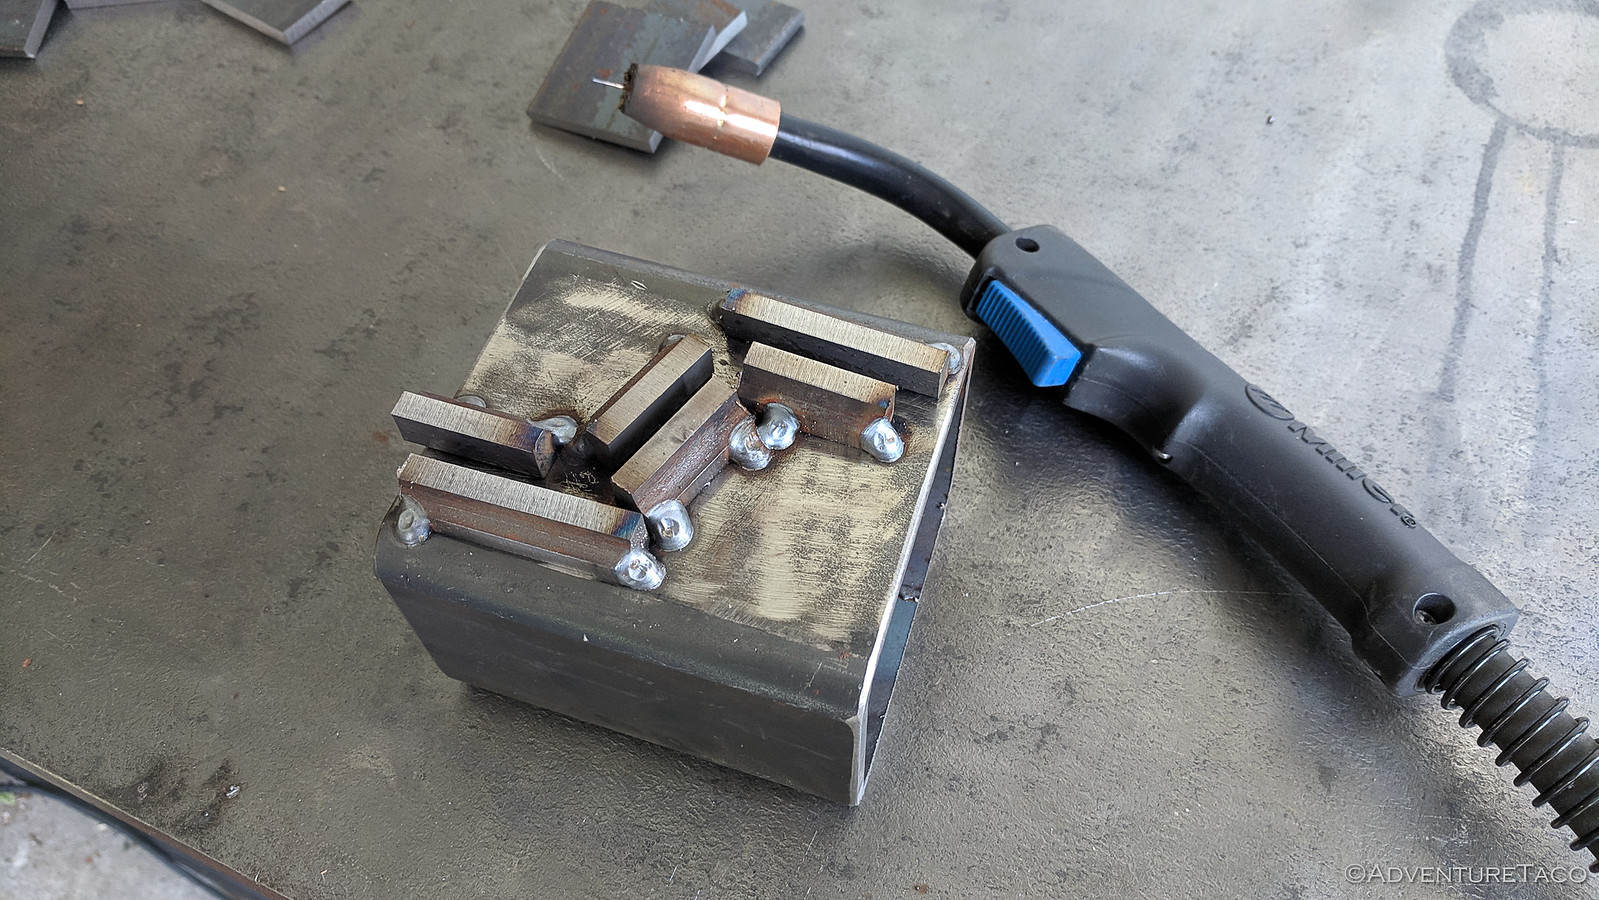


From there, I proceeded to tack everything up in several places in order to prevent movement during the full welding, and then decided that I'd even do as much of the full welding in the jig as I could - both as practice with downhill and to keep everything stable.


To my surprise - yes, I'm still easily surprised when it comes to metal fab - I seemed to stumble through successfully. Once ground, the brackets looked like a single piece. "Oooo, those are pretty." [email protected]


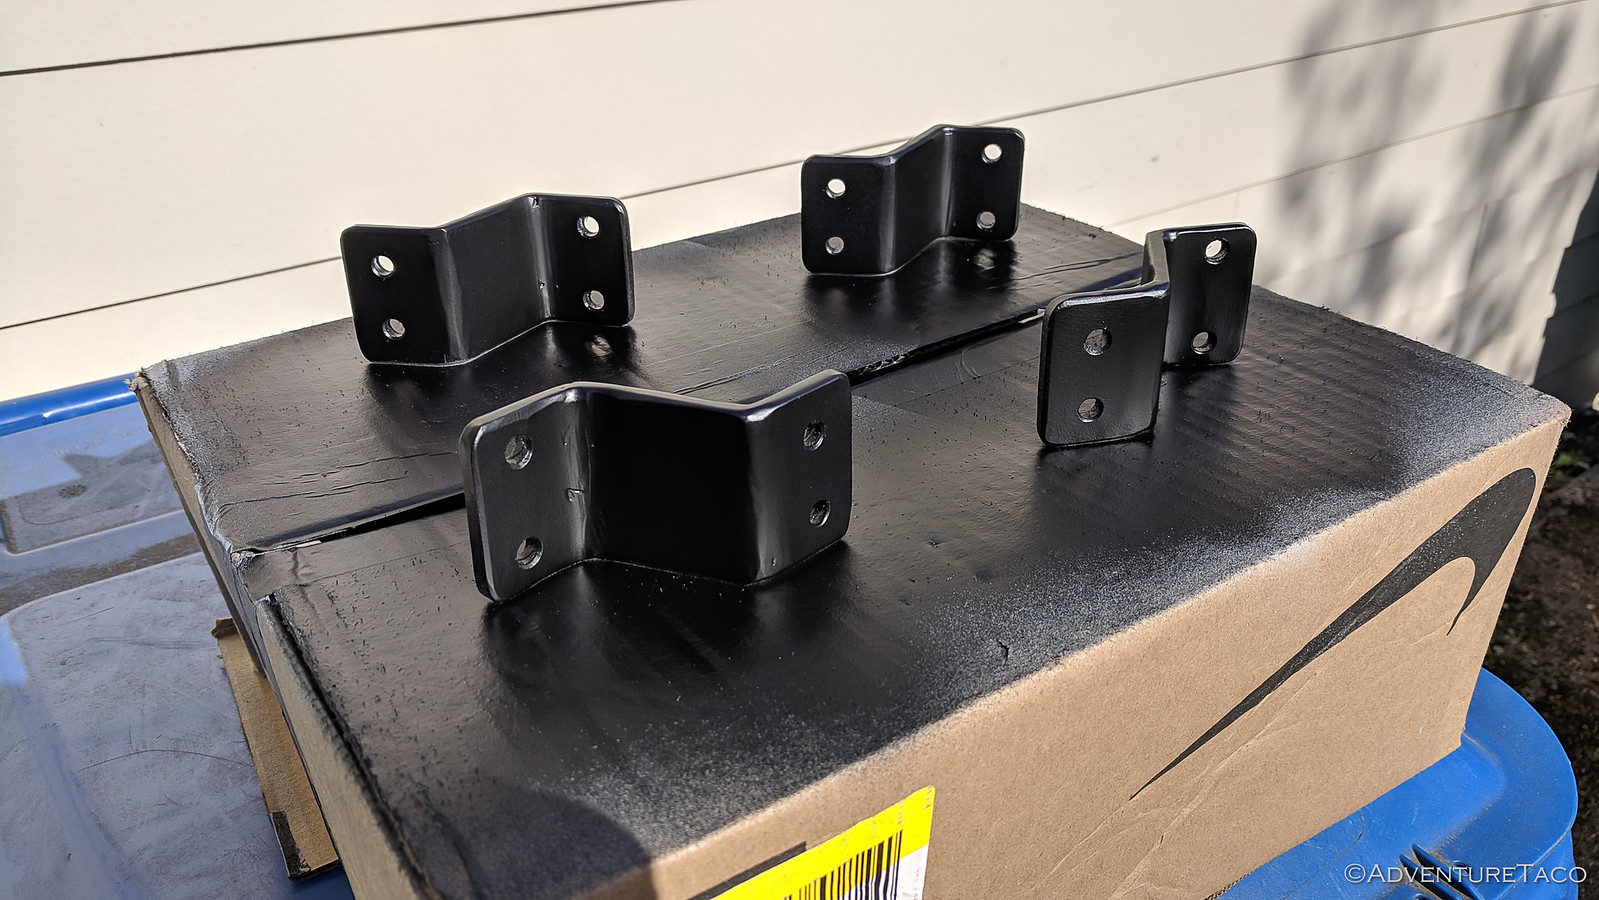
The drill press made quick work of the necessary holes* for the cross bars and roof rails, and then - with great enthusiasm, as I'm sure was the case the first time I got to use spray paint when I was a kiddo - I got some help getting them primed and painted.

* I just wished I'd measured their location twice before drilling.


Once the paint had a day or so to dry, I went to test fit one of the cross rails so I could start on the rest of the rack and that's when I discovered that I'd drilled the holes on the wrong ends of the bracket. That is - the hole spacing on the end which sits on the roof was drilled for the end which bolts to the cross rail and vise-versa.

Dang!​

As a woodworker I know better. Measure twice, cut once.

I figured that the best thing to do at this point was to fill in the holes rather than try to make entirely new brackets - the only downside being that I'd have to regrind and repaint everything. Grrrr. But, no use crying over spilled milk as they say, and pretty soon, I was once again ready to make forward progress.



To make the side plates, I'd picked up a remnant piece of 3/16" aluminum the last time I'd been to the steel yard - my thought being that I could use my woodworking tools to create the shape I wanted. To make things easier, I started with a piece of 3/4" plywood to create a template - forming the wood much easier (and less expensive) than using the sheet aluminum right off the bat.

Tracing and cutting, cutting and sanding - it didn't take long to arrive at a shape I liked that followed the lines of the roof and would provide a bit of visual interest for the rack.
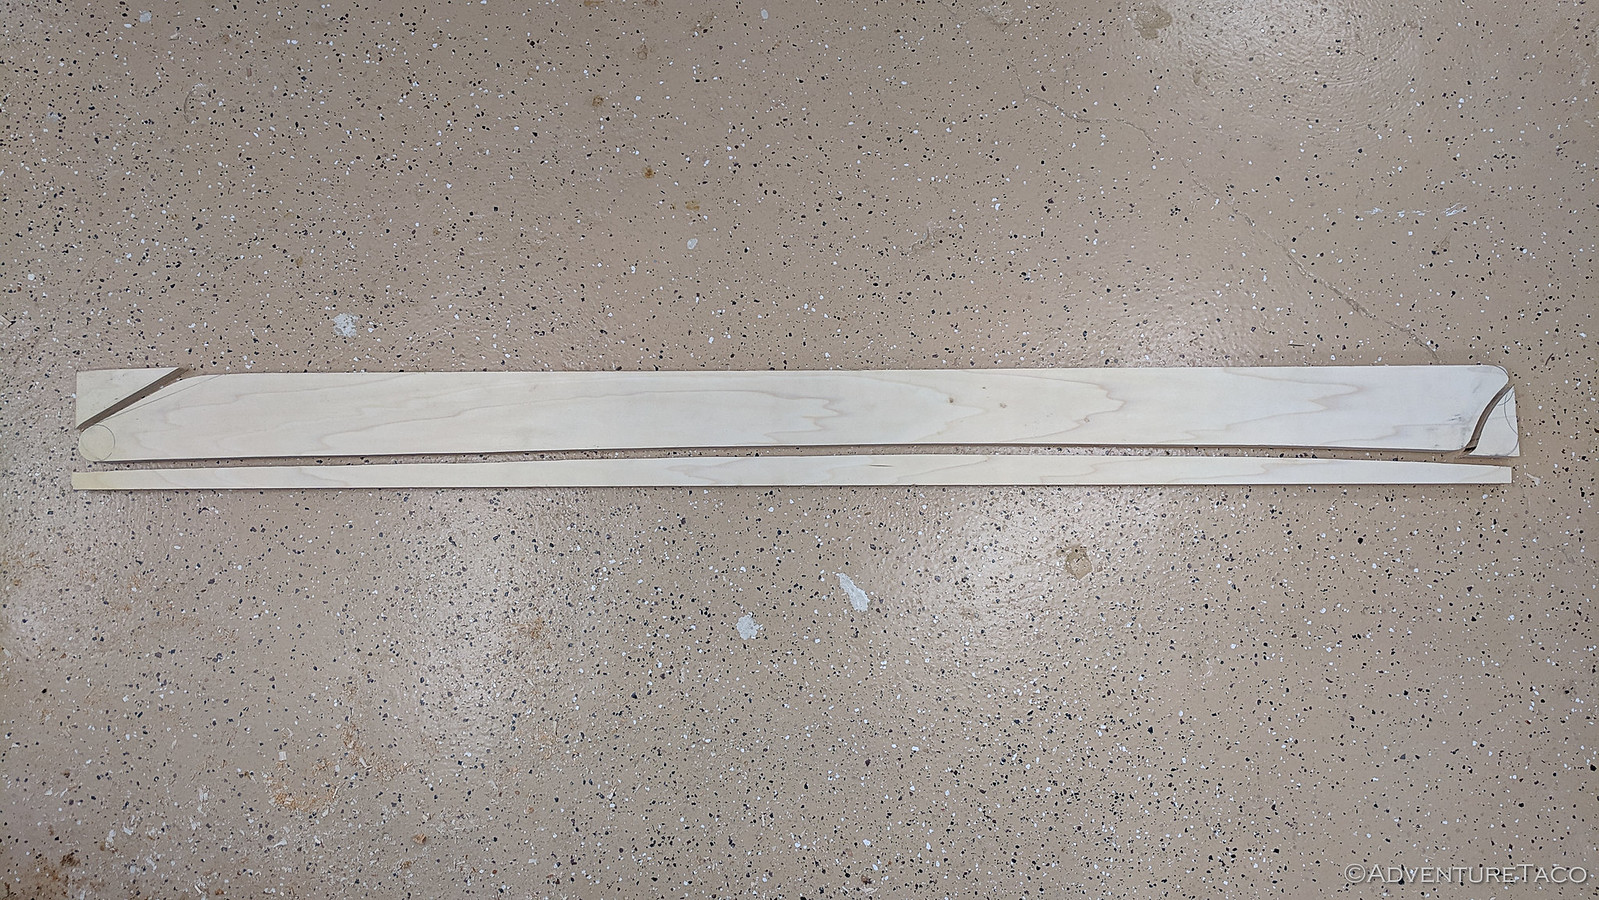

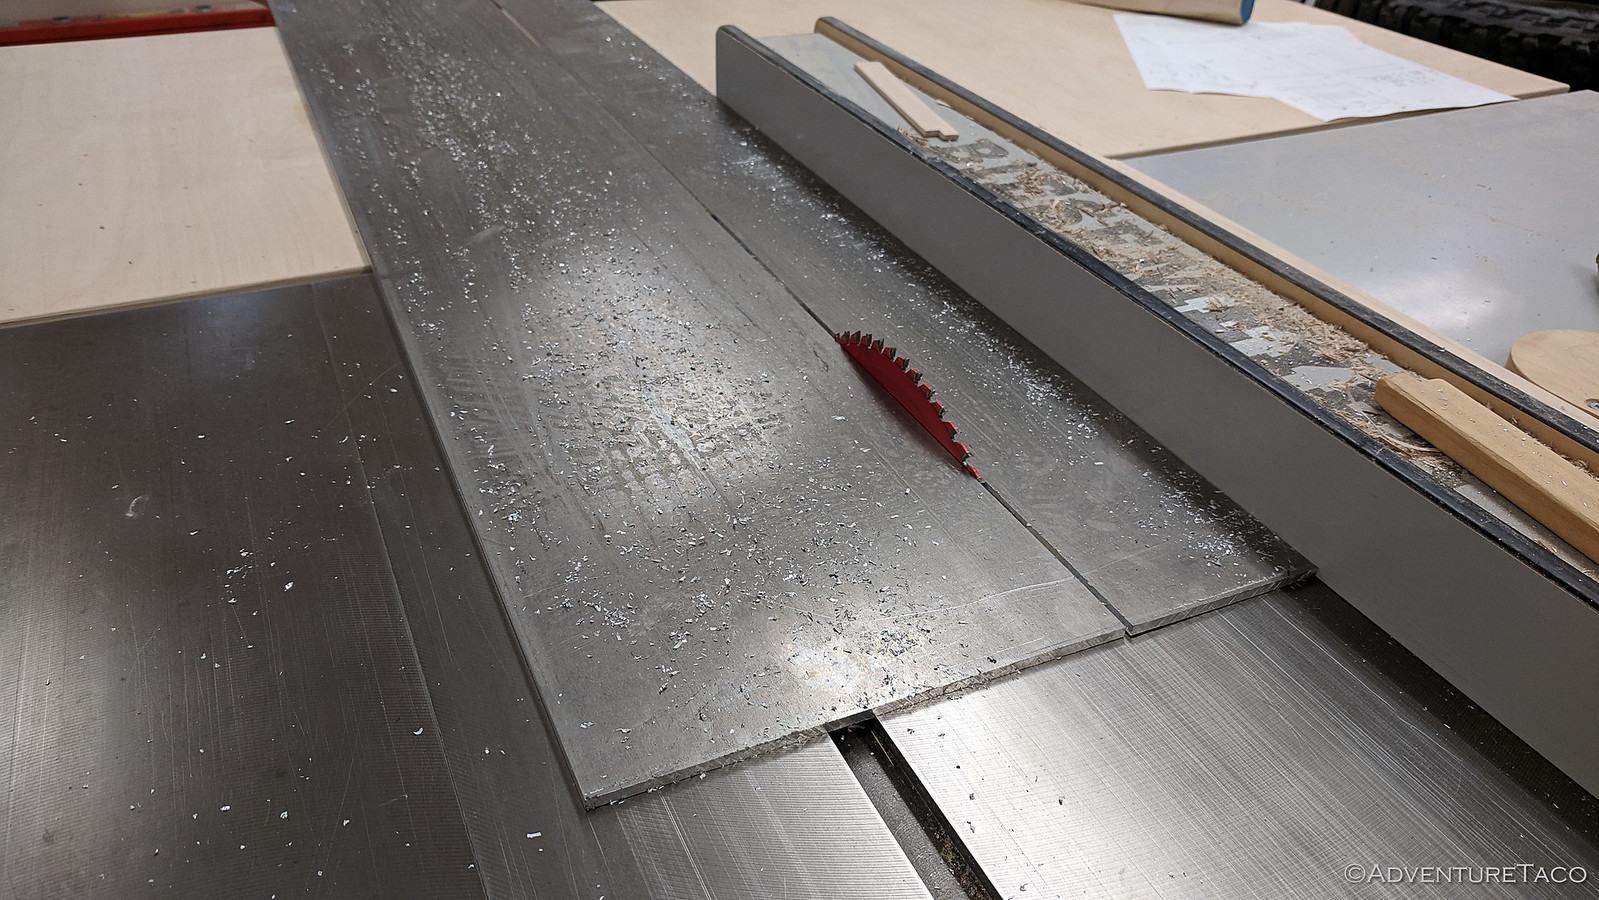
Finally, the moment of truth - time to start cutting aluminum. First, roughly on the tablesaw. Let me tell you - aluminum chips flying up and hitting you in the face is way different than sawdust! Once that torture was over, I headed over to the bandsaw to get the gentle curves.


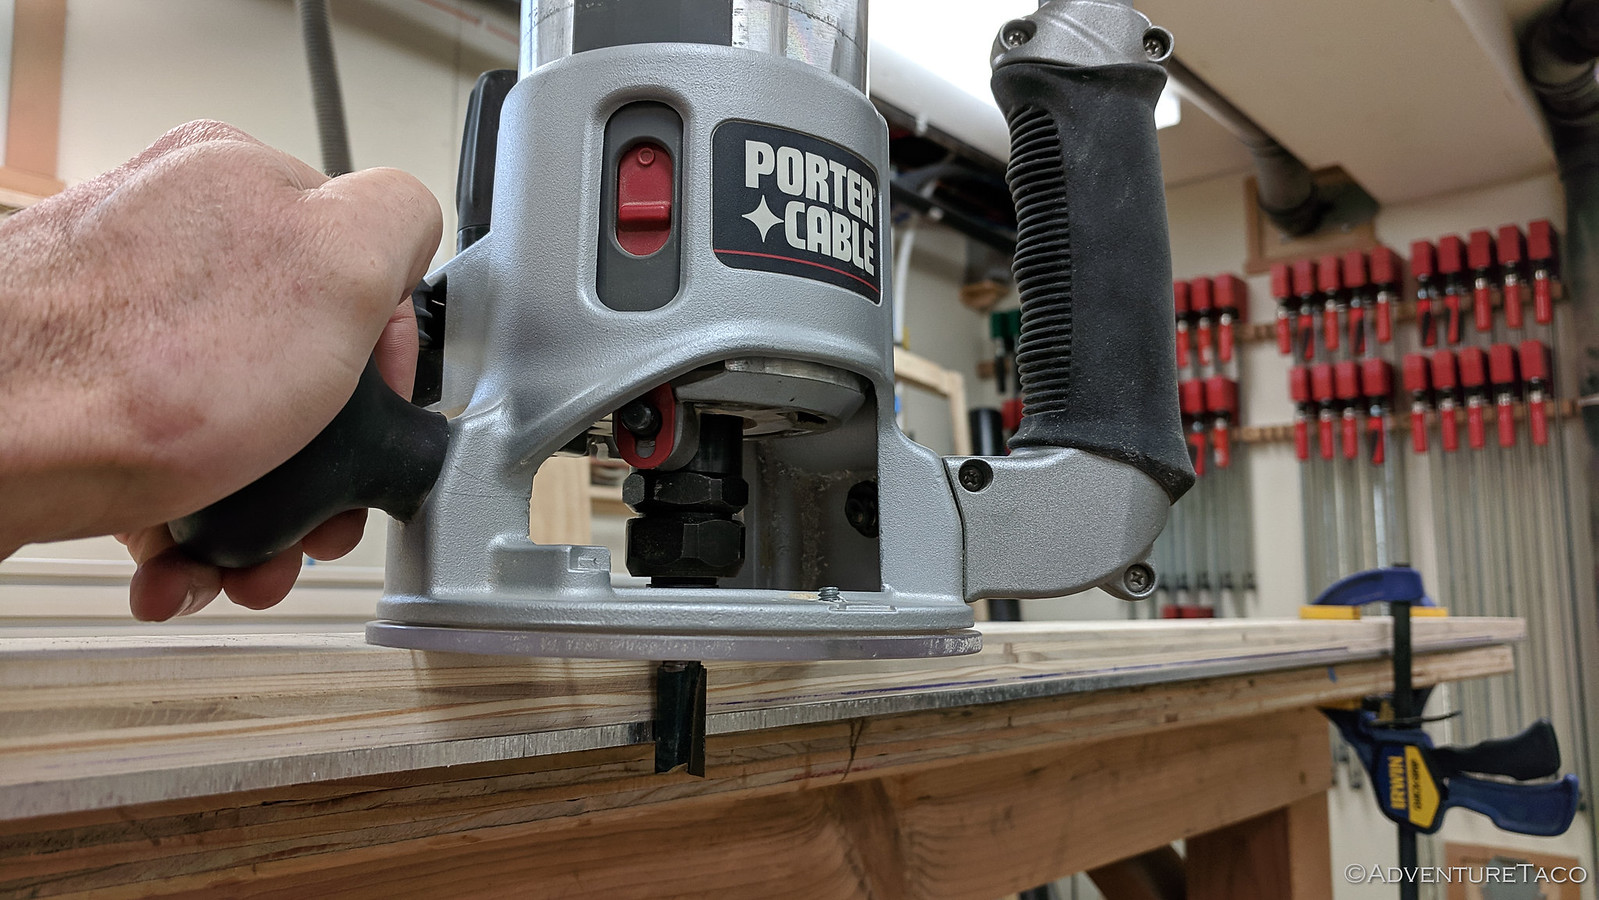
Finally, I clamped the plywood template to the roughed-out side plate and used the router with a flush-trim, templating bit to get the shape just-so, and the wire brush on the angle grinder to give it a nice brushed look.
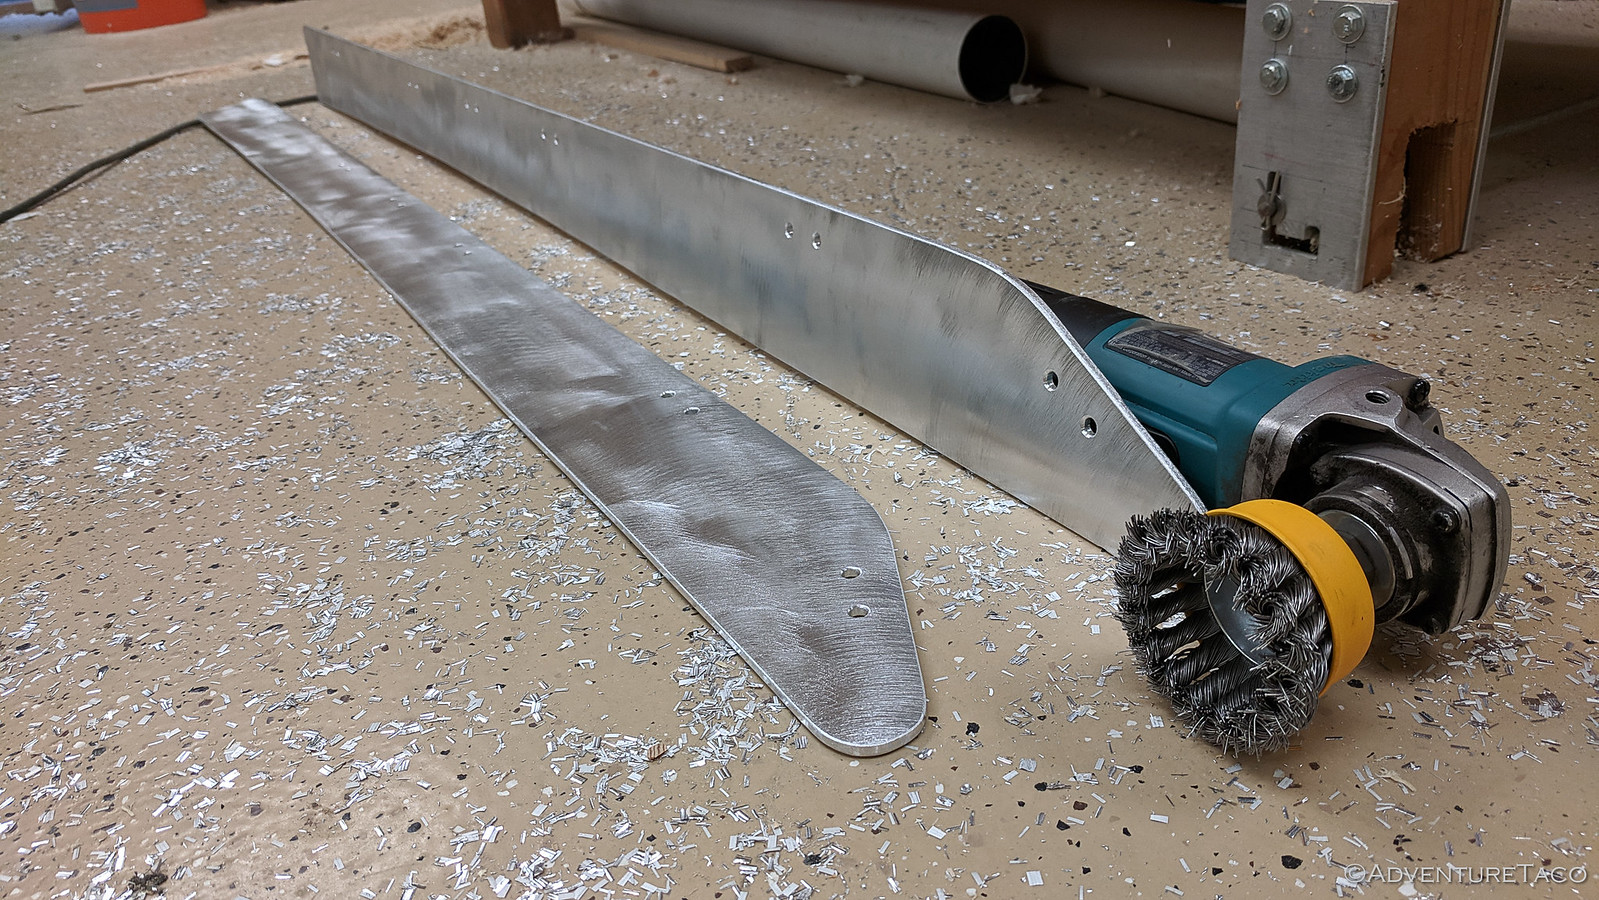


Holy smokes - this might actually work. And that would be totally awesome.

I grabbed all the parts and headed out to the 4Runner, which had been patiently waiting for me for a few days - this project, like essentially all others, taking longer than I expected given the fact that life continues even when projects aren't complete! ::):


I made quick work of removing the OEM rack and made a mental note to pressure wash the roof of the 4Runner. It was a mess up there - lots of pine needles and pollen that don't exist around our place, so likely from the previous owner - probably not cleaned in years!


And then, it was just a few M6 stainless steel bolts to secure the feet to the roof rails, some ¼-20 stainless carriage bolts to secure the feet to the cross bars, and ¼-20 stainless hex bolts to attach the side plates to the cross bars.


Came out pretty reasonably if you ask me. And it's sturdy! I have only a small amount of lingering doubt that it won't be up to the task of holding the tent. ...which I still need to figure out a mounting solution for.

But that should be "easy."

 
Last edited:
4Runner Organization and a Bed for @mini.turbodb
May 7, 2019.

Roof rack built, we now had a place for @mrs.turbodb and I to sleep, but what about the whole reason we decided to get the 4Runner in the first place? We wanted to have something more comfortable for @mini.turbodb!

The idea was for her to sleep in the back of the 4Runner - "downstairs" as she likes to call it - but for that to work, I needed to make the back storage area just a little higher so that it would be level with the folded down back seat.

Not only that, but I knew that we'd want a nice place to store the 50 qt ARB Fridge/Freezer, and it wouldn't be bad to get a flat work surface for making meals and whatnot on when we were in camp.

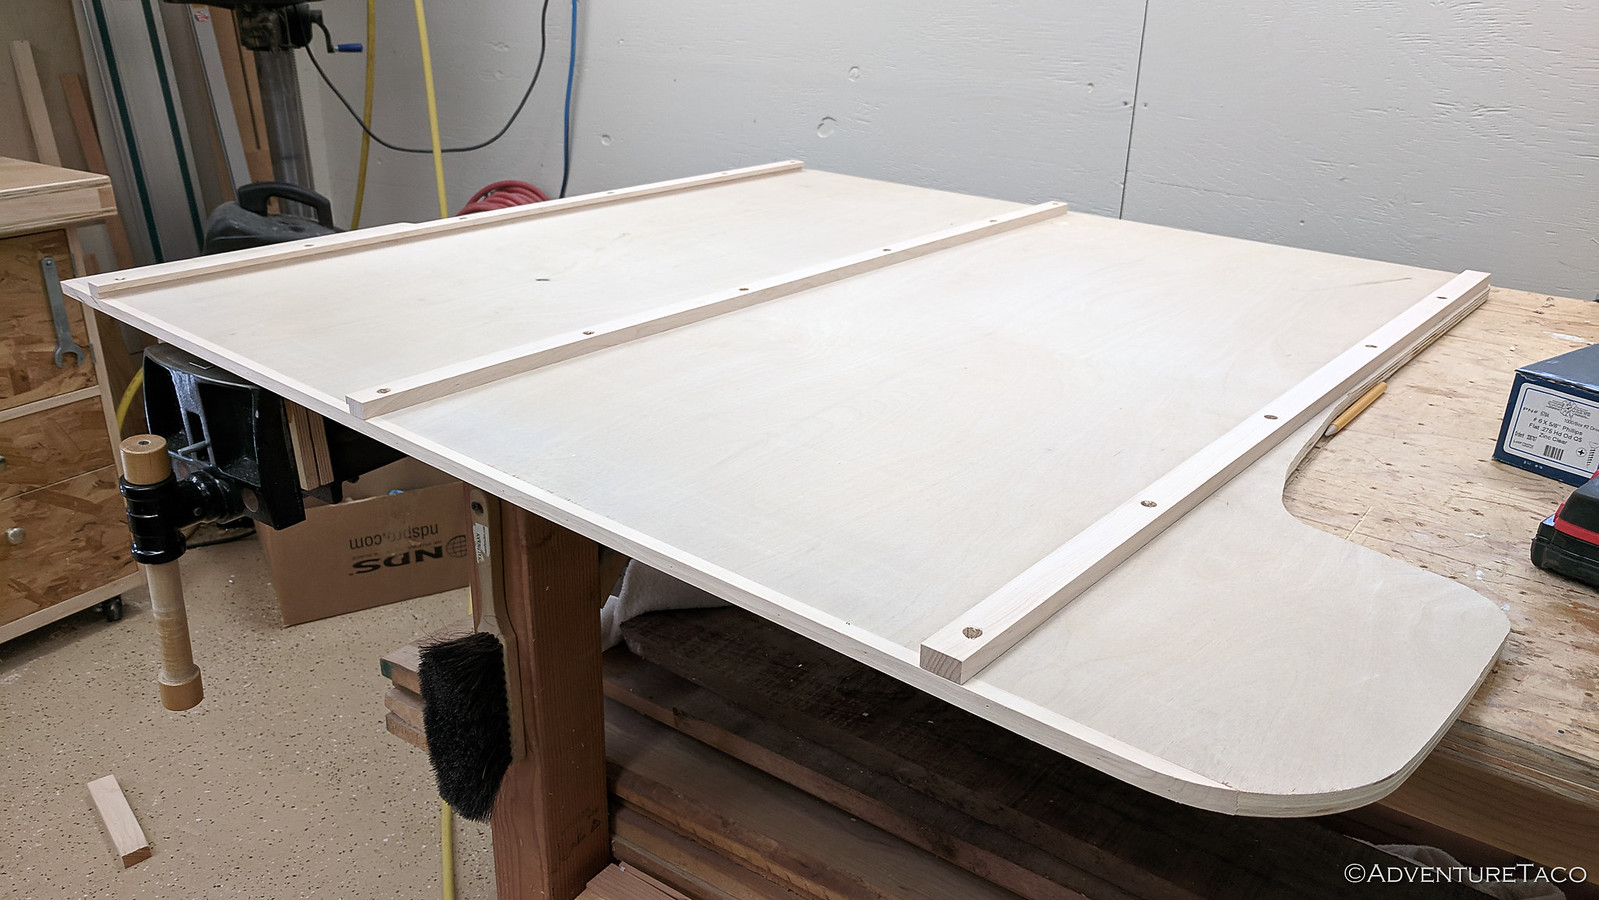
With those things in mind, I set out to make what I thought would be the perfect organization platform - functional, reasonably inexpensive, and as light as possible. To that end, I decided that the construction would be primarily ½" shop-grade Baltic Birch plywood. This would be lighter and less expensive than ¾" ply, and would also be plenty strong with it's 7-layer (but really 5 + veneers) construction. A rough estimation suggested that one sheet would be more than enough.


My next order of business - having once again decided that I would wing the design as I had with the 4Runner roof rack - was to start measuring the space where the organization platform would live. I broke out my favorite trusty tape measure and a pencil and paper and started writing down numbers.

No, not random numbers. The size of the rear storage area.


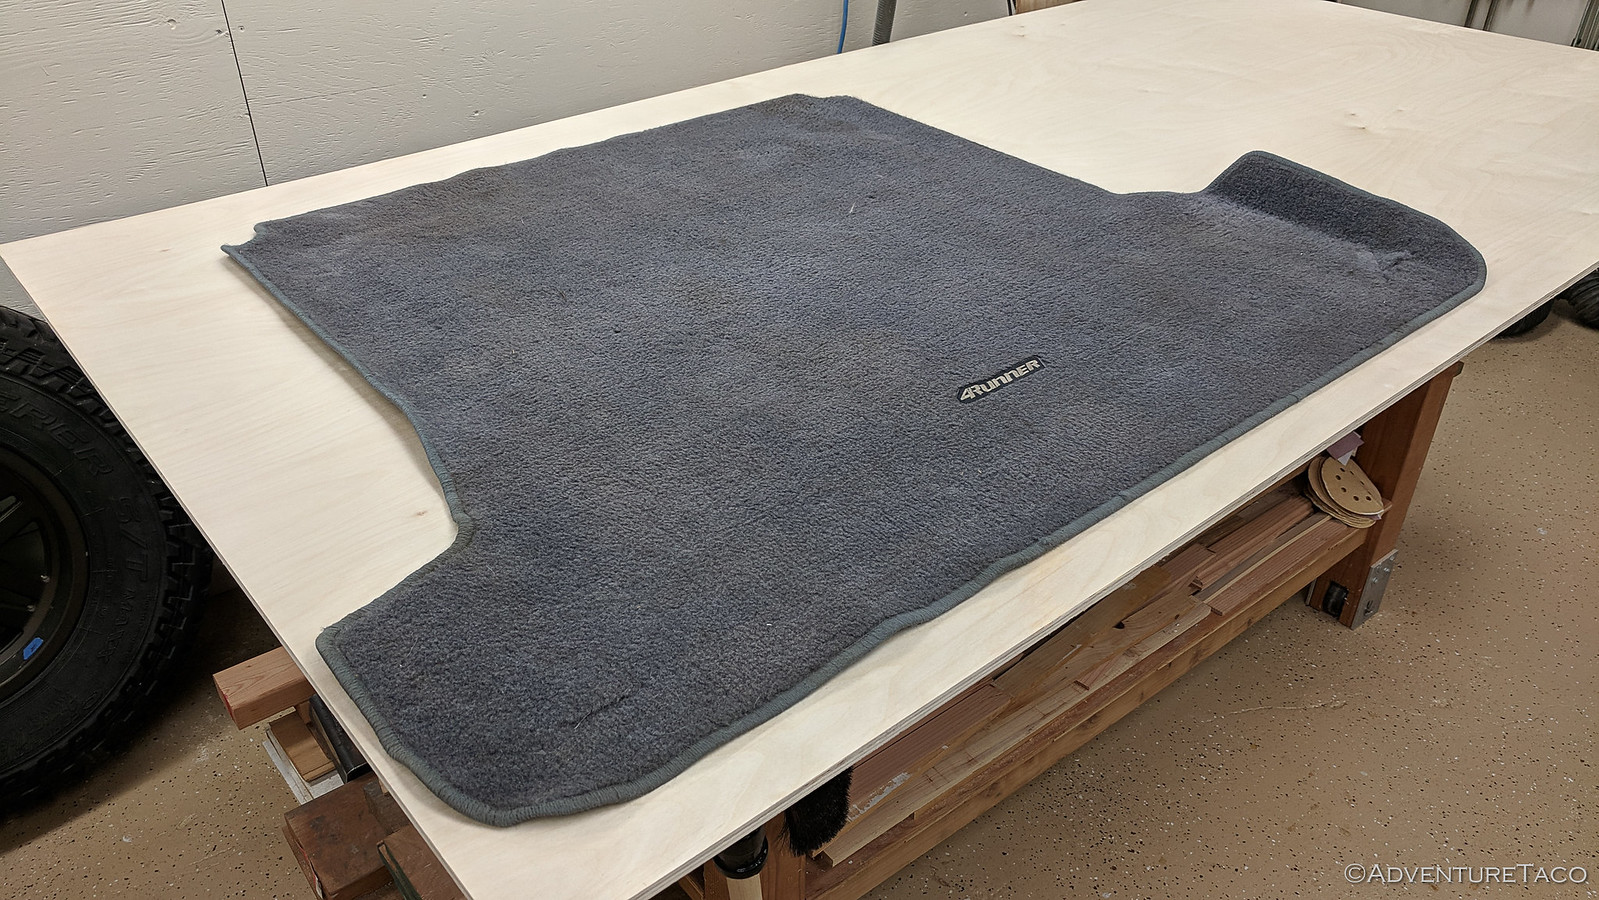
As I was measuring, I realized that I was completely wasting my time. Toyota had done this for me already - or rather, they'd done it for all of us, and likely other folks had realized it well before I had. So I stopped measuring and headed back into the shop, with the perfect template for what I planned to build!


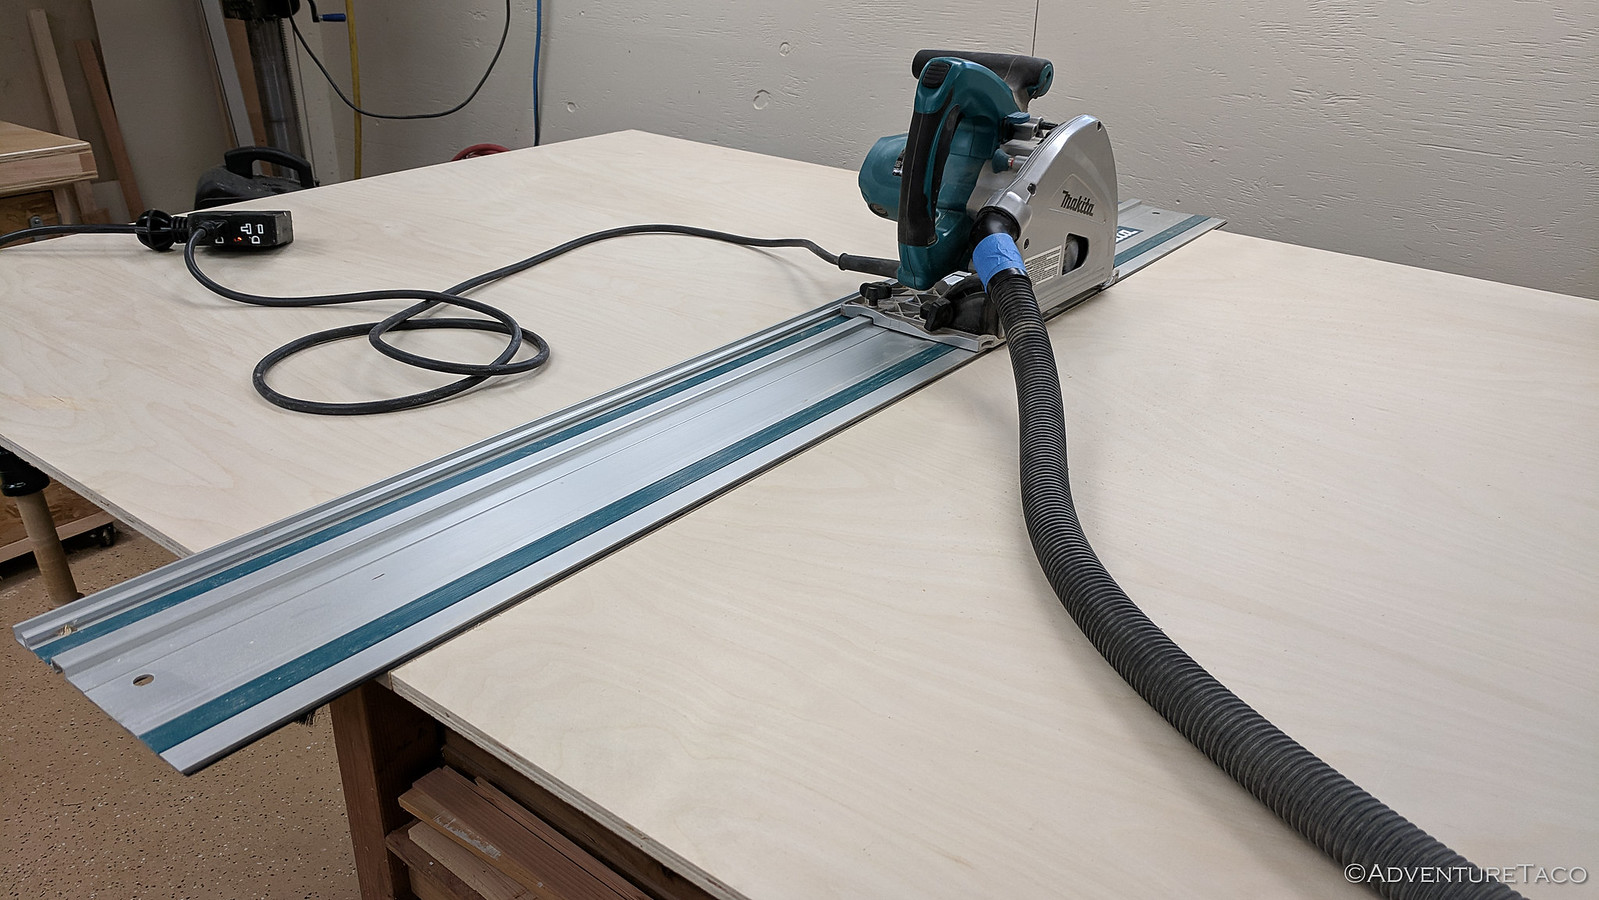
A bit of tracing and it was time to cut. At approximately 40-inches in depth, the first cut was easiest with the track saw, and the rest were a combination of track and jig saw - close to the line on the curves, but leaving just a hair of material that I removed with the belt sander. Yes, I was approaching this a little more precisely than necessary.


A quick test fit showed that what I'd created was perfect - it fit into place and wouldn't slide around. And, it was still about half-an-inch lower than the folded-down back seat. Perfect, since the next steps involved adding a bit of height.


First though, a piece of maple edging. While this is likely not really necessary - since who cares if this thing gets a little banged up - I liked the idea of providing a bit of protection for when people slide things in and out of the back of the 4Runner. Glue and a few pin nails held this in place nicely.


Oh, and I should mention at this point - it's simply amazing how much faster it is to build things using wood as opposed to metal. Definitely my favorite medium despite all the metal fab I've been doing of late.

With the edging on, the next step was to install a few 9/16" runners on the bottom of the panel. The purpose of these was threefold:
  1. Raise the panel approximately ½" so that it was flush with the back seat. (Bear with me, I know I'm repeating myself.)
  2. Provide some additional thickness for the drawer supports (that would hold the ARB fridge) to screw into.
  3. Provide a small void under half of the panel for a slide-out table. More on that shortly.

With the runners in place, the next order of business was building the pull out "drawer" for the fridge. I modeled this off the one I built for the Tacoma since it's worked so well (with minor modification). The only difference on this one is that I decided to rabbit the bottom into the drawer sides for a bit more strength and rigidity. So I quickly machined some maple bits (for strength) and got ready to put everything together.


A few screws to hold the drawer sides together, a few more to hold the drawer rails to the platform, and finally even more to attach the drawer slides to the drawer sides and rails and I was nearly done. The only thing left to do - cut a simple piece of plywood that could pull out as a work surface.


And with that, it was time to test it out again. Or really, place it in its final location in the back of the 4Runner.


One of the quickest projects since it was made of wood, this is one that I think we'll get a ton of use out of. And, perhaps most importantly, @mini.turbodb loves it. And she cant wait to get setup "downstairs."
 
Well done!

Well that's another well thought out and executed mod to the 4runner. Your workmanship and skills are enviable. Great choice of material for this project. Do you plan to paint or lacquer it? Or just leave it raw?

I really enjoy reading your posts. Your sense of humor and humble attitude, are engaging.

Keep up the great work, and keep posting your mod's and trip reports.

Durwin
 
Well that's another well thought out and executed mod to the 4runner. Your workmanship and skills are enviable. Great choice of material for this project. Do you plan to paint or lacquer it? Or just leave it raw?

I really enjoy reading your posts. Your sense of humor and humble attitude, are engaging.

Keep up the great work, and keep posting your mod's and trip reports.

Durwin
Thanks! Glad you're enjoying. I've had a fun time writing up everything with the Tacoma, and the 4Runner is shaping up to be a lot of fun as well, so it's nice that you're enjoying it.

As far as finishing the platform - I considered some poly or enamel, but decided against it because the point of this thing isn't some piece of fine furniture that needs to last in pristine condition for generations. I expect that it will get banged up from gear going in/out, and might need to be tweaked over time as we use it and see what works well and what can be improved. So for now at least, it stays raw.
 
Thanks! Glad you're enjoying. I've had a fun time writing up everything with the Tacoma, and the 4Runner is shaping up to be a lot of fun as well, so it's nice that you're enjoying it.

As far as finishing the platform - I considered some poly or enamel, but decided against it because the point of this thing isn't some piece of fine furniture that needs to last in pristine condition for generations. I expect that it will get banged up from gear going in/out, and might need to be tweaked over time as we use it and see what works well and what can be improved. So for now at least, it stays raw.

That makes sense. I assumed you had thought it through, and was mostly just curious what you decided. If you do ever decide to put a finish on the 'final revision', I would highly recommend a tintable bedliner. I built a sleeping / storage platform for my 4runner 2 years ago and also used baltic birch ply, and finished it will a tinted bedliner that matches (fairly well) the interior plastics. It has held up remarkably well and is a breeze to clean. I always travel with my golden retriever and he has not put a scratch in it. If interested I can try and post a pic.

Either way, great job.

Durwin
 
That makes sense. I assumed you had thought it through, and was mostly just curious what you decided. If you do ever decide to put a finish on the 'final revision', I would highly recommend a tintable bedliner. I built a sleeping / storage platform for my 4runner 2 years ago and also used baltic birch ply, and finished it will a tinted bedliner that matches (fairly well) the interior plastics. It has held up remarkably well and is a breeze to clean. I always travel with my golden retriever and he has not put a scratch in it. If interested I can try and post a pic.

Either way, great job.

Durwin
That's a great idea if I ever do decide to paint it (or a future revision), thanks! :thumb:
 
Frogs, Snakes, and Axle Seals
July 31 - Aug 1, 2019.

We hadn't been back from our adventure on the Idaho Backcountry Discovery Route (IDBDR) long when we decided that we should really get out with the child. After all, we had this nice 4Runner for her to sleep in and the last time we'd gone had been - to our surprise - the "best day of [her] life," according to her.

Hoping to best our previous success, we figured that this time, we'd pair the camping with a nice restaurant for dinner and some pick-your-own peaches the following day. Oh, no naive we were to think that we could possibly influence the whims of a child.

We headed out just before noon on a Wednesday, sure that upon our arrival, we'd get our favorite spot - now safer due to one less dead tree looming over the site. But as we flexed out the 4Runner a bit and pulled in to the site, we discovered another family with the same idea we had... and they'd arrived about 3 minutes before us. Tarnations!


The parents disappointed, but @mini.turbodb ecstatic - since she thinks the backup site is far cooler than the favorite spot - we headed over to the backup site. It was - as we've always found it to be - available, and we proceeded to setup camp.


Much playing ensued. Mostly it consisted of me skipping rocks, @mrs.turbodb enjoying her book next to the river, and @mini.turbodb doing everything she could to get as dirty and wet in the creek as possible. Eventually, I was even able to convince her to actually swim 10' across the creek in one of the deeper swimming holes - the water level much lower, and safer, than the last time we'd visited.


One of the things I really enjoy about @mini.turbodb is that she's much more comfortable with and doing traditionally non-girl things that other kids I've been around. So, when we were playing on the rocks and I noticed a snake, she piped right up with, "Oh, I saw one of those earlier. It was brown with diamonds on it's back." The fact that it didn't even phase her - she'd not mentioned it at all when she'd seen it, is pretty great in my opinion. And of course, now that I'd found noticed one, we were definitely going to catch it.

:yes:​

I proceeded to fish it out of the rocks and water, and immediately there was a request for a transfer. Or at least the opportunity to pet. Because... of course.


Eventually, it was time for dinner - so we headed into town and had one of the best dinners we've eaten at one of our favorite restaurants. It's a reasonably fancy buffet-style joint, and over the years we've gotten to know the chef and staff - to the point where we are on a first-name basis, and can request certain items be available on the nights we're there.

Their specialty is steak, and @mini.turbodb and I were elated to come up with a new - and we think best - way of evaluating a trip to the buffet: You've made a good decision of what to put on your plate if you've maximized your steak intake. :hungry:

Everyone full, it was back to camp with us - still light, but way after bedtime - and into our respective floors of the 4Runner.


We awoke the next morning to no real plans, and a breakfast of champions - cookies we'd packed into a to-go box at the dinner buffet the night before. Generally, this is frowned upon by @mrs.turbodb, but with cookies is a little more OK, and this morning she was happy to partake.

It was once again a beautiful day down at the creek. Well, it was beautiful all over, but we only ever went down by the creek.


More water play ensued, @mini.turbodb finding a route across the river she'd never known was accessible to her, and we explored further upstream. Through various pools, some of us throwing big splashy rocks just at the other's feet :anonymous:, skipping stones across the glass-like surface of side pools, and having an all-around great time.

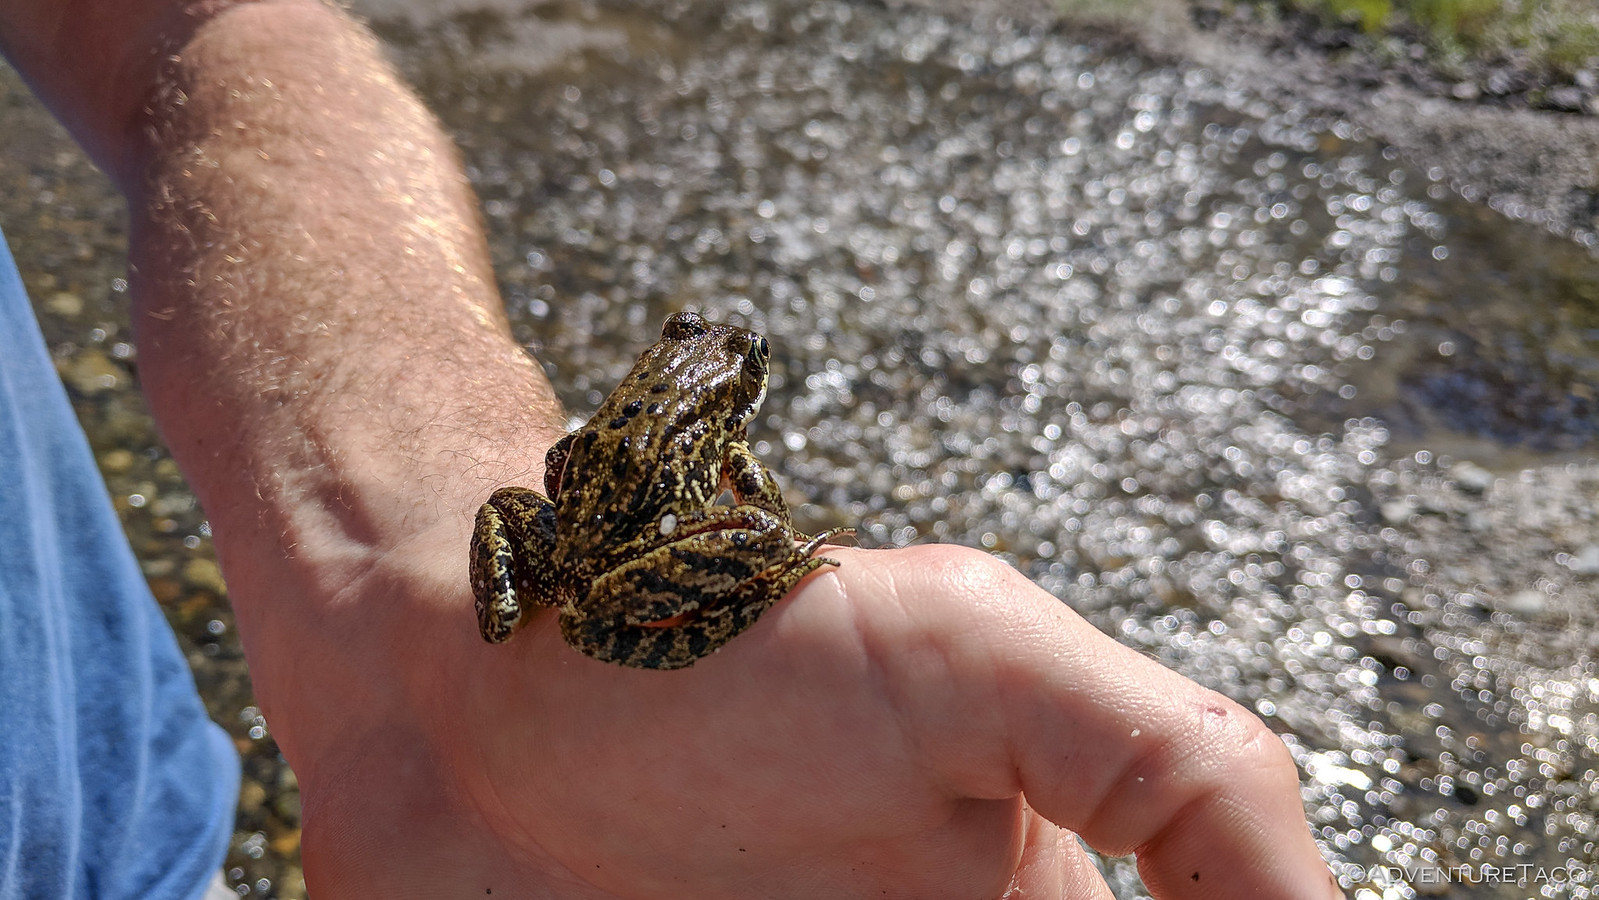
Then, as we were headed back, the ground seemed to move beneath my foot. Or rather, just before my foot hit the ground. Or rather, a small frog jumped.

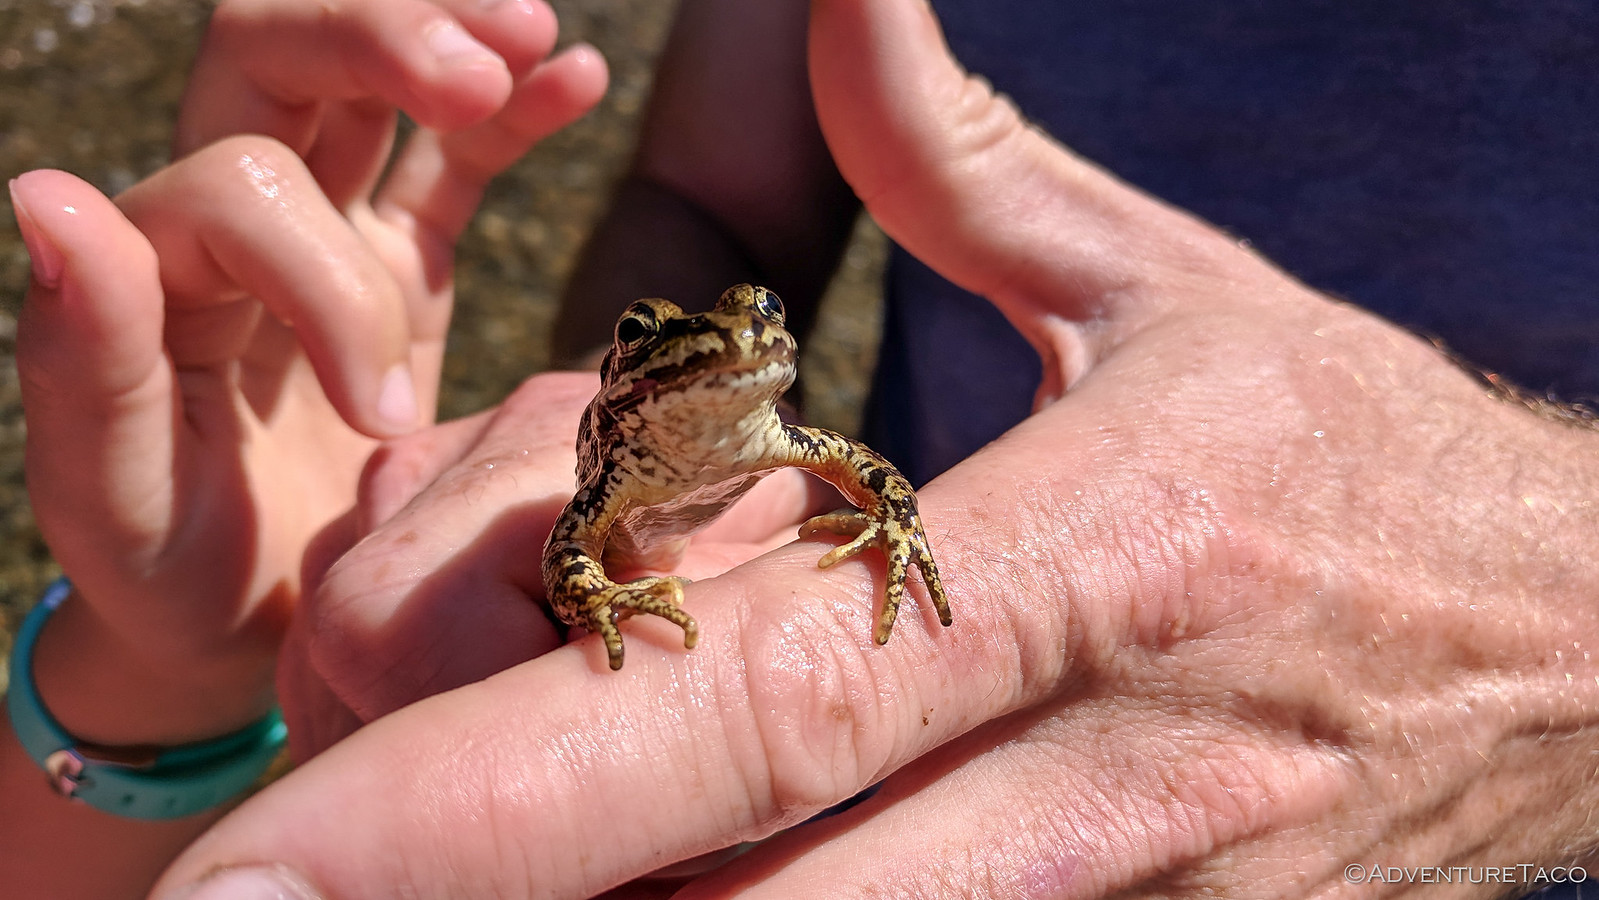
As usual, no small wild animal is safe around me, and it was soon scooped up and a call went out to the child. We'd found lunch!


Once again, she was keen to get her hands all over this little guy, so the transfer was made - even if it would only be momentary - and she was thrilled.


Just as had been the case the day before, we eventually had to call it quits. @mini.turbodb had lost our only lunch to the creek, and if I'm being totally honest, it probably wouldn't have been enough to feed the three of us anyway. Plus, @mrs.turbodb had informed us that - under no uncertain terms - we were going to u-pick peaches, where she planned to spend hours selecting as many peaches as she wanted for $0.69 per pound.

Oh, twist our arms why don't you?! :p After 20 minutes, we went home with 43 lbs of peaches.


It had been a good trip - or should I say great trip - to this point. Everyone was happy, though we hadn't heard anything about "best life day" or anything like that. However, upon arriving home, I noticed a disturbing sight decorating the rear wheel wells of the 4Runner - wet streaks.


Visible on both sides, there's only one thing this can really be - and it's easily verified by a quick look at the brake drums: both rear axle seals on the 4Runner are leaking. :annoyed_gaah: Guess there's some work on the 4Runner in my future!
 
Turbo, what a great way to spend a couple of days. Looks like fun.

Sorry to hear about your rear axle seals giving out. I'm sure you will have them replaced and have the 4runner back on the road / trail soon.

Thanks for taking the time to share your adventures.
Durwin
 
Turbo, what a great way to spend a couple of days. Looks like fun.
Sorry to hear about your rear axle seals giving out. I'm sure you will have them replaced and have the 4runner back on the road / trail soon.

Thanks for taking the time to share your adventures.

Durwin
Thanks man. I've got it patched up already, and it wasn't too bad once I got the right tools.

Will get that written up (hopefully soon here) so others can benefit as well!
 
I'm Too Late! - Rear Diff Breather Mod on 3rd Gen 4Runner
August 7, 2019.

I have a confession to make: I procrastinated this job and it may have cost me.

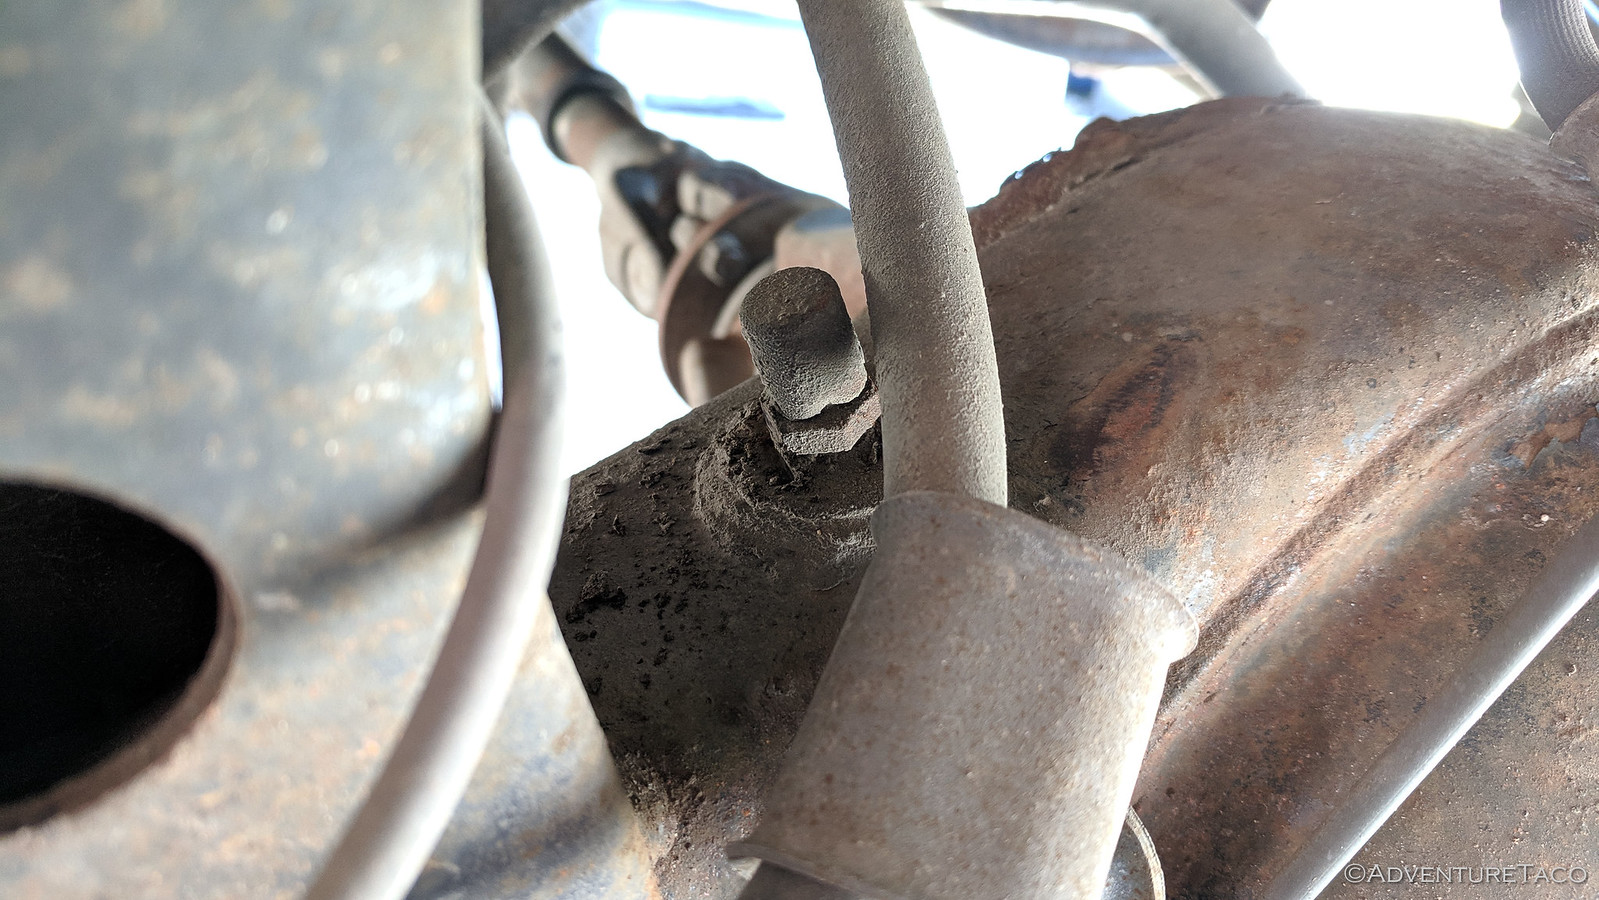
So let's back up for a moment. See, this was a mod that I knew I needed to do to the 4Runner as soon as I got it. Toyota has conveniently placed the rear diff breather right on top of the rear diff - pretty much as low as it can go. All well and good except that it's not at all well and good. In that position, not only can the breather can suck water into the diff when submerged in deep water, it can also get clogged up by road grime.


This latter issue isn't one that you generally hear of when it comes to relocating the breather, but it's the one that can cost you hundreds - or thousands - of dollars if it happens. Because when it does, and the diff heats up - expanding the air and oil inside - the air and oil have nowhere to go... and so they force their way out the easiest path possible - generally your rear axle seals.

And then you get a nice ring of gear oil in your wheel wells. And the opportunity to replace your axle seals, wheel bearings, and rear brake shoes. Oh, and you get to purchase a bunch of special tools, if you decide to do it yourself.


But now we're getting into another story for another post. This time, we're just going to do the diff breather relocation...so this never happens again. Oh, the trouble I could have saved myself doing this one week earlier!

The mod is pretty simple: add an extension to the breather to move it up out of the reach of any water crossing and road grime. The hardest step is finding the right parts to do the mod. Luckily, others have gone before, and the parts have been well identified. They work for all generations of 4Runners, and all generations of Tacomas. And probably a lot more Toyotas to boot.
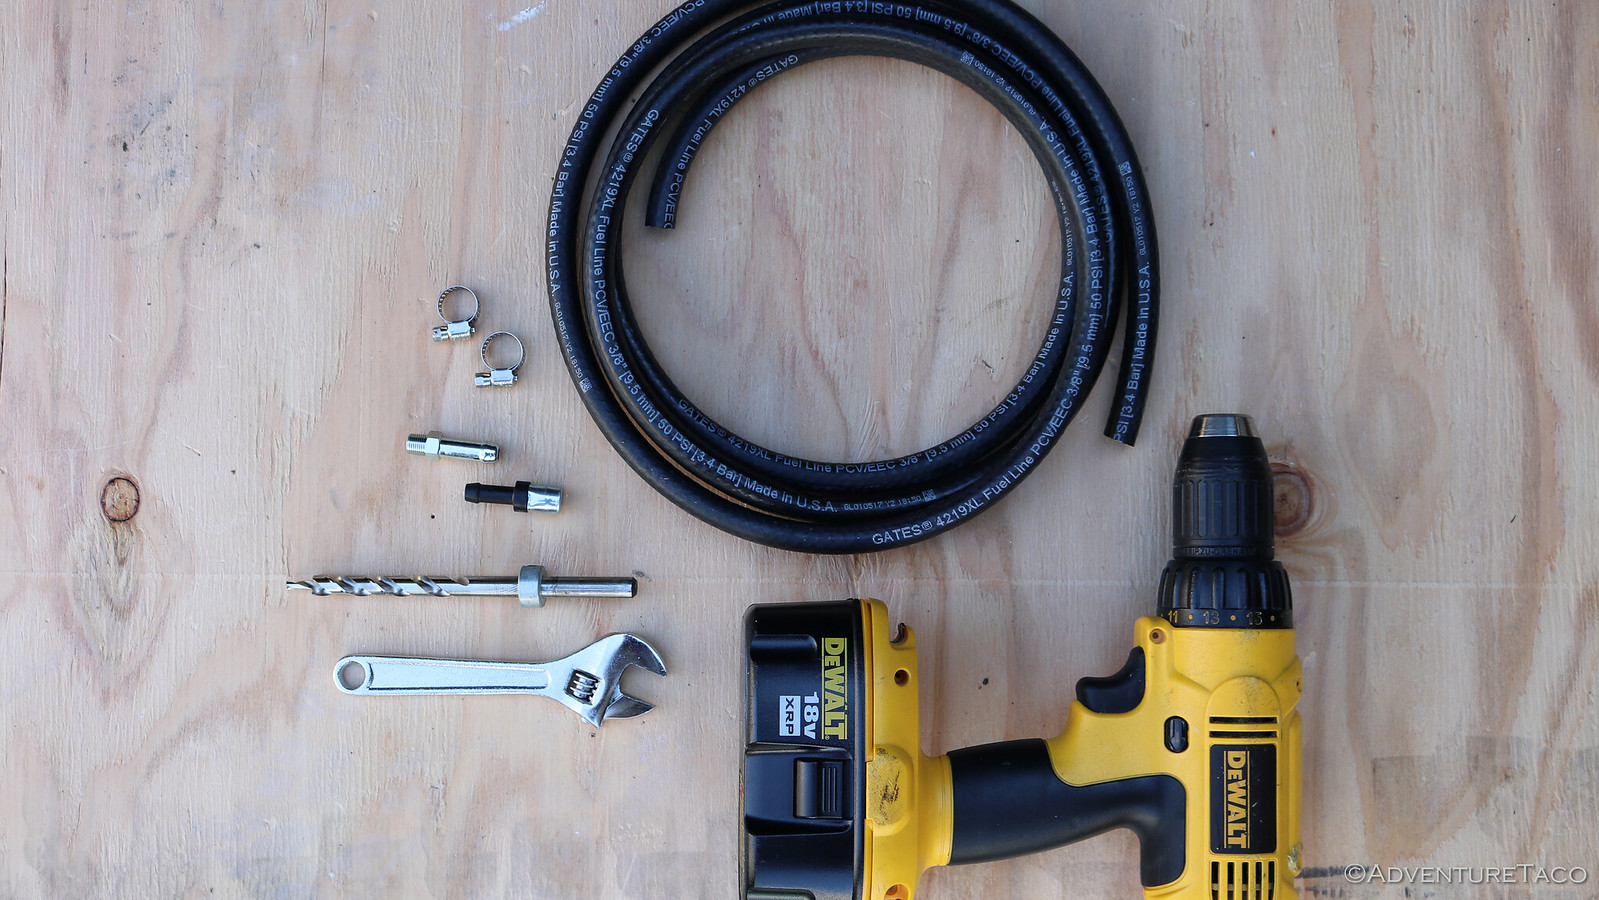
  1. 90930-03136 Plug Breather
  2. 90404-51319 Union
You'll also need a few other odds and ends, and tools:
  1. Two stainless steel hose clamps
  2. A length of 3/8th inch fuel line (8' is plenty, I used exactly 5' to get to the fuel door location)
  3. Slot screwdriver
  4. Drill (if you're going to drill a hole for the relocated breather)
  5. Adjustable wrench
  6. A few zip ties

Once you've gathered everything, the process is reasonably straight forward, though slightly less so on the 4Runner than the 1st gen Tacoma - only because the fuel filler gasket is a rubber material instead of hard plastic.
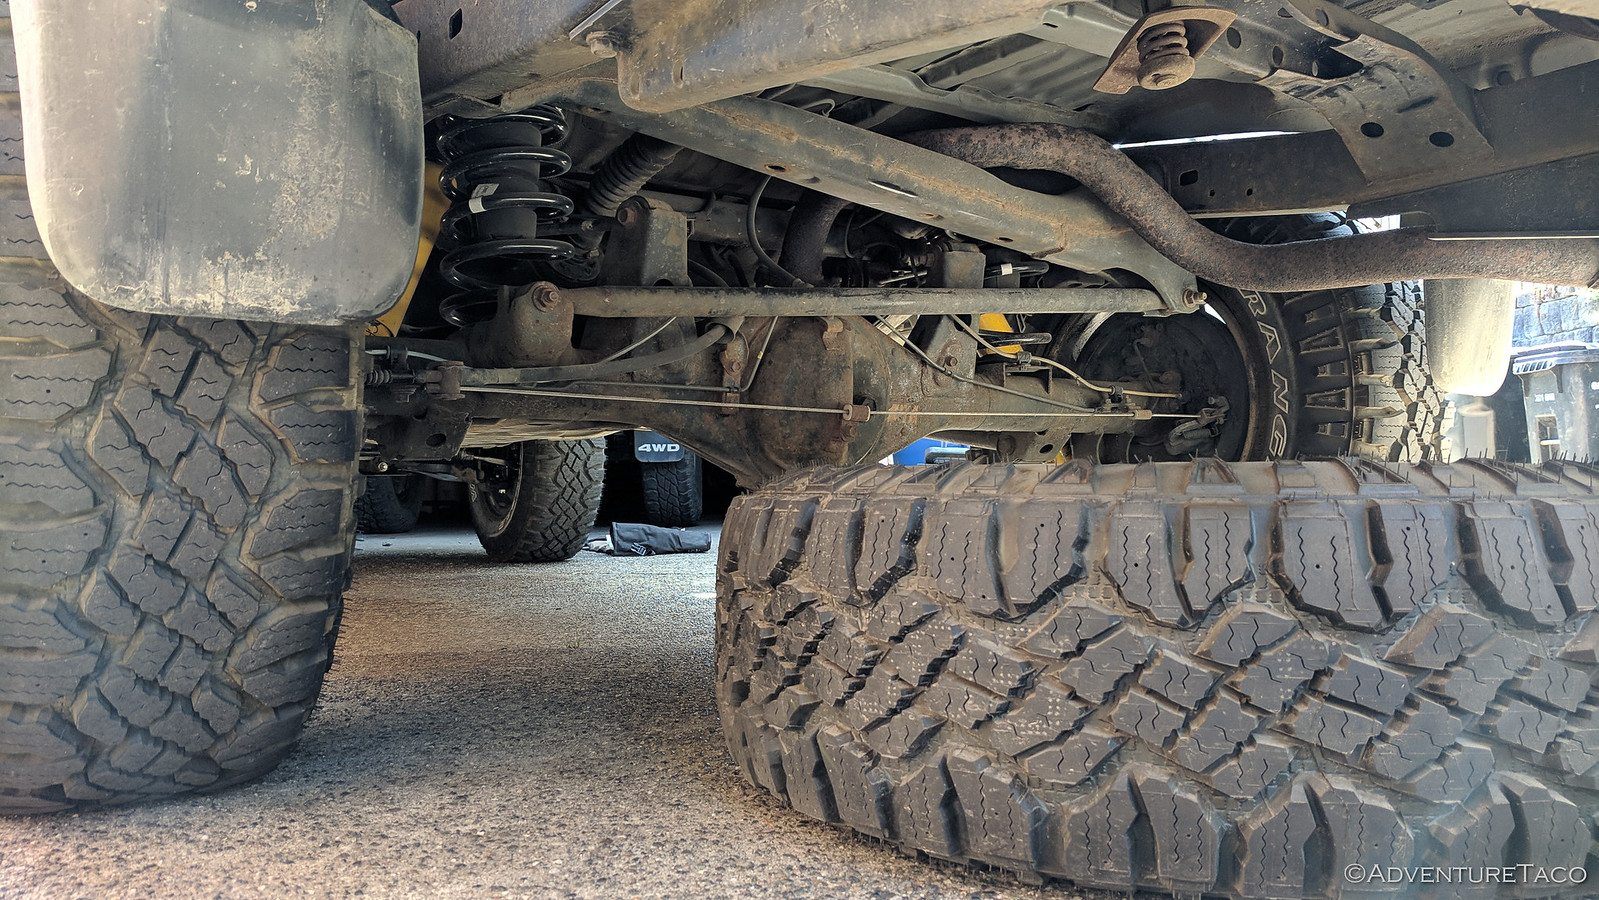
  1. Drop the spare, to get a bit more room to work under the truck. Then jack up the rear using the hitch receiver.


  2. Clean around the OEM breather (so nothing falls in your diff as you make the swap, and then remove the OEM breather, prep the Union by optionally wrapping it with a bit of Teflon tape, and install it.

  3. Attach the fuel line to the Union with a hose clamp and run the other end to the location you'll install the new Plug Breather. Zip tie it as you go, and don't forget to allow for rear axle droop (leave some slack). Note: If you've lifted the truck off the rear wheels in step 1, you've already accounted for axle droop.

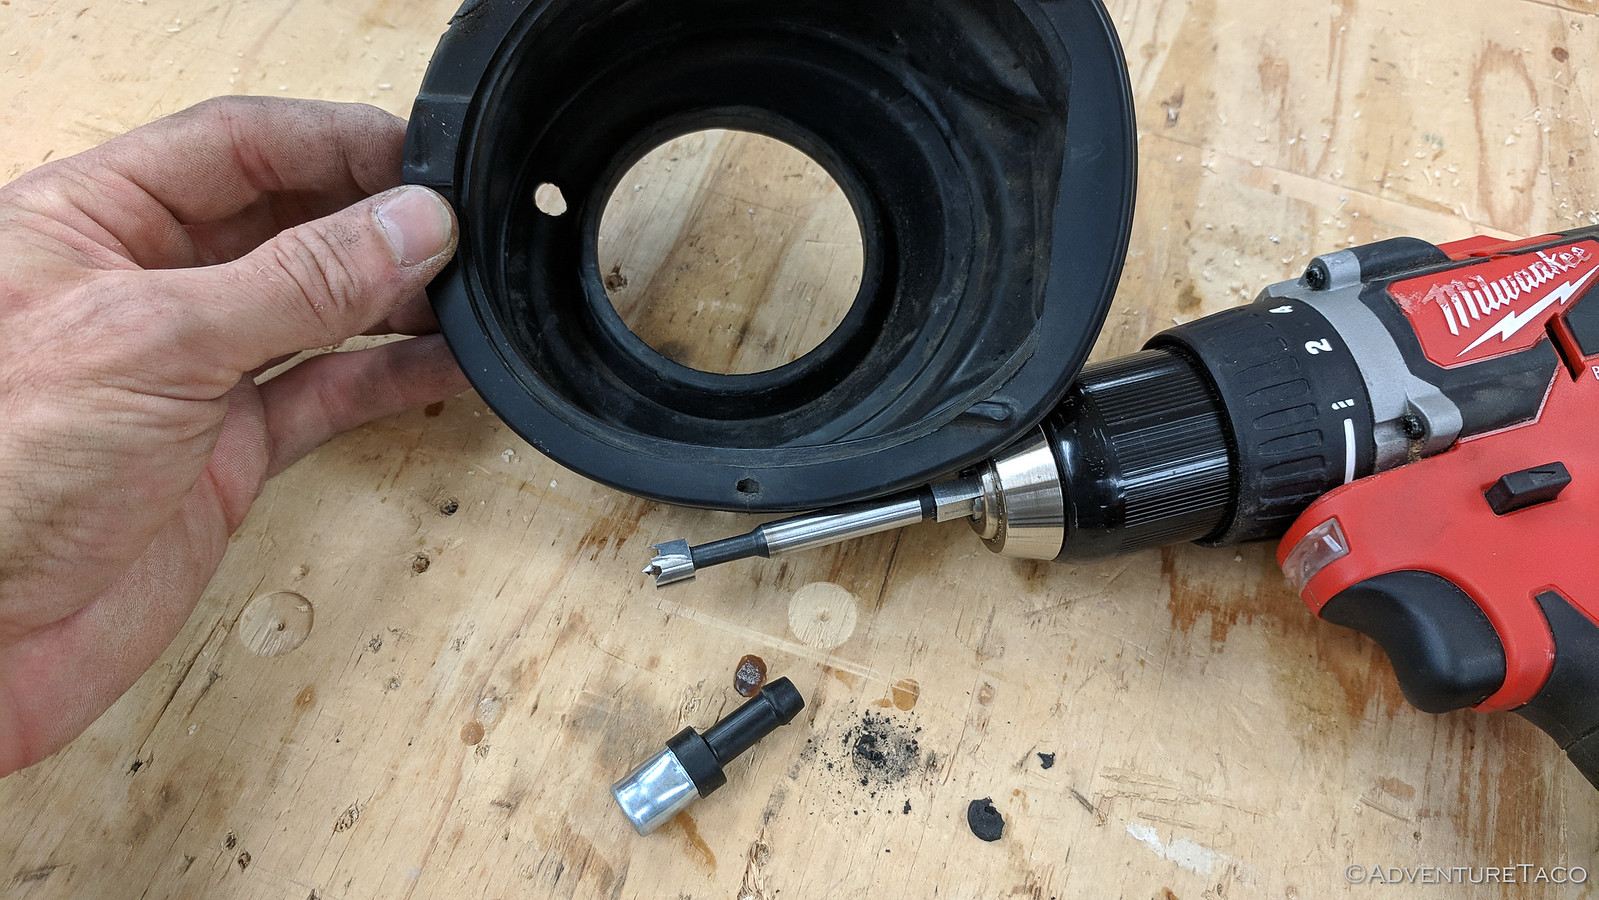
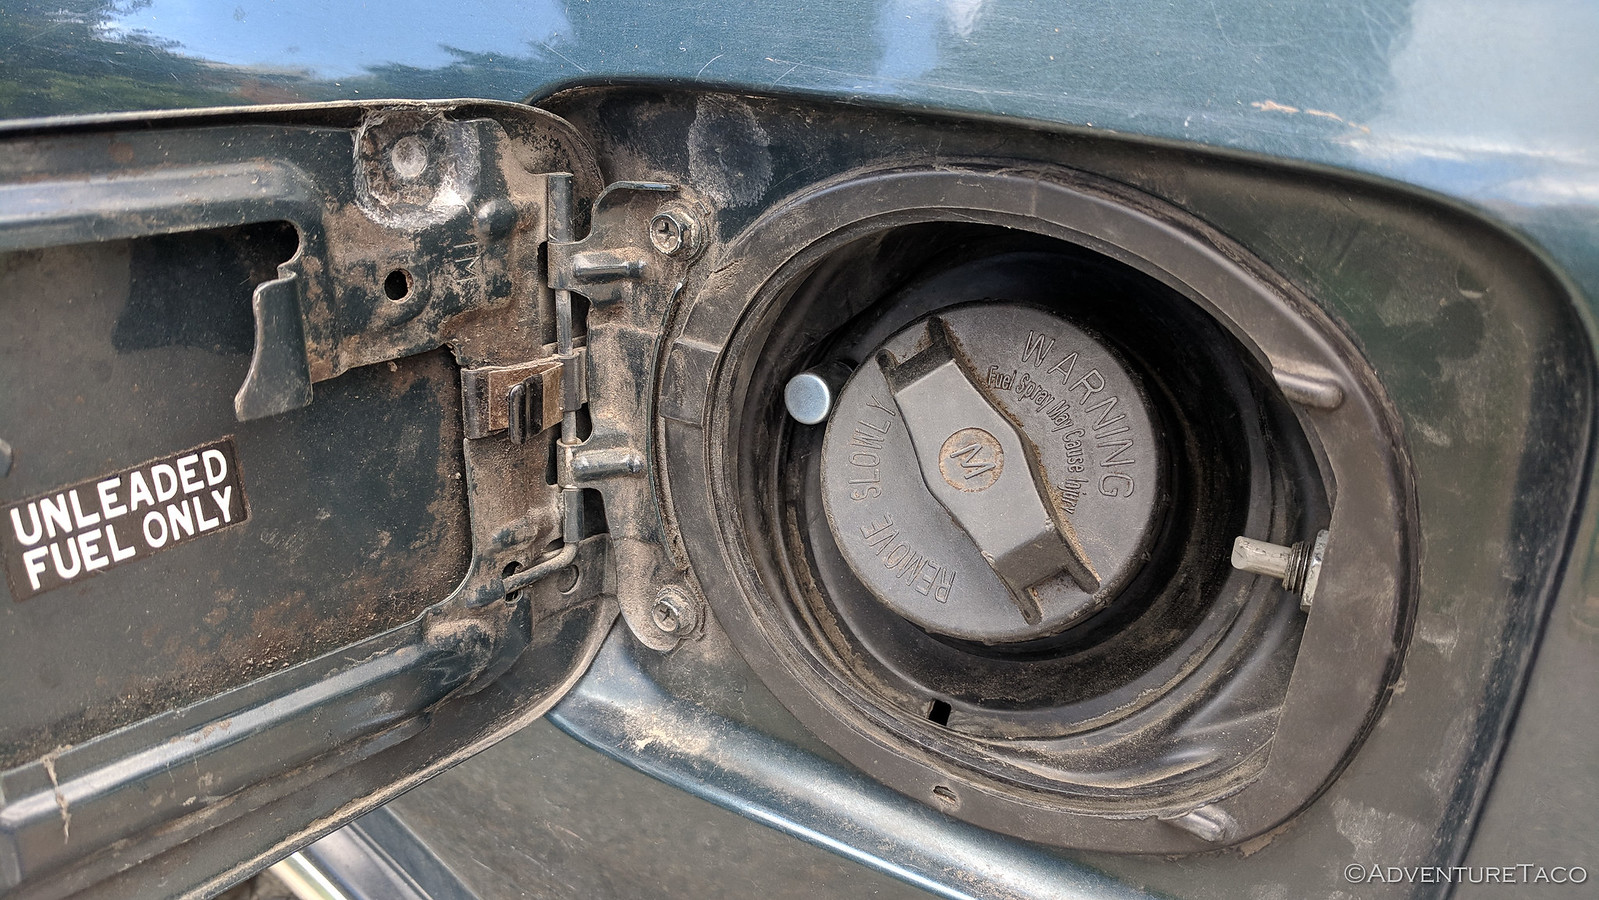
  4. If you're putting the breather behind the fuel filler door, you'll need to remove the gasket. This is tedious, but not hard. Start by removing the nut that holds the latching mechanism, and then pry out the two (2) wire clamps that hold the gasket in place.

  5. Drill a hole in the place of your choice in the gasket. I choose the 9-o'clock position since it seemed to be out of the way and have enough room to make a small hole.

  6. Push the new Plug Breather through the gasket, and then attach the fuel line with the other hose clamp. Then, reinstall the fuel filler gasket.

You're basically done with the mod at this point, and your 4Runner will thank you the next time you make your way through some water. Or mud.

 
Replacing My Rear Axle Seals & Bearings on a Toyota 4Runner (also Tacoma)

August 22, 2019.

Well, as I mentioned previously, our last family camping trip was both a success and a failure. I mean, the camping part was all success, but noticing that my rear axle seals were leaking when we got home - that part was definitely a failure.


My first order of business was to address what I hoped was what caused the seals to leak in the first place - by relocating the rear diff breather. With that out of the way, it was time to address the actual problem - so I procrastinated.

See, I was worried that this was going to be a huge, complicated job - and let me be the first to assure you - it's not! I mean, you need a few special tools and such, but with a bit of interweb research, the right tools and a list of the necessary steps, the job is straight forward and reasonably easy.

If you've come here just looking for the tools and steps - perhaps to print out for doing the job yourself - follow this link to everything you'll need...

<p style="text-align: center; font-size: 2em;">Step-by-Step: Replacing Rear Axle Seal & Bearing on a 1st gen Tacoma w/ABS (or 3rd gen 4Runner)</p>

OK, so having written up all the steps, it was - as usual - time to gather the parts and tools. This is a double-edged sword for me - I love new tools, but don't love paying for them. But hey, I'm saving money by doing this myself, right?

:spending:

buy to save™

The parts for this project are reasonably few, and I went OEM on everything since I generally figure that a few extra bucks for parts that are perfect is worth it. Even then, nothing here is that expensive.
Note that I decided to save about $150 and re-use the ABS tone rings and inner- and outer-retainers. The steps I've linked to above can help you save that same $150.


Next, I needed to pick up a few special tools.


And of course, I used the "normal" tools that we all have around the shop for the various jobs we do on our trucks.
  • Floor jack and (2) 6 ton jack stands.
  • Misc sockets (I recommend this set from Williams, a Snap-On brand)
    • 10mm socket - to remove the ABS sensor from the axle housing.
    • 14mm deep socket - to remove nuts holding brake drum to axle housing.
    • 24mm socket - to remove diff fill/drain plugs.
    • 5/8" deep socket - to use in the press when pressing on various components.
    • Ratchet, Extensions, and breaker bar as necessary.
  • 14mm box end wrench (set) - to remove nuts holding brake drum to axle housing.
  • 10mm flare nut wrench (set) - to remove brake line fittings from rear drum.
  • Snap ring pliers - to remove/install the snap-ring for the outer retainer.
  • 3mm, 4mm, 5mm Allen wrench (set) - to measure placement of the inner retainer on re-installation.
  • Assortment of vacuum caps - to prevent brake fluid from leaking out of rear lines once disconnected.
  • Brake cleaner - to clean the brake components, as well as axle, throughout the process.
  • Grease - for installing new parts.
Logistics out of the way, I printed out the steps and after a leisurely breakfast of something that I'm sure was tasty, I got to work. My first order of business was getting the rear axle of the 4Runner up on jack stands so that I could remove the rear wheels, a step which quickly highlighted the problem for me - the stain of diff oil right there on the outside of the brake drum.


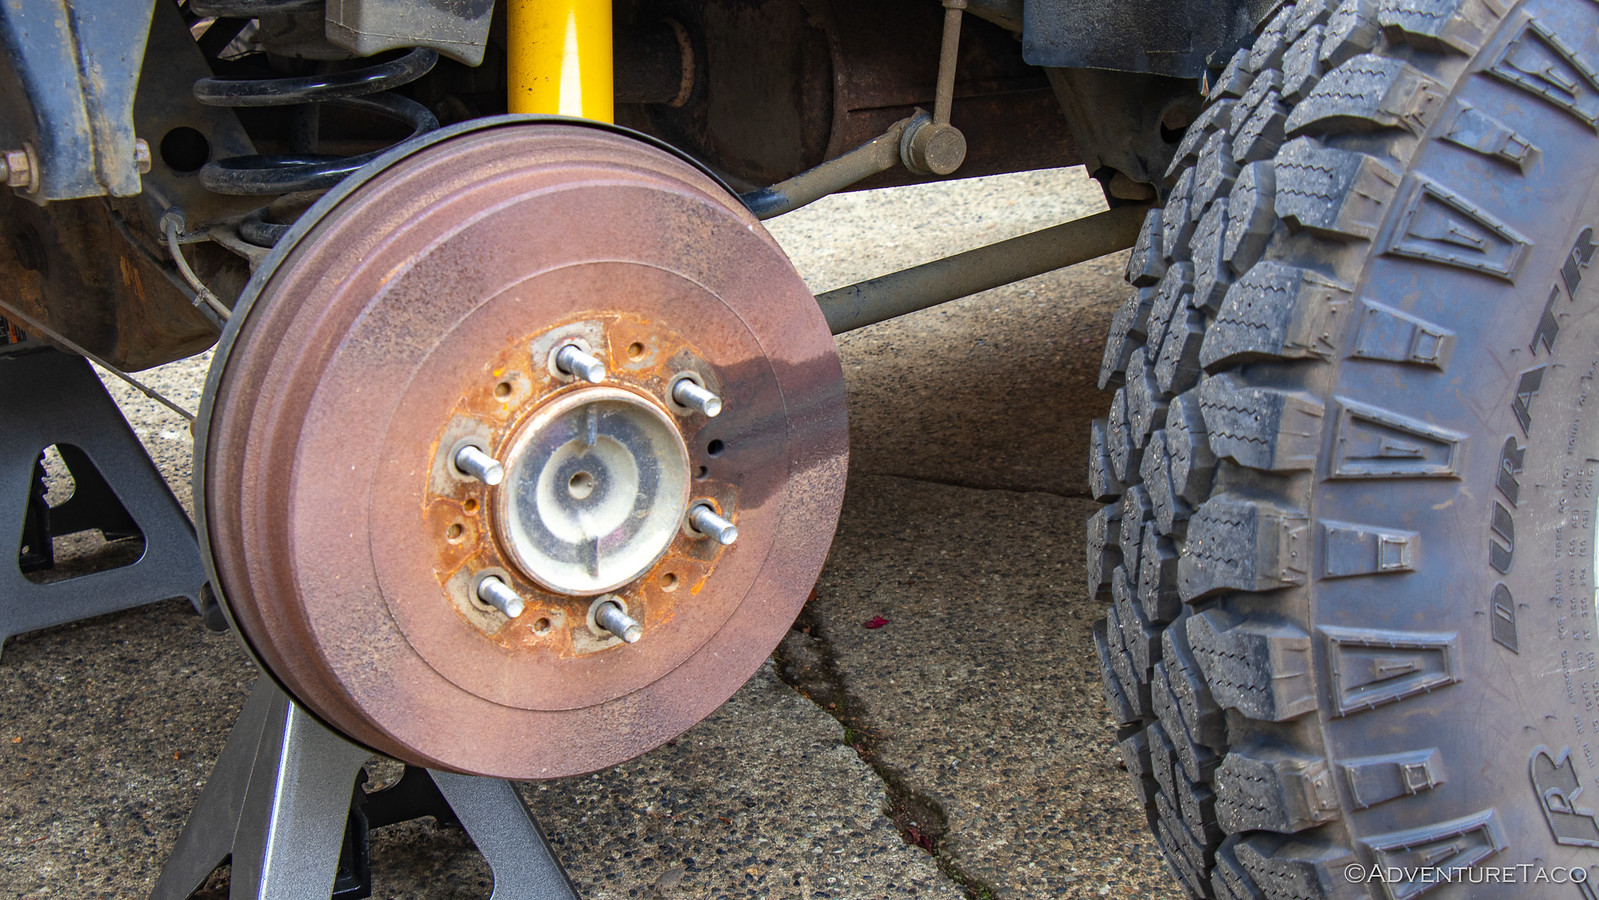
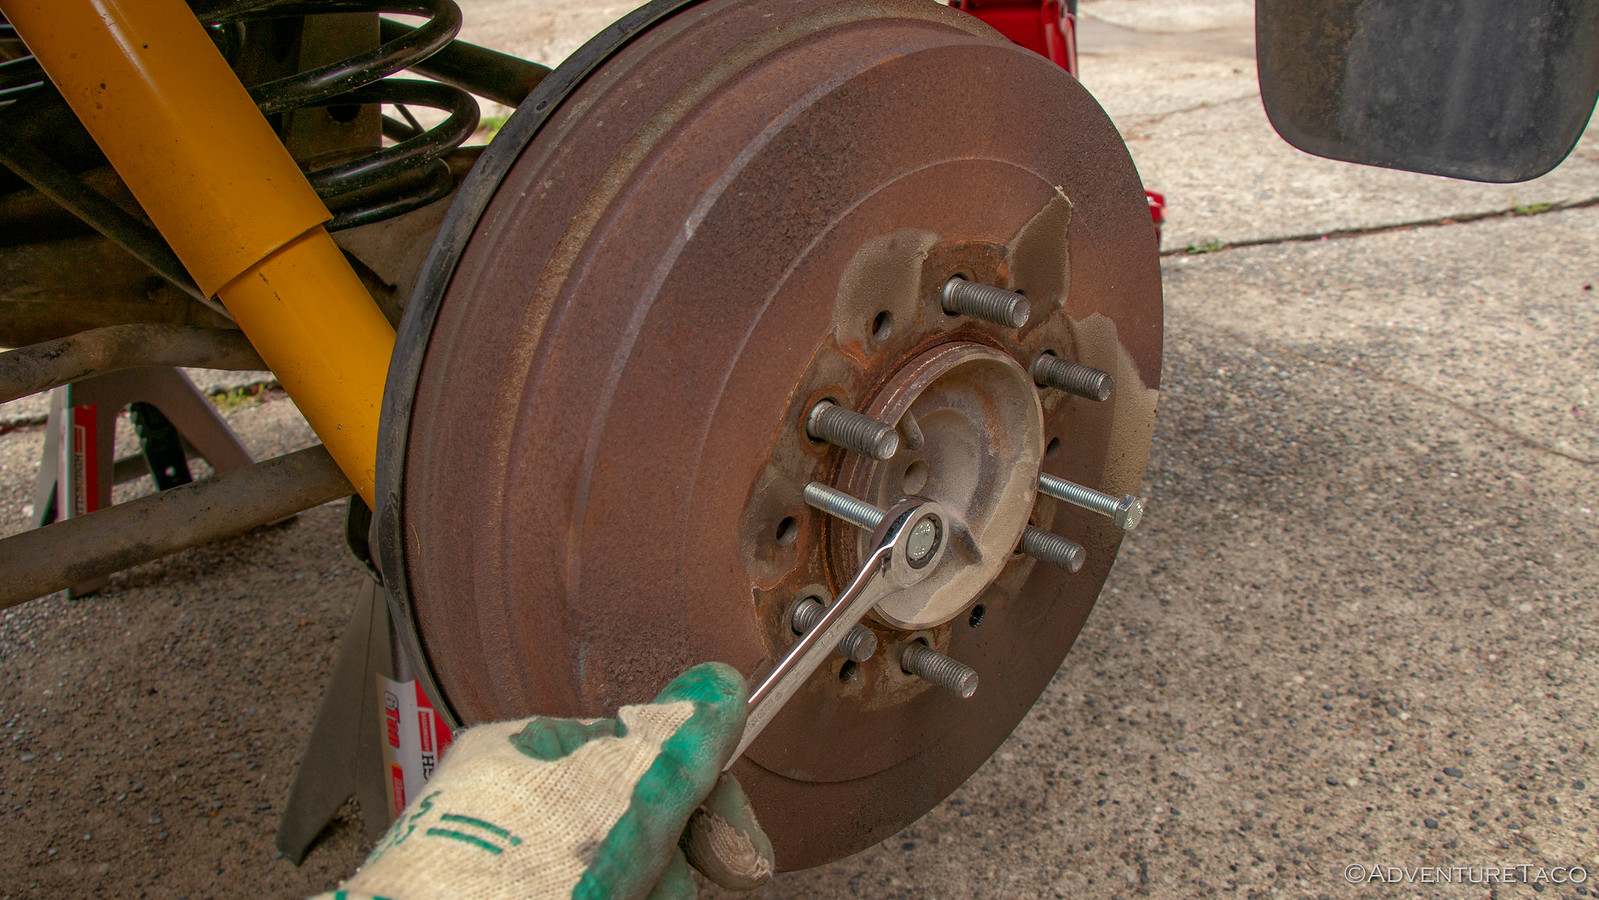
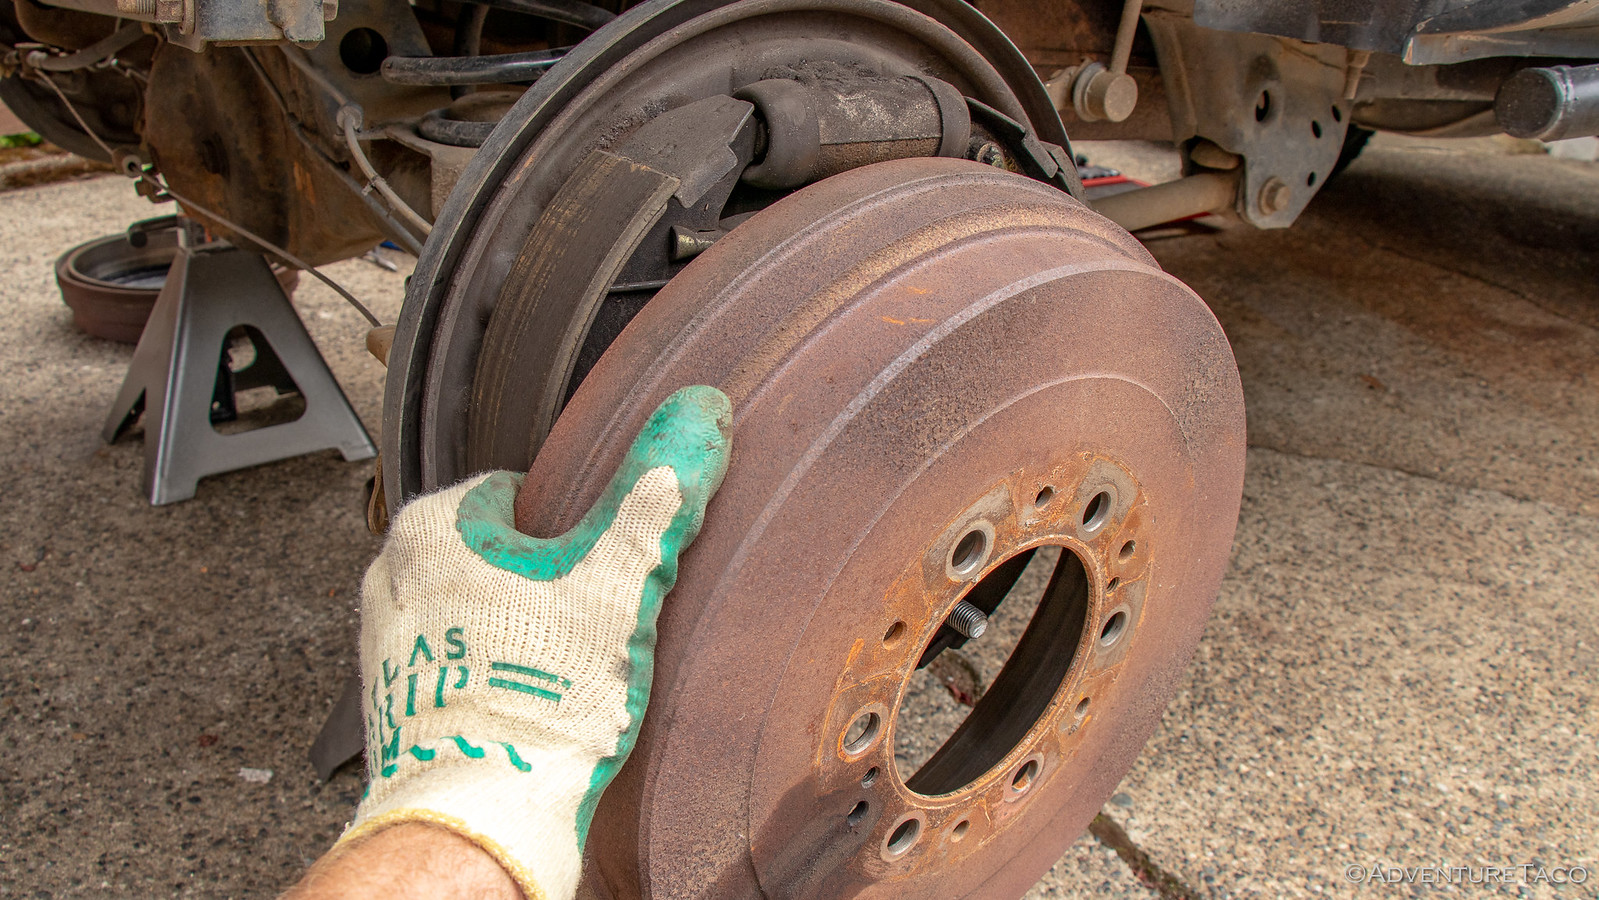
Next, it was time to remove various bits so that when I went to pull the axles out of the housing, it wouldn't be held up by anything. First up were the brake drums. Perhaps naively, I'd expected these to come off relatively easily. Ha, couldn't be further from the truth. Even after disconnecting the e-brake lines from them, they didn't budge one iota as I pulled on them and tried to pursuade them with my dead-blow mallet. Ultimately - after loosening the tensioners also failed - I resorted to using two, M8-1.25x50 bolts to coax them off, each one making a small popping noise as the rust that secured them to the axle released - now 45 minutes into the project.


Confidence waning already, I decided that my next move would be to drain the rear diff while I removed the other bits off the brakes - so it could drain out fully before I pulled the axles. Plus, it's easy - so no worries about further eroding my ego. :wink: You'll see here that I'm actually draining the diff oil into a milk jug rather than my normal oil drain pan. That's because I'm going to reuse this oil, despite the fact that it might break the Internet. But seriously, it'll be OK - it's got less than 1500 miles on it.


As the oil drained out - mostly into my jug - I took a few minutes to remove the rear brake lines using a 10mm flare nut wrench and some silicone caps that kept brake fluid from getting all over everything, and the ABS sensors - which were covered in diff oil, another indicator of axle seal failure.


Now flush with confidence, and having learned when I changed the timing belt that a job like this benefits from a little organization - I was ready to remove the 4, 14mm nuts that secure the back plate to the axle housing... which I did.


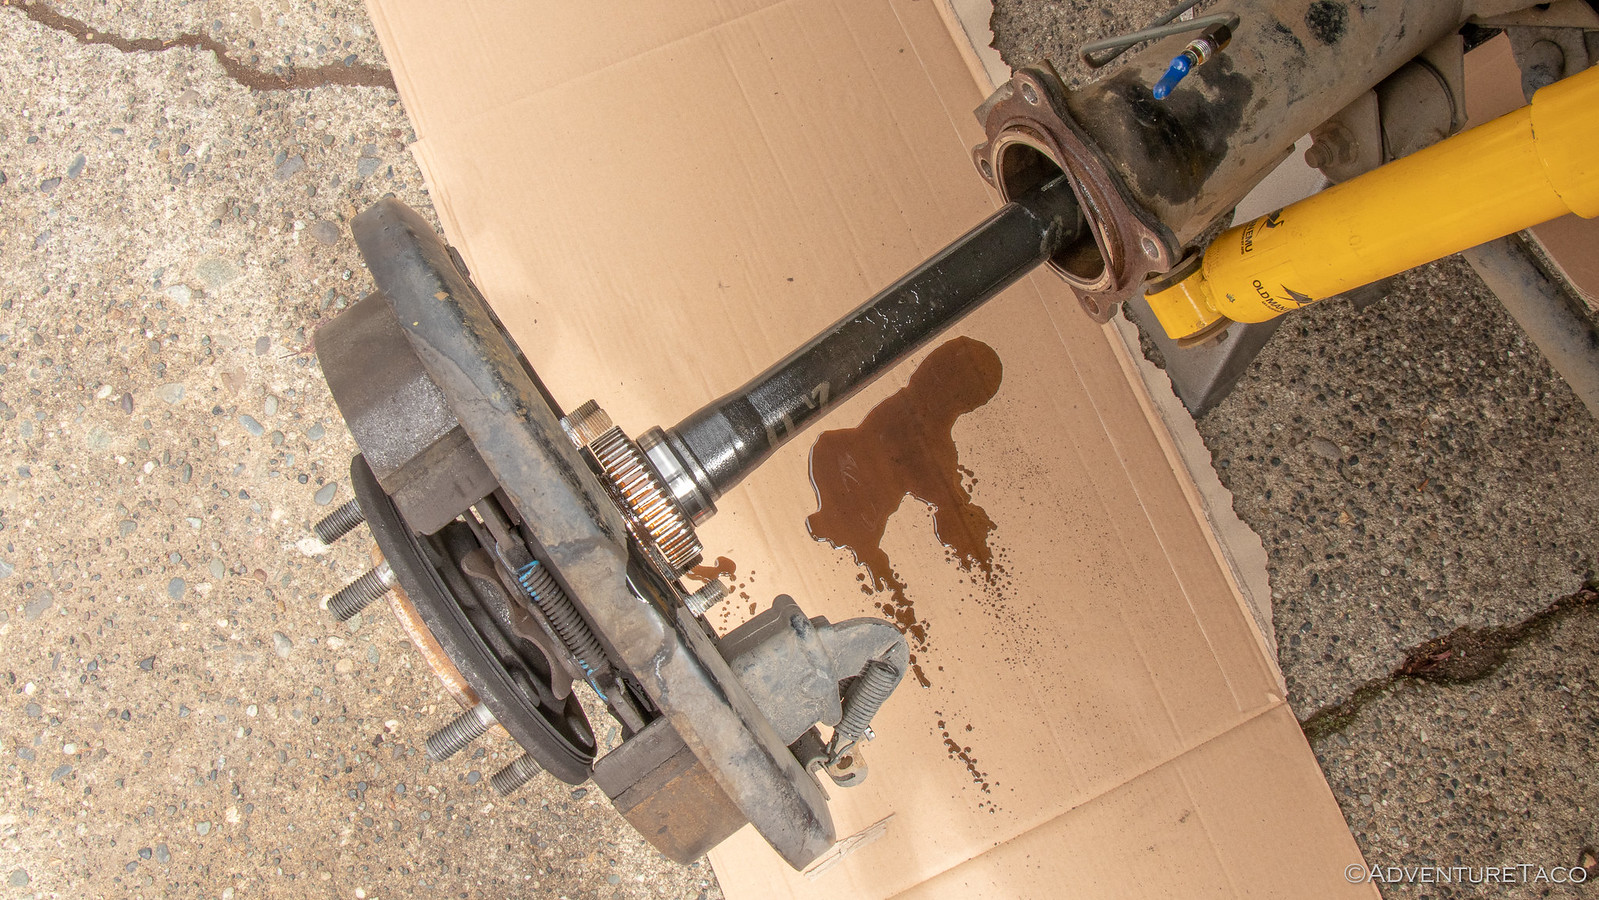
Found my missing rear diff oil!

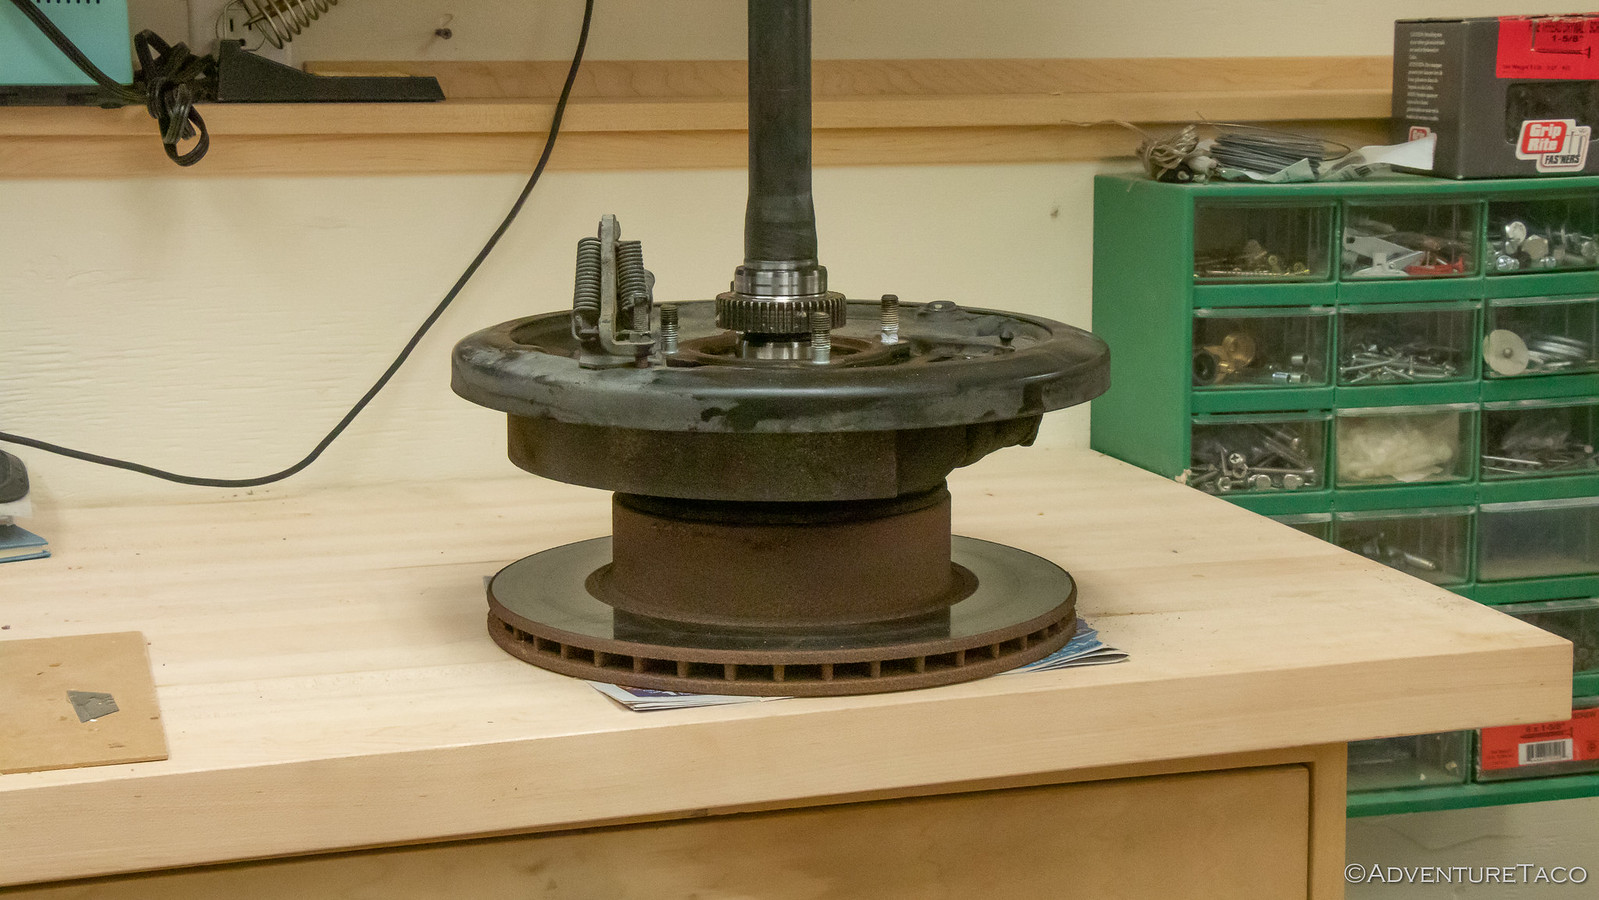
Axle now in hand, I cleaned it up a bit and set it on the workbench - or rather, on an old rotor I'd set on the workbench - so I could start the work of pressing various components off... and then new versions of those same parts - back on.

 
Now - this is probably a good place to mention that if you're replacing your axle seals as a preventative maintenance - and they weren't leaking - you may not need to do any of this. But, if your axle seals were leaking, and allowed diff oil into the axle bearing (and brake drums) - then you need to replace your bearing and drums as well. Diff oil in the bearing will "wash out" the bearing grease that keeps things moving smoothly, and will keep your brakes from working well - so it's a good idea to replace everything at the same time.

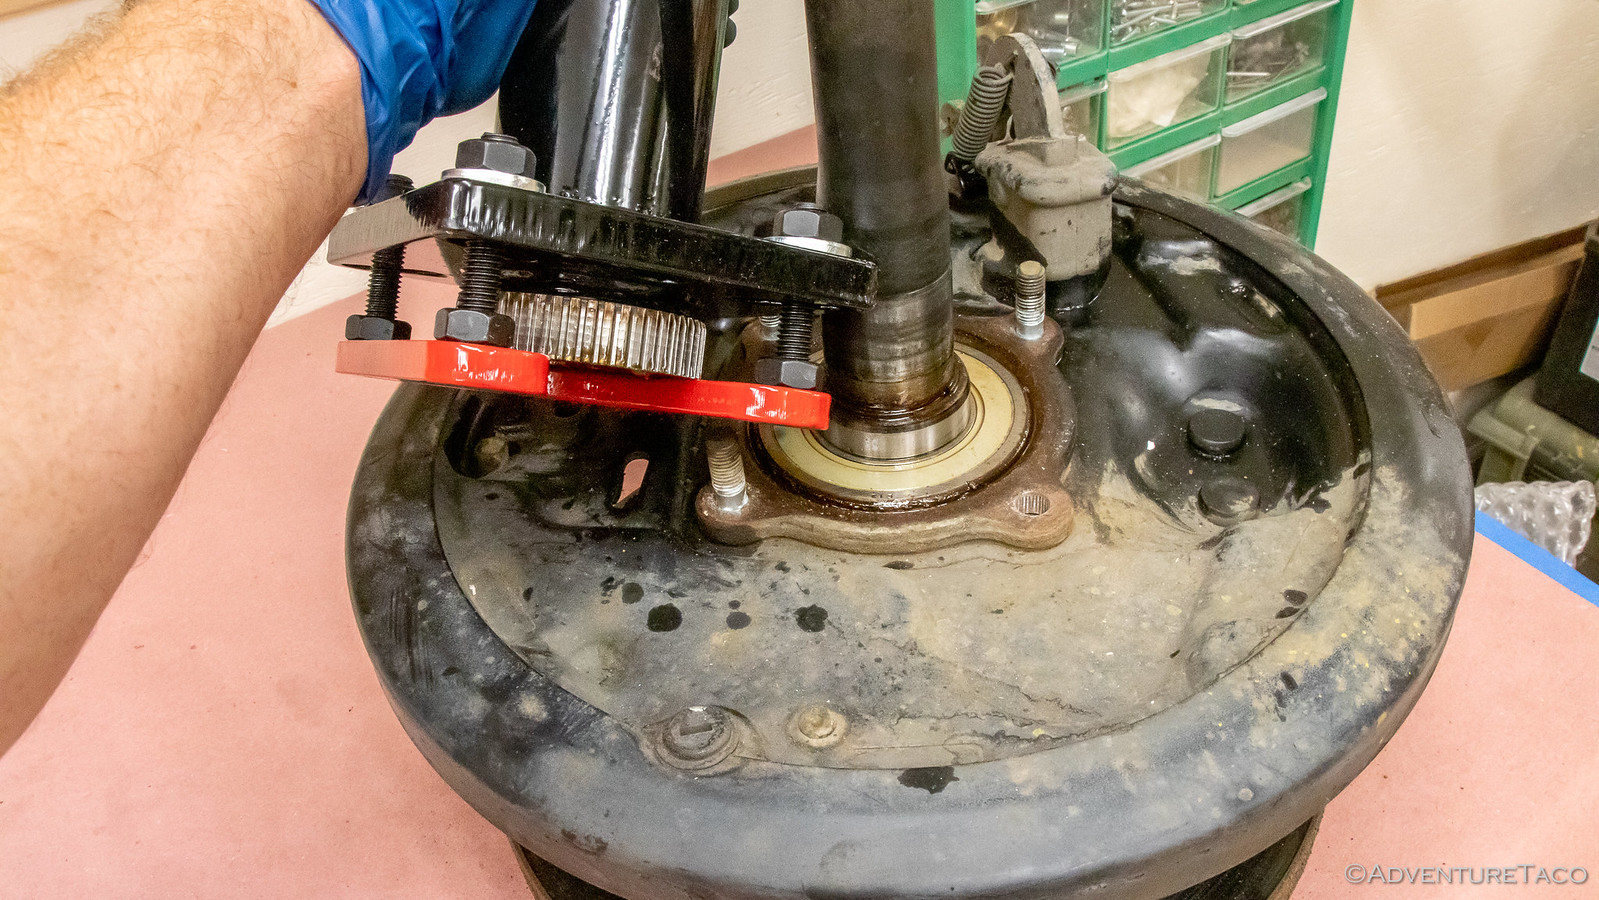
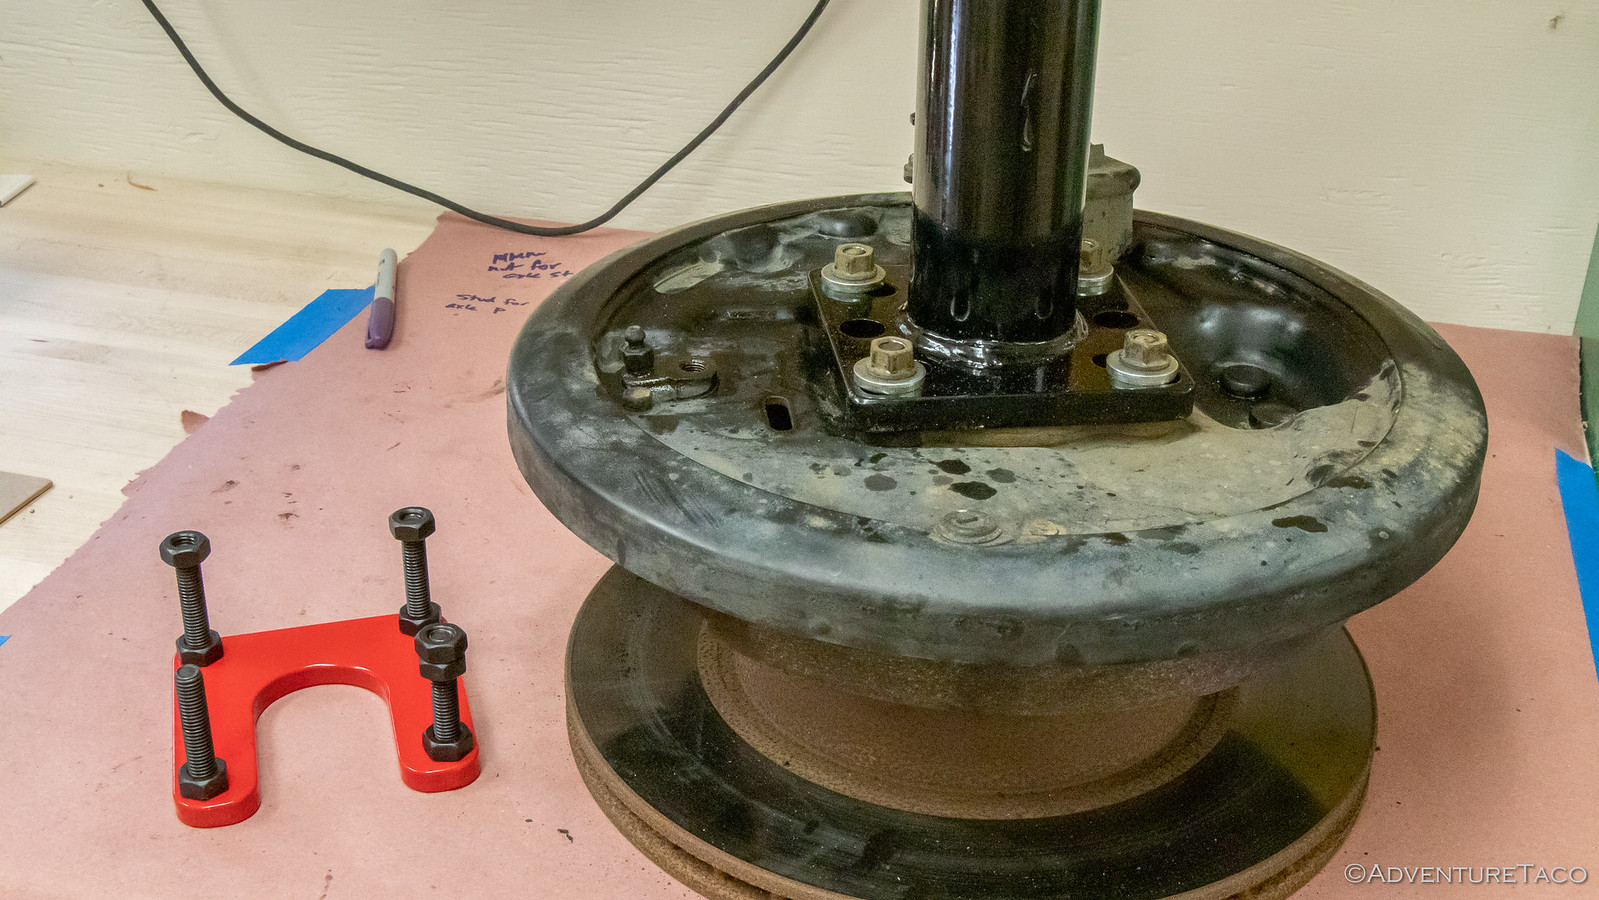
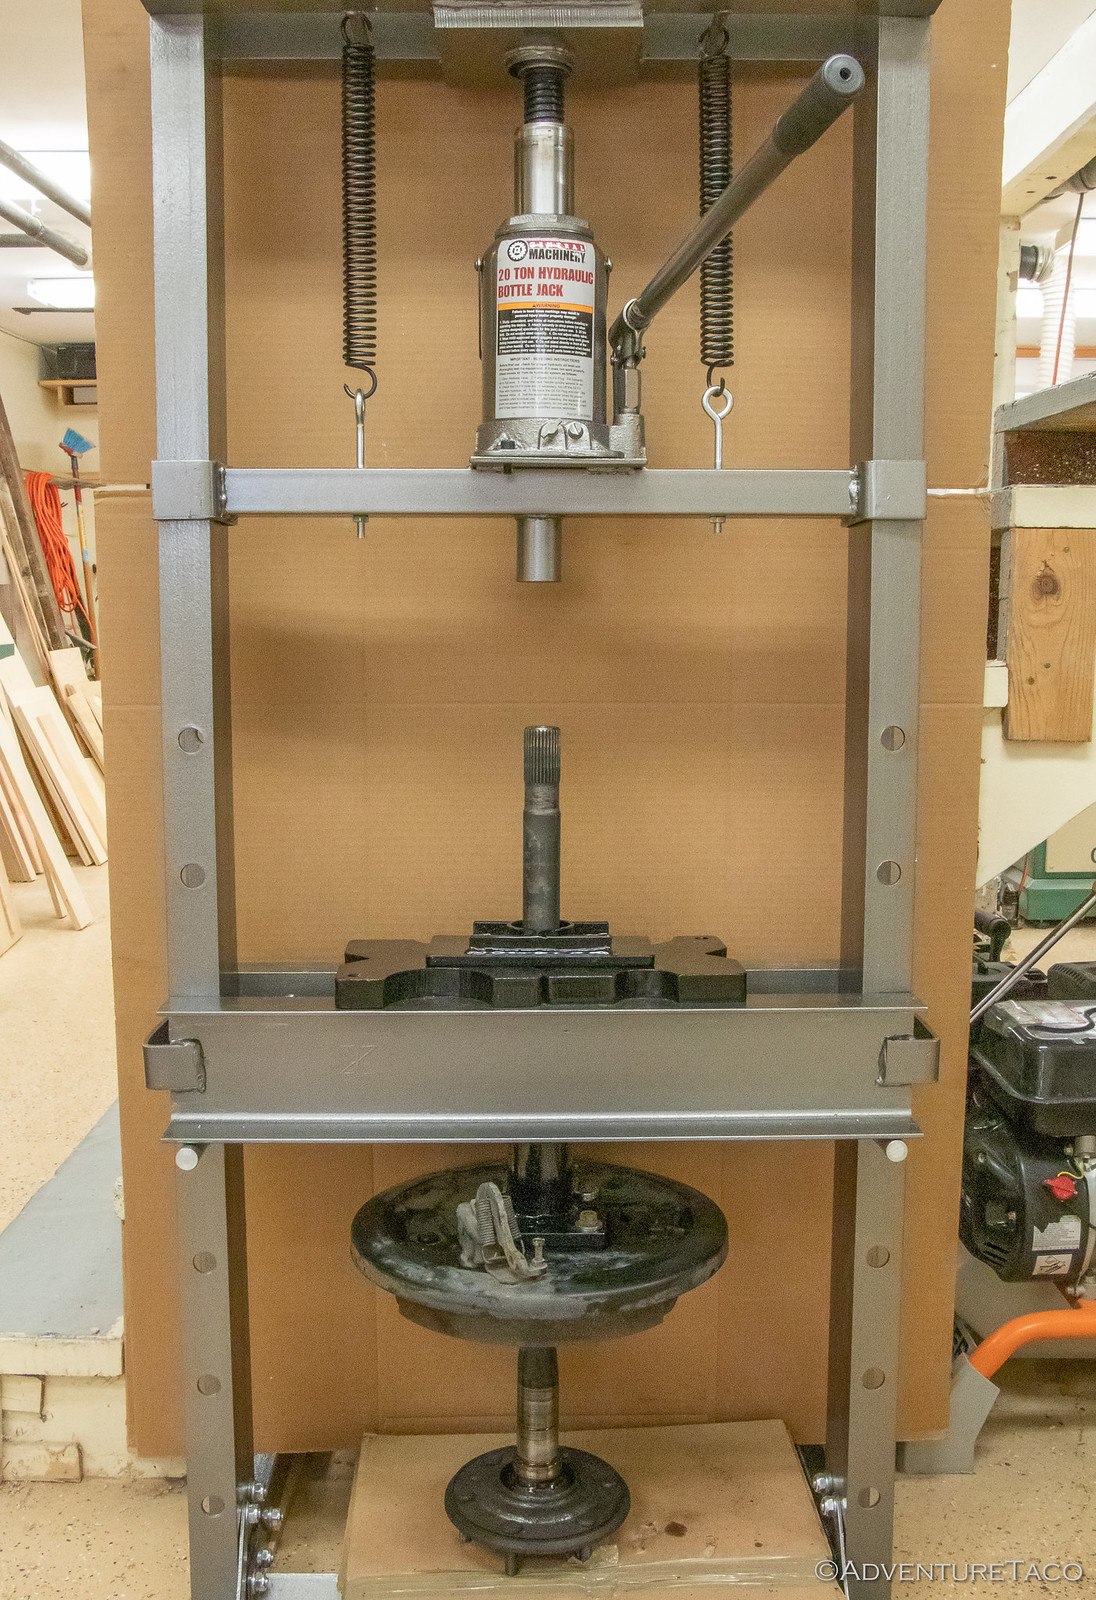
The first step is to use the 20-ton shop press and Rear Wheel Axle Bearing Puller & Tone Ring Tool/Installer SST to remove the ABS tone ring and inner retainer from the axle. And to use the SST, I had to pound out one of the studs that holds the backing plate to the axle housing. Using a nut to protect the threads and my trusty hammer, I was soon ready to go.


With the stud removed (from the assembly, not from me), I slid the red plate of the SST under the ABS tone ring and secured the puller over the axle with supplied washers and nuts and then put the entire assembly into the press. So far, so good.


As I started to press, I thought two things to myself. First - the design and build quality of the shop press is pretty "meh." I mean, it's Harbor Freight, and it seemed to work - if clumsily - for the entire project, but it is not a finely tuned machine. If I had more uses for it, I'd strongly consider a more expensive machine with a little better fit-and-finish. Second - I marvelled at the design and build quality of the Rear Wheel Axle Bearing Puller & Tone Ring Tool. This thing is awesome. Through the entire project, it couldn't have been more perfect - making all of the pulling and pressing operations simple - and safe. If you're doing this job and are considering making do with your own fixtures, my recommendation would be to do yourself a favor and pick one of these up. The time and frustration saved are worth it alone, even if you don't care about safety.

Pretty soon, I had the axle pressed out of the ABS tone ring and inner retainer. And, it's easy to see here where the axle seal rides on the inner retainer.


The next press operation was to remove the axle from the bearing and outer retainer, and to do that I had to draw the stud I'd removed from the backing plate back into place - an easy process with the washers supplied in the puller SST and a 14mm nut.


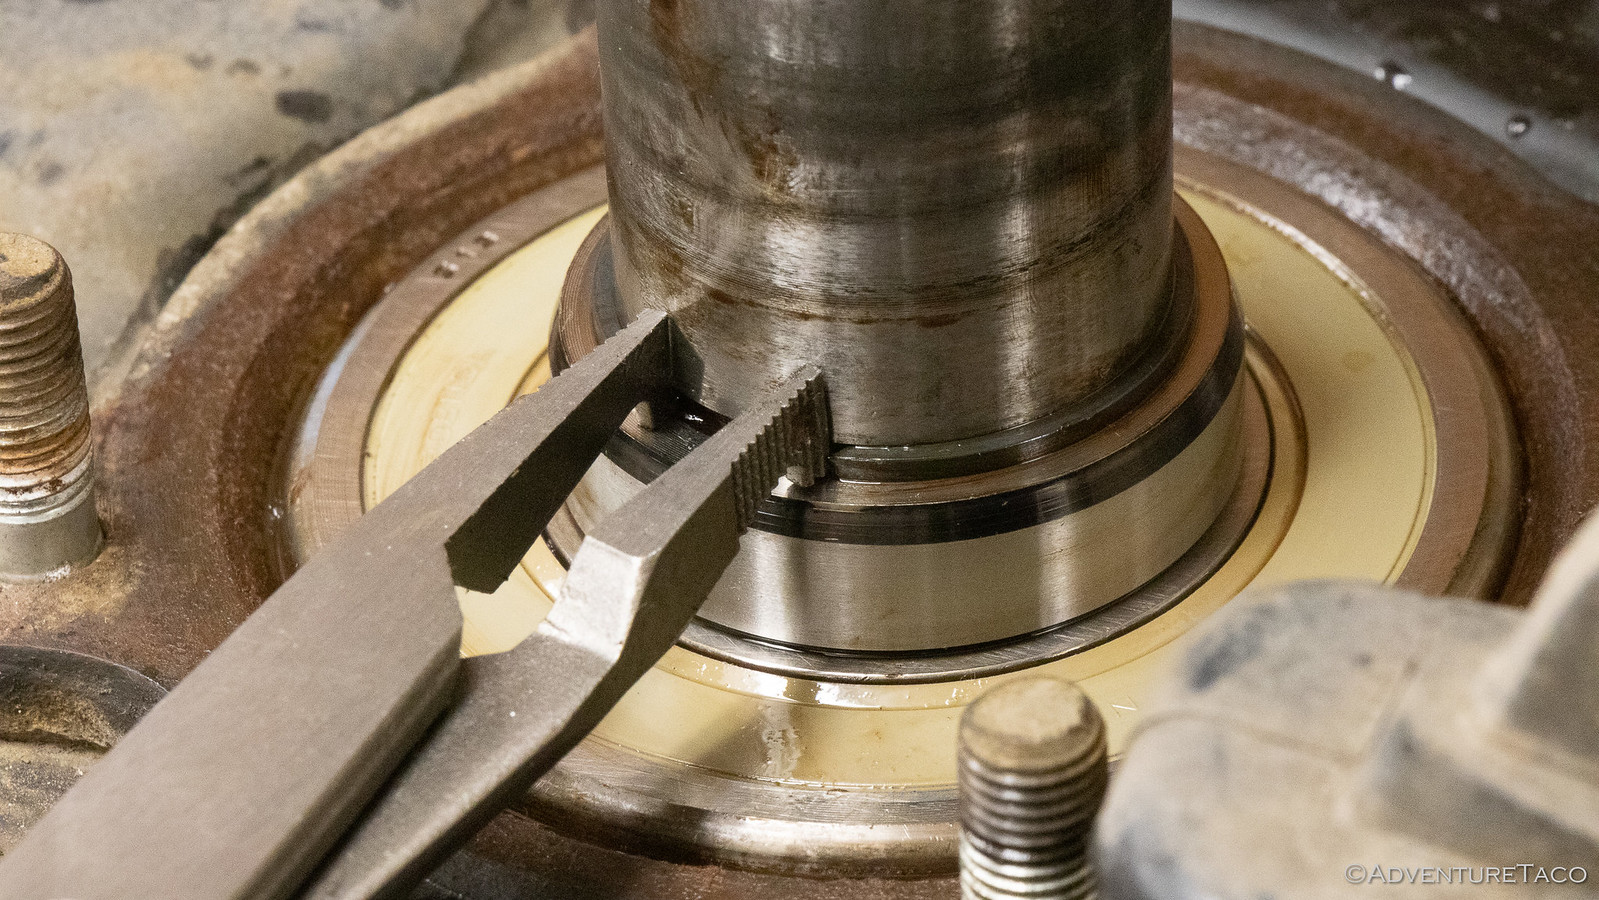
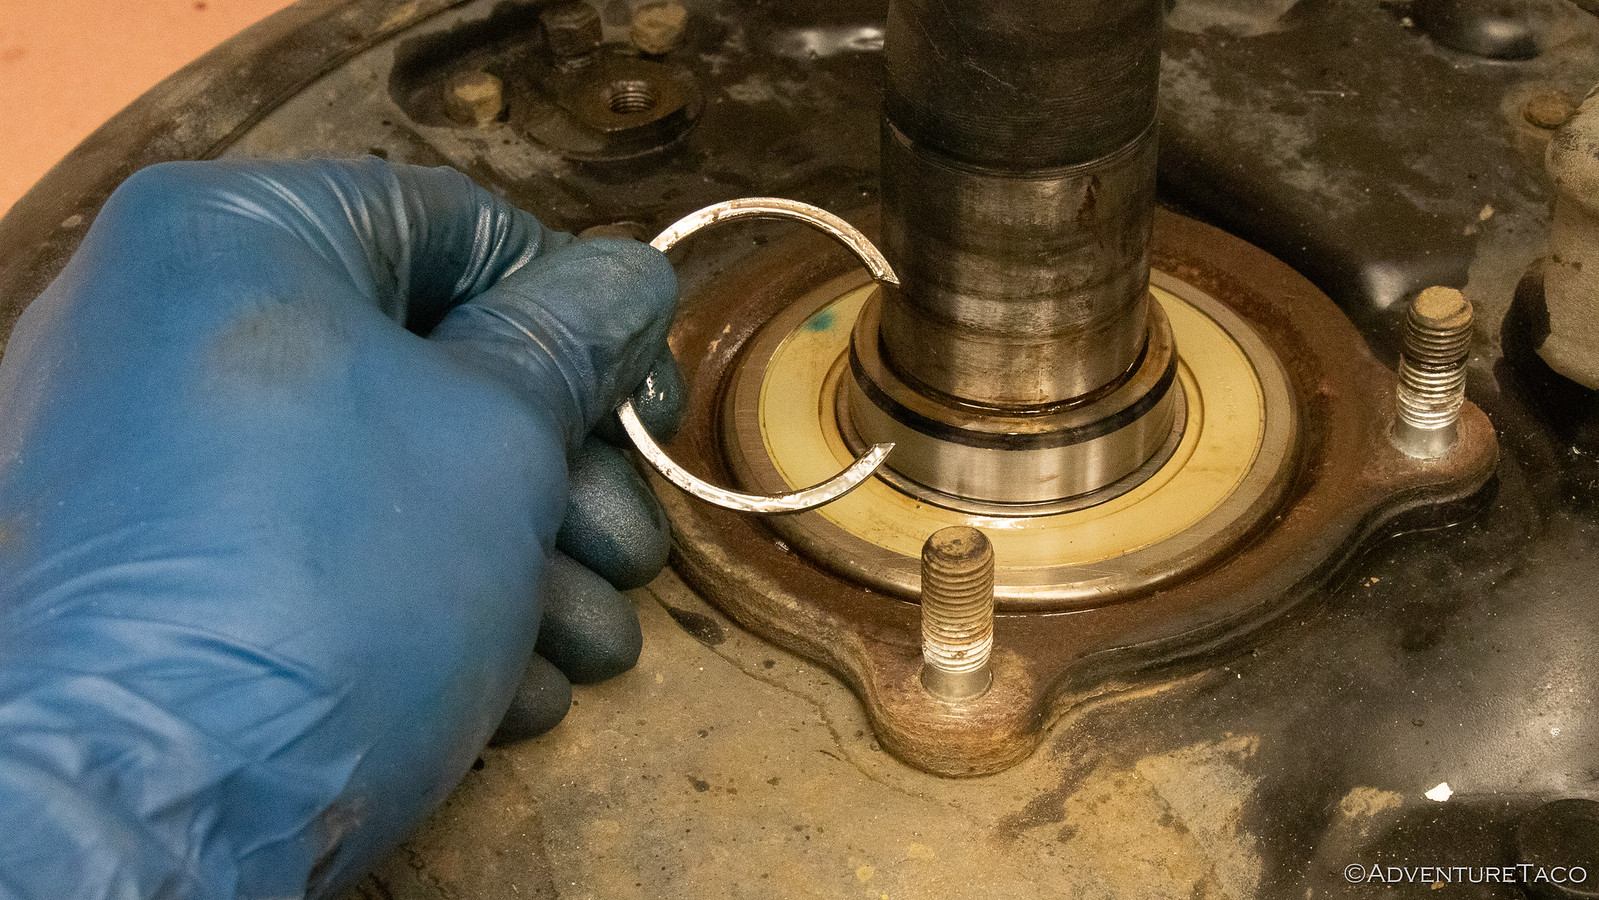
Oh, and I had to remove the snap ring that holds the bearing and retainer in place. I was prepared for this to take a bit of doing given how long other snap rings have taken to remove, but this time I guess I got lucky - it came right off, easy peasy.


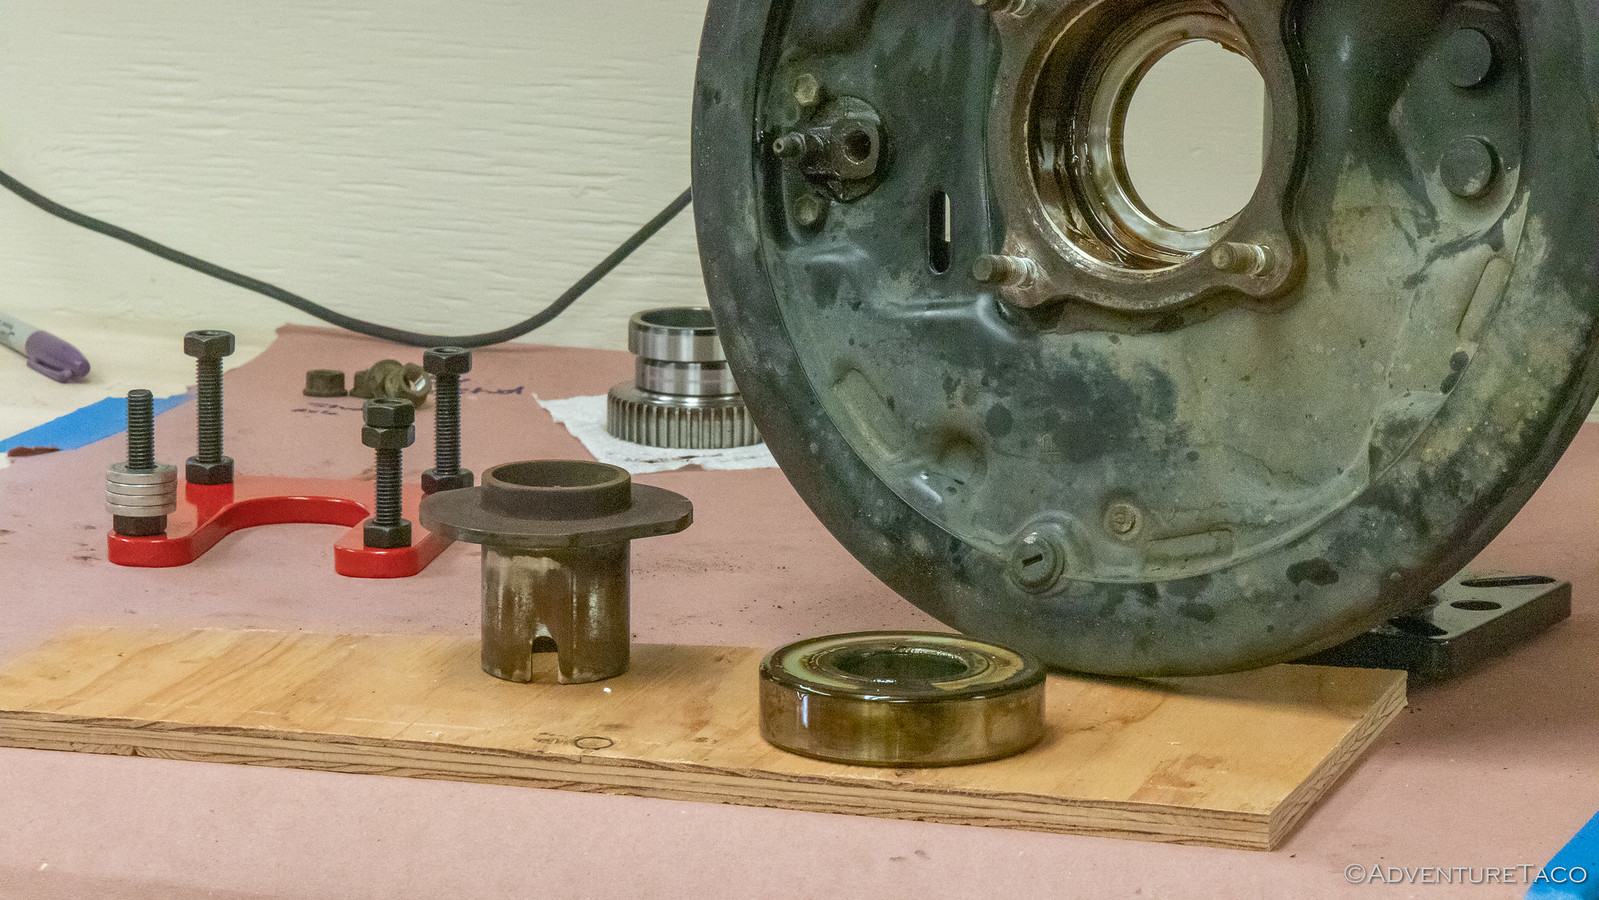
With the snap ring removed, I could secure the Rear Wheel Axle Bearing Puller to the backing plate with its heavy duty washers and nuts, and move back over to the press. This time, as I pressed the axle down through the SST, the bearing and outer retainer would be captured, leaving the axle bare at the end of the operation.


Boy! The bang when the axle bearing released was - how should I say this - a "pants changer." It was loud, the entire press shaking as the energy was released. But, everything worked as it should, and as I removed the SST from the backing plate, there was the outer retainer - clean as a whistle, and with no "wear line" like the inner retainer - since no seal rides on it.


The fact that there is no wear line on the outer retainer is what allows us to save that $150 that I mentioned at the beginning of the post - we can simply swap the positions of the retainers on installation, and have a nice clean surface for our new axle seal to ride on. But more on that later...

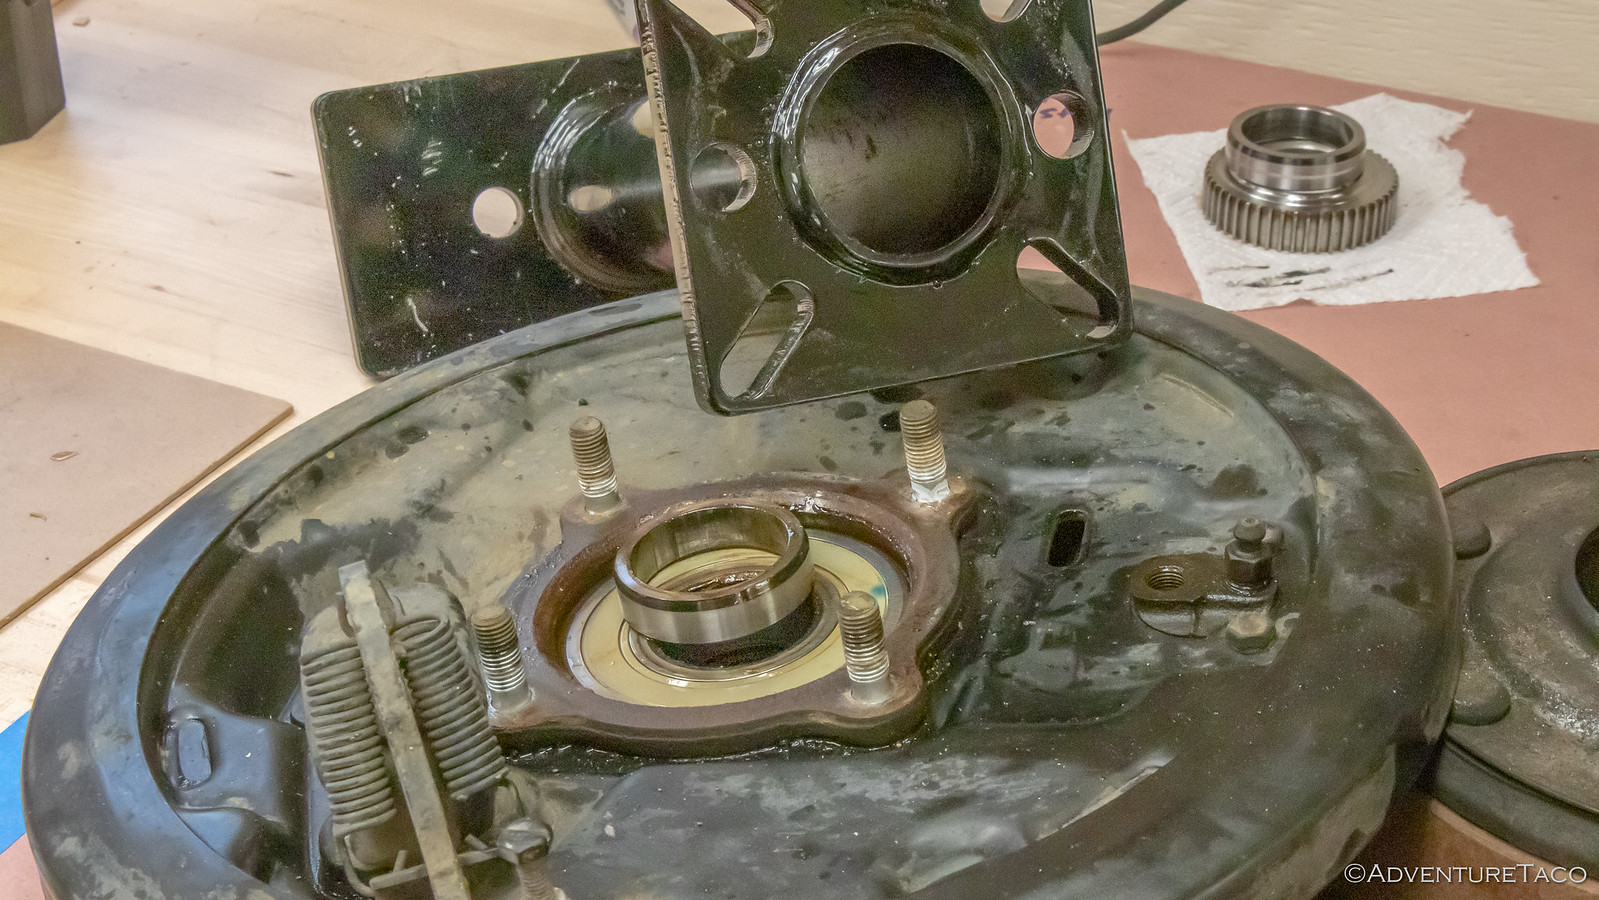
I had to more bits to remove at this point before I was ready to start re-installation. First up was the outer dust shield, which just pulled right off with a pair of pliers. With the dust shield out of the way, I could use the Bearing Driver that came with the same Rear Wheel Axle Bearing Puller & Tone Ring Tool SST (how awesome is that?) to knock the wheel bearing out of the brake backing plate and onto the workbench.


At this point, I think it was mid-afternoon. It'd taken me a good 4 hours or so to get this far. I'd blame it on photos, but the reality is that I was just being really careful to double check myself at every step, since this was the first time I'd done this. As Eric at [MENTION=82791]Relentless[/MENTION] Fab said to one of his guys when I was there - "Slower is faster." Truer words were never spoken .:thumbsup:
 

Members online

No members online now.

Forum statistics

Threads
278,312
Messages
3,554,083
Members
248,016
Latest member
Advally Service

Trending content

Back
Top