

SKP-4R
New member
At the request of [MENTION=124732]LawnDart[/MENTION]....
Before the write-up, big thanks to [MENTION=102715]CrazyNorwegian[/MENTION] for the tips. It is fairly straight forward, but I figured a more detailed in-depth look at the process might benefit a few folks.
*There are no tools involved, just a little bit of elbow grease and finessing with clips.
1) A obvious first step would be to remove the shifter nobs. That includes the transfer case as well on Trail and Pro models.
2) The second step would be to pull up on the back cupholder. Place your right hand in-between the cupholder and outside of the center console and give it a good tug. This undid almost all of the clips.
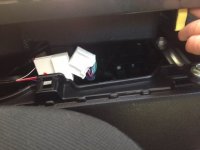
3) Before I worked my way up to remove the last few clips near the transfer case, I unplugged the rear window switch located beneath the rear cupholder. After undoing the rest of the clips, the center console should be free to wiggle out.
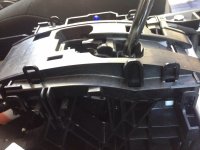
4) The next step is locating the 4 clips around the transmission trim area. There is one at each corner. Simply pull out on the tabs and the trim should lift up
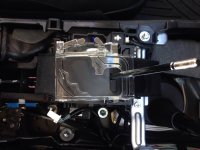
5) A similar type of tab holds the clear plastic shield beneath the trim that was just removed. Once that is removed, you can lift the rubber dust cover away to get down to the plastic.
(steps 4-6 are not necessary if you are installing light switches)
6) If you are cleaning this area like I am, the last step would be to get a moist wipe to reach all the area's that need to be cleaned. There was a fair amount of soda residue that had turned syrupy which was my main reason for cleaning. Be careful not to touch or remove any grease on the shifter itself or the shaft that leads to the transmission.
7) Reinstallation is the opposite of what you just did, making sure to connect the rear window switch before you press everything down.
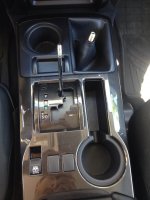
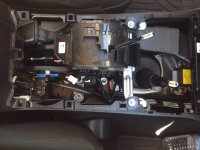
Bellow are a few helpful photos taken during the process. Hopefully you never have to need this thread unless you are installing switches, but if you do it is not that hard.
Before the write-up, big thanks to [MENTION=102715]CrazyNorwegian[/MENTION] for the tips. It is fairly straight forward, but I figured a more detailed in-depth look at the process might benefit a few folks.
*There are no tools involved, just a little bit of elbow grease and finessing with clips.
1) A obvious first step would be to remove the shifter nobs. That includes the transfer case as well on Trail and Pro models.
2) The second step would be to pull up on the back cupholder. Place your right hand in-between the cupholder and outside of the center console and give it a good tug. This undid almost all of the clips.
3) Before I worked my way up to remove the last few clips near the transfer case, I unplugged the rear window switch located beneath the rear cupholder. After undoing the rest of the clips, the center console should be free to wiggle out.
4) The next step is locating the 4 clips around the transmission trim area. There is one at each corner. Simply pull out on the tabs and the trim should lift up
5) A similar type of tab holds the clear plastic shield beneath the trim that was just removed. Once that is removed, you can lift the rubber dust cover away to get down to the plastic.
(steps 4-6 are not necessary if you are installing light switches)
6) If you are cleaning this area like I am, the last step would be to get a moist wipe to reach all the area's that need to be cleaned. There was a fair amount of soda residue that had turned syrupy which was my main reason for cleaning. Be careful not to touch or remove any grease on the shifter itself or the shaft that leads to the transmission.
7) Reinstallation is the opposite of what you just did, making sure to connect the rear window switch before you press everything down.
Bellow are a few helpful photos taken during the process. Hopefully you never have to need this thread unless you are installing switches, but if you do it is not that hard.
Attachments
Last edited:


