 05-28-2017, 01:19 AM
|
#1
|
|
Member
|
|
Join Date: Mar 2017
Location: So. Utah
Posts: 244
|
|
|
Member
Join Date: Mar 2017
Location: So. Utah
Posts: 244
|
AOB Switch to Auxbeam light bar
Yes, I've read all the other breads on wiring and I have a decent understanding on parts of the install and still other questions on other parts.
This much I know:
AOB blue to FACTORY green
AOB black to FACTORY grey
I don't know where to hook up my
AOB red or my AOB green
Here's my wire from my harness that is inside my cabin now

Here is what my harness looks like

In my reading I also learned that vampire connectors aren't the best option to use to tap into other wires. What else can I use because there's no way I can solder behind my dash?
Also is it safe to assume that the factory grey and green wires in other connectors going into other switches behind the dash would do the same thing as the heated wiper control switch?
My last question is this:
I read a thread about frying your ECU, but didn't really understand how it happened and what you need to do to ensure not to do it. I'm fairly handy but I'll admit I'm way in over my head with this. I know nothing about wires and electricity.
@ rigtec
and
@ barryhiram
seem to know what they're doing.
Someone please help me get this last little part figured out.
|

|
 Reply With Quote Reply With Quote
|
|
05-28-2017, 03:04 AM
|
#2
|
 |
Senior Member
|
|
Join Date: May 2012
Location: Bergenfield NJ.
Posts: 2,606
Real Name: Greg
|
|
|
Senior Member
Join Date: May 2012
Location: Bergenfield NJ.
Posts: 2,606
Real Name: Greg
|
Quote:
Originally Posted by spizike9

Yes, I've read all the other breads on wiring and I have a decent understanding on parts of the install and still other questions on other parts.
This much I know:
AOB blue to FACTORY green
AOB black to FACTORY grey
|
There should be a wiring diagram that comes with the AOB switch. But... the Green and Grey wires are only for the illumination/courtesy circuit; NOTHING ELSE! Under no circumstances are these wires able to operate the fog-lights or the harness relay; this circuit is for the instrument cluster lighting (this is the power supply from the parking light circuit to illuminate the dash switches at night) on the dash!
Quote:
I don't know where to hook up my
AOB red or my AOB green
|
I have an AOB wiring schematic in one of my threads but I can't remember which one at the moment, so use the search function at the top of the GEN-5 forum; just put in AOB switch wiring diagram and plenty should come up.
Quote:
|
In my reading I also learned that vampire connectors aren't the best option to use to tap into other wires. What else can I use because there's no way I can solder behind my dash?
|
I connect my wiring with male/female spade 'Stake-on' or Butt connectors.

Quote:
|
Also is it safe to assume that the factory grey and green wires in other connectors going into other switches behind the dash would do the same thing as the heated wiper control switch?
|
Yes, that is correct; They are only for illumination purposes!
Quote:
|
My last question is this: I read a thread about frying your ECU, but didn't really understand how it happened and what you need to do to ensure not to do it. I'm fairly handy but I'll admit I'm way in over my head with this. I know nothing about wires and electricity.
|
While working under the dash, I accidentally allowed my HOT line to come in contact with the Gray ground line, and that Gray line comes from the Main Body ECU Compu net; which is a computer! Just don't do that and you'll be fine... you can even disconnect the NEG battery cable before you started the wiring to play it safe!
In the Harness kit, it looks like the small (16ga) RED wire goes from the battery power source under the hood to the switch (HOT). The small black wire (16ga) comes from the ground under the hood and goes to the switch; that's only for the ON/OFF indicator. And the yellow appears to trigger the relay from the switch in the LED cabin (ARB harness). NOTE: The Green and Gray wires that you mentioned in your last post appear to be from the courtesy light circuit to illuminate all of the dash switches... The large (RED & BLK 8ga/4ga) cables are to be connected directed to the POS and NEG battery posts and should have an in-line fuse holder built-in to protect the wiring in the harness. The ARB kit should come with a wiring schematic(?) ...or again; do a search at the top of this page, 'Best to you',
rig
__________________
2012 Limited (in bliz) Black leather interior.
Commercial hvac diagnostics/electrical specialist (Steamfitters Journeyman Local 475)
Last edited by rigtec; 05-28-2017 at 12:34 PM.
|
|
|
Reply With Quote
|
|
05-28-2017, 08:14 AM
|
#4
|
 |
Member
|
|
Join Date: Mar 2012
Location: New Hampshire
Posts: 785
Real Name: 3 guesses..........
|
|
|
Member
Join Date: Mar 2012
Location: New Hampshire
Posts: 785
Real Name: 3 guesses..........
|
Quote:
Originally Posted by spizike9
Yes, I've read all the other breads on wiring and I have a decent understanding on parts of the install and still other questions on other parts.
This much I know:
AOB blue to FACTORY green
AOB black to FACTORY grey
I don't know where to hook up my
AOB red or my AOB green
Here's my wire from my harness that is inside my cabin now
Here is what my harness looks like
In my reading I also learned that vampire connectors aren't the best option to use to tap into other wires. What else can I use because there's no way I can solder behind my dash?
Also is it safe to assume that the factory grey and green wires in other connectors going into other switches behind the dash would do the same thing as the heated wiper control switch?
My last question is this:
I read a thread about frying your ECU, but didn't really understand how it happened and what you need to do to ensure not to do it. I'm fairly handy but I'll admit I'm way in over my head with this. I know nothing about wires and electricity.
@ rigtec
and
@ barryhiram
seem to know what they're doing.
Someone please help me get this last little part figured out. |
Nothing to add,
@ rigtec
&
@ Saker
got you covered bro.
__________________
 '12 SR5, Blizzard Pearl * Factory (style) Fog Light Switch-Fits knock-out! * 30" BD Stealth LED Light Bar, Upper Grill '12 SR5 * Reverse Light Mod-SR5 Factory Bumper * FN f(x) Pro Wheels - Custom Coating *
 LLumar Paint Protection/Tint, Flowmaster Cat-Back, Bilstein 6112/5160, LR UCA's, AirLift w/Load Control, 285/70/17 Nitto TG, LW's D2S 4.0 HID low beam mod, V-LED Interior/Reverse/LMZ High Beam/Turn Signals/V-6 DRL Lights (all 5000K), Kappa Dash/Doors/Hatch Speakers, CompuStar Remote Start, B&M Trans Cooler, Devil Horn Emblems, XB LED Fogs, Dongle Mod, TRD CAI, DC 270-XP Alt
|
|
|
Reply With Quote
|
|
05-28-2017, 09:49 AM
|
#5
|
|
Member
|
|
Join Date: Mar 2017
Location: So. Utah
Posts: 244
|
|
|
Member
Join Date: Mar 2017
Location: So. Utah
Posts: 244
|
@ rigtec
Don't laugh when I tell you this but I guess I just don't quite understand how I would tap into the grey and green wire. It seems like there should be a Y fitting that I could use but I know that's not the case. So would I just cut a wire, then shove the old cut wire and the new wire into a butt connector?
@ Saker
thanks for the diagram and making it more scenario specific. I'm a little confused on where AOB GREEN goes.
I also went and looked at my relay. I had no idea that those things were numbered. So that makes things easier to understand but I still have some questions
I know it says 12v power source but not sure where that would be.
I also see that you want me to connect to 86 on the relay. The AOB diagram says that's for older vehicles and for newer vehicles I should use 85 on the relay. Please be patient with me. I just don't quite see what difference would be if there even would be one.

@ barryhiram
thanks for responding to the my bat signal.
Last edited by spizike9; 05-28-2017 at 10:01 AM.
|
|
|
Reply With Quote
|
|
05-28-2017, 10:54 AM
|
#6
|
|
Member
|
|
Join Date: Mar 2012
Location: New Hampshire
Posts: 785
Real Name: 3 guesses..........
|
|
|
Member
Join Date: Mar 2012
Location: New Hampshire
Posts: 785
Real Name: 3 guesses..........
|
Quote:
Originally Posted by spizike9
@ rigtec
Don't laugh when I tell you this but I guess I just don't quite understand how I would tap into the grey and green wire. It seems like there should be a Y fitting that I could use but I know that's not the case. So would I just cut a wire, then shove the old cut wire and the new wire into a butt connector?
@ Saker
thanks for the diagram and making it more scenario specific. I'm a little confused on where AOB GREEN goes.
I also went and looked at my relay. I had no idea that those things were numbered. So that makes things easier to understand but I still have some questions
I know it says 12v power source but not sure where that would be.
I also see that you want me to connect to 86 on the relay. The AOB diagram says that's for older vehicles and for newer vehicles I should use 85 on the relay. Please be patient with me. I just don't quite see what difference would be if there even would be one.
@ barryhiram
thanks for responding to the my bat signal. |
Question for you, picture doesn't show connection of black wire at relay, but looks to me like the light bar ground wire and small black wire are connected to terminal 86 on relay, does it also have an addition black wire that connects to a ground source in engine compartment?
If the above is true, then your switch harness (small black, yellow, red wires) would be............
Red - All time power 12v.
Yellow - Trigger to relay, applying 12v will energize relay turning on light bar
Black - Ground, not used with AOB switch
You have two choices on how you want light bar to turn on;
1) Turn on whether ignition is on/off (all time power), connect red wire to AOB red. Add 3 amp fuse to protect AOB switch.
2) Ignition only, connect AOB red to and ignition source such as cigarette lighter or ignition source at fuse panel. Red harness wire not used, cap wire off to prevent any chance of shorting.
Yellow wire connects to AOB green wire (12v output when switch is turned on).
Hope that helps & good luck!
__________________
'12 SR5, Blizzard Pearl * Factory (style) Fog Light Switch-Fits knock-out! * 30" BD Stealth LED Light Bar, Upper Grill '12 SR5 * Reverse Light Mod-SR5 Factory Bumper * FN f(x) Pro Wheels - Custom Coating * LLumar Paint Protection/Tint, Flowmaster Cat-Back, Bilstein 6112/5160, LR UCA's, AirLift w/Load Control, 285/70/17 Nitto TG, LW's D2S 4.0 HID low beam mod, V-LED Interior/Reverse/LMZ High Beam/Turn Signals/V-6 DRL Lights (all 5000K), Kappa Dash/Doors/Hatch Speakers, CompuStar Remote Start, B&M Trans Cooler, Devil Horn Emblems, XB LED Fogs, Dongle Mod, TRD CAI, DC 270-XP Alt
Last edited by barryhiram; 05-28-2017 at 07:04 PM.
|
|
|
Reply With Quote
|
|
05-28-2017, 11:40 AM
|
#7
|
|
Member
|
|
Join Date: Mar 2017
Location: So. Utah
Posts: 244
|
|
|
Member
Join Date: Mar 2017
Location: So. Utah
Posts: 244
|
Terminal 86 has one bigger black wire going to the light bar and one bigger black wire going to the battery and one little black wire going to nothing.
|
|
|
Reply With Quote
|
|
05-28-2017, 12:12 PM
|
#8
|
|
Senior Member
|
|
Join Date: May 2012
Location: Bergenfield NJ.
Posts: 2,606
Real Name: Greg
|
|
|
Senior Member
Join Date: May 2012
Location: Bergenfield NJ.
Posts: 2,606
Real Name: Greg
|
Quote:
Originally Posted by spizike9
@ rigtec
Don't laugh when I tell you this but I guess I just don't quite understand how I would tap into the grey and green wire. It seems like there should be a Y fitting that I could use but I know that's not the case. So would I just cut a wire, then shove the old cut wire and the new wire into a butt connector? |
spizike9,
Find a factory switch that's easy to access; one that lights up when the parking lights are on. Next: Carefully cut the Green and Gray wires; not too far down stream where they're hard to splice, and not too close to the factory switch where you cut them too short to spice a second time... so use good judgement as far as where to cut the wires.
Then cut them in a good location, splice them 1/4 to 1/2 inch leaving enough copper wire to join them to your AOB illumination circuit wires. I used male and female spade stake-on connectors so it's very simple to disconnect (unplug) your AOB switches should you need to remove the trim panel at some point in the future. Hope this helps!
rig, Cheers
__________________
2012 Limited (in bliz) Black leather interior.
Commercial hvac diagnostics/electrical specialist (Steamfitters Journeyman Local 475)
|
|
|
Reply With Quote
|
|
05-28-2017, 12:22 PM
|
#9
|
 |
Senior Member
|
|
Join Date: Feb 2015
Location: South Florida
Posts: 1,889
Real Name: Chris
|
|
|
Senior Member
Join Date: Feb 2015
Location: South Florida
Posts: 1,889
Real Name: Chris
|
Quote:
Originally Posted by spizike9
@ rigtec
Don't laugh when I tell you this but I guess I just don't quite understand how I would tap into the grey and green wire. It seems like there should be a Y fitting that I could use but I know that's not the case. So would I just cut a wire, then shove the old cut wire and the new wire into a butt connector?
@ Saker
thanks for the diagram and making it more scenario specific. I'm a little confused on where AOB GREEN goes.
I also went and looked at my relay. I had no idea that those things were numbered. So that makes things easier to understand but I still have some questions
I know it says 12v power source but not sure where that would be.
I also see that you want me to connect to 86 on the relay. The AOB diagram says that's for older vehicles and for newer vehicles I should use 85 on the relay. Please be patient with me. I just don't quite see what difference would be if there even would be one.
@ barryhiram
thanks for responding to the my bat signal. |
@ rigtec
,
@ barryha
rim and
@ Saker
will bust my chops again for using t-taps (I know it's like nails on a chalkboard to them) but here is how I hooked it up, still going fine with dimming and works as well as factory switches after 1 year.
Here is the write-up.
Cymon's Weekend Warrior and MFD Thread (Scroll down to post #40)
__________________
2015 SR5 Premium 4wd Magnetic Grey w/3rd row: Frontrunner Slimline II 3/4 Rack - Yakima Skybox 16 - Weathertech - 22" Behind Grill Light Bar - TRD Skid w/Full Aluminum RCI Skids - RCI Sliders - Falken AT3 265 SL - Lamin-X - Taxa Cricket
"If I Can Do it You Can" Light Bar Install
ARB Breather Mod
Cymon's Weekend Warrior/MFD Thread
|
|
|
Reply With Quote
|
|
05-28-2017, 12:31 PM
|
#10
|
|
Senior Member
|
|
Join Date: May 2012
Location: Bergenfield NJ.
Posts: 2,606
Real Name: Greg
|
|
|
Senior Member
Join Date: May 2012
Location: Bergenfield NJ.
Posts: 2,606
Real Name: Greg
|
Quote:
Originally Posted by spizike9
Terminal 86 has one bigger black wire going to the light bar and one bigger black wire going to the battery and one little black wire going to nothing.
|
I just looked at your harnesses wiring. The large RED wire connects to the pos battery terminal and relay term #30. The Large BLK wire runs between terminal #87 (N/O) normally opened contacts and the load (LED's lighting), which will feed your lights when the switch is on. The small red wire is HOT and feeds the AOB switch at the #86 terminal (Coil). And the small BLK wire will provide the ground to #85 terminal(Coil)! That's it!
rig
__________________
2012 Limited (in bliz) Black leather interior.
Commercial hvac diagnostics/electrical specialist (Steamfitters Journeyman Local 475)
Last edited by rigtec; 05-28-2017 at 11:02 PM.
|
|
|
Reply With Quote
|
|
05-28-2017, 02:24 PM
|
#11
|
 |
Member
|
|
Join Date: Nov 2016
Location: Denver
Age: 40
Posts: 456
Real Name: Q
|
|
|
Member
Join Date: Nov 2016
Location: Denver
Age: 40
Posts: 456
Real Name: Q
|
If you do not want to tap into any of your factory wirings for the switch, here is what I did. Here what I did for the switch.
The green goes to my battery for the power source. This allows me to turn on the lights with the engine off. You can tap a fuse if you only want the switches to work when the car is turned on.
The blue was a fuse-tap to the taillights. This will illuminate the switch when you turn on your lights. Note: doing it this way, you CANNOT dim the switches. This would be the green factory wire on the wiper warmer switch.
The red connects to the relay
The black was grounded to a nearby ground. This would be the grey wire on the wiper warmer switch.
__________________
2016 BLACK Trail Premium - KDSS Toytec BOSS | 275/70/r17 BF KO2s | Custom roof rack | SCS Ray 10s | Relentless Front Bumper | 4300k HID Xenon Depot low beams | Baja Designs OnX6 Hi-Power 20", Squadron Pro, Squadron Sport, S2 Pro, S2 Sport | Blackout emblems | Interior LEDs | Wet Okole Seat Covers | T4R.org Trail badges | N-fab nerf steps | Hollywood racks bike rack | Spytec A119c dash cams - front/rear | SwitchPro | ARB Single Compressor
Instagram: thatonefitguyq
|
|
|
Reply With Quote
|
|
05-28-2017, 02:58 PM
|
#12
|
 |
Senior Member
|
|
Join Date: Dec 2013
Location: Near Baton Rouge, LA
Age: 70
Posts: 4,062
|
|
|
Senior Member
Join Date: Dec 2013
Location: Near Baton Rouge, LA
Age: 70
Posts: 4,062
|
Quote:
Originally Posted by Cymon
@ rigtec
,
@ barryha
rim and
@ Saker
will bust my chops again for using t-taps (I know it's like nails on a chalkboard to them) but here is how I hooked it up, still going fine with dimming and works as well as factory switches after 1 year.
Here is the write-up.
Cymon's Weekend Warrior and MFD Thread (Scroll down to post #40) |
Noooo..... I use them too. Not my fav, but still working without any issues, so far!
__________________
Best Regards,
Saker
 2021 T4R *MIDNIGHT BLACK METALLIC* TRD OFF ROAD PREMIUM 4X4| Sakers Ebony Build | Sakers Previous 2014 Midnight Build | Scuba Mod | LED LIGHT BAR INSTALL | Saker's EBRs Photos Updated 05-21-16| Saker's Previous 2013 FJ TT/SE
|
|
|
Reply With Quote
|
|
05-28-2017, 06:57 PM
|
#13
|
|
Member
|
|
Join Date: Mar 2012
Location: New Hampshire
Posts: 785
Real Name: 3 guesses..........
|
|
|
Member
Join Date: Mar 2012
Location: New Hampshire
Posts: 785
Real Name: 3 guesses..........
|
__________________
'12 SR5, Blizzard Pearl * Factory (style) Fog Light Switch-Fits knock-out! * 30" BD Stealth LED Light Bar, Upper Grill '12 SR5 * Reverse Light Mod-SR5 Factory Bumper * FN f(x) Pro Wheels - Custom Coating * LLumar Paint Protection/Tint, Flowmaster Cat-Back, Bilstein 6112/5160, LR UCA's, AirLift w/Load Control, 285/70/17 Nitto TG, LW's D2S 4.0 HID low beam mod, V-LED Interior/Reverse/LMZ High Beam/Turn Signals/V-6 DRL Lights (all 5000K), Kappa Dash/Doors/Hatch Speakers, CompuStar Remote Start, B&M Trans Cooler, Devil Horn Emblems, XB LED Fogs, Dongle Mod, TRD CAI, DC 270-XP Alt
|
|
|
Reply With Quote
|
|
05-28-2017, 06:58 PM
|
#14
|
|
Member
|
|
Join Date: Mar 2012
Location: New Hampshire
Posts: 785
Real Name: 3 guesses..........
|
|
|
Member
Join Date: Mar 2012
Location: New Hampshire
Posts: 785
Real Name: 3 guesses..........
|
Quote:
Originally Posted by Saker
Noooo..... I use them too. Not my fav, but still working without any issues, so far!
|
Key word............. SO FAR
Lol
__________________
'12 SR5, Blizzard Pearl * Factory (style) Fog Light Switch-Fits knock-out! * 30" BD Stealth LED Light Bar, Upper Grill '12 SR5 * Reverse Light Mod-SR5 Factory Bumper * FN f(x) Pro Wheels - Custom Coating * LLumar Paint Protection/Tint, Flowmaster Cat-Back, Bilstein 6112/5160, LR UCA's, AirLift w/Load Control, 285/70/17 Nitto TG, LW's D2S 4.0 HID low beam mod, V-LED Interior/Reverse/LMZ High Beam/Turn Signals/V-6 DRL Lights (all 5000K), Kappa Dash/Doors/Hatch Speakers, CompuStar Remote Start, B&M Trans Cooler, Devil Horn Emblems, XB LED Fogs, Dongle Mod, TRD CAI, DC 270-XP Alt
Last edited by barryhiram; 05-28-2017 at 07:11 PM.
|
|
|
Reply With Quote
|
|
05-28-2017, 08:03 PM
|
#15
|
|
Member
|
|
Join Date: Mar 2017
Location: So. Utah
Posts: 244
|
|
|
Member
Join Date: Mar 2017
Location: So. Utah
Posts: 244
|
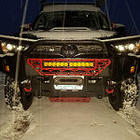
My dad came back into town so he helped me finish the wiring with his soldering gun. Big thanks to everyone who helped me out. Words can't express how grateful I am for this forum and it's members. So this is how my wiring went down.
AOB black to FACTORY grey
AOB blue to FACTORY green
AOB red to LIGHTBAR red (relay section 30)
AOB green to LIGHTBAR yellow (relay section 85)
LIGHTBAR black was capped and now used. (relay section 86)
Sorry, hard to see the colors with the flash


|
|
|
Reply With Quote
|
 Posting Rules
|
You may not post new threads
You may not post replies
You may not post attachments
You may not edit your posts
HTML code is On
|
|
|
|


 :
: 


 Linear Mode


