Adventures of 4RnR Grl (and build)

I missed a few more pictures from my phone.

92aef477542e3435ce2c953a7805a688.jpg

bd743266f39ec7b423052acfde72f4c3.jpg

6cb3cddeb1a238b8c98b265d0d1b62d3.jpg

5b7ba7f3d9ce8ceb3477ffe2f8a0deb0.jpg


And damage control...

be4101e72ba4dce184a800385287252a.jpg


This is a stupid bumper. It popped off last time at the Cove as well. I was able to get it reseated after words, but the clips inside are broken.

22ce83a57e419ce7a1433b30aea6d583.jpg


Drivers side fender liner popped off.

486e5f95cb273a63b79253becb2e17b4.jpg


Bent tail pipe.

0c2c83e071d61c3361199788e232436f.jpg


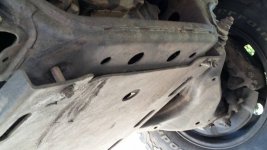
Bent skid and a bolt that will have to come off.

96c914da700079d59d0a1d5ed7c20e2e.jpg


A really beat up gas tank skid (needs replacing anyway).

08409bd25f91cc8c9c7594464fa0d48a.jpg


Both of my front rocker caps are off. The first one John just happened to see out of the corner of his eye. The second I think he just pulled off so I wouldn't lose it. So... they need a screw in them to stay on for the future.

[MENTION=131488]ST1FLER[/MENTION]

I think you need to make her a sammich.:behindsofa:
 
I've been off of here for awhile and have gotten absolutely nothing done since June... raising a litter of puppies is no joke. They all went home last weekend... minus the girl I kept to be my next show and performance dog. I went the extra mile and clicker trained the litter beginning at 4 weeks. They were 95% house broken by the time they went to their new homes. Here's our attempt at a group photo... We tried. And the liver nose girl I kept, named Harper. Now back to your regularly scheduled 4Runner posts........
 

Attachments

  • AAA 20161007 Group.jpg
    AAA 20161007 Group.jpg
    139.6 KB · Views: 1,272
  • AAA 20161007 Harper Purple.jpg
    AAA 20161007 Harper Purple.jpg
    131.8 KB · Views: 1,250
I've been off of here for awhile and have gotten absolutely nothing done since June... raising a litter of puppies is no joke. They all went home last weekend... minus the girl I kept to be my next show and performance dog. I went the extra mile and clicker trained the litter beginning at 4 weeks. They were 95% house broken by the time they went to their new homes. Here's our attempt at a group photo... We tried. And the liver nose girl I kept, named Harper. Now back to your regularly scheduled 4Runner posts........
beautiful Ridgebacks! Harper's eyes are gorgeous.
 
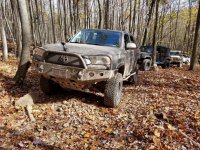
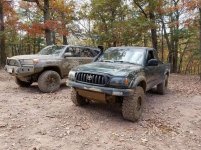
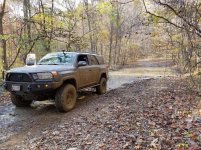
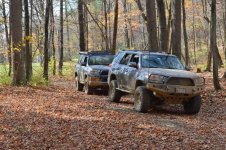
I still haven't hosed any of the mud off my truck yet. But here's a few shots from the Cove this past weekend.... No major damage, just that stupid plastic rear bumper that pops off every time I go down something steep. Time for an upgrade I believe. After seeing the SSS rear swingout, in person at the Cove... I do believe I'm sold.
 

Attachments

  • 20161029 saturday lineup.jpg
    20161029 saturday lineup.jpg
    137.5 KB · Views: 1,157
  • 20161030 badassery.jpg
    20161030 badassery.jpg
    132 KB · Views: 1,130
  • 20161030 snake trail.jpg
    20161030 snake trail.jpg
    137.2 KB · Views: 1,128
  • 20161030 in the mud.jpg
    20161030 in the mud.jpg
    101.7 KB · Views: 1,130
  • 20161030 mud pit.jpg
    20161030 mud pit.jpg
    132.6 KB · Views: 1,116
  • 20161030 me ant.jpg
    20161030 me ant.jpg
    146.3 KB · Views: 1,140
I still haven't hosed any of the mud off my truck yet. But here's a few shots from the Cove this past weekend.... No major damage, just that stupid plastic rear bumper that pops off every time I go down something steep. Time for an upgrade I believe. After seeing the SSS rear swingout, in person at the Cove... I do believe I'm sold.

When you come over tomorrow- remind me to show you my solution to those crappy spacers on your rear skid.
What I did will not bend or fail, and it's simple!


0c2c83e071d61c3361199788e232436f.jpg
 

Attachments

  • 0c2c83e071d61c3361199788e232436f.jpg
    0c2c83e071d61c3361199788e232436f.jpg
    64.4 KB · Views: 1,177
When you come over tomorrow- remind me to show you my solution to those crappy spacers on your rear skid.
What I did will not bend or fail, and it's simple!


View attachment 225528

This is what John ended up fixing before the Cove. One of the nuts was broken inside the frame. He finagled a new nut inside there by some miracle. We used the jack to push the skid up closer to the frame, and used the super fat, short spacers (instead of the cheap ones I got at Lowes) provided by Schrockworks. But... I still want to know your solution... There is the potential for a second broken frame nut.
 
I've been off of here for awhile and have gotten absolutely nothing done since June... raising a litter of puppies is no joke. They all went home last weekend... minus the girl I kept to be my next show and performance dog. I went the extra mile and clicker trained the litter beginning at 4 weeks. They were 95% house broken by the time they went to their new homes. Here's our attempt at a group photo... We tried. And the liver nose girl I kept, named Harper. Now back to your regularly scheduled 4Runner posts........

Did I read mentionings of a BARF diet? (Raw diet) my dogs love it!!
 
Did I read mentionings of a BARF diet? (Raw diet) my dogs love it!!

Yes my dogs have been raw fed for ten years. My litter was raised exclusively on raw meat, eggs, and goat milk. Three of the five puppy homes are continuing to feed raw as well. With performance dogs, I feel it can't be beat.
 
Yes my dogs have been raw fed for ten years. My litter was raised exclusively on raw meat, eggs, and goat milk. Three of the five puppy homes are continuing to feed raw as well. With performance dogs, I feel it can't be beat.

Absolutely awesome!!! Everyone at the store looks at us so disgusted when we say the turkey backs, necks, and giblets are for our wonderful dogs!! We don't go to the vet(cuz the diet keeps them tip top) but we won a dog costume contest and got a free vet visit, the vet raved about how healthy they were..... She didn't say much after I told her they were raw diet! Your dogs are beauts by the way!!! And if you can afford it, make the comitment to stay with the diet, I think every dog should get this kind of love!
Do you do veggies too? Mine love them all, but for walk treats we use dried carrots and zukini and what not
 
So... I think I've swung hubby to the dark side.

New to us 2009 Tundra SR5. Primarily for towing his currently broken car (when it's fixed), and to and from work. High mileage but well.... it's a Toyota.

8213cd741d901614cbd8a3681c6e54d0.jpg


Edit... the 4Runner is not leaving.
 
Last edited:
I read a bunch of I need a rear bumper....now all we need to know is when is [MENTION=65614]Antman[/MENTION] going to put it on?
 
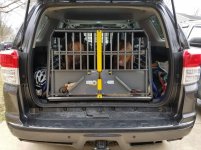
Not a huge deal to most people.... but after waiting and wanting, this finally fell into my lap.... This means.... I can FINALLY build my storage box and I have full use of the rear seats again (which I never really use).

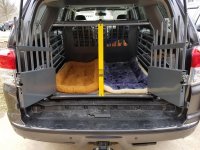
This is made in Switzerland. It is the only dog crate that has been through extensive crash testing (and passed). This is not cheap, and I only got it because someone was selling theirs (never used) for less than half the cost of a new one (I could never justify the cost of a new one). It's lockable, anchors to the truck, easily slides out, has a front emergency escape hatch, and is designed to collapse to keep the dog safe. It's the Bentley of dog crates. It's a MIM Variocage XXL.

EDIT: I might add: there are about six 4Runner projects sitting in my garage hinging on a roof rack and Dual battery setup...... soon............
 

Attachments

  • vario 1.jpg
    vario 1.jpg
    137.6 KB · Views: 2,160
  • vario 2.jpg
    vario 2.jpg
    137 KB · Views: 1,888
Last edited:
This week's arrivals....

Front Runner Full length rack
TWO Die Hard G34 Batteries
Components for my dual battery setup
ICON UCA uniball service kit (mine are shot)

I'm still waiting on my Schrockworks battery tray (and pump relocation bracket) and a couple other items....

My garage is starting to look like a parts store, so it was time to get the roof rack decision made and get the battery install done. I have lights, compressor, an awning, and some other stuff that has been waiting for these two things to happen.

Now... I need some time. This weekend is full, so hopefully everything will be here so I can get the battery stuff laid out.

:whoo::whoo::boink:
 
Front Runner Full Length Slimline

Tuesday was a snow day... or as I referred to it, Install-my-roof-rack-day since it was a free day that was unexpected.

I ordered my Front Runner slimline Full length Rack from Josh at Apex Overland in NC. He has a great price, is very communicative, and super helpful (I had a question during install). Also super nice guy (met him at the Cove in November).

Anyway. This is not a detailed step-by-step writeup as I'm sure someone else has already done that.... but I took a few pictures along the way.

I started by dumping out the big bag of hardware to make sure everything was accounted for. I liked the little cards that were included with all the bags of hardware saying who packed them and to have fun on your adventure. Just a cool personal touch. Everything was accounted for. I read through the list of tools needed. The only thing I did not have was the rivnut setter tool. I did a quick google search and learned you don't necessarily need it as the same thing can be accomplished using a bolt and a few nuts to tighten it down. I did make a run to Lowe's for two drill bits. I wanted new bits since my existing bits were pretty chewed up.

First thing that happened was removing the old rack. I parked in the garage the night before, so the truck would be dry with the impending snow storm. I flipped on the heater and opened the door to the house to heat it up. It was probably 55 degrees in there. I made a note that once the stock rack came off, I would not be driving anywhere with open roof holes. At that point I was pretty committed.

After the stock rack came off, I used a small bucket, some car wash soap and a couple rags. I carefully washed the roof and rinsed and dried it, making sure to ring out my rags as to not drip any water into the roof holes. There was a lot of mud under the stock rack foot from my previous mud-baths at the Cove and Rausch Creek, so I made sure to clean around the existing roof holes well. I then applied a coat of Meguiar's Gold Class paste wax. The roof itself was in pretty good condition. There were a few scratches, but overall looked to be in good shape. I had only used my stock rack a few times.

b02a719264934b468fe8cd77361ec7d1.jpg


I measured out the markings to drill the holes in the gutter using the provided instructions. I used the new rack feet to measure for the holes instead of measuring in millimeters.... as I did not have any metric measuring tape to do this. I drilled the 5mm pilot holes, then used my shop-vac to clean up the metal shavings after each holes was drilled. While I was drilling the last hole, my friend Rick arrived. His power was out due to the storm and he wanted to help with the project. I let him drill what seemed to me to be the GIANT holes (11.5mm) for the rivnuts. He used a bolt and a couple of nuts to get the rivnuts set.

We put the rack supports together, applied some water proof sealant around the roof holes (and on the bolts) and placed the spacers over the roof holes.

Canine helpers
9c144e89fc5da7a70cab9c8cddf0e852.jpg


We fastened down the center support first and noticed there was quite a bit of play between the front and rear feet (like a see-saw). This is when I called Josh from Apex. He called a friend of his and got back to me. We loosened up the center bracket to give the support a bit more play in the center, and as the bolts on the front and rear got wrenched down, it straightened itself out. Around this time Tyler showed up. Tyler and Rick pretty much finished the rest of the install while I watched. Tyler had already installed the same rack on his 5th Gen, so knew how everything was supposed to fit together. Honestly if Tyler hadn't of showed up, Rick and I might still be trying to figure things out. Both Tyler and Rick were a huge help.... and what better thing to do on a snow day!!!

67ec59c09d540d115533e3e2922415c0.jpg


934d1a82ca4eebe67711460972a91a17.jpg


While it did take us a long time to get it all done from start to finish, we weren't exactly rushing through it. We did BS a lot (A LOT) and refer back to the directions every now and then. We wanted to make sure it was right.

Finished.

5a2fa87bdeb407e44899f0819ba4cbf9.jpg


b00b463fbc1b879085ceb2085a4bad6b.jpg


Here is is in daylight.

c6cae665c9edbcb32096d80a8bf0b4a9.jpg


Corey's Pros:

1. The rack is aluminum (won't rust).
2. It's flat.
3. It's lighter than a Gobi or a Baja.
4. It didn't have to be delivered to a commercial address.
5. No welds.
6. Easy system for tying things down (slide a nut into the channel and make your own tie down points).
7. It's versatile (you can have fewer slats, or many making the deck completely solid).
8. It is attached to the roof in the front, being completely supported.
9. My truck still fits into my 80" garage (truck measured at 78" with rack)
10. The sheer amount of accessories that bolt onto this rack seem to be endless.

Corey's Cons:

1. The time it takes to be put together probably varies depending on your skill level and experience.
2. I don't particularly like the way the fairing is shaped. I think it should be longer, tilted forward more at the bottom, and not have a center gap (although it did not whistle at 70MPH on the freeway so there is that).
3. Drilling into the roof (for many this is a no-go, but after owning this truck for four years, I think it's fun drilling new holes into it lol). The whole drilling into the roof thing is not difficult by any means, it's just nerve wracking (I definitely broke into a cold sweat drilling the pilot holes, there was no going back).


EDIT: When you are bolting the feet on, the instructions tell you to use a large amount of RTV/silicone. Do not by any means go easy on this part. After I had the rack on for two days I went through a car wash and ended up with water in the cabin. I pulled the rack off and found we had not used nearly enough silicone (I wasn't involved in that part). I pulled up all the spacers, and used waterproof silicone to get a good seal around each hole. After putting the spacers on, I even put more silicone around the bolt holes and in the spacer gaps. No problems since, but it was a little frustrating having to pull the rack off. I accomplished removal buy putting some towels under each foot and sliding the rack back toward the rear to access the holes and spacers.
 
Last edited:
Tuesday was a snow day... or as I referred to it, Install-my-roof-rack-day since it was a free day that was unexpected.

I ordered my Front Runner slimline Full length Rack from Josh at Apex Overland in NC. He has a great price, is very communicative, and super helpful (I had a question during install). Also super nice guy (met him at the Cove in November).

Anyway. This is not a detailed step-by-step writeup as I'm sure someone else has already done that.... but I took a few pictures along the way.

I started by dumping out the big bag of hardware to make sure everything was accounted for. I liked the little cards that were included with all the bags of hardware saying who packed them and to have fun on your adventure. Just a cool personal touch. Everything was accounted for. I read through the list of tools needed. The only thing I did not have was the rivnut setter tool. I did a quick google search and learned you don't necessarily need it as the same thing can be accomplished using a bolt and a few nuts to tighten it down. I did make a run to Lowe's for two drill bits. I wanted new bits since my existing bits were pretty chewed up.

First thing that happened was removing the old rack. I parked in the garage the night before, so the truck would be dry with the impending snow storm. I flipped on the heater and opened the door to the house to heat it up. It was probably 55 degrees in there. I made a note that once the stock rack came off, I would not be driving anywhere with open roof holes. At that point I was pretty committed.

After the stock rack came off, I used a small bucket, some car wash soap and a couple rags. I carefully washed the roof and rinsed and dried it, making sure to ring out my rags as to not drip any water into the roof holes. There was a lot of mud under the stock rack foot from my previous mud-baths at the Cove and Rausch Creek, so I made sure to clean around the existing roof holes well. I then applied a coat of Meguiar's Gold Class paste wax. The roof itself was in pretty good condition. There were a few scratches, but overall looked to be in good shape. I had only used my stock rack a few times.

b02a719264934b468fe8cd77361ec7d1.jpg


I measured out the markings to drill the holes in the gutter using the provided instructions. I used the new rack feet to measure for the holes instead of measuring in millimeters.... as I did not have any metric measuring tape to do this. I drilled the 5mm pilot holes, then used my shop-vac to clean up the metal shavings after each holes was drilled. While I was drilling the last hole, my friend Rick arrived. His power was out due to the storm and he wanted to help with the project. I let him drill what seemed to me to be the GIANT holes (11.5mm) for the rivnuts. He used a bolt and a couple of nuts to get the rivnuts set.

We put the rack supports together, applied some water proof sealant around the roof holes (and on the bolts) and placed the spacers over the roof holes.

Canine helpers
9c144e89fc5da7a70cab9c8cddf0e852.jpg


We fastened down the center support first and noticed there was quite a bit of play between the front and rear feet (like a see-saw). This is when I called Josh from Apex. He called a friend of his and got back to me. We loosened up the center bracket to give the support a bit more play in the center, and as the bolts on the front and rear got wrenched down, it straightened itself out. Around this time Tyler showed up. Tyler and Rick pretty much finished the rest of the install while I watched. Tyler had already installed the same rack on his 5th Gen, so knew how everything was supposed to fit together. Honestly if Tyler hadn't of showed up, Rick and I might still be trying to figure things out. Both Tyler and Rick were a huge help.... and what better thing to do on a snow day!!!

67ec59c09d540d115533e3e2922415c0.jpg


934d1a82ca4eebe67711460972a91a17.jpg


While it did take us a long time to get it all done from start to finish, we weren't exactly rushing through it. We did BS a lot (A LOT) and refer back to the directions every now and then. We wanted to make sure it was right.

Finished.

5a2fa87bdeb407e44899f0819ba4cbf9.jpg


b00b463fbc1b879085ceb2085a4bad6b.jpg


Here is is in daylight.

c6cae665c9edbcb32096d80a8bf0b4a9.jpg


Corey's Pros:

1. The rack is aluminum (won't rust).
2. It's flat.
3. It's lighter than a Gobi or a Baja.
4. It didn't have to be delivered to a commercial address.
5. No welds.
6. Easy system for tying things down (slide a bolt into the channel and make your own tie down points).
7. It's versatile (you can have fewer slats, or many making the deck completely solid).
8. It is attached to the roof in the front, being completely supported.
9. My truck still fits into my 80" garage (truck measured at 78" with rack)

Corey's Cons:

1. The time it takes to be put together probably varies depending on your skill level and experience.
2. I don't particularly like the way the fairing is shaped. I think it should be longer, tilted forward more at the bottom, and not have a center gap (although it did not whistle at 70MPH on the freeway so there is that).
3. Drilling into the roof (for many this is a no-go, but after owning this truck for four years, I think it's fun drilling new holes into it lol). The whole drilling into the roof thing is not difficult by any means, it's just nerve wracking (I definitely broke into a cold sweat drilling the pilot holes).

HEY WHERES THE TENT THAT GOES ON TOP OF THAT THING? You know what I don't see in the parts store that is your garage, the bumper that Corey can't pull off her rig...:blabla:
 

Members online

Forum statistics

Threads
278,315
Messages
3,554,125
Members
248,016
Latest member
Advally Service

Trending content

Back
Top