BucknutBob's Build

BucknutBob

New member
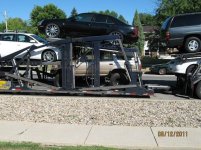
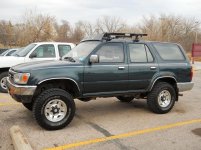
This build started with an unexpected head-start. I had a stock '95 with the 3.0 V6 that I had bought off eBay. I had decided to do a solid axle set-up on it, and was researching what all would be needed, building my purchase list, and setting the money aside.

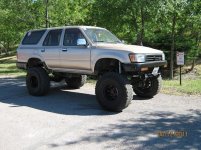
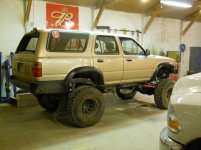
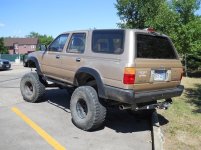
One day, while doing a web search for maintenance parts for the truck, a misplaced sale ad for a "rock crawler" 4Runner came up on the search list. It was a '95 also, with the 3.0 V6 and 5-spd too, but had the EXACT suspension I was planning to put under mine. Same Trail-Gear kit I planned to buy, same height, same tires, plus lockers (although I want selectable ARB's--these were full-time mechanicals), all on a truck with half the miles of my current one, and no rust (mine was from IL, and had more rust than I really wanted underneath). In other words, this was what my truck was going to be in a year or so, but with an even better foundation--it wasn't a hard sell!

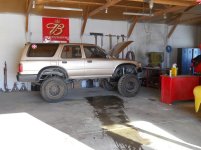
The green one was what I had. The other shots are as the new one arrived from CA--I bought it off of Craigslist. Everything apart from the suspension is stock.
 

Attachments

  • AA-Green 1.jpg
    AA-Green 1.jpg
    72.3 KB · Views: 1,140
  • AA-Yota build pic 1.jpg
    AA-Yota build pic 1.jpg
    90.6 KB · Views: 1,057
  • AA-Yota build pic 3.jpg
    AA-Yota build pic 3.jpg
    92.7 KB · Views: 1,080
Register to hide this ad
3.0 Went "Boom"

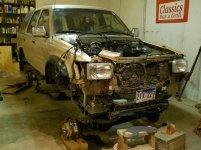
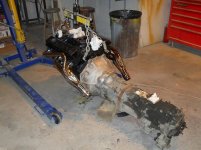
After a whopping one week, the "wonderful" 3.0 gave up its head gasket. Yeehaw. While I had been thinking of doing a Chevy V8 swap sometime in the future, this put those plans on the fast-track. I was sick of the wimpy V6 (this was my third), and decided I didn't want to dump another dime in one. So begins the second chapter: research, list-building, and tossing too much money around! I have a full thread elsewhere on the installation, so for this thread I'm just doing some highlights.

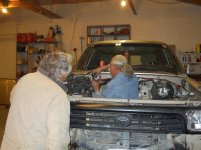
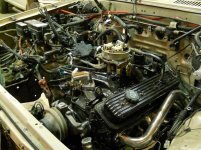
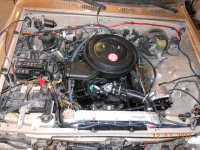
First step was installing a 3" 4Crawler body lift for header/distributor clearance. I didn't want to make the thing even taller, but without modifying the frame and engine mounts to drop the whole drivetrain down, the lift was necessary. I got a rebuilt 350 from a local builder, which meant this whole project would have to be pieced together the hard way, one part at a time. I started with custom headers, engine mounts, bellhousing and all clutch parts, wiring harness and computer for the TBI injection I insisted on (I didn't want a carb for high altitude wheeling). This was all pretty daunting for someone who had never done something like this before, but I was determined to pull it off. I give a lot of credit to my brother and his friend (who provided the garage and a LOT of help).
 

Attachments

  • Tall One downsized 4.jpg
    Tall One downsized 4.jpg
    67.1 KB · Views: 1,105
  • Tall one 8.jpg
    Tall one 8.jpg
    63 KB · Views: 1,027
  • Tall One downsized 5.jpg
    Tall One downsized 5.jpg
    74.5 KB · Views: 1,040
  • Tall One downsized 9.jpg
    Tall One downsized 9.jpg
    69.3 KB · Views: 1,053
  • Tall One downsized 6.jpg
    Tall One downsized 6.jpg
    108.5 KB · Views: 1,041
  • AA-Tall Toys new engine 2.jpg
    AA-Tall Toys new engine 2.jpg
    70.3 KB · Views: 1,059
  • Tall One downsized 14.jpg
    Tall One downsized 14.jpg
    62.4 KB · Views: 1,077
Getting Armored

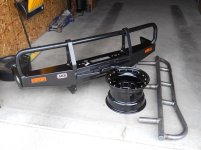
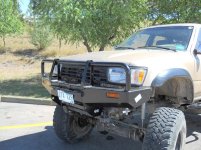
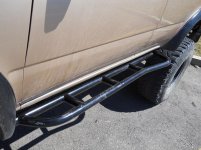
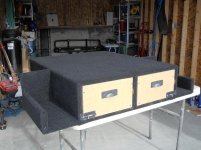
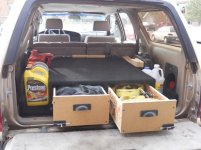
Now that a lot of the big stuff was done, I could turn to some other important goodies, like protecting the truck from all the rocks and trees I was now playing on and around. I picked up an ARB winch bumper from a local shop--since it was for a 1st Gen, and I had a body lift, it had to be professionally fitted/adapted. I also added All-Pro sliders, having them welded to the frame for ultimate strength. For some secure interior storage space, I built a two-drawer cabinet for the cargo floor--it has 100# slides for heavy pieces, and spaces for fluids on the sides.
 

Attachments

  • AA-Truck toys.jpg
    AA-Truck toys.jpg
    49.8 KB · Views: 1,061
  • AA-truck toys 6.jpg
    AA-truck toys 6.jpg
    83.3 KB · Views: 1,060
  • AA-truck toys 9.jpg
    AA-truck toys 9.jpg
    66.2 KB · Views: 1,059
  • AA-truck toys 8.jpg
    AA-truck toys 8.jpg
    76 KB · Views: 1,067
  • AA-Truck storage 1.jpg
    AA-Truck storage 1.jpg
    57.4 KB · Views: 1,260
  • AA-Truck storage 9.jpg
    AA-Truck storage 9.jpg
    57.3 KB · Views: 1,763
I love your rig bob. I'm also putting a 350 in mine this winter when I get some time off work. I knew I had to install a BL to clear the new engine, however I was going to try to scrape by with a 2inch, but seeing you did the 3inch I'll definitely go that route. Thanks for all the info, I'm sure if you had a nice writeup such as this your process wouldve been smoother lol. And big props, def not an easy task.
 
Thanks for the kind words, 4runnin83! Let me know if you have any questions with the swap--I'm by no means an expert, but I could let you know what I came up with for solutions to specific problems. Gonovr/Nate had done V8 conversions more than I have, so I would keep him in mind, too. Very interested to see how yours turns out!
 
Sucking up for T4ROM!!!! Can't say I blame you. That thing is sweet! I'll give you a run for you money in the next 12 months though.
 
Sucking up for T4ROM!!!! Can't say I blame you. That thing is sweet! I'll give you a run for you money in the next 12 months though.

Well, if I had just done like you did from the start, keeping everything together in one thread, this one wouldn't have been necessary. It's really nothing new, just consolidating the highlights, in particular for KidV's new Master Build thread. I know it was a pain when I was trying to find build info for 2nd Gen's.
 
That storage box is sickk!:trophy:

Thanks for the compliments, Toyaddict and psiems--I was happy how the box turned out, too. That was my first time making one--I've made a couple car stereo assemblies before for mounting speakers and amps, but this was the first time doing something with drawers. I had to "cheat" to get the drawers to move freely--using measurements, the walls weren't quite square, and the drawers would bind. So, I pulled the outside walls loose, mounted the slides and drawers, and THEN re-attached the walls--perfectly smooth action now! Live and learn, I guess.
 

Members online

No members online now.

Forum statistics

Threads
278,307
Messages
3,554,050
Members
248,016
Latest member
Advally Service

Trending content

Back
Top