4RunninElgin
New member
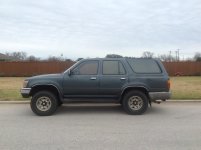
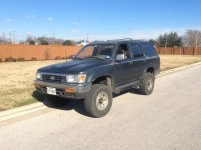
This was definitely one of the more challenging jobs I've done on my 4Runner. It was my first time ever doing suspension work. This was a much needed/wanted improvement to the Runner at 315,000+ it was definitely time! I've done the majority of the work myself so I figured why not!?
I learned that this was Definitely Not for the weekend warrior. The shocks and springs sure!... but the bushings....Ha! I have the bumps and bruises to prove it!
This may be a little long but hopefully it'll help someone out in the future.
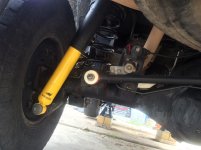
O.M.E. Suspension Kit from Rocky Road Outfitters and EnergySuspension Master Bushing Kit (LCE convinced me but I found it for a few dollars less)...
Here's what you'll need and a few tips:
Lots of PB. I used a wire wheel on a drill to get the crud off the threads then started blasting the bolts a day or so before I started.
Patience, Perseverance, Attention to Detail.
Vise
Propane/Acetylene Torch
27mm combination wrench and Socket
22mm combination wrench and Socket
1 1/8" & 1 3/4" Hole Saw(Remove the arbor bit if it has one)
Hacksaw/Sawzall
Air Hammer/Hammer & Chisel
File/Sandpaper
Wire Wheel Brushes(HFT has a 6 piece 1.5"-4" that will cover your needs)
Rubber Mallet
Large Adjustable Clamp
Molly Grease
Marking Pen/Nail Polish(make sure and mark the alignment marks)
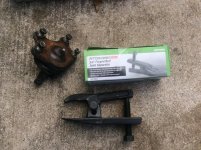
Since you're already going to have to detach the control arms to do the bushings. Go ahead and do the upper and lower Ball Joints. These can be and usually are a B**** to get out and none of the "normal" approaches work if you're trying not to remove the steering knuckle. The 3/4" ball joint separator from HFT worked on the top B.J.s but not on the bottom...I had a local shop remove the lowers after getting the lower arm off. I had to use an air hammer/chisel to get the crown nut off.
BEWARE: If you've removed the arms... Do Not be in the way when that sucker pops out!!!!
It left a nice little indentation on my fender well.
Stay away from A.Z. for the ball joints!! I didn't even get them on before I realized how crappy they are(didn't even torque(25ftlb) and the nuts stripped)...
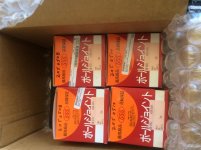
From what I've read, the majority of the people here go to Napa ($311) or the factory(didn't check $). Wish I would have done my homework before b/c now I'm having to wait for them in the mail. I took a shot on LCEs ($53ea/all 4/$229 shipped).
Besides being a long time customer. Here's why:
"When it comes to ball joints, there is a lot of options out there, but there is only one that performs better and lasts longer than the rest, OE replacement. This is the same ball joint Toyota used on Pickups and & 4Runners back in the days, so expect only the best from them. We all know that if one of your suspension-steering components is not working properly, it will eventually affect your tire alignment or it will make it impossible to align your vehicle. LCE offers only the best replacements for your beloved Toyota vehicles, making sure they are stock quality or better"
Exactly the same ones I pulled off. Nice!
Rear Suspension and Bushing Replacement:
Use hole saws 1 1/8" & 1 3/4" to remove old rubber bushings from arms. Drill from both sides.
Use hacksaw/sawzall to cut 2 notches <1/4" apart in outer metal sleeve
Don't cut in to the control bars!!! Sand/file any rough spots/nicks if you do.
Use air hammer to pound out notch from each side and work your way through until outer sleeve pops out.
Clean everything you're reusing with wire wheel.
Use the supplied lube on all surfaces that contact metal.
You'll need to jack up the rear axle almost to the top of the fender wells to get the lateral control bar back on so wait to put in your springs/shocks.
Settle the suspension after initial installation. Don't torque the bolts all the way until you've gotten the wheels on and put it back on the ground. Get a buddy and bounce for a few minutes then jack it back up and torque the bolts to the specs.
The Springs and Shocks were pretty straightforward. I "rented" the McPhearsen compressors. Just make sure you get them in the right spots so you don't have to undo them b/c the brake lines/axle are in the way.
Front Suspension and Bushing Replacement
Support the cv axle, and wheel assembly at all times. You don't want to disconnect the c.v. axles or break the brake lines.
I used some para cord and a bungee wrapped around the underside of the lugs and up through some of the mounting holes and tied off.
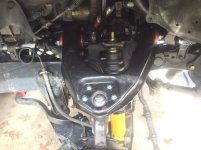
Removing the old bushings from the Upper Arms was a little confusing at first b/c there's little to no mention of the upper arm shaft or how it comes out. The F.S.M. says one thing but the instructions for the bushings say another. After some deciphering, a few phone calls, a trip to the dealers(referred to an off-road shop), and some deep thought. I put 2+3 together....
According to the bushing directions, You have to reuse all the metal outer shells and inner sleeves.
Don't remove the outer shell from the arm as stated in the FSM.
You don't need an S.S.T. or to have the old bushings pressed out or the new ones in!
You Burn em out.
With the torch, Start with the front facing side of the arm evenly heating the exterior of the outer sleeve. Try not to expose the rubber directly to the torch. After a few minutes you'll start to hear a sizzle and seeing smoke. I watched the old bushing separate from the outer sleeve, start to drop, and gave the opposite of the U.A. Shaft a tap with the mallet and it slid right out. Success!
Here's the video:
http://youtu.be/At4eBkkMPPo
When it comes to the inner sleeve I heated the interior and used a long screwdriver to push it out.
Use the 2" wire wheel to work your way through the leftover rubber/clean out/off the metal sleeves.
Coat the new bushings with lube and they just slide right in....a little help from an adjustable clamp and socket might be necessary.
You'll have to carefully pry off the smaller washer on the inside of the bushing retainers on the lower arm inner sleeve with a flathead. It's pressed together and there is an inner lip that needs to be preserved.
You'll need a 1.5" wire wheel to clean out the bushing cups on the lower control arm.
Since the ball joint is attached to the lower control arm you'd think it would be easier to get it out.
Think again.
Torsion Bars:
Lining them up was a bit on the tricky side. Put the rear adjustment bracket on and get it in place.
You can rotate the control arms up and down and rear adjustment brackets left to right a little to help line up the grooves.
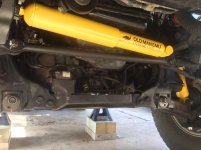
Steering Stabilizer:
You'll need the B.J. Popper for this...but it's pretty straightforward.
After taking it out for a tester....Its Much Stiffer! But feels solid on the road and a little higher No more wobble, pulsating on braking, pulling to the side or bottoming out over speed bumps..
I'm liking it so far and I'll check in farther down the road after it all has a chance to settle.....I think it's level(front to back) now but I'm not sure....
Hope I didn't leave anything out.
Cheers!
I learned that this was Definitely Not for the weekend warrior. The shocks and springs sure!... but the bushings....Ha! I have the bumps and bruises to prove it!
This may be a little long but hopefully it'll help someone out in the future.
O.M.E. Suspension Kit from Rocky Road Outfitters and EnergySuspension Master Bushing Kit (LCE convinced me but I found it for a few dollars less)...
Here's what you'll need and a few tips:
Lots of PB. I used a wire wheel on a drill to get the crud off the threads then started blasting the bolts a day or so before I started.
Patience, Perseverance, Attention to Detail.
Vise
Propane/Acetylene Torch
27mm combination wrench and Socket
22mm combination wrench and Socket
1 1/8" & 1 3/4" Hole Saw(Remove the arbor bit if it has one)
Hacksaw/Sawzall
Air Hammer/Hammer & Chisel
File/Sandpaper
Wire Wheel Brushes(HFT has a 6 piece 1.5"-4" that will cover your needs)
Rubber Mallet
Large Adjustable Clamp
Molly Grease
Marking Pen/Nail Polish(make sure and mark the alignment marks)
Since you're already going to have to detach the control arms to do the bushings. Go ahead and do the upper and lower Ball Joints. These can be and usually are a B**** to get out and none of the "normal" approaches work if you're trying not to remove the steering knuckle. The 3/4" ball joint separator from HFT worked on the top B.J.s but not on the bottom...I had a local shop remove the lowers after getting the lower arm off. I had to use an air hammer/chisel to get the crown nut off.
BEWARE: If you've removed the arms... Do Not be in the way when that sucker pops out!!!!
It left a nice little indentation on my fender well.
Stay away from A.Z. for the ball joints!! I didn't even get them on before I realized how crappy they are(didn't even torque(25ftlb) and the nuts stripped)...
From what I've read, the majority of the people here go to Napa ($311) or the factory(didn't check $). Wish I would have done my homework before b/c now I'm having to wait for them in the mail. I took a shot on LCEs ($53ea/all 4/$229 shipped).
Besides being a long time customer. Here's why:
"When it comes to ball joints, there is a lot of options out there, but there is only one that performs better and lasts longer than the rest, OE replacement. This is the same ball joint Toyota used on Pickups and & 4Runners back in the days, so expect only the best from them. We all know that if one of your suspension-steering components is not working properly, it will eventually affect your tire alignment or it will make it impossible to align your vehicle. LCE offers only the best replacements for your beloved Toyota vehicles, making sure they are stock quality or better"
Exactly the same ones I pulled off. Nice!
Rear Suspension and Bushing Replacement:
Use hole saws 1 1/8" & 1 3/4" to remove old rubber bushings from arms. Drill from both sides.
Use hacksaw/sawzall to cut 2 notches <1/4" apart in outer metal sleeve
Don't cut in to the control bars!!! Sand/file any rough spots/nicks if you do.
Use air hammer to pound out notch from each side and work your way through until outer sleeve pops out.
Clean everything you're reusing with wire wheel.
Use the supplied lube on all surfaces that contact metal.
You'll need to jack up the rear axle almost to the top of the fender wells to get the lateral control bar back on so wait to put in your springs/shocks.
Settle the suspension after initial installation. Don't torque the bolts all the way until you've gotten the wheels on and put it back on the ground. Get a buddy and bounce for a few minutes then jack it back up and torque the bolts to the specs.
The Springs and Shocks were pretty straightforward. I "rented" the McPhearsen compressors. Just make sure you get them in the right spots so you don't have to undo them b/c the brake lines/axle are in the way.
Front Suspension and Bushing Replacement
Support the cv axle, and wheel assembly at all times. You don't want to disconnect the c.v. axles or break the brake lines.
I used some para cord and a bungee wrapped around the underside of the lugs and up through some of the mounting holes and tied off.
Removing the old bushings from the Upper Arms was a little confusing at first b/c there's little to no mention of the upper arm shaft or how it comes out. The F.S.M. says one thing but the instructions for the bushings say another. After some deciphering, a few phone calls, a trip to the dealers(referred to an off-road shop), and some deep thought. I put 2+3 together....
According to the bushing directions, You have to reuse all the metal outer shells and inner sleeves.
Don't remove the outer shell from the arm as stated in the FSM.
You don't need an S.S.T. or to have the old bushings pressed out or the new ones in!
You Burn em out.
With the torch, Start with the front facing side of the arm evenly heating the exterior of the outer sleeve. Try not to expose the rubber directly to the torch. After a few minutes you'll start to hear a sizzle and seeing smoke. I watched the old bushing separate from the outer sleeve, start to drop, and gave the opposite of the U.A. Shaft a tap with the mallet and it slid right out. Success!
Here's the video:
http://youtu.be/At4eBkkMPPo
When it comes to the inner sleeve I heated the interior and used a long screwdriver to push it out.
Use the 2" wire wheel to work your way through the leftover rubber/clean out/off the metal sleeves.
Coat the new bushings with lube and they just slide right in....a little help from an adjustable clamp and socket might be necessary.
You'll have to carefully pry off the smaller washer on the inside of the bushing retainers on the lower arm inner sleeve with a flathead. It's pressed together and there is an inner lip that needs to be preserved.
You'll need a 1.5" wire wheel to clean out the bushing cups on the lower control arm.
Since the ball joint is attached to the lower control arm you'd think it would be easier to get it out.
Think again.
Torsion Bars:
Lining them up was a bit on the tricky side. Put the rear adjustment bracket on and get it in place.
You can rotate the control arms up and down and rear adjustment brackets left to right a little to help line up the grooves.
Steering Stabilizer:
You'll need the B.J. Popper for this...but it's pretty straightforward.
After taking it out for a tester....Its Much Stiffer! But feels solid on the road and a little higher No more wobble, pulsating on braking, pulling to the side or bottoming out over speed bumps..
I'm liking it so far and I'll check in farther down the road after it all has a chance to settle.....I think it's level(front to back) now but I'm not sure....
Hope I didn't leave anything out.
Cheers!