5th Gen 4Runner Low Profile Rear Plate Bumper Kit | website
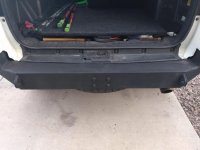
Many have seen this bumper pop-up on a number of 5th Gens lately and thought I'd give my feedback and review as it's been on my vehicle for about 2months and a total of about 6 different runs out over different kinds of terrain.
THE WHAT: Coastal Offroad is a company based out of British Columbia that offers DIY-weld bumper kits. They basically design and laser-cut the material and send it to you. Since it is not a complete bumper, your expected turnaround time from ordering to receiving the product is fairly quick - I got mine in a week and a half.
PRICE: Extremely fair. Keep in mind the prices on the site are in Canadian so remember to convert as it is lower in USD. You can use promocode: socal5 to get another 5% off your order.
PRICE TO WELD: I get asked this a million times a day - this is going to vary GREATLY depending on where you're at. I've heard people say $700, i've heard people say $1500. Ask around and find a good fabricator. Mine was Outgear Solutions out of Santa Ana, CA and he did a fantastic job.
STRENGTHS: Solid as a rock. I've tested it over various kinds of terrain and I don't hear any rattles or having anything coming loose. The carrier option is jerry cans or rotopax and i've had no problems with mine. I carry a 34" tire and have no problem with rattles or shakes. I'm not going to say it doesnt shake at all because all carriers WILL shake, but this one is extremely minimal to where you don't notice it whatsoever from within the cabin. People trailing behind me have said it doesn't shake much at all compared to some others out there. It's all mostly 3/16 steel and I see this thing surviving just fine even in the event of a crash.
WEAKNESSES: No locking pin when open. Not necessarily a weakness as this was by design to allow ease of use but some will call it that. The heim joints are fairly "sticky" to where they stay open and have resistance to stay put once you open it.
MISC: I had some custom work done on mine (the beauty of a DIY weld bumper, right?). This bumper sits very tight to the hatch and is not designed to clear any ladders - we accomplished this by notching out the area around the ladder. I also had 3 holes drilled into the side of the jerry can carrier for aesethetics.
OVERALL: I am very happy. I was originally looking at the other popular bumpers out there, but I am very big on keeping a clean look, but trying to be as unique as possible (tough with so many great modded 5th gens out there). I took a gamble and it paid off big time.
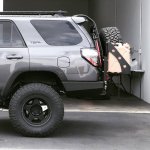
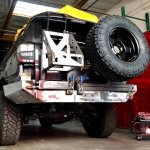
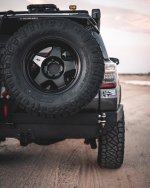
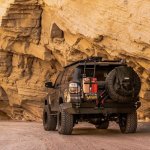
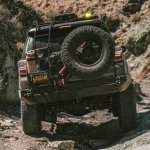
Many have seen this bumper pop-up on a number of 5th Gens lately and thought I'd give my feedback and review as it's been on my vehicle for about 2months and a total of about 6 different runs out over different kinds of terrain.
THE WHAT: Coastal Offroad is a company based out of British Columbia that offers DIY-weld bumper kits. They basically design and laser-cut the material and send it to you. Since it is not a complete bumper, your expected turnaround time from ordering to receiving the product is fairly quick - I got mine in a week and a half.
PRICE: Extremely fair. Keep in mind the prices on the site are in Canadian so remember to convert as it is lower in USD. You can use promocode: socal5 to get another 5% off your order.
PRICE TO WELD: I get asked this a million times a day - this is going to vary GREATLY depending on where you're at. I've heard people say $700, i've heard people say $1500. Ask around and find a good fabricator. Mine was Outgear Solutions out of Santa Ana, CA and he did a fantastic job.
STRENGTHS: Solid as a rock. I've tested it over various kinds of terrain and I don't hear any rattles or having anything coming loose. The carrier option is jerry cans or rotopax and i've had no problems with mine. I carry a 34" tire and have no problem with rattles or shakes. I'm not going to say it doesnt shake at all because all carriers WILL shake, but this one is extremely minimal to where you don't notice it whatsoever from within the cabin. People trailing behind me have said it doesn't shake much at all compared to some others out there. It's all mostly 3/16 steel and I see this thing surviving just fine even in the event of a crash.
WEAKNESSES: No locking pin when open. Not necessarily a weakness as this was by design to allow ease of use but some will call it that. The heim joints are fairly "sticky" to where they stay open and have resistance to stay put once you open it.
MISC: I had some custom work done on mine (the beauty of a DIY weld bumper, right?). This bumper sits very tight to the hatch and is not designed to clear any ladders - we accomplished this by notching out the area around the ladder. I also had 3 holes drilled into the side of the jerry can carrier for aesethetics.
OVERALL: I am very happy. I was originally looking at the other popular bumpers out there, but I am very big on keeping a clean look, but trying to be as unique as possible (tough with so many great modded 5th gens out there). I took a gamble and it paid off big time.
Attachments
-
 54435464_2805511512807540_1226335260338290688_n.jpg95 KB · Views: 9,682
 -
 55443465_2805511632807528_6820988389144133632_n.jpg134.4 KB · Views: 8,632
 -
 56312077_2820966114595413_953370387662503936_n.jpg98.6 KB · Views: 6,792
 -
 56845630_2841715712520453_8377776474731577344_n.jpg135.9 KB · Views: 6,844
 -
 57154314_2857295400962484_4419083892280000512_n.jpg132.3 KB · Views: 7,296