Custom Light Bar: detailed build / discussion

dnobes

New member
Hey Guys,

I came up with a new project! Nobody makes what I want for my 4Runner... So, I am gonna make one myself!!!

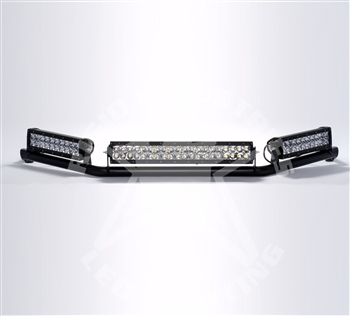
This was my inspiration:
attachment.php

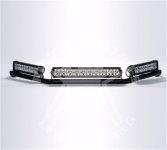
Toyota FJ Roof Mount

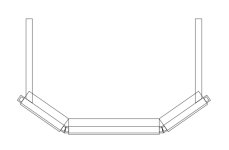
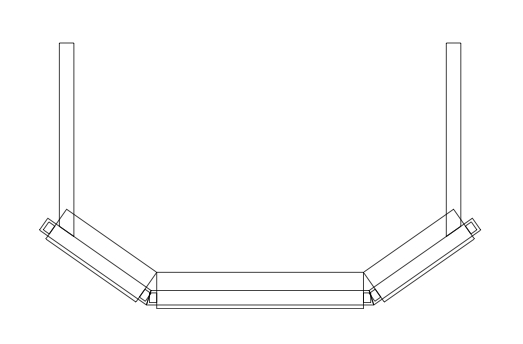
This is my design w/ lights:
attachment.php

20" center light: 20" E-Series LED Light Bar
10" side lights: 10" E-Series LED Light Bar

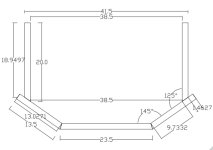
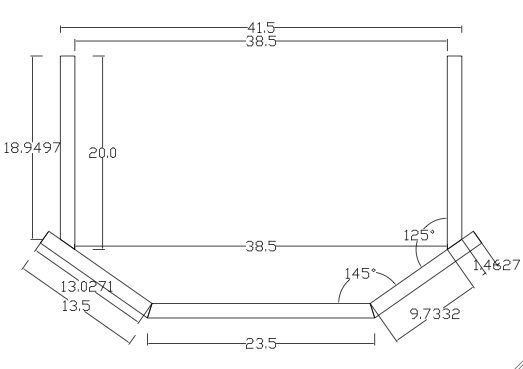
This is my design w/ measurements but no lights:
attachment.php


I drafted up the above design in CAD. It is a top down view. The first design has the lights in the image, but underneath the lights and the swivel mounts on the sides are the tubes that should be pretty easy to tack weld together. I am planning on 1.5" tube, and went with a 35 degree offset for the smaller side lights. Due to the simplicity of it, I thought this might be a good starter thing for me to learn to weld on. Otherwise, I think I could take it to a machine shop, where they do work for $45/hour and this would take them less than an hour, max 90 minutes, and I could just pay to have it done.

If you have any feedback, I am all ears! I think cutting the tubes, and getting it welded should be pretty easy or cheap... The only thing I am unsure about is how to mount it to my roof... What I want to do is make this a simple add on, so that where you see the tubes ending actually side mounts into the roof rack side rails. I was thinking I will chop up a factory cross rail and reuse the end pieces and weld them to the tube somehow... I am going to have to get creative with that one weekend... I was thinking I could chop up a factory cross bar and reuse the parts that insert into the rails, and then come up with some support system for holding the front of the bar on the roof behind the windshield but ahead of the sunroof.

Any thoughts anyone? I am located in Atlanta if you have any people or shops in mind that might be worth dropping a line to get this project going.

*If anyone would like the DWG file that maintains the scale and dimensions, PM me and I will be happy to send it your way.
 

Attachments
  • FJ2010BRKT-2T.jpg
    FJ2010BRKT-2T.jpg
    37.4 KB · Views: 1,407
  • Light_Bar_Final_Design_no_meas.jpg
    Light_Bar_Final_Design_no_meas.jpg
    22.9 KB · Views: 986
  • Light_Bar_Final_Design_w_meas.jpg
    Light_Bar_Final_Design_w_meas.jpg
    39.7 KB · Views: 956
Last edited:
Register to hide this ad
Angle Justification and Light Spread

So, this design was definitely based on the light bar sold by Rigid for the FJ Cruiser, but the design was fully justified, and not just a copy for the sake of copying. First off, the center had to be a 20" because well that just looks cool, otherwise three 10" ones would probably have been enough, seeing as someone else pointed out that they are bright as heck!

The reason for going with three lights over 1 or 2 is the maximal light spread! One 30" or 40" light would indeed provide more light, but how much light do I need in any one area? I really needed a wide spread of light, with increased light directly in front, hence the design call on the 20" center with two 10" side lights.

This particular design allows for a full 110 degree light spread! That should light up my horizon incredibly well, covering ~85% of what the eyes can see without turning your head away.

The flood pattern option on these lights covers a 20 degree from center spread. That's 20 degrees left and 20 degrees right from straight with the flood option. So, because of that I chose to do a 38 degree offset for the side lights. Take 20 degrees from the center light, and 20 degrees from the side light, and subtract one from each for some overlap to minimize any chance for a dark spot.

Twenty degrees to the side of the side light, and 35 degrees between the center and side light, and then double all that. This setup will end up giving me a full 110 degree spread! I am pretty stoked about it! This is my snowboarding toy, so I need it to light up the back roads on the mountains after the sun goes down, and this should give me PLENTY of sight to see any deer coming from any direction!

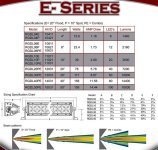
See the attached document below from Rigid with all the specs supporting what I just explained...
http://www.toyota-4runner.org/attachment.php?attachmentid=68566&stc=1&d=1343275145
 

Attachments

  • E-Series_LED_Light_Specs.jpg
    E-Series_LED_Light_Specs.jpg
    102.2 KB · Views: 663
Last edited:
Just dropped off at the machine shop!

I just dropped off the materials at the machine shop!

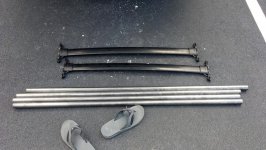
I first picked up 20 feet of 1.5" round, 11 gauge steel tubing. I only needed 8 feet, but they did not sell it any smaller increments than 20 feet, seeing as I went to a steel manufacturer outside the city... It was $35 plus $10 to cut it into four 5 ft pieces so that it would fit in the back of my 4Runner... I got it at IMS Georgia Steel. IMS Georgia Steel

I then went to Johnson & Brown Machine Works in Atlanta. They don't have a website, but here is the google plus link for them: https://plus.google.com/106093588285030596133/about
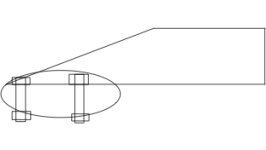
I spoke to a gentleman named Chris there and he was great! I went over the supplied plans and we talked for about thirty minutes going over ideas and details and he seemed really sharp, and I knew my project was in good hands! We discussed how to mount my design to the parts of the factory cross bar that slide into the rails. We decided to remove the center bar (of course), and cut a round notch for the 1.5" tube to rest in. We would cut the 1.5" tube at an angle at the end for styling effect, and allow for us to put bolts inside the tube through the factory cross bar ends, which we will just drill holes for. This is a visual of the side view for what we are basically going for...
attachment.php


This is exactly everything I left him with...
attachment.php


The downside is that he is on vacation next week, so I won't get it back for at least a week and a half... Well that sucks... The good news is that I am in no real rush other than being anxious, so this will work out just fine!
 

Attachments

  • Side_View_Rail_Mount.jpg
    Side_View_Rail_Mount.jpg
    10.2 KB · Views: 921
  • Supplies.jpg
    Supplies.jpg
    138.8 KB · Views: 950
Last edited:
Ordered the 20" Light and Mounts

Just yesterday I ordered the 20" Rigid E-series light!
I got it from "wundercarparts" or "wcpdiesel.com"
They have this "make us an offer" system on their website, which resulted in me getting a VERY good deal on it. Here is the link:
Rigid Industries RGDL20PE 20" E-Series LED Light Bar (Spot/Flood Combo) (12031) - WCP Diesel

I also ordered the mount/support tabs that I will weld on to my light bar:
SLOTTED TAB MOUNTS (PAIR)

This project is moving along! I am gonna hold off on the two side 10" lights for a month or two before dropping the $$ on those, but it will still look good with just the 20" in the center til I get those in!

~Dave
 
Last edited:
That looks wicked, btw those lights are crazy bright, my buddy has just one 10" on his Hummer and its crazy i cant imagine 3. Good luck with the build
 
That looks wicked, btw those lights are crazy bright, my buddy has just one 10" on his Hummer and its crazy i cant imagine 3. Good luck with the build
So yeah, I totally agree with you, which is something I took into account. The light has a 20 degree from center spread, so that's 20 degrees left and 20 degrees right from straight with the flood option. That's why I did a 38 degree offset for the side lights. There will be 1 degree of overlap to prevent a dark area at 20 degrees to either side from center with only 1 degree of overlap. This setup will end up giving me a full 116 degree spread! I am pretty stoked about it! This is my snowboarding toy, so I need it to light up the back roads on the mountains after the sun goes down, and this should give me PLENTY of sight to see any deer coming from any direction!
 

Members online

Forum statistics

Threads
278,316
Messages
3,554,113
Members
248,016
Latest member
Advally Service

Trending content

Back
Top