diodia TRD Pro Build Thread

diodia

New member
I was torn if I should start a build thread for yet another 2016 4Runner TRD Pro, but here it goes!

End of summer of 2016, my car at the time decided to develop some transmission noise (or so the forums told me). As the car was not worth much more than a new tranny, the sensible thing to do was to trade it in and get a new one. It was a time to say goodbye to this beauty...

IMG_20150718_133415[1].jpg


I started off my search Saturday morning, at the dealership that I pass on my way to the mall. They did have a Trail trim, but without KDSS, which I wanted. Upon some more search, another dealer nearby had a TRD Pro, in stock, not bought at the time. You can see where this is going...
I showed up to the dealership, saw it parked up front by the door, and fell in love. The rest is history – we struck a deal and I was a proud owner of a 2016 4Runner TRD Pro at the end of the day Saturday. I`d say a successful car shopping experience, having bought it in a day! I also paid MSRP and they gave me a killer trade-in value for the Benz. Would highly recommend Zach at East Madison Toyota.
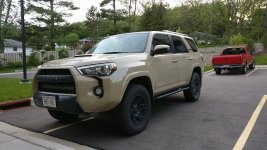
Here is how the truck looked at the time of purchase. Pretty stoked!

photo_1469904919974[1].jpg

Out with the old, in with the new :cool:

16402844_1356334894416604_799042339939014091_o.jpg

So: what did I buy this truck for and what do I plan to do with it?
Truck is my daily driver, and aside from somewhat high fuel consumption, I love everything about it. It looks tough, mean, and unusual, I get compliments on it all the time too. As a daily driver in Wisconsin, especially during the winter, it is great. Aside from being a daily driver, truck will also carry all my gear to various outdoor activities (scuba diving, skiing, etc.), do some off-roading, be a reliable camping transportation, and tow a boat in a somewhat near future. It does all of that with ease and then some.

**I do have to agree with some other folks on the forum, though, that it does lack a bit of power. A little more “umph” when hitting the gas would be nice. More on that later.

Here comes the build part! The below is the list of the mods I plan to do for the truck, in (most likely) chronological order, as the funds and time become available. If a mod has a link, it has been completed

Things I`m considering in the future, but not soon:

  • Magnusson supercharger (once (fingers crossed) it comes out)
  • Safari snorkel
  • All around tint
  • Beefier tires
  • Regearing
  • Full on suspension upgrade
  • Rear bumper
  • Front bumper
 

Attachments

  • IMG_20150718_133415[1].jpg
    IMG_20150718_133415[1].jpg
    135.6 KB · Views: 877
  • photo_1469904919974[1].jpg
    photo_1469904919974[1].jpg
    126.8 KB · Views: 890
  • 16402844_1356334894416604_799042339939014091_o.jpg
    16402844_1356334894416604_799042339939014091_o.jpg
    139 KB · Views: 928
Last edited:
Register to hide this ad
HIDs + Stealth Light Bar Install

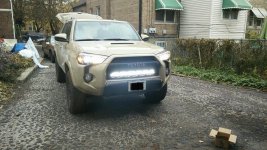
Decision for the first mod was to upgrade the lightning. The stock light output sucks... That`s the end of it. As such, a light bar and HID`s are the sensible thing to do. I followed the instructions for the HIDs from [MENTION=103267]Saker[/MENTION] found here. Morimoto from TRS is what I chose.

The light bar was a tough call, but followed advice from [MENTION=127401]Krayziekid[/MENTION] and went with Opt7 C2 in 32". Used Rago fabrication mounts found here. Install was as described, this is how they look installed without the bumper. This is what the end result looks like!

15204187_1290572124326215_726397764_o.jpg
 

Attachments

  • 15204187_1290572124326215_726397764_o.jpg
    15204187_1290572124326215_726397764_o.jpg
    140.4 KB · Views: 861
It is good to know that our 4Runners are capable of transporting rare and sensitive cargo...

20187542_1529073473809411_1155976658_n.jpg
 

Attachments

  • 20187542_1529073473809411_1155976658_n.jpg
    20187542_1529073473809411_1155976658_n.jpg
    73.3 KB · Views: 725
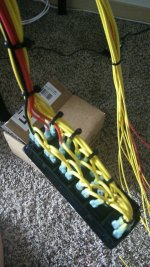
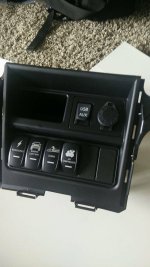
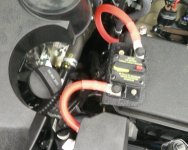
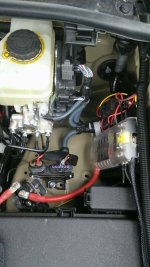
Fuse block install

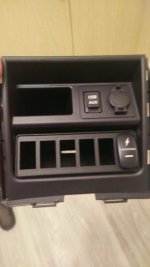
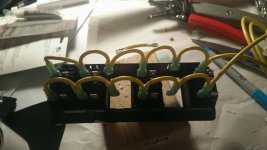
At the same time as I was doing the lightbar, the auxillary fuse block was installed. Following [MENTION=834323]Okki[/MENTION] thread here, the install went fairly well.

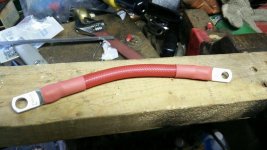
The wire is marine grade, so are the terminals. Should last a little while. Crimper was "borrowed" temporarily from HF. Worked like a charm - highly recommend it.

Something a little different that I did - I have a relay that controls power to the whole fuse block. It is wired independently of the ignition, and allows me to switch on all of the accessories without a key in the ignition.

Lessons learned:
  • Interior corners of the Runner are sharp
  • 16GA wire for the switches is overkill - 18GA would work just fine.
  • Mount all of the switches in the pod at the same time - was too cheap to buy two more, and will have to take everything apart to install two additional switches.
  • If I was to do it all over again, the ONLY thing I`d change is the mount - you can get this amazing mount here for significantly less pain and effort. It`ll look better too.

And the pictures on how the install progressed:
14813158_1256005054449589_1680423342_o.jpg
14881495_1258278387555589_1403458844_o.jpg
14907719_1258967834153311_1089868486_o.jpg
14894408_1258981534151941_244283126_o.jpg
14907766_1258981630818598_1880047788_o.jpg
15204130_1289127264470701_2101021556_o.jpg
15205566_1290561674327260_276029446_o.jpg
15183897_1290561670993927_1008402020_o.jpg
 

Attachments

  • 14813158_1256005054449589_1680423342_o.jpg
    14813158_1256005054449589_1680423342_o.jpg
    54.5 KB · Views: 593
  • 14881495_1258278387555589_1403458844_o.jpg
    14881495_1258278387555589_1403458844_o.jpg
    68.9 KB · Views: 612
  • 14907719_1258967834153311_1089868486_o.jpg
    14907719_1258967834153311_1089868486_o.jpg
    128.5 KB · Views: 604
  • 14894408_1258981534151941_244283126_o.jpg
    14894408_1258981534151941_244283126_o.jpg
    77.6 KB · Views: 594
  • 14907766_1258981630818598_1880047788_o.jpg
    14907766_1258981630818598_1880047788_o.jpg
    59.4 KB · Views: 625
  • 15204130_1289127264470701_2101021556_o.jpg
    15204130_1289127264470701_2101021556_o.jpg
    92.3 KB · Views: 596
  • 15205566_1290561674327260_276029446_o.jpg
    15205566_1290561674327260_276029446_o.jpg
    100.8 KB · Views: 602
  • 15183897_1290561670993927_1008402020_o.jpg
    15183897_1290561670993927_1008402020_o.jpg
    109.2 KB · Views: 592
Last edited:
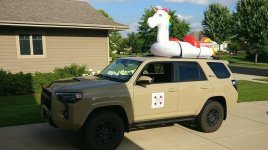
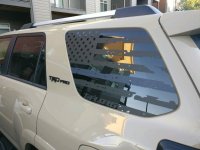
Decided that my truck need some freedom.... Well, it got some freedom :biggrin2:
Oh, and before you ask - yes, that is a thin blue line.
20472009_1540010152715743_138520715_n.jpg
 

Attachments

  • 20472009_1540010152715743_138520715_n.jpg
    20472009_1540010152715743_138520715_n.jpg
    96.7 KB · Views: 463
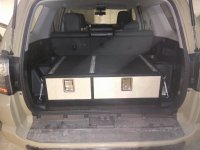
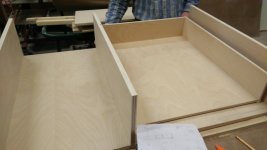
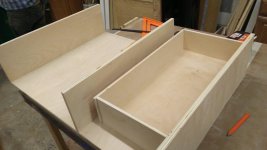
Rear Cargo Drawer Build

I never got around to post the write-up with the pictures on my drawer build, so here it goes.

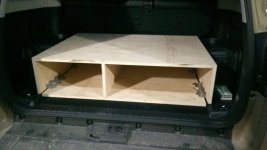
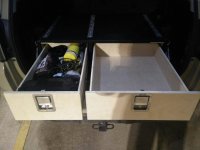
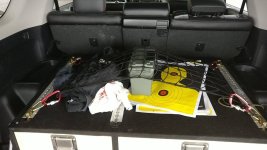
My dad and I spent about 18 hours building it (it was a very very long night) and I`m thrilled with the result. Carpet has held up really well to all of my abuse, the drawers are rock solid. We decided not to build it for the whole length of the bed in order to be able to put a hard rifle case vertically between the drawers and the hatch - works like a charm.

15967041_1330532086996885_463163293_o.jpg

15935265_1330532126996881_2121049226_o.jpg

18675212_1469765553073537_856834641_o.jpg

We used 1/2" plywood for the drawers, with a 3/4" top, sides, and the bottom - bought at a local hardware shop.

15935507_1329706563746104_179071885_o.jpg

15942702_1329688050414622_1385548272_o.jpg

Rails were bought from here, and the drawers open up most of the way.
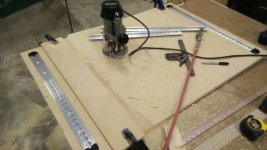
Top mounting rails were bought from here and cut to size. We used a router to drill out the space on the top.

15966394_1329851557064938_657736544_o.jpg

First fitment into the car - everything lines up! The sides of the drawers actually sit on the little raised corners of the bed, and are load bearing.

15943369_1329749067075187_1716957656_o.jpg

Used 3M spray glue to put the carpet on the box. Decided not to do it for the drawer faces, as that`s where the stickers will go :eyebrows: In addition, I will be using Plasti-Dip to line the insides of the drawers, so that they`d be easier to clean and stuff wouldn`t roll around.

Unfortunately, I do not have any of the drawings left, but if someone needs any of the dimensions - let me know and I`ll measure them out!

Other parts - metal corners, carpet, latches - were all bought from here. Great prices, excellent quality products.
 

Attachments

  • 15935507_1329706563746104_179071885_o.jpg
    15935507_1329706563746104_179071885_o.jpg
    114.2 KB · Views: 309
  • 15942702_1329688050414622_1385548272_o.jpg
    15942702_1329688050414622_1385548272_o.jpg
    129.8 KB · Views: 315
  • 15943369_1329749067075187_1716957656_o.jpg
    15943369_1329749067075187_1716957656_o.jpg
    133.3 KB · Views: 301
  • 15966394_1329851557064938_657736544_o.jpg
    15966394_1329851557064938_657736544_o.jpg
    129 KB · Views: 344
  • 15967041_1330532086996885_463163293_o.jpg
    15967041_1330532086996885_463163293_o.jpg
    121.1 KB · Views: 333
  • 15935265_1330532126996881_2121049226_o.jpg
    15935265_1330532126996881_2121049226_o.jpg
    121.5 KB · Views: 301
  • 18675212_1469765553073537_856834641_o.jpg
    18675212_1469765553073537_856834641_o.jpg
    136.1 KB · Views: 294
Speaker Upgrade

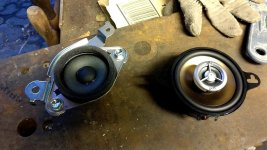
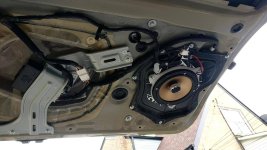
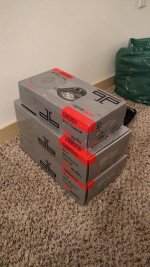
As everyone is aware, the speakers in the TRD Pro are lacking in most departments.... As such, decided to upgrade to some lovely Polks! Really really like them and the install was painless (aside from having to fab up some mounting brackets).

17175860_1386199048096855_2059754462_o.jpg

Comparison between the old and the new - the weight is at least 5x as more on the new ones.

17670593_1413136958736397_1724270119_o.jpg

Brackets needed some massaging on a grinder to fit, but it is doable!

17670855_1413221782061248_1476372198_o.jpg

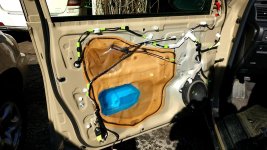
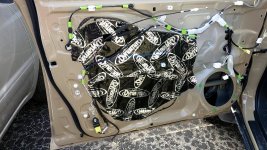
While I was at it, I also used up Dynamat on all of the doors and the hatch. Lined up the exterior panel as well as used it to seal up the door as an enclosure. Works like a dream, the ride is a lot quieter.

Before:
17692960_1413829632000463_1399496726_o.jpg

After:
17759228_1414092755307484_148276877_o.jpg

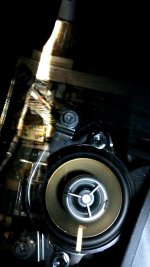
And how they look in the hatch.

17761608_1414296315287128_1813293738_o.jpg

Overall, changed all the speakers in the truck with Polks. Sound signature is really good, the lows are great. it does feel that I have a sub-woofer of sorts, all due to the Dynamat in the doors. :guitar3:

Took me about a day to do, as we had to rummage through multiple Wal-Marts to get materials for the brackets - used cutting boards. Worked great!
 

Attachments

  • 17175860_1386199048096855_2059754462_o.jpg
    17175860_1386199048096855_2059754462_o.jpg
    140.5 KB · Views: 303
  • 17670593_1413136958736397_1724270119_o.jpg
    17670593_1413136958736397_1724270119_o.jpg
    139.8 KB · Views: 321
  • 17670855_1413221782061248_1476372198_o.jpg
    17670855_1413221782061248_1476372198_o.jpg
    130.7 KB · Views: 303
  • 17692960_1413829632000463_1399496726_o.jpg
    17692960_1413829632000463_1399496726_o.jpg
    140.2 KB · Views: 301
  • 17759228_1414092755307484_148276877_o.jpg
    17759228_1414092755307484_148276877_o.jpg
    149.7 KB · Views: 283
  • 17761608_1414296315287128_1813293738_o.jpg
    17761608_1414296315287128_1813293738_o.jpg
    136.5 KB · Views: 283
Rock Sliders!!

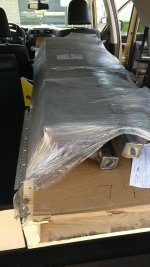
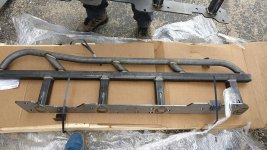
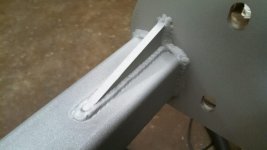
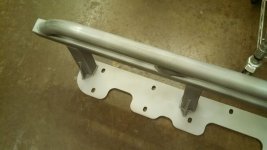
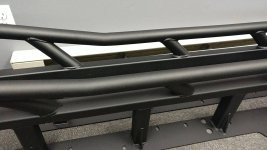
Had the pleasure to deal with [MENTION=111262]pelfreybilt[/MENTION] to get some sliders. Amazing service. good turnaround time, excellent product. Pictures speak for themselves.

I had a local shop powdercoat the sliders in textured matte black powder. That set me back another $350. Might have been a bit pricey, but the guy plated the sliders with some material (forget what it is) to prevent rusting. Hence the extra $$.

Also - the pallet with the sliders does fit in the 4Runner :dancin:

18427018_1460146450702114_168486886_o.jpg

18518992_1463173353732757_1425735855_o.jpg

18596267_1466355933414499_471301515_o.jpg

18553790_1466355843414508_2145007185_o.jpg

18575775_1467998376583588_447825202_o.jpg

Fits with no issues, looks pretty good too!

18618105_1468188139897945_1803576697_o.jpg
 

Attachments

  • 18427018_1460146450702114_168486886_o.jpg
    18427018_1460146450702114_168486886_o.jpg
    138 KB · Views: 279
  • 18518992_1463173353732757_1425735855_o.jpg
    18518992_1463173353732757_1425735855_o.jpg
    142.5 KB · Views: 278
  • 18596267_1466355933414499_471301515_o.jpg
    18596267_1466355933414499_471301515_o.jpg
    60 KB · Views: 277
  • 18553790_1466355843414508_2145007185_o.jpg
    18553790_1466355843414508_2145007185_o.jpg
    65.4 KB · Views: 299
  • 18575775_1467998376583588_447825202_o.jpg
    18575775_1467998376583588_447825202_o.jpg
    136.3 KB · Views: 274
  • 18618105_1468188139897945_1803576697_o.jpg
    18618105_1468188139897945_1803576697_o.jpg
    132.5 KB · Views: 309

Members online

Forum statistics

Threads
278,306
Messages
3,554,046
Members
248,016
Latest member
Advally Service

Trending content

Back
Top