Chris_Overland
New member
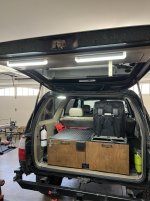
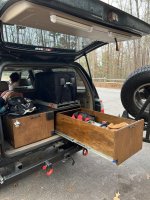
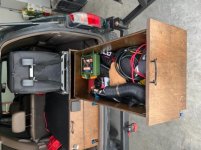
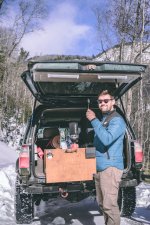
With our move to Colorado just 2 months away, and bigger, longer trips on the horizon, we decided to sell my homebuilt "overland" trailer and decided to build out the back of the 4runner with a drawer system.
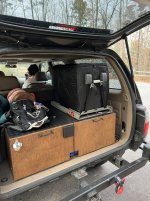
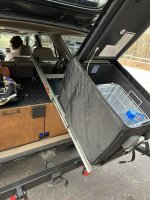
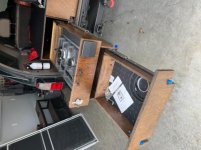
I wanted to build it around our new Iceco fridge (which is AWESOME). I used their regular slide and converted it into a tilting slide with some limiting straps. It's pretty simple, but it works great and didn't cost a fortune as tilting slides tend to!
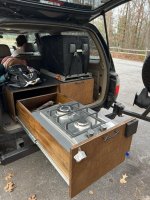
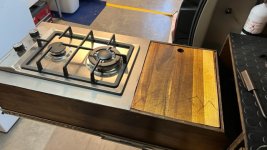
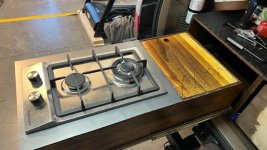
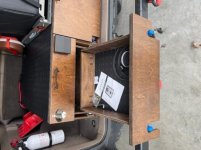
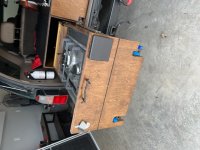
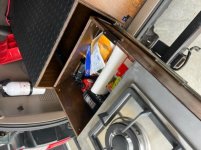
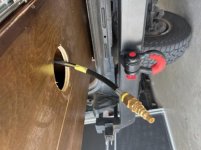
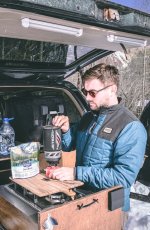
Another staple feature was the kitchen. I did a built-in propane stove with a "pantry" and a custom cutting board. There was a ton of extra room under the stove, so I built another smaller drawer and am going to use it as a cooking utensils/spice storage space. The propane hose has a quick connect for easy attachment and pops out right under the drawer!
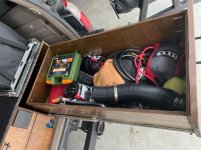
The main storage compartment has SO MUCH room, more than I anticipated actually. All out of gear fits in there, and more. I have a ton of stuff thrown in right now just to get a feel for how much I can realistically shove in there.
Dividers or storage bins will be absolutely necessary though, stuff gets buried easily since they are so deep and long.
On the top and inside the drawers. I put the durable rubber garage flooring. I installed a LED light bar on the inside driver ceiling to light up the entire storage area and 2 on the hatch to provide area lighting. They are BRIGHT! Much brighter than I thought. They all have their own individual switches built-in, so it's easy to just use the ones I need, or have all 3 on for when we are cooking in the dark!
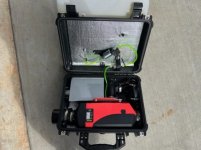
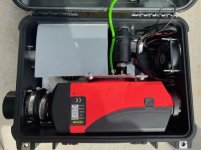
Also, not really rear drawer system-related, but I finally went ahead and built my own portable diesel heater. Really had to get away from the Mr. Heater Buddy propane heater. When it got cold we would run it all night and it used about 3lbs of propane in about 7-8 hours, so it was hella uneffiecnet. But the main drawback was just how much condensation was left in the RTT when we woke up. I wanted to avoid mildew and mold, so the propane heater had to go!
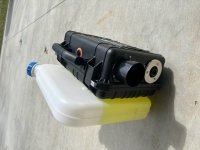
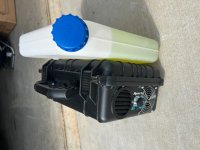
This was built using an Apache 4800 case from Harbor Freight, a Vevor 2kw diesel heater, and some 3D printed parts. Turned out pretty awesome. Tested it out overnight attached to my Bluetti 700. Barley uses 15% battery in about 8 hours, and it SIPS fuel. I'm betting we could go 8-10 nights without having to refuel. So no need to carry extra diesel which is nice.
This build didn't turn out quite how I wanted, but maybe a v.2 will happen over the summer. I wanted it to look much more polished, but alas I am impatient and rushed a lot of things.
Things I would redo:
Overall, I'm happy with how it turned out, now we just need to get out and use it a bit more!!
Anyways, onto the good stuff, pictures!
(I'm not posting all the "in progress pics, if people really want to see it, I'll do a full build thread."
I wanted to build it around our new Iceco fridge (which is AWESOME). I used their regular slide and converted it into a tilting slide with some limiting straps. It's pretty simple, but it works great and didn't cost a fortune as tilting slides tend to!
Another staple feature was the kitchen. I did a built-in propane stove with a "pantry" and a custom cutting board. There was a ton of extra room under the stove, so I built another smaller drawer and am going to use it as a cooking utensils/spice storage space. The propane hose has a quick connect for easy attachment and pops out right under the drawer!
The main storage compartment has SO MUCH room, more than I anticipated actually. All out of gear fits in there, and more. I have a ton of stuff thrown in right now just to get a feel for how much I can realistically shove in there.
Dividers or storage bins will be absolutely necessary though, stuff gets buried easily since they are so deep and long.
On the top and inside the drawers. I put the durable rubber garage flooring. I installed a LED light bar on the inside driver ceiling to light up the entire storage area and 2 on the hatch to provide area lighting. They are BRIGHT! Much brighter than I thought. They all have their own individual switches built-in, so it's easy to just use the ones I need, or have all 3 on for when we are cooking in the dark!
Also, not really rear drawer system-related, but I finally went ahead and built my own portable diesel heater. Really had to get away from the Mr. Heater Buddy propane heater. When it got cold we would run it all night and it used about 3lbs of propane in about 7-8 hours, so it was hella uneffiecnet. But the main drawback was just how much condensation was left in the RTT when we woke up. I wanted to avoid mildew and mold, so the propane heater had to go!
This was built using an Apache 4800 case from Harbor Freight, a Vevor 2kw diesel heater, and some 3D printed parts. Turned out pretty awesome. Tested it out overnight attached to my Bluetti 700. Barley uses 15% battery in about 8 hours, and it SIPS fuel. I'm betting we could go 8-10 nights without having to refuel. So no need to carry extra diesel which is nice.
This build didn't turn out quite how I wanted, but maybe a v.2 will happen over the summer. I wanted it to look much more polished, but alas I am impatient and rushed a lot of things.
Things I would redo:
- Cut everything on a table saw! Guess that's my excuse to finally buy one.
- Build all the boxes with dovetail joints.
- Spend more time sanding each panel after the final coat of poly. They are still rough in some spots.
- Re-do the drawer faces completely. Not in love with them.
- Re-do the "utensil" drawer completely.
- Attach it to the base better and install more support. Which I will be doing here shortly because the rattles are driving me nuts!
- Sacrifice some of the passenger side drawer to install a LiPo battery in the way back, so I don't have to plug the fridge into my Bluetti every time I turn off the ignition.
Overall, I'm happy with how it turned out, now we just need to get out and use it a bit more!!
Anyways, onto the good stuff, pictures!
(I'm not posting all the "in progress pics, if people really want to see it, I'll do a full build thread."