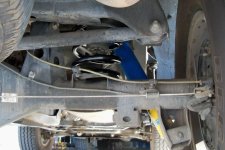
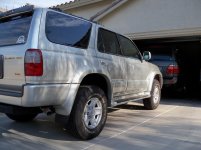
Got OME 906 coils and Bilsteins installed today

Phx994Runner

New member
My son and I braved the 110 degree day here in Phoenix this morning and tackled the rear of his 99 4Runner Limited 4x4. A couple of weeks back I had stock replacement Moog 81041 coils and Pro-Comp ES3000's put on (garage did it), but although the ride was better it was still too soft. Ride height was about 1/4" higher than the original ride.

Anyway, took about 2hours with a floor jack and two 6-ton jack stands. Not too bad. Tricky part was getting the Moog's out - with the frame on jack stands and the floor jack on the rear diff, dropped the rear axle as far as we could before stretching the brake hose in the center. Then we used a bottle jack on the opposite side to drop the other side to pop the spring out. That was the cat's meow!

Going to try posting my first couple of pics here below...

Oh, rears went from 35 1/8" to just over 36 1/2" from floor to fender lip (thru center cap). BEST NEWS of all is no bottoming out on parking lot speed bumps now! :guitar3:
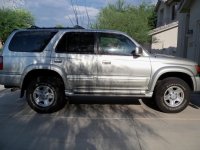
 

Attachments

  • 101_0291.jpg
    101_0291.jpg
    133.7 KB · Views: 4,042
Register to hide this ad
Nice Job!! Especially in that heat..

That combination of coils with the Bilstein HDs will give you exceptional handling. Do you have the Bilstein HDs on the front as well??

If not I recommend putting the same shocks on the front as well.
 
When we did the Moogs and Pro-Comps in the rear a couple weeks ago, we had the front done also. Up front are Moog 81088 coils and Pro-Comp ES9000 gas struts. The front handles well - just like the rear, the Moogs gave a slight (1/8 - 1/4") height gain from the stock 99 coils after a couple of days of driving around.

Overall what a difference in the ride from when we got it with the original suspension components at 189K to now. I have no idea how the original owner still drove it that way.

Forgot to mention credit to this link someone gave me on another post - I followed the Rear instructions which helped tremendously:
OME Suspension Install on 4Runner - Toyota 120 Platforms Forum
 
My buddy who has a 4gen 4runner found it and I wish I would have had that post when I did mine a couple of years ago. While it is an intuitive process, the visual aids would have helped.

For 189K, that may be the cleanest undercarriage I have seen. I guess it pays to live in the desert. Just keep an eye on the LBJs if they are original and the radiator, otherwise enjoy many more miles on that rig.
 
Can you get the measurements for the center of the hub to the fender (the metal fender unde the flare)? I don't have the flares and I'd like to see where I'll be at if I install these.

The measurements you gave basically include the tire you have on at whatever PSI you're running, so the ground to fender measurement doesn't really apply to everyone's setup, whereas the hub to fender is universal for all as long as it's to the metal part of the fender.

Looks good man!
 
My buddy who has a 4gen 4runner found it and I wish I would have had that post when I did mine a couple of years ago. While it is an intuitive process, the visual aids would have helped.

For 189K, that may be the cleanest undercarriage I have seen. I guess it pays to live in the desert. Just keep an eye on the LBJs if they are original and the radiator, otherwise enjoy many more miles on that rig.

What am I looking for on the LBJ's to indicate they may fail?

Yeah, this was a one-owner Phoenix 4Runner that looks like it was never taken off-road. Very clean underneath, no rust, no dings, no errors ;)
 
Dezert4Runner - I'll take a set of measurements from the center hub both front and back...once it cools down below 105 degrees later this evening.
 
To check the LBJ visually, look for any leakage or tears around the boot.

To really get an accurate account, jack the 4runner up to where the front tires are barely off the ground, take the flat or tapered end of the pry bar and stick it under the tire and try to wiggle or pry the tire up. If you feel resistance, the BJ is good. Being a small guy, this works for me. If you have long arms, physically grasp or hug the tire and try and move it up and down. Again, if resistance is met, then the joint is good. To check outer tie rods, grasp the tire at 9 and 3 o'clock, and try to wiggle it. If plenty of resistance, then they are OK.

The 906s will probably drop close to 1/2" over the period of a year, and then they are settled.
 
Can you get the measurements for the center of the hub to the fender (the metal fender unde the flare)? I don't have the flares and I'd like to see where I'll be at if I install these.

The measurements you gave basically include the tire you have on at whatever PSI you're running, so the ground to fender measurement doesn't really apply to everyone's setup, whereas the hub to fender is universal for all as long as it's to the metal part of the fender.

Ok - from the approx. center of the rear wheel hub to the metal fender (which is maybe 1/8" higher than the outer flare) is: 22 1/2"
 
Ok - from the approx. center of the rear wheel hub to the metal fender (which is maybe 1/8" higher than the outer flare) is: 22 1/2"

Sweet! I'm measuring 20" rear pass side and 19 1/2" driver's side, so these would give me quite a bit with the worn out springs I've currently got. Thanks alot for the measurements.
 

Members online

Forum statistics

Threads
278,316
Messages
3,554,111
Members
248,016
Latest member
Advally Service

Trending content

Back
Top