Rear storage box.

Zeke588

New member
Hey y'all, just a couple weeks ago I went on a quick day trip wheeling. Normally I take my dogs, however on this trip i had too much gear in the back, didnt want the dogs to be bouncing around on it and making it dirty and what not (had kids clothes, and baby blankets, and it was snowing. Last thing i need is mom to be mad that all the baby's blankets are wet.)

So I set out to find a rear storage system. I didnt want a full size rear drawer system, I lose too much height for my dogs to be back there, and just cant justify it yet. I also wanted something that I could remove fairly easily in the event that i need the full size rear cargo area.

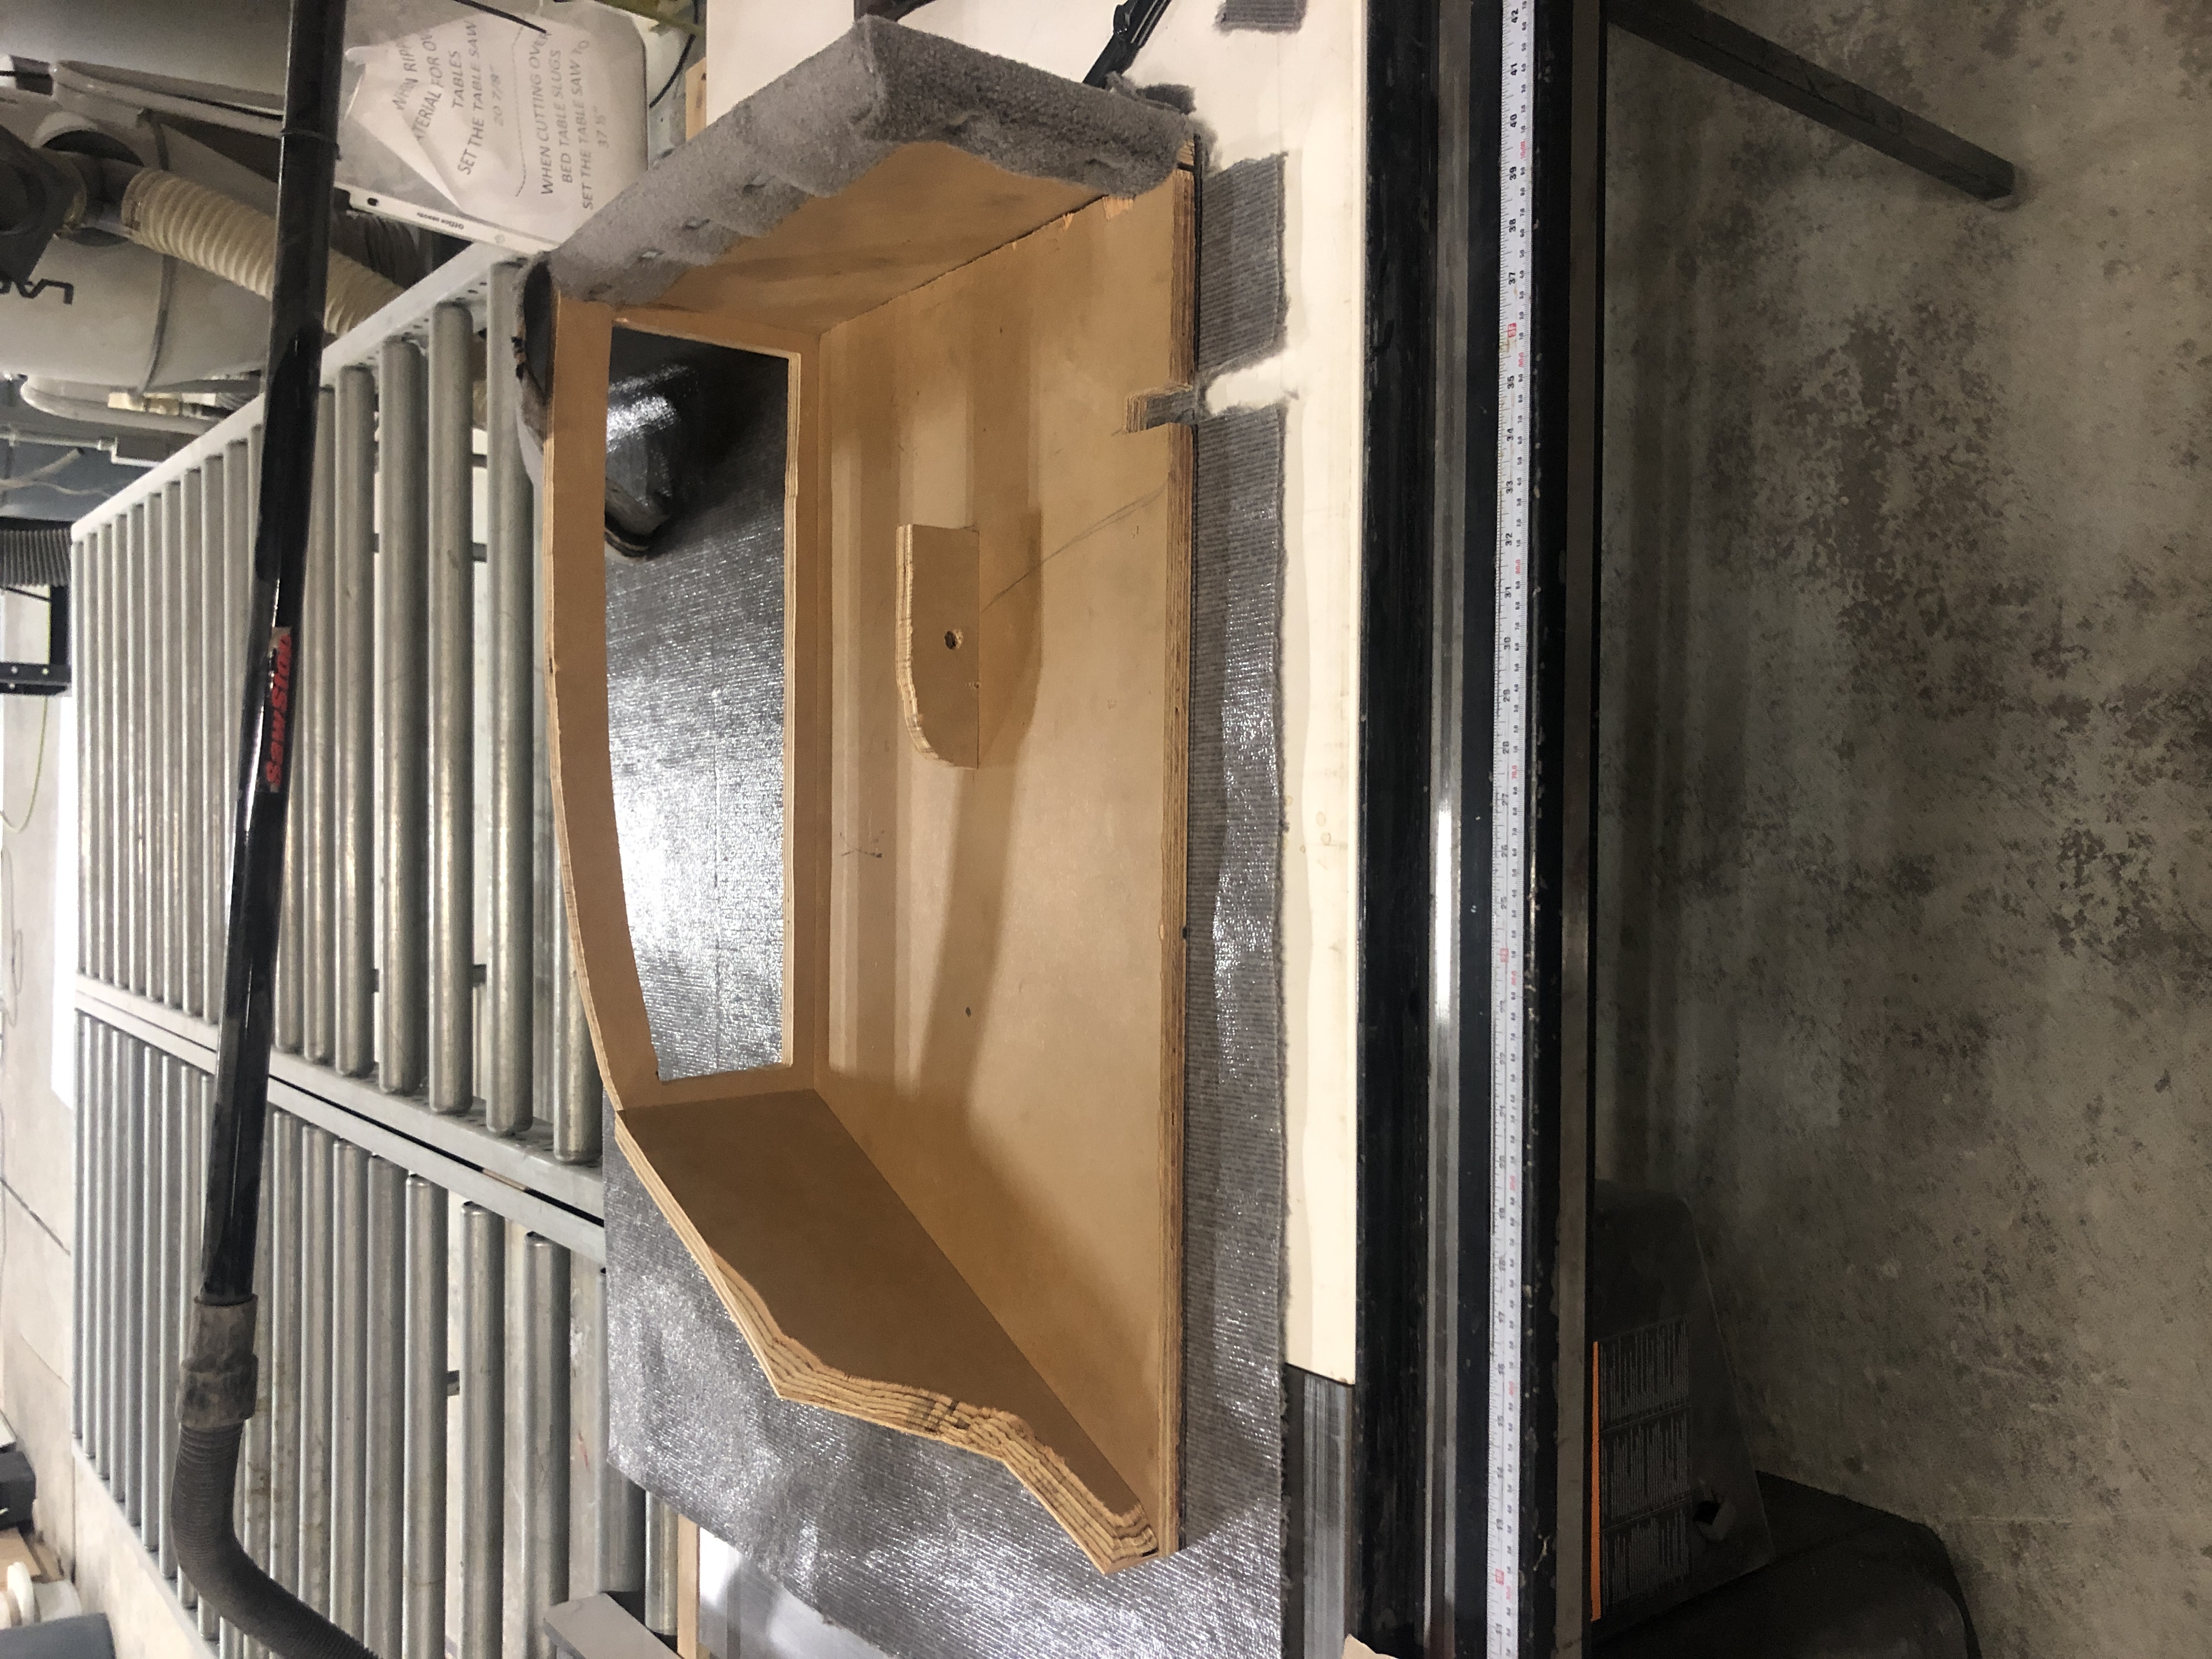
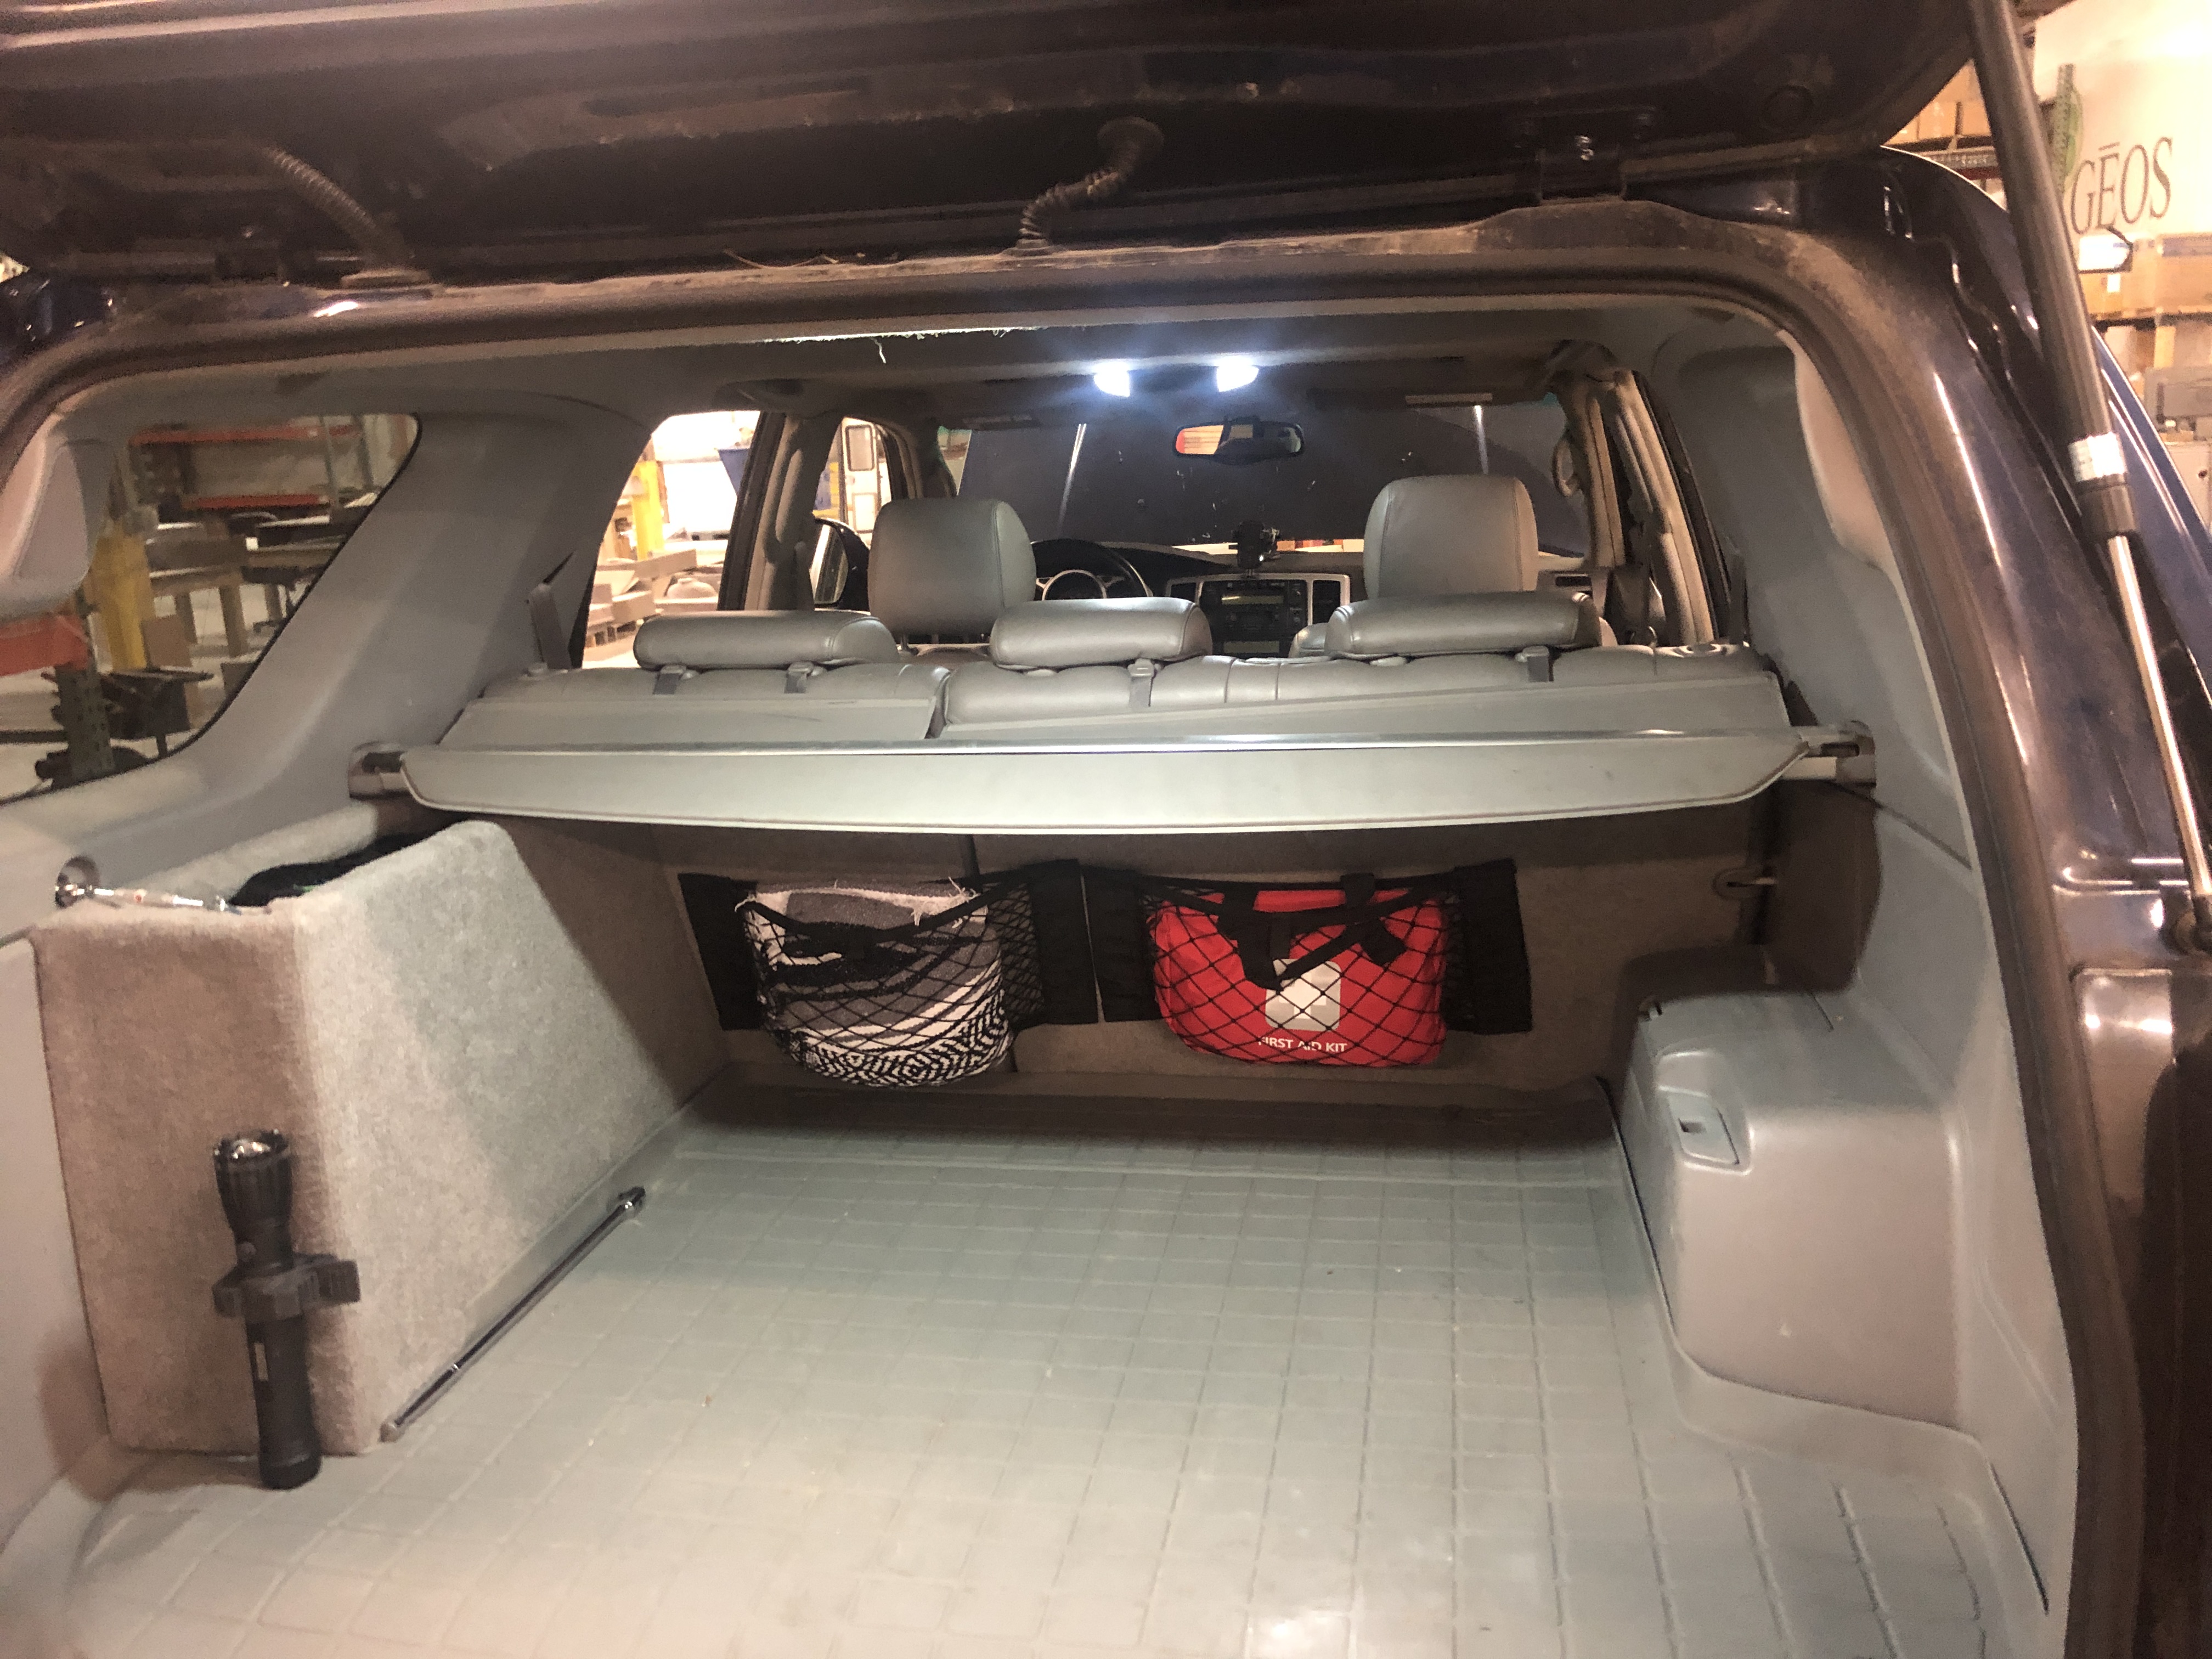
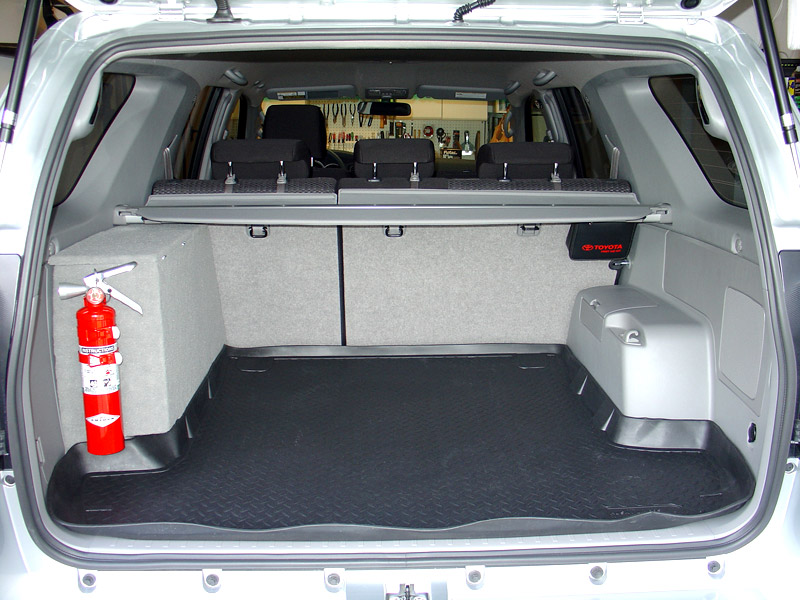
So i came across a thread by where they built a box maximizing the void space above the wheel well. So Im here to show you guys what I built for storage. Keep in mind that it is not finished and that is it just mocked up in the back of the truck..

Ive made the cuts of wood that go against the panel contoured too match the curve of the truck. I still need to carpet it (Home Depot has a pretty good selection of carpet. i happened to find some that is tan to match the interior of my truck.
 

Attachments

  • 74419FD5-9F2F-4520-9813-6489B503C8C0.jpg
    74419FD5-9F2F-4520-9813-6489B503C8C0.jpg
    136.6 KB · Views: 1,900
Register to hide this ad
I've made the cuts of wood that go against the panel contoured too match the curve of the truck. I still need to carpet it (Home Depot has a pretty good selection of carpet. I happened to find some that is tan to match the interior of my truck.

I apologize for the poor picture quality as well.

as you can see it takes up very minimal space in the actual cargo area, it utilizes the "dead space" above the wheel well.

I used wood glue and 1 inch screws too hold it together, and I will say that the glue is holding up better than i thought. (the box has taken a few tumbles out of the truck while i was working on it.)

In total this box has cost me about 30 dollars. I used 1/2 inch OSB wood that I had laying around in the garage, got most my hardware, carpet, and glue at home depot.

Total time invested is probably 3-4 hours and counting. I work 8-5 in Montana. Which means right now i only have about an hour after work before it gets too cold that my hands stop working.

I will have an update on the box hopefully tomorrow morning or Wednesday. I'm planning on having it finished completely before the weekend, so that I can take it out on a trail and beat it up, too see how it holds up.

I also plan on having a shorter version done in two weeks. A buddy of mine has an Orangeboxx panel on the way and from the looks of it it may be too tall too fit both the boxx and the panel.
 
Hey! That looks familiar!

It’s looking good, glad you’re making a thread on it.
Can’t wait to get them done and test em out!
 
I recently did mine, you’ll love it.

61.JPG


62.JPG


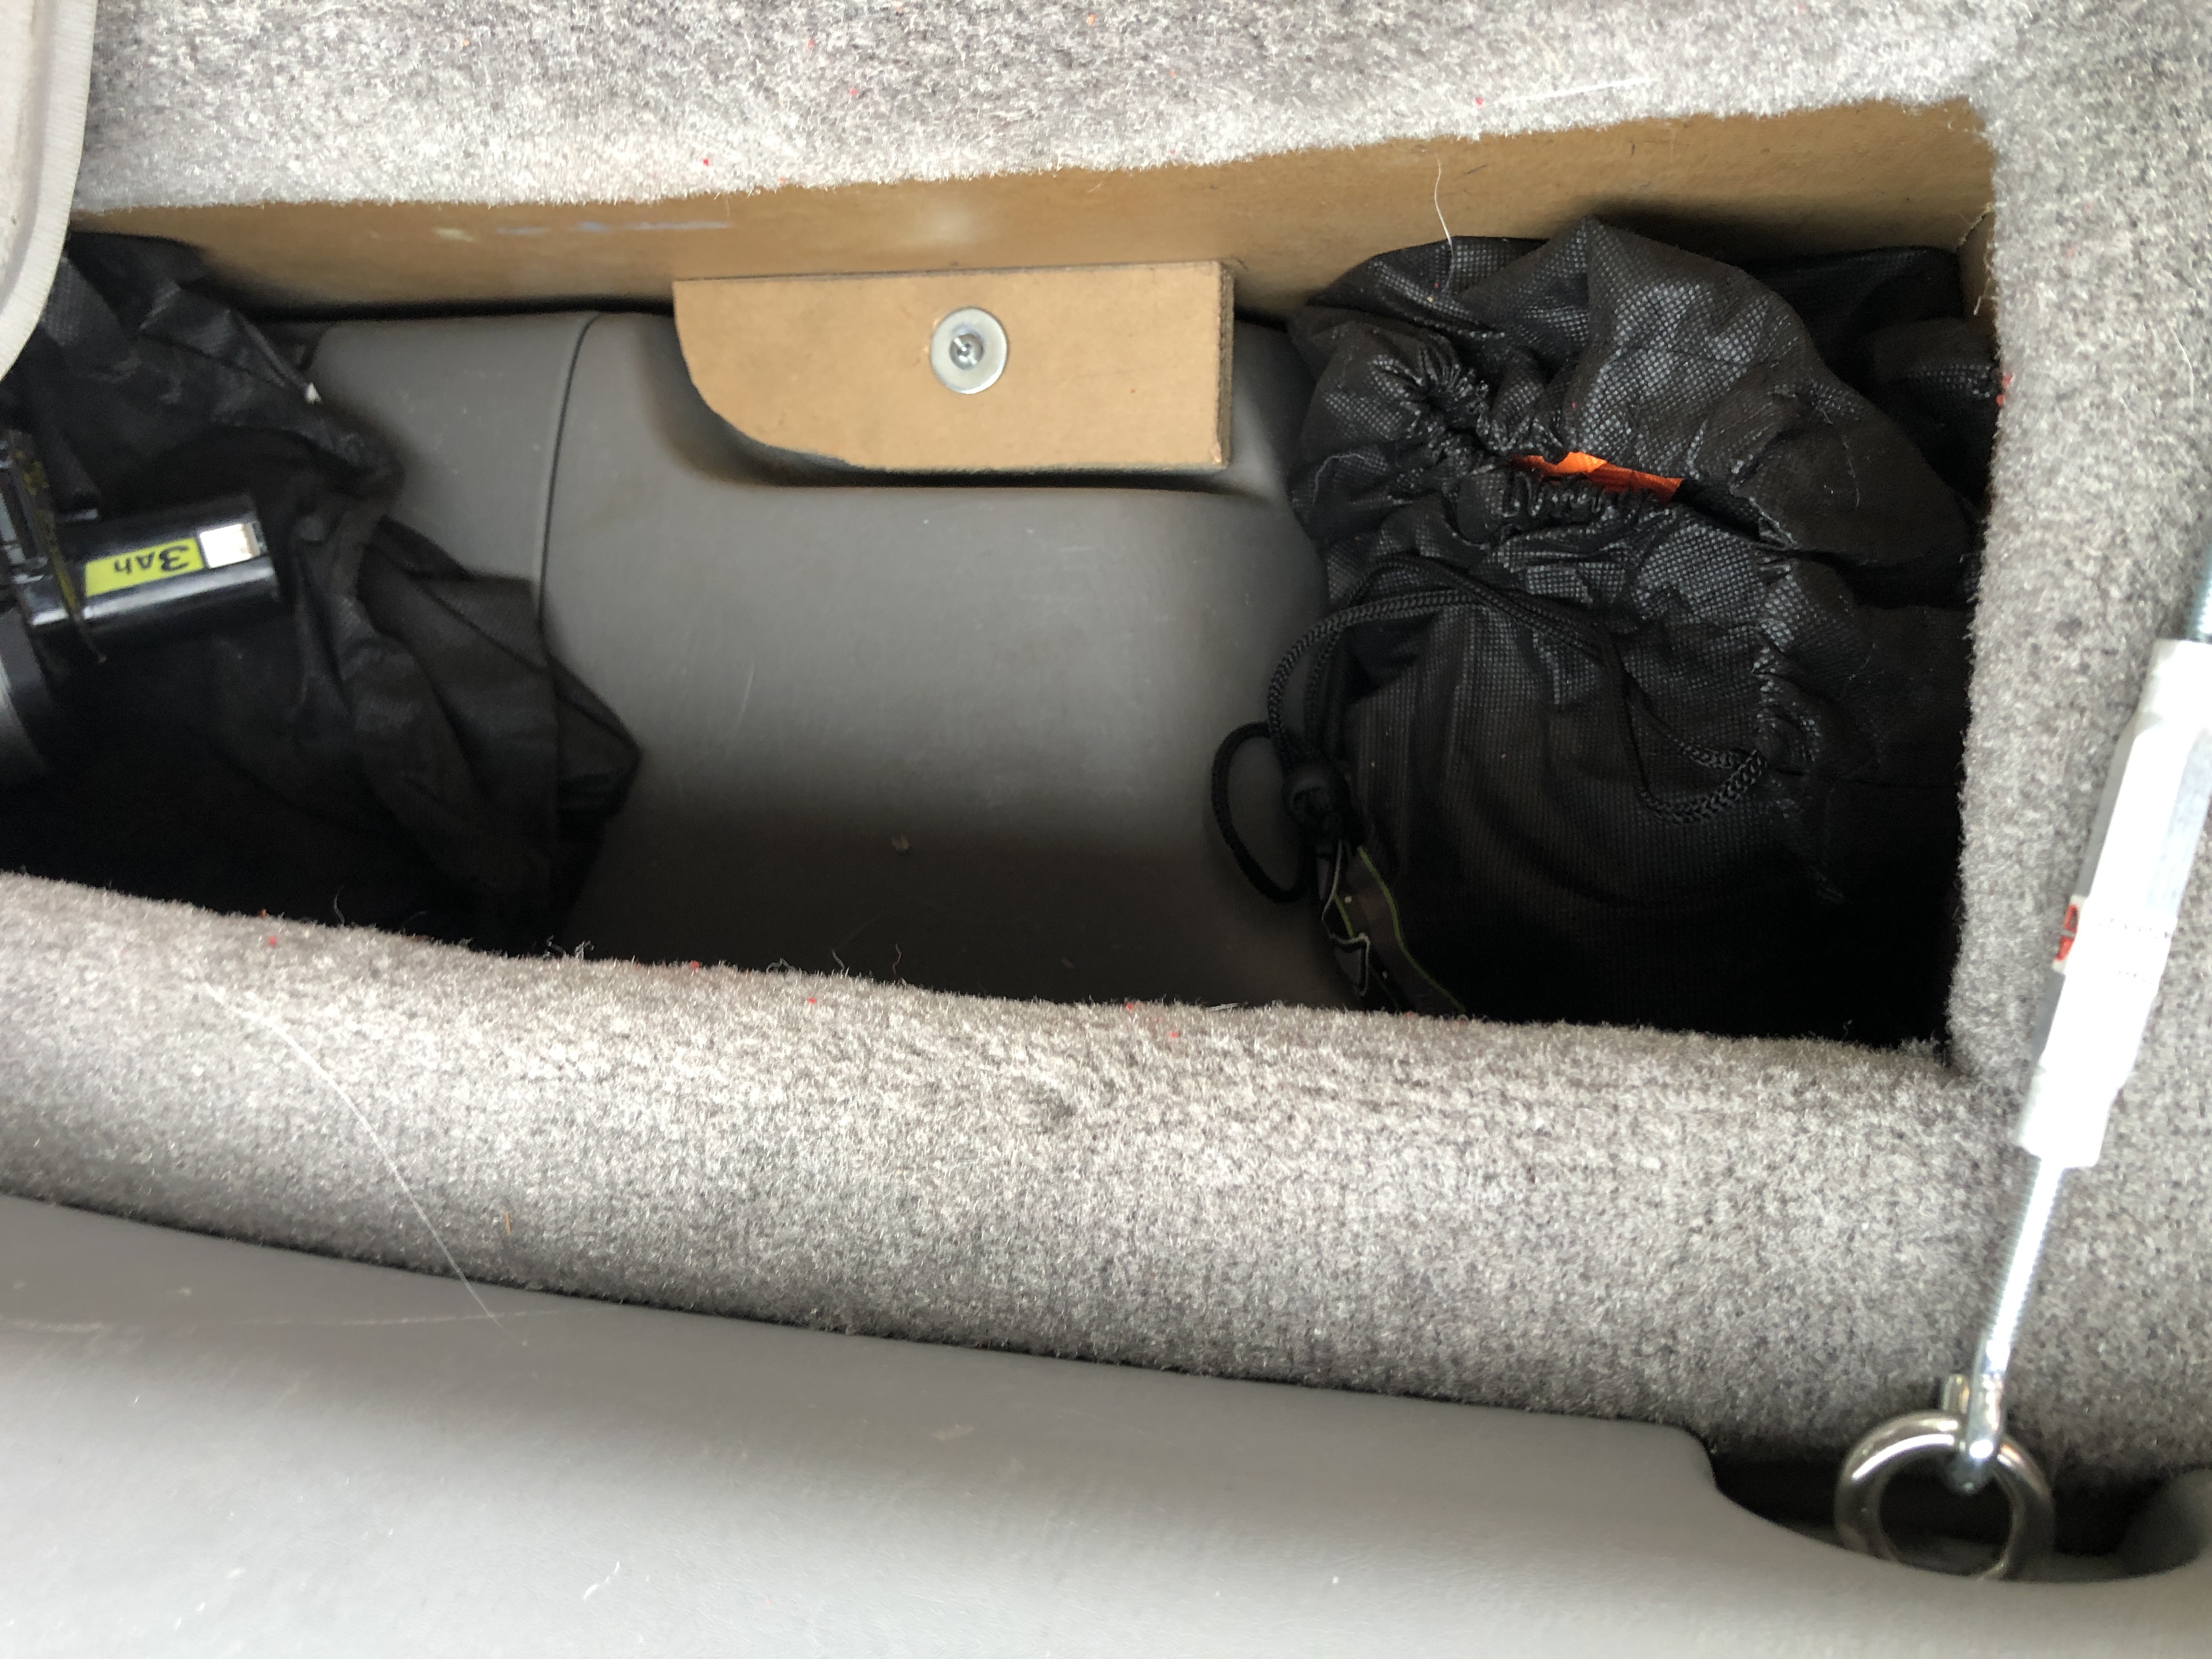
I put it that little wood nub so I could bolt to the lock point of the 2 tier cargo system thing.
 
I recently did mine, you’ll love it.

61.JPG


62.JPG


I put it that little wood nub so I could bolt to the lock point of the 2 tier cargo system thing.

Nice! Does it rattle around? Or does the lock hold it in place? Mines getting carpeted tonight and will be installed tomorrow night hopefully.
 
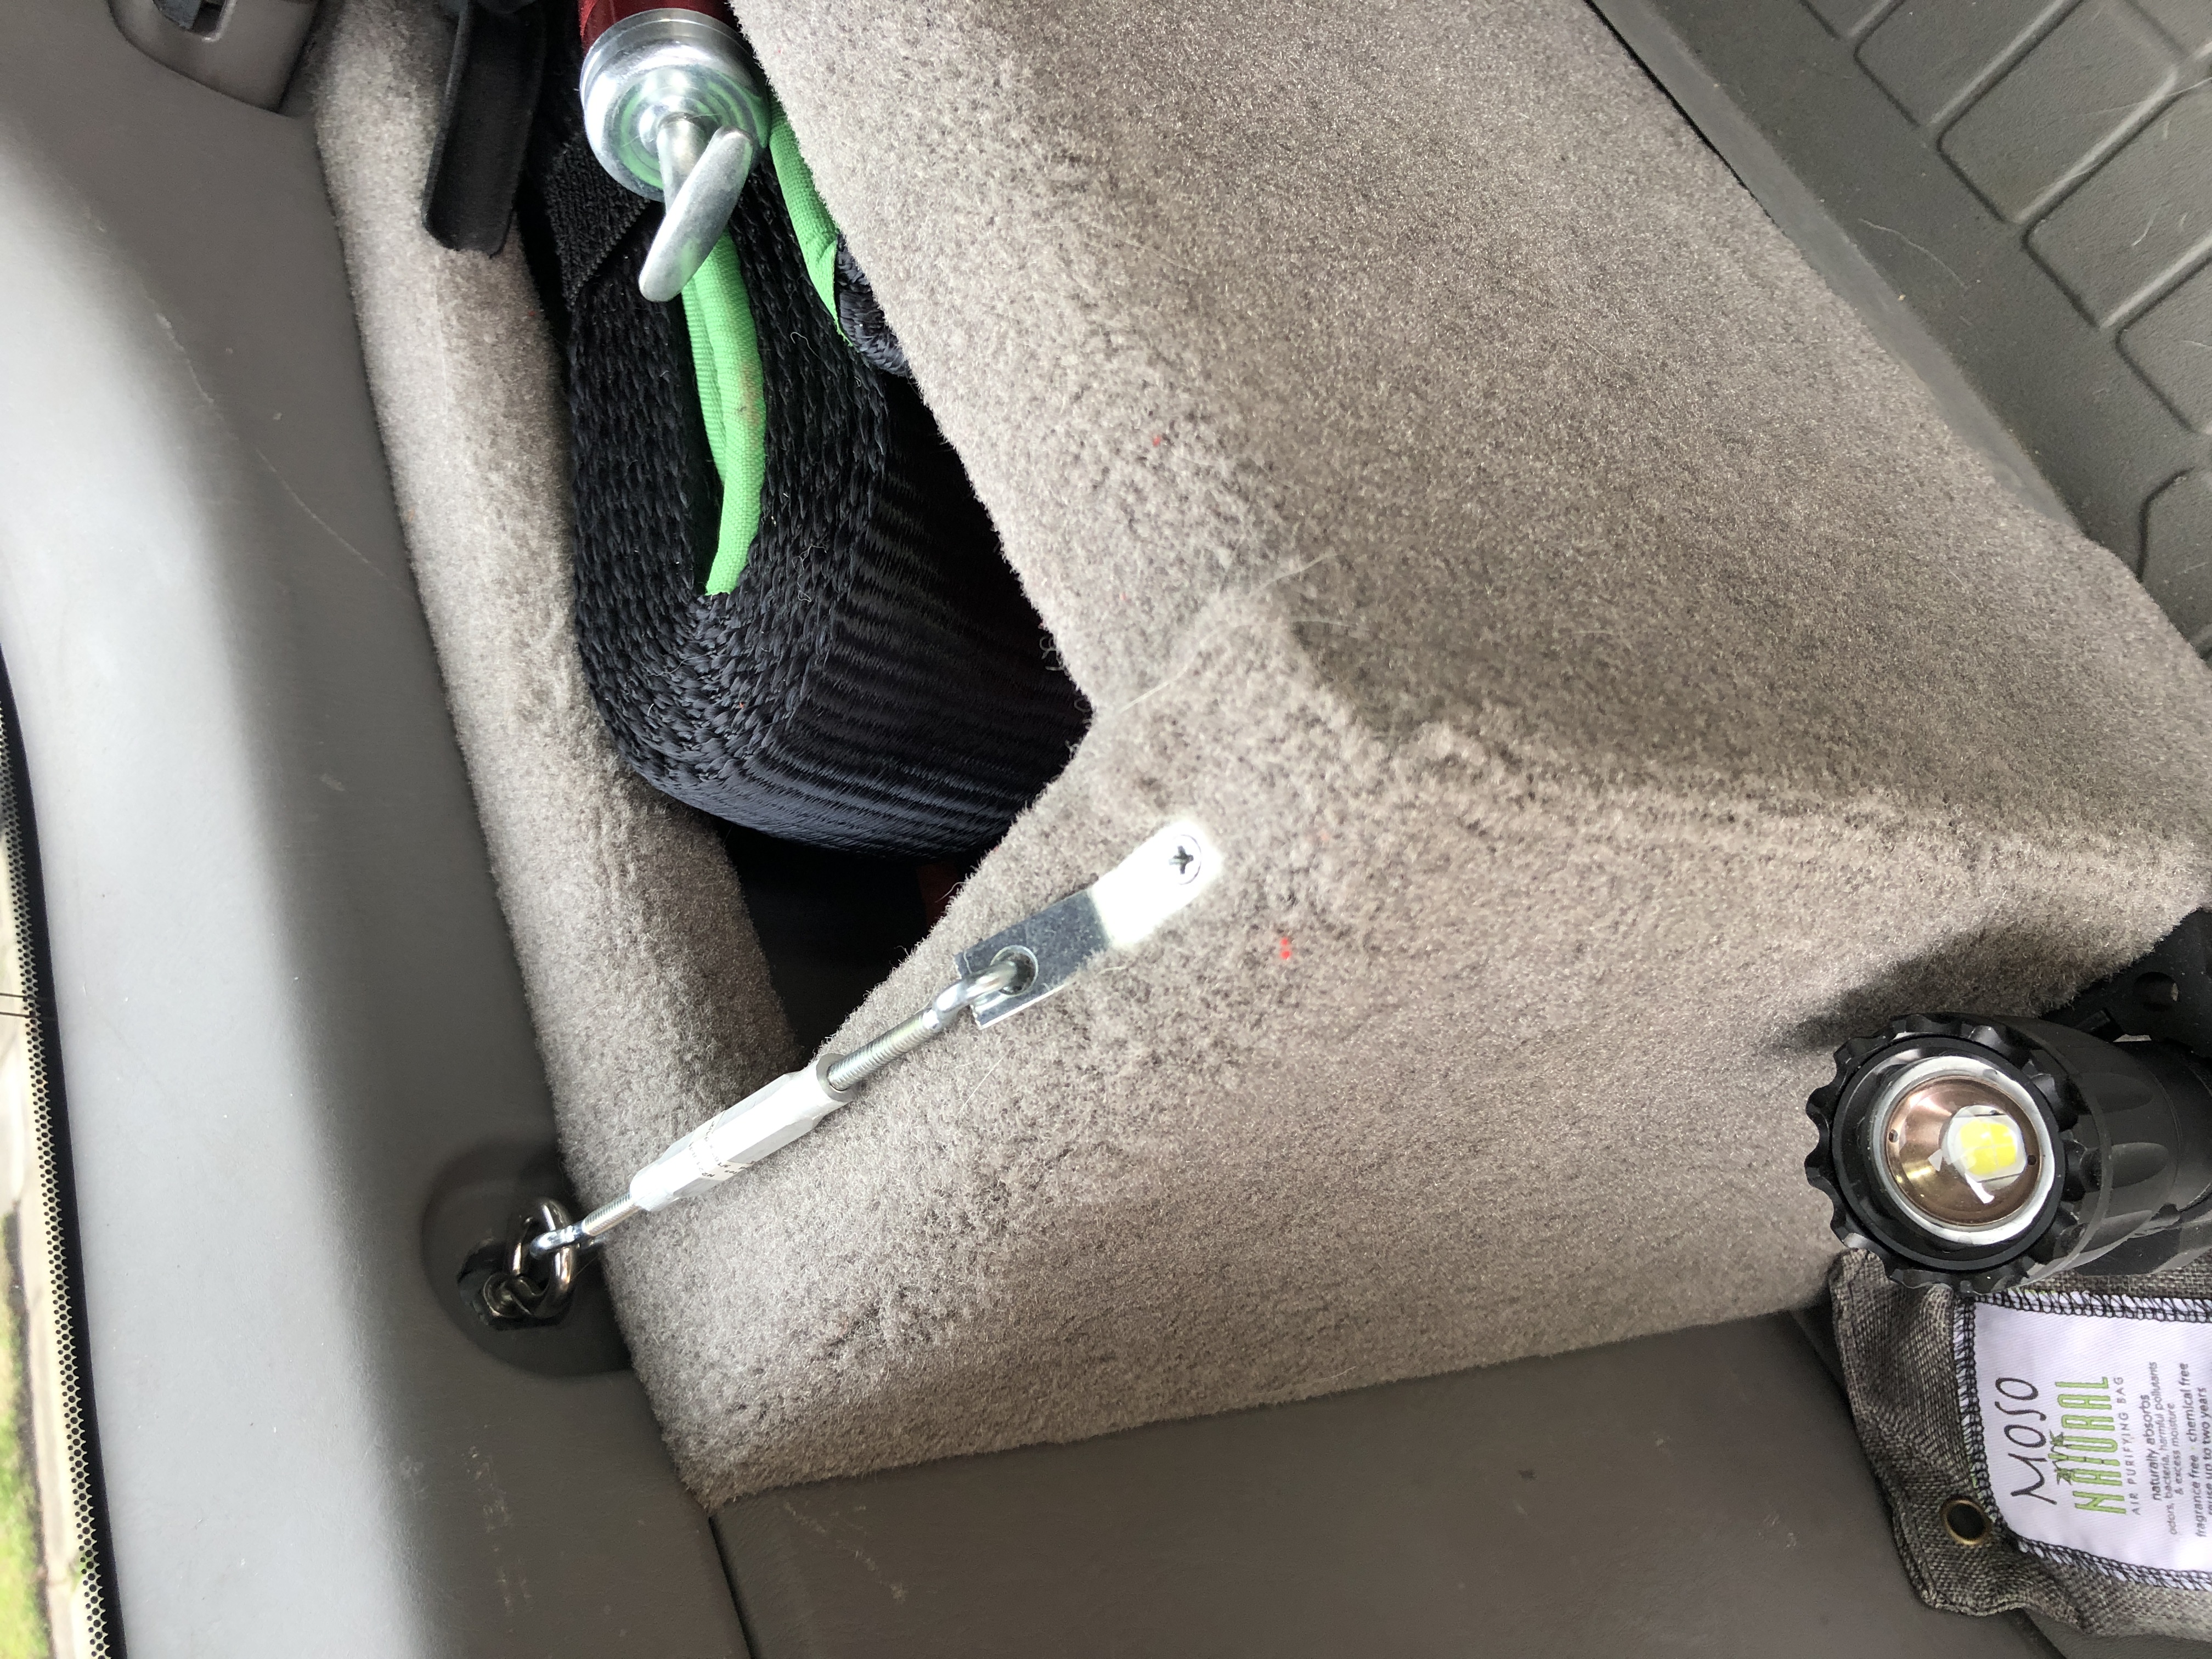
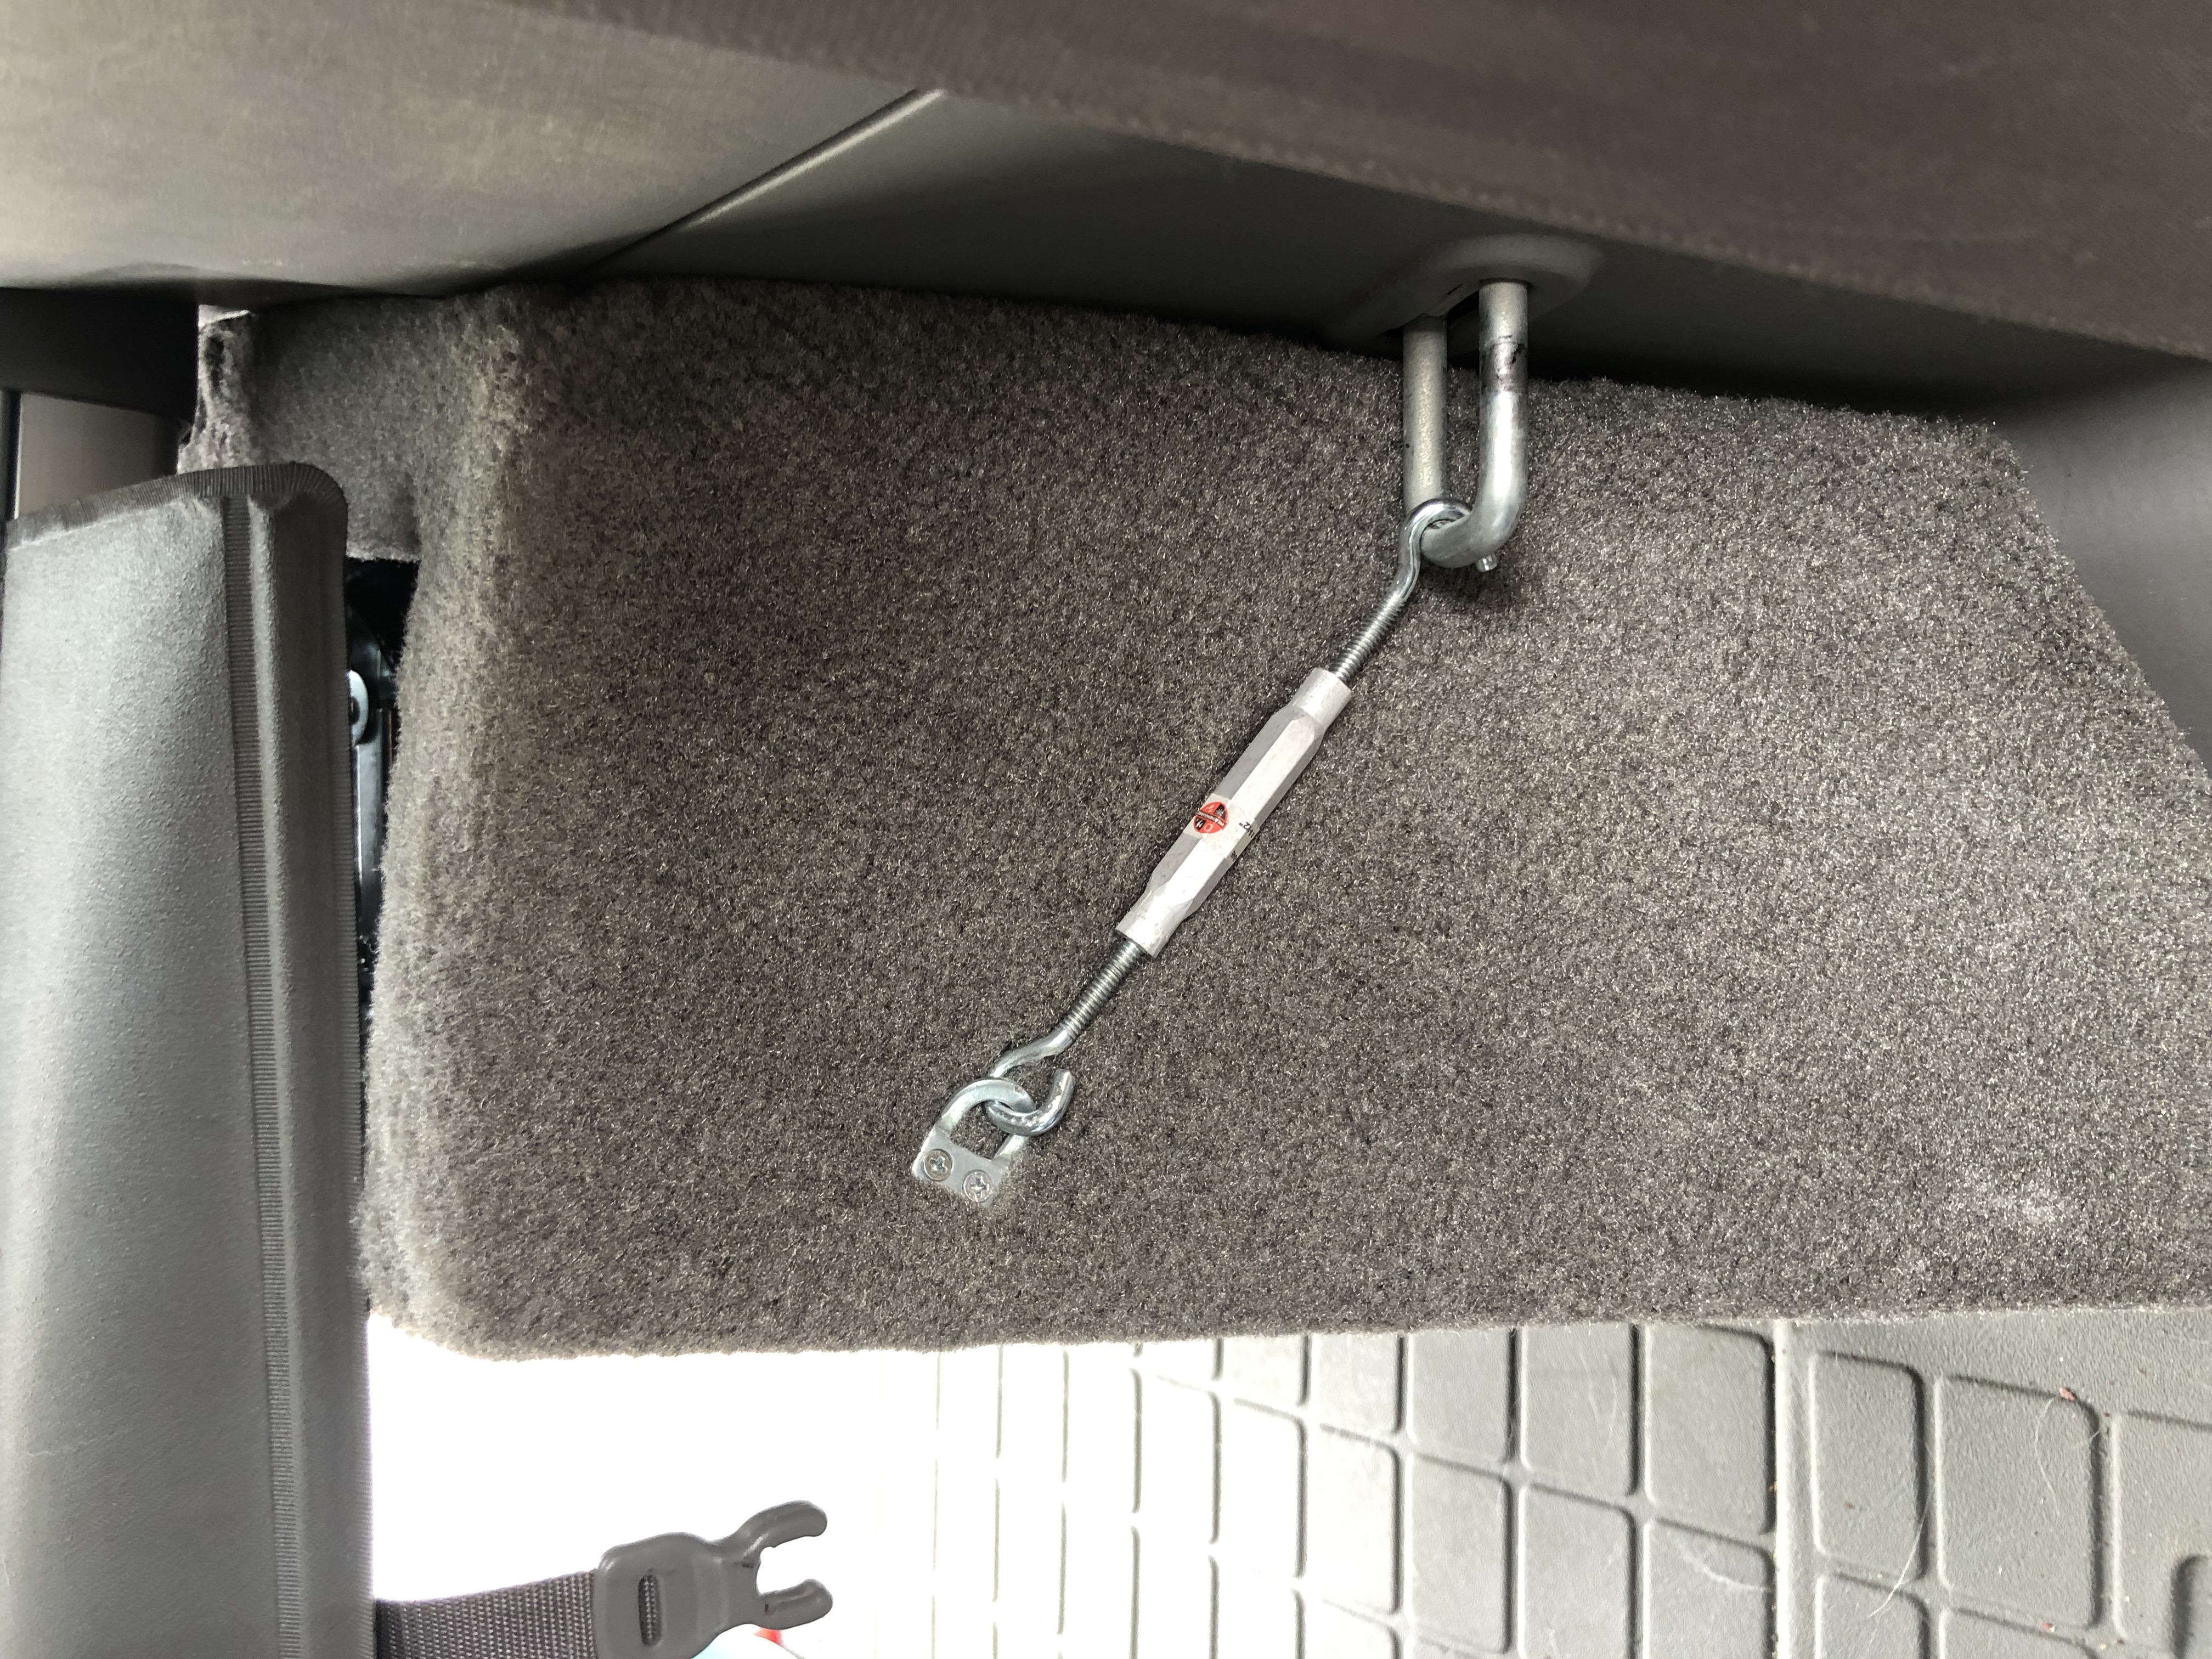
It did but I locked it in with 2 turnbuckles and that bolt spot so it's attached in 3 spots. Then I just made sure to stack soft/hard materials separated by each other in the box and it's silent. No top on mine because I just wanted a "stuff box" to throw battery jumper back, straps, jumper cables, gloves, etc. I don't ever intend to sell this vehicle but if I did I made it so that the box can be removed and there are no holes or modifications to the interior.
 
It did but I locked it in with 2 turnbuckles and that bolt spot so it's attached in 3 spots. Then I just made sure to stack soft/hard materials separated by each other in the box and it's silent. No top on mine because I just wanted a "stuff box" to throw battery jumper back, straps, jumper cables, gloves, etc. I don't ever intend to sell this vehicle but if I did I made it so that the box can be removed and there are no holes or modifications to the interior.

Would you mind showing me were you mounted your hardware? I was planning on using a turn buckle on the side to the factory shackle point but i like the clean look like yours!
 
I recently did mine, you’ll love it.

61.JPG


62.JPG


I put it that little wood nub so I could bolt to the lock point of the 2 tier cargo system thing.

I really like this option for a box! simple and wouldn't interfere with sleeping/cargo area. Keep any of the measurements?
 
I really like this option for a box! simple and wouldn't interfere with sleeping/cargo area. Keep any of the measurements?
I have a few. Its kind of hard to match the curve of the side panel in measurements. Definitely need a jig saw too cut the round parts out.
 
I have a few. Its kind of hard to match the curve of the side panel in measurements. Definitely need a jig saw too cut the round parts out.

Did you just make a mockup out of cardboard or something and transfer to plywood until it fit right?

Also, where'd you find that net on the back of the back seat? Looks like its velcro'd?
 
Did you just make a mockup out of cardboard or something and transfer to plywood until it fit right?

Also, where'd you find that net on the back of the back seat? Looks like its velcro'd?

Cardboard. Lots of cardboard. Used it to get a rough idea for an outline and then just cut accordingly.
 
I got my inspiration from your site!

Mine too!

I like the way you mounted your hardware to the box. My only issue is I can't mount to the top of the box like you did because I have a lid. Also my mounting point is going to have to be in a different area.
 
Been too cold too work on the storage box in the car. I have it inside and I'm upholstering it. Headed to ace to get some hardware for mounting and it should be good to go!
 
Finally got the box in! All I need to finish is adding a bracket too hold the other end of the turnbuckle. Now that I have the extra storage I don't really know what to put in there lol. I have a tire repair kit, viair tire inflator, a few ratchet straps with bungees, small tow strap, and a small set of tools. I still have the space for a few more things if I organize it too. right now everything is kind of just thrown in there. When I get the chance I will dump all the stuff I keep in there and lay it out so you can get an idea of how much stuff is in there.
 

Attachments

  • DAB2BBD9-1A8E-4749-BB46-5DBD01B553B8.jpg
    DAB2BBD9-1A8E-4749-BB46-5DBD01B553B8.jpg
    134.4 KB · Views: 436
Shout out to [MENTION=212467]Zeke588[/MENTION] for helping out on this.

He did the measuring and fitting on his box and made templates of each piece. I have a storage panel on that window so I couldn’t have a box as tall as his. We got together and adjusted a few measurements due to my orange boxx panel and cut them out.

From there I took the pieces home and have been assembling, upholstering, etc this week after work as I have a free hour here and there.

Just need to finish up the lid now, but it’s turning out pretty good so far. It definitely adds some seriously needed storage. Plan on having some basics back there, jumper cables, viair compressor, gloves, ratchet straps, basic tool set, all crap that just sits in the back of the 4Runner otherwise.

aCuf8bg.jpg


JfmJd8W.jpg
 

Members online

Forum statistics

Threads
278,306
Messages
3,554,045
Members
248,016
Latest member
Advally Service

Trending content

Back
Top