

AZ4
New member
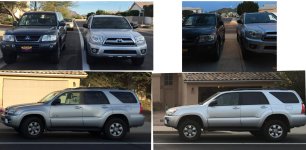
This past Saturday, a buddy of mine and I installed a Sonoran Steel lift kit with Camburg (ball joint) UCAs on my 4x4 2007 4Runner. This was my first suspension install and my buddy’s second (he put OME shocks & coils on his Montero). We started at 8am and finished at 5:30pm. We had a Factory Service Manual and mostly the right tools for the job. This was our experience.
Front Prep
Jacked up the front end one side at a time. There doesn't seem to be a good place to jack up the front like there is in the rear (differential pumpkin) so we did it one at a time using the frame. We placed jack stands, chocked the rear tires, removed the front tires, and put a tire under the engine for safety in case of jackstand slippage or failure. We are paranoid.
Front Disassembly
Front Assembly
Rear Prep
New Rear Springs
Track bar
Adjusted track bar to match the length of the old one, installed and adjusted it under the truck.
Finale
I immediately took it for a test drive and *loved* the new ride. The old shocks were pretty much done at 120,000 miles. The next day I went out to Bulldog Canyon in AZ and had some fun. The vehicle handles great and had no problems.
What I would have done differently
Notes
The rear was more difficult than I expected. I was hesitant to stand on the rear axel and flex it because it looked like some brake lines were under tension, but it all seems to have worked out. (The FSM does state to disconnect the brake lines).
From what I understand, you do not *need* to install the UCAs with this truck and this lift, but I figured since I was in there anyway, I might as well do so and ensure myself a good alignment and good ride. I was steered away from uni-ball joints, and from what I have read about maintenance, I am glad I went what what I did.
Doing the install myself did cost me a Saturday as well as cause me some panic, but I did save some money and I did learn a lot about suspensions and my truck. Totally worth it.
The Bilistein 5100s came with no diagrams or instructions. The kit instruction wording was correct (it did say to remove the rear sway bar, I must have missed that), but the instructions would have benefited from a few diagrams or an explicit call out of the order of the hardware onto the shocks. I think the kit directions are written for somebody who knows what they are doing, not for first timers and overthinkers like me.
To his immense credit, Steve fielded our texts and phonecalls and cleared up all our questions (on a Saturday, no less). I was lucky he was available; my daily driver was disassembled in the driveway and I was near panic at some points.
In summary, I am very happy with the kit, and very appreciative of [MENTION=1795]sschaefer3[/MENTION] for his patience. I can’t recommend Sonoran Steel enough.
Front Prep
Jacked up the front end one side at a time. There doesn't seem to be a good place to jack up the front like there is in the rear (differential pumpkin) so we did it one at a time using the frame. We placed jack stands, chocked the rear tires, removed the front tires, and put a tire under the engine for safety in case of jackstand slippage or failure. We are paranoid.
Front Disassembly
- Removed the swaybar links from both sides, rotated it up and out of the way. Removed the lower nut from the shock, and the 3 top nuts. Two of the 3 top nuts were easy to access from the wheel well and remove, but the 3rd one is inside the engine bay and required some gymnastics with a short spanner wrench, penetrating lube, and severe muscling to loosen. It was very difficult to get the right angle on this.
- Completely removed the skid control sensing wire bracket from the UCA (the Camburg comes with its own mounting hardware for this line). Removed the brake line bracket and tucked it back in the engine bay for additional clearance. Removed the cotter pin and castle nut from the ball joint, gently tapped the ball joint out of the steering knuckle. Removed the bolt holding in the arm. This required lifting the battery out of the way on the driver’s side. On the passenger’s side, removing the bolt required navigating some hoses, but nothing needed to be removed. Removed the upper control arms. Removed the coilovers.
- Disassembled the old coilovers. We used a rental strut spring compressor from O’Reily’s to disassemble the front coil easily. This needed to be done to re-use the top plate/upper strut sub assembly to use with the new coilovers.
Front Assembly
- Assembled the new coilovers. The same compressor had zero chance at the mega progressive TRD springs included with the kit. We worked on one for over an hour, and all we accomplished was watching the compressor bolt bend against the might of the coil. So we called a local shop and paid $60 to have them assembled. Because we are paranoid, we gave them the relevant FSM pages, the instructions from the lift kit, the passenger’s side coilover for a reference, and the disassembled driver’s side shock with the bushing , cups, and top plate put together in the right order.
- Ate BBQ while coilovers were being assembled by the shop.
- Installed new UCA’s, torqued according to FSM. This was pretty straight forward. The grease that comes with the arms is damn sticky. Wished I had used gloves. Attached speed sensor wire.
- Installed the assembled coilovers. Slid in the new assembly, finger tightened the nuts. Attached brake line, reattached sway bar, torqued everything to spec… except for that damn third top plate bolt. I did the best I could from inside the engine bay without a torque wrench. Lifted the 4runner up enough to put the tires on. Lowered vehicle, torqued lug nuts, marveled at the new height of the front end.
Rear Prep
- Lifted from the rear differential pumpkin, placed jackstands under rear frame, removed rear tires, chocked front tires, placed tire under spare for safety. Realized additional clearance is needed, raised the vehicle some more, placed wood blocks under jackstands
- Removal of old hardware. Removed track/PanHard bar, removed old shocks, removed old springs.
New Rear Springs
- Tried for over an hour to get the new springs in place. No dice, there wasn’t enough clearance between the frame and the axel. Tried using the spring compressor. No dice.
- Called Steve.
- Steve: “Did you detach the rear sway bar?”
- Detached rear sway bar.
- Had buddy stand on the axel and slipped the compressed rear spring with the bump stop cone into place. Released and removed the spring compressor. Repeated on other side.
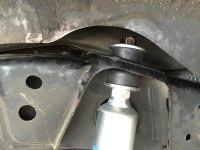
- The rear shock came with new mounting hardware, but no diagrams or instructions. The lift kit instructions said to use it instead of the old Toyota hardware and bushings. This was confusing, because nothing seemed to add up. I called Steve (again) and he told me to place a zinc cup, then a bushing with the nipple facing the frame hole (up) another bushing with the nipple facing the frame hole (down) and then another zinc washer and finally the locking nut.
- Reattached sway bar, retorqued all nuts, jacked the vehicle up and put the tires back on.
Track bar
Adjusted track bar to match the length of the old one, installed and adjusted it under the truck.
Finale
I immediately took it for a test drive and *loved* the new ride. The old shocks were pretty much done at 120,000 miles. The next day I went out to Bulldog Canyon in AZ and had some fun. The vehicle handles great and had no problems.
What I would have done differently
- Read the directions more carefully
- Jacked up the vehicle more initially
- Taken the front coilovers into a shop immediately. Trying assemble them myself was fruitless and probably dangerous. I also chipped the paint on the coils trying to compress them on the concrete driveway.
- Replaced the rear bump stops. The driver’s side looked pretty rotted and beat up for some reason. I might replace them the next time I have the rear tires off.
- Replaced the rear sway bar bushings. They appeared to be slightly rotted. I might also do this the next time I have the rear tires off.
Notes
The rear was more difficult than I expected. I was hesitant to stand on the rear axel and flex it because it looked like some brake lines were under tension, but it all seems to have worked out. (The FSM does state to disconnect the brake lines).
From what I understand, you do not *need* to install the UCAs with this truck and this lift, but I figured since I was in there anyway, I might as well do so and ensure myself a good alignment and good ride. I was steered away from uni-ball joints, and from what I have read about maintenance, I am glad I went what what I did.
Doing the install myself did cost me a Saturday as well as cause me some panic, but I did save some money and I did learn a lot about suspensions and my truck. Totally worth it.
The Bilistein 5100s came with no diagrams or instructions. The kit instruction wording was correct (it did say to remove the rear sway bar, I must have missed that), but the instructions would have benefited from a few diagrams or an explicit call out of the order of the hardware onto the shocks. I think the kit directions are written for somebody who knows what they are doing, not for first timers and overthinkers like me.
To his immense credit, Steve fielded our texts and phonecalls and cleared up all our questions (on a Saturday, no less). I was lucky he was available; my daily driver was disassembled in the driveway and I was near panic at some points.
In summary, I am very happy with the kit, and very appreciative of [MENTION=1795]sschaefer3[/MENTION] for his patience. I can’t recommend Sonoran Steel enough.
Attachments


Last edited:


