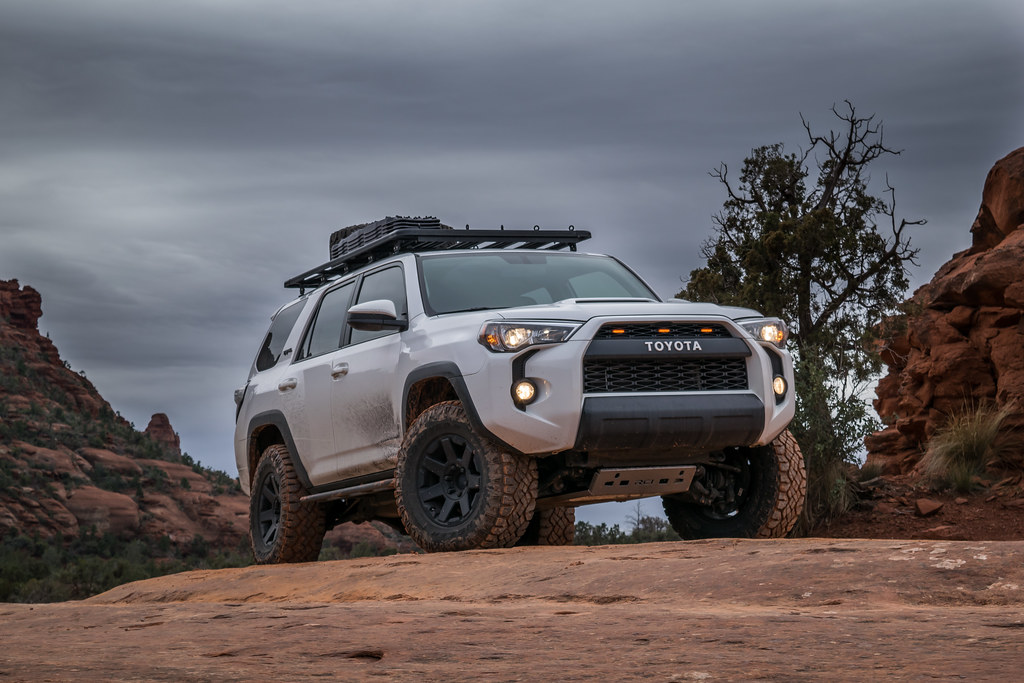
StormRunner Build & Adventure Thread

Not that you're asking for opinions (unless you are), but I vote don't paint the skids. I agree that they look really good as is...
:decision:

Agreed. I left my RCI aluminum raw as it looks good already and will "weather" better than paint that would get immediately trashed.

Yeah I am back and forth on painting. If I did paint, I would paint them a gloss white so they would look very similar to the raw aluminum but it would certainly be more upkeep to have them painted than to have them just raw.

Did you get the filler plate too?

I did not. I am currently using my stock plastic filler plate. When I looked at the filler plate online it was just 16ga. steel with two bends so I figured I could fab that myself for cheaper than $65. However, my local metal shop only sells 4'x4' sheets and that costs $70. I couldn't think of much else I would make with 16ga. steel so it didn't seem worth it to buy a half sheet. Now if I could get a 4'x4' sheet of aluminum then I would be all over that but not that excited for a steel filler
 
So with the extra time off for the holiday I tackled a few projects I have been wanting to get to. One was adding the grill lights now that I have the TRD Grill. I am sure most everyone has seen these lights installed on different rides but I wanted to install them a bit differently.

Most people place the lights on the outside of the grill and zip-tie them to the grill. I didn't like that they sat outside the grill because in the day it just looked funny to me. So I modified the lights by chopping off the side fins so they slid into the grill slots from behind. I have seen others do this but seems like everyone still zip-ties them on. I just couldn't bring myself to zip-tie lights to a $40k ride.

I ended up making some small tabs that would mount to the existing holes on the lights and then I could drill small holes in the slats of the grill to secure the tabs to the grill. I used small, black hardware so it's only visible if you come right up to the grill are looking for it. The lights are very secure now.

A few pics to show how I set it up:

Here is the light harness ready to slide into the grille with the tabs already attached. In this pic it had silver hardware for mocking it up
30466304164_0771b8650e_b.jpg


Here they are attached to the grill
30920118370_52470f01ea_b.jpg


And from behind the grill
30466310564_7f109447bd_b.jpg


The wire loom I zip-tied up under the radiator crossmember to head over towards the battery area
31173204121_d2e719aac0_b.jpg


Just in front of the battery is where I installed a weather-proof connection so if I need to remove the light harness I can easily do so
30466308174_ab7d8fdee7_b.jpg


I also wanted the light independently controlled rather than tapping into the headlights or fog lights or some other area. And because I love Batman I had to go with a Bat Signal button
31173202601_cd9ff536ee_b.jpg


The finished product from a short distance. I don't have a good picture of them lit up yet as I had a lot of other projects going on as well this weekend but soon I will grab one
31173206731_e40f840038_b.jpg
 
So with the extra time off for the holiday I tackled a few projects I have been wanting to get to. One was adding the grill lights now that I have the TRD Grill. I am sure most everyone has seen these lights installed on different rides but I wanted to install them a bit differently.


Most people place the lights on the outside of the grill and zip-tie them to the grill. I didn't like that they sat outside the grill because in the day it just looked funny to me. So I modified the lights by chopping off the side fins so they slid into the grill slots from behind. I have seen others do this but seems like everyone still zip-ties them on. I just couldn't bring myself to zip-tie lights to a $40k ride.


I ended up making some small tabs that would mount to the existing holes on the lights and then I could drill small holes in the slats of the grill to secure the tabs to the grill. I used small, black hardware so it's only visible if you come right up to the grill are looking for it. The lights are very secure now.


A few pics to show how I set it up:


Here is the light harness ready to slide into the grille with the tabs already attached. In this pic it had silver hardware for mocking it up

30466304164_0771b8650e_b.jpg


Here they are attached to the grill

30920118370_52470f01ea_b.jpg


And from behind the grill

30466310564_7f109447bd_b.jpg


The wire loom I zip-tied up under the radiator crossmember to head over towards the battery area

31173204121_d2e719aac0_b.jpg


Just in front of the battery is where I installed a weather-proof connection so if I need to remove the light harness I can easily do so

30466308174_ab7d8fdee7_b.jpg


I also wanted the light independently controlled rather than tapping into the headlights or fog lights or some other area. And because I love Batman I had to go with a Bat Signal button

31173202601_cd9ff536ee_b.jpg


The finished product from a short distance. I don't have a good picture of them lit up yet as I had a lot of other projects going on as well this weekend but soon I will grab one

31173206731_e40f840038_b.jpg


so sickkkkk man!


Sent from my iPhone using Tapatalk
 
So I finally finished up my drawer system!

31948393335_072f2e14ce_b.jpg


It has one full-extension drawer for gear and the right side is reserved for an ARB fridge with slide. I will probably wait until spring to get a fridge since I won't really need it in the winter but I wanted to be ready for it.

I used Baltic Birch ply so it is very strong. I then laminated all exposed surfaces and then finished the edges with aluminum edging just for style. I thought about building a mounting plate but decided I wanted to easily be able to go back to stock in case I want to use the full interior as a sleeper for a weekend trip so it is secured with turnbuckles to all four factory d-rings. I made it so the rear seats can still recline because I love that for long trips. I also lined the drawer with thin rubber matting to ensure I had no rattles with the packed gear. The only thing left is I plan to order some rubber diamond-plate mat to lay on top so gear on top of the drawer doesn't slide around. Really happy with how it turned out.

31832075251_972c4b6d18_b.jpg


Here you can see the turnbuckle. Some of my gear I keep outside the drawer like blanket, towel, paper towels, ice scraper, etc but most is kept in the drawer.

31139267263_b3283a5944_b.jpg


The drawer fully extended and loaded up with my gear

31911388226_7d748e5de0_b.jpg


And here is an updated picture of the gear I carry. Some things I carry are not pictured but most is shown here.
 
Looks legit!! Need to redo mine at some point.

Thanks, I like how it turned out but it was a LOT of work. I didn't want it to look like I went to Home Depot and threw a bunch of stuff together though. If I can't do it myself and make it look like it belongs then I will just buy professional.
 
Just read thru your whole build to this point. Not bad to burn a day at work. Top notch! Can't wait to start mine. Enjoyed how your build started in regards to function/importance first.
 
Been busy snowboarding lately but I did get to head to Sedona and run Broken Arrow Trail this weekend. Was a different experience with it being muddy but since it's winter there was a lot less traffic so it allowed for a lot more photo's then normal. Had a blast as always

31390089453_4099940781_b.jpg


32162037676_12e9c5ab9d_b.jpg


32200433705_bbfcff2a5e_b.jpg


31390097413_80594b793d_b.jpg


32162035266_b1328265be_b.jpg


32162030176_b05676db4b_b.jpg


32051714732_52317aecea_b.jpg


31390076313_bbe15196b9_b.jpg


31824740600_cf7f4b1c76_b.jpg


31390073563_ff01d9a5b8_b.jpg


32051709832_188566d0f8_b.jpg
 
your build keeps getting better and better. question as i am no an owner of a "new to me" K9 rack (1.6M). Did you find some of the eyelets at the hardware store or did you buy the ones from specifically online at ~$5. just looking for what my options are.
 
your build keeps getting better and better. question as i am no an owner of a "new to me" K9 rack (1.6M). Did you find some of the eyelets at the hardware store or did you buy the ones from specifically online at ~$5. just looking for what my options are.

I bought the Front Runner eye-nuts because they were powder-coated black. You can get some for much cheaper than that but all I could find was chrome finish and I didn't want that on my rack. Kind of expensive but they will last forever so depending on what you want, just buy once and get what you want :D
 
I bought the Front Runner eye-nuts because they were powder-coated black. You can get some for much cheaper than that but all I could find was chrome finish and I didn't want that on my rack. Kind of expensive but they will last forever so depending on what you want, just buy once and get what you want :D

Good call on the black. Just ordered some from my buddy at Apex Overland.
 
Got a good amount of snow in Flagstaff this weekend. At least a couple of feet on top of what we already had so I decided to head out and see if I could get stuck. Spoiler Alert: I couldn't

32432843216_8dc6e83133_b.jpg


32094785410_7b313472b0_b.jpg


32473213635_7759e4b572_b.jpg


32094799530_b023f9193f_b.jpg


32094793000_6f474ab4a7_b.jpg


32473215215_2417f8a14e_b.jpg


And then a throwback pic all the way to last weekend when I hit Taos Ski Valley and Wolf Creek for some boarding

32321859362_15f6e4c556_b.jpg
 

Members online

Forum statistics

Threads
278,309
Messages
3,554,071
Members
248,016
Latest member
Advally Service

Trending content

Back
Top