The Red Runner bumper build

Myrunr2010

New member
The Red Runner Rear bumper build

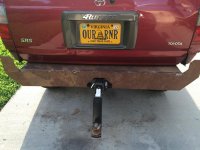
EDIT: So I figured i'd go ahead and post the finished product at the beginning so folks can see what I built without having to scroll to the end.
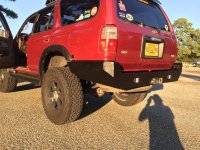
IMG_0582.jpg

So a few weeks ago I went to the scrap yard and came home with this guy. Its 1/4", which was a little thicker than I was anticipating buying, but you can't beat the price at 30 cents a pound. All said and done it was 176.49 (i figure i should be able to return atleast 50 dollars in unused angle that i had to cut off).IMG_0493.jpg
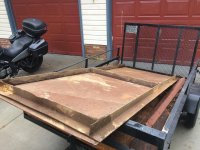
I had done some looking around and really liked the bumpers that [MENTION=22788]prospectator[/MENTION] and [MENTION=58958]PATCO[/MENTION] built ( http://www.toyota-4runner.org/3rd-gen-t4rs/93306-another-rear-bumper-build.html ). I needed to work around my tow hitch, which I've got figured out. I still really want to integrate some auxiliary backup lights into the bumper that will turn on when the vehicle is put into reverse, as well as have an auxiliary switch on the dash.

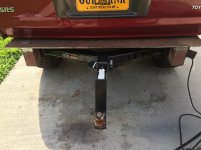
First step was figuring out my mounts and my tow hitch. With the 1" body lift I wanted to figure out a way to get my hitch a little higher. With the way that my Curt hitch was, I was able to use the standard mounting locations, and just flip it upside down. My mounts follow pretty close with what prospectator did.

The four bottom bolts are all using standard attachments either on the frame already or that were added when the hitch was installed. The bolt furthest back on the frame is just through the one side of the frame and i tack welded a nut to the inside. The bolt towards the front of the vehicle is all the way through both sides.IMG_0519.jpg
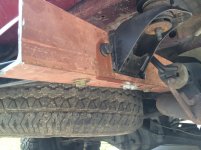
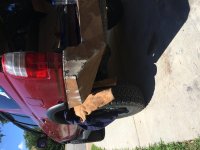
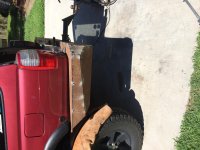
You can see the flipped hitch in this shot. IMG_0521.jpg
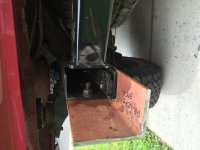
And the last shot shows the rest of my mount. I needed to gain some height to account for the body lift. It will also provide a nice attachment point for the back plate to weld to.IMG_0522.jpg
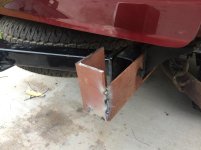
On a side note, i'll have to remember to orient my camera better when I take pictures, i have no clue why it always flips the photos sideways like that....
 

Attachments

  • IMG_0493.jpg
    IMG_0493.jpg
    135.9 KB · Views: 1,147
  • IMG_0519.jpg
    IMG_0519.jpg
    133.7 KB · Views: 1,130
  • IMG_0522.jpg
    IMG_0522.jpg
    125 KB · Views: 1,174
  • IMG_0521.jpg
    IMG_0521.jpg
    127.6 KB · Views: 1,128
  • IMG_0582.jpg
    IMG_0582.jpg
    137.6 KB · Views: 873
Last edited:
Register to hide this ad
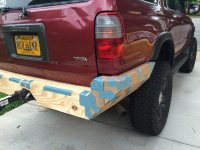
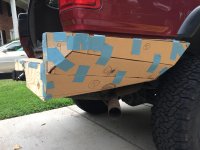
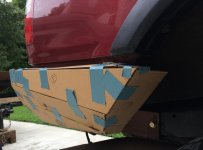
So yesterday I was able to spend the afternoon spending some quality time with some card board, razor blade and duct tape. I've seen enough suggestions about using card board to mock everything up and make sure it looks right. I plan to try and attach pieces as I cut so I can use the rest of the card board to double check and make sure things haven't moved around on me at all.
 

Attachments

  • IMG_0530.jpg
    IMG_0530.jpg
    132.7 KB · Views: 1,146
  • IMG_0537.jpg
    IMG_0537.jpg
    132.9 KB · Views: 1,087
  • IMG_05381.jpg
    IMG_05381.jpg
    121.8 KB · Views: 1,108
Grind that rust off to shiny metal before you do any welding.....otherwise your welds will be weaker as they are contaminated.
 
Grind that rust off to shiny metal before you do any welding.....otherwise your welds will be weaker as they are contaminated.

That is the plan. That sheet is pretty well covered in it, thankfully it's mostly just surface rust. There are a few spots that were under the angle that are pretty rough looking though.
 
Just an update on the progress. Got the top plate cut and tacked in place. I went ahead and fully welded it to the backside of the mount. I wasn't sure what my access to that area would look like once the the whole thing was together. Ground it flat afterwards so that I had a flat surface to mount the back plate to.

IMG_0544.jpg

Got the back plate cut and tacked in place as well.

IMG_0546.jpg

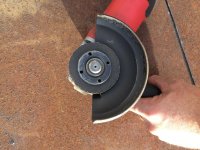
I'm trying real hard to preserve and conserve my cut off wheels so I don't end up going through a million of them during this process. I think i did a pretty good job!

IMG_0545.jpg
 

Attachments

  • IMG_0544.jpg
    IMG_0544.jpg
    137.3 KB · Views: 1,057
  • IMG_0546.jpg
    IMG_0546.jpg
    136.5 KB · Views: 1,017
  • IMG_0545.jpg
    IMG_0545.jpg
    138.3 KB · Views: 1,038
Nice job so far, the 1/4" steel is really gonna go through cut off wheels.
I would use Por 15 as a primer & then paint over that since it's not UV ray friendly. Good Luck!
 
Nice job so far, the 1/4" steel is really gonna go through cut off wheels.
I would use Por 15 as a primer & then paint over that since it's not UV ray friendly. Good Luck!

Yeah I went through 2 just cutting that back plate. I'm trying to take it slow so I don't prematurely destroy them.

As far as paint goes, I'm thinking I will likely go get some bed liner and cover them in that
 
Yeah I went through 2 just cutting that back plate. I'm trying to take it slow so I don't prematurely destroy them.

As far as paint goes, I'm thinking I will likely go get some bed liner and cover them in that

Use a rust preventative paint like POR 15 or Eastwood before the Bed Liner.
 
Use a rust preventative paint like POR 15 or Eastwood before the Bed Liner.

Do you think it will cause issues with adhesion of the bedliner? If i remember right from last time I used bedliner it wanted to be put directly on a bare metal surface.

Looks like it's going to be a solid bumper. I noticed you're in Hampton. I might have to have you make me one

...lol. Where abouts in Newport News are ya?

Agree. Even por15 looks nice. Paint it or use Bedliner over it. Por15 will fade under sun. Nice looking bumper. Tell us how much. It weights after finished.

Im starting to get worried that its going to weigh a stinkin ton. Originally i was thinking like, oh, well, 1/4" is only 3 lbs per square foot heavier than 3/16", how much of a difference can it really be? But now i'm starting to realize that it could make quite the difference!
 
It shouldn't cause adhesive issues.... Although I recommend using monstaliner. Which they sell CHASSY saver. Almost same as por15.

My rear savage bumper, is little over 100lbs. You can check on their site how much it weights with carrier.
 
It shouldn't cause adhesive issues.... Although I recommend using monstaliner. Which they sell CHASSY saver. Almost same as por15.

My rear savage bumper, is little over 100lbs. You can check on their site how much it weights with carrier.

I did my stock bumpers and trim like 6-9 months ago to try and stop/slow the rust issues I was having on them since I didn't know when this build would actually happen. We just used the brand that Walmart sells. It seems to be holding up pretty well except in areas where I didn't sand/rough it up too well, that's why I asked.
 
Do you think it will cause issues with adhesion of the bedliner? If i remember right from last time I used bedliner it wanted to be put directly on a bare metal surface.


...lol. Where abouts in Newport News are ya?


Im starting to get worried that its going to weigh a stinkin ton. Originally i was thinking like, oh, well, 1/4" is only 3 lbs per square foot heavier than 3/16", how much of a difference can it really be? But now i'm starting to realize that it could make quite the difference!

I've never spayed bed liner but what about pick up trucks? They spray the bed right over paint. Your steel has so much rust on it I'm afraid the rust will spread under the bed liner. 3 spray cans of Eastwood rust encapsulator should do the trick.
 
Took the day off work, I don't feel like I got as far as I should have. I guess it was just a lot of steel to be cut, which is time consuming, and it was blistering hot today. I think all said and done i've used 15 cut off wheels.

....forgot to orient the camera right again...
 

Attachments

  • IMG_0552.jpg
    IMG_0552.jpg
    134.7 KB · Views: 417
  • IMG_0553.jpg
    IMG_0553.jpg
    137.3 KB · Views: 445

Members online

Forum statistics

Threads
278,307
Messages
3,554,050
Members
248,016
Latest member
Advally Service

Trending content

Back
Top