• If you plan to post to Classified forums, you must follow these rules, or your post will be deleted.

    1. Thread title must include at a minimum: FS or FT, Item(1st, 2nd, 3rd, 4th or 5th gen), Price and Location. For Example: FS: 4th GEN Carpet Floor Mats - Tan, $50 Denver, CO.
    2. All Threads must contain the following information
      • What is for sale/trade (model, specs, etc.)
      • Condition
      • Price/What you want to trade for
      • Location of item
      • At least one picture of the item for sale or for trade
    3. No "Feeler" Threads - Its either for sale or it isn't.
    4. Moderators lock Classified Threads that have not had any activity in 90 days or when the part is announced SOLD.
    5. Threads not complying with the rules will be deleted without notice.

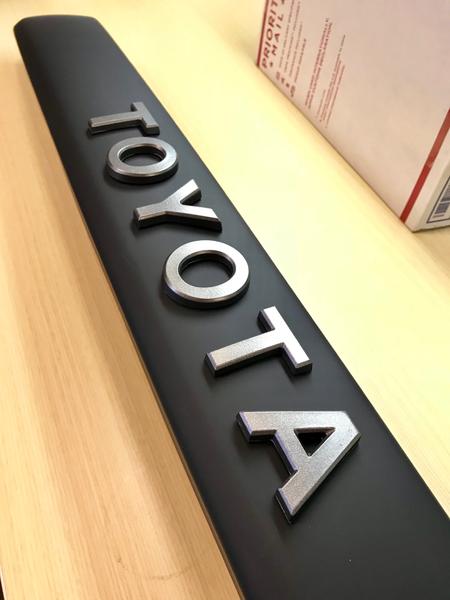
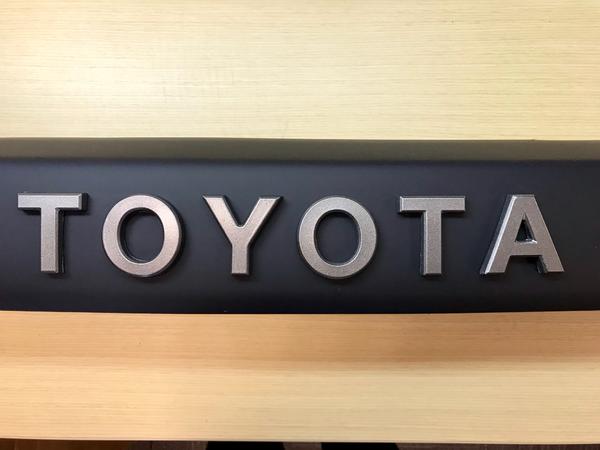
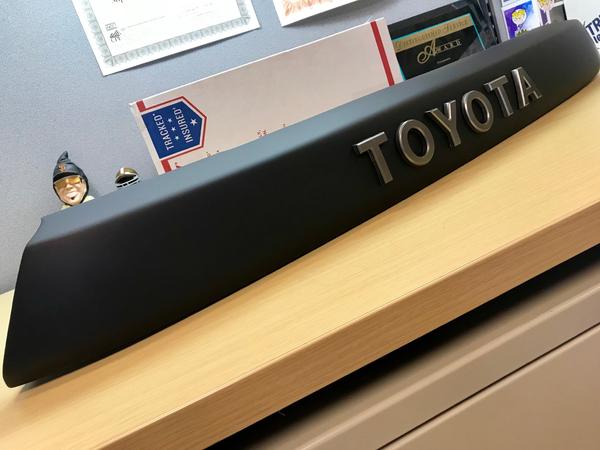
TSO PRO GRILLE GROUP BUY / TRD pro grille alternative

I was only able to get 11 packaged up yesterday. Kept fighting my printer not wanting to print labels properly. I will get the rest of the first 20 of them packaged tonight and sent out tomorrow.

If you are in the top 30 on the list and ordered letters. But are not switching to the 3d letters please pm me before tonight so I can get yours out tomorrow. I will wait until Thursday to ship letter orders unless I hear otherwise from people.

hmmm... i was #29 on the list without letters. wondering if mine was sent out.:behindsofa:
 
Im still a little confused with the regular vs 3d letters. I cant honestly really tell a difference. You posted a picture a few posts back and I didnt even know which was which in that picture haha. Main reason I havent changed yet.

If you can't tell the difference, save the added $15 and get your garnish shipped faster :thumb:
 
So a quick tutorial to installing the letter. I wrote formal instructions on the template. Install letters before installing cover.

First place 3/4 inch tape at the top of the cover and measure your halfway point.
cfcbb080fe03df84f51a0f13f31937b1.jpg


Next cut out template and transfer it to cardboard. For this I found it best to tape it to cardboard. Then cutout the letters. Or just leave it as paper and use the paperr cutout for your tempalte. After cut out align the template center line with your center line on the tape.

eb92f381d88e5eb8bf0ac98a3c21c021.jpg


Then proceed attaching the letters.

967638dd4891e315651a631a13f0a5a3.jpg
8469053e0248cf445c4d88dc373f96b8.jpg


To attach tape to letters. Use isopropyl alcohol to clean the back of the letters. Then unroll and apply tape only as necessary. It is very important to keep the tape clean. Cut to length and attach to the letter. Press firmly. For best results let tape set after installation for 30 mins to allow adhesive to wet out. To peel plastic red coating. I found it best to use a fresh new razor blade. Then peel a corner on each price of tape. Then use tweezers to peel them all off.

Here is a picture of one of 1000 ways to attach the tape. I only provide enough to tape for the letters

2cc25c5b80ca8f1a1bb90244b47453a3.jpg
 
So a quick tutorial to installing the letter. I wrote formal instructions on the template. Install letters before installing cover.

First place 3/4 inch tape at the top of the cover and measure your halfway point.
cfcbb080fe03df84f51a0f13f31937b1.jpg


Next cut out template and transfer it to cardboard. For this I found it best to tape it to cardboard. Then cutout the letters. Or just leave it as paper and use the paperr cutout for your tempalte. After cut out align the template center line with your center line on the tape.

eb92f381d88e5eb8bf0ac98a3c21c021.jpg


Then proceed attaching the letters.

967638dd4891e315651a631a13f0a5a3.jpg
8469053e0248cf445c4d88dc373f96b8.jpg


To attach tape to letters. Use isopropyl alcohol to clean the back of the letters. Then unroll and apply tape only as necessary. It is very important to keep the tape clean. Cut to length and attach to the letter. Press firmly. For best results let tape set after installation for 30 mins to allow adhesive to wet out. To peel plastic red coating. I found it best to use a fresh new razor blade. Then peel a corner on each price of tape. Then use tweezers to peel them all off.

Here is a picture of one of 1000 ways to attach the tape. I only provide enough to tape for the letters

2cc25c5b80ca8f1a1bb90244b47453a3.jpg
Looking good! This is exciting.
 
So a quick tutorial to installing the letter. I wrote formal instructions on the template. Install letters before installing cover.

First place 3/4 inch tape at the top of the cover and measure your halfway point.

Next cut out template and transfer it to cardboard. For this I found it best to tape it to cardboard. Then cutout the letters. Or just leave it as paper and use the paperr cutout for your tempalte. After cut out align the template center line with your center line on the tape.


Then proceed attaching the letters.


To attach tape to letters. Use isopropyl alcohol to clean the back of the letters. Then unroll and apply tape only as necessary. It is very important to keep the tape clean. Cut to length and attach to the letter. Press firmly. For best results let tape set after installation for 30 mins to allow adhesive to wet out. To peel plastic red coating. I found it best to use a fresh new razor blade. Then peel a corner on each price of tape. Then use tweezers to peel them all off.

Here is a picture of one of 1000 ways to attach the tape. I only provide enough to tape for the letters

Was my unit used for this tutorial? The first T came preinstalled. THANK YOU for making my life easier!! And thank you for putting this together!!!


zxpwr350-albums-tso+grille-picture50597-img-6700.jpg

zxpwr350-albums-tso+grille-picture50596-img-6699.jpg

zxpwr350-albums-tso+grille-picture50595-img-6698.jpg
 
Ladies and gentlemen!! It is with much honor and happiness that I present to you “The Garnish”
I apologize for the dirty truck, I only cleaned the necessary areas for the install, I just couldn’t wait!!!
be8abecba1609a4b175ae6846622f067.jpg

d07cef734dc88b4c4c45cd91898bccbd.jpg

842978f6f2023994dd6e5e78070f1b34.jpg

8690e06069fdecbea6d46aa0dc38e5a4.jpg

ac79d50823fdaf17bbb4460a984dec5a.jpg


Sent from my iPhone using Tapatalk
 
Ladies and gentlemen!! It is with much honor and happiness that I present to you “The Garnish”
I apologize for the dirty truck, I only cleaned the necessary areas for the install, I just couldn’t wait!!!


Sent from my iPhone using Tapatalk

I feel like the stock TRD Pro one has more gaps on the sides. That looks like a damn good fit.
 
Wow. Fitment is mos def better than the OEM garnish. I feel like selling mine for $350 to pick up one of these bad boys.
 

Members online

Forum statistics

Threads
278,317
Messages
3,554,126
Members
248,016
Latest member
Advally Service

Trending content

Back
Top