turbodb's Build and Adventures

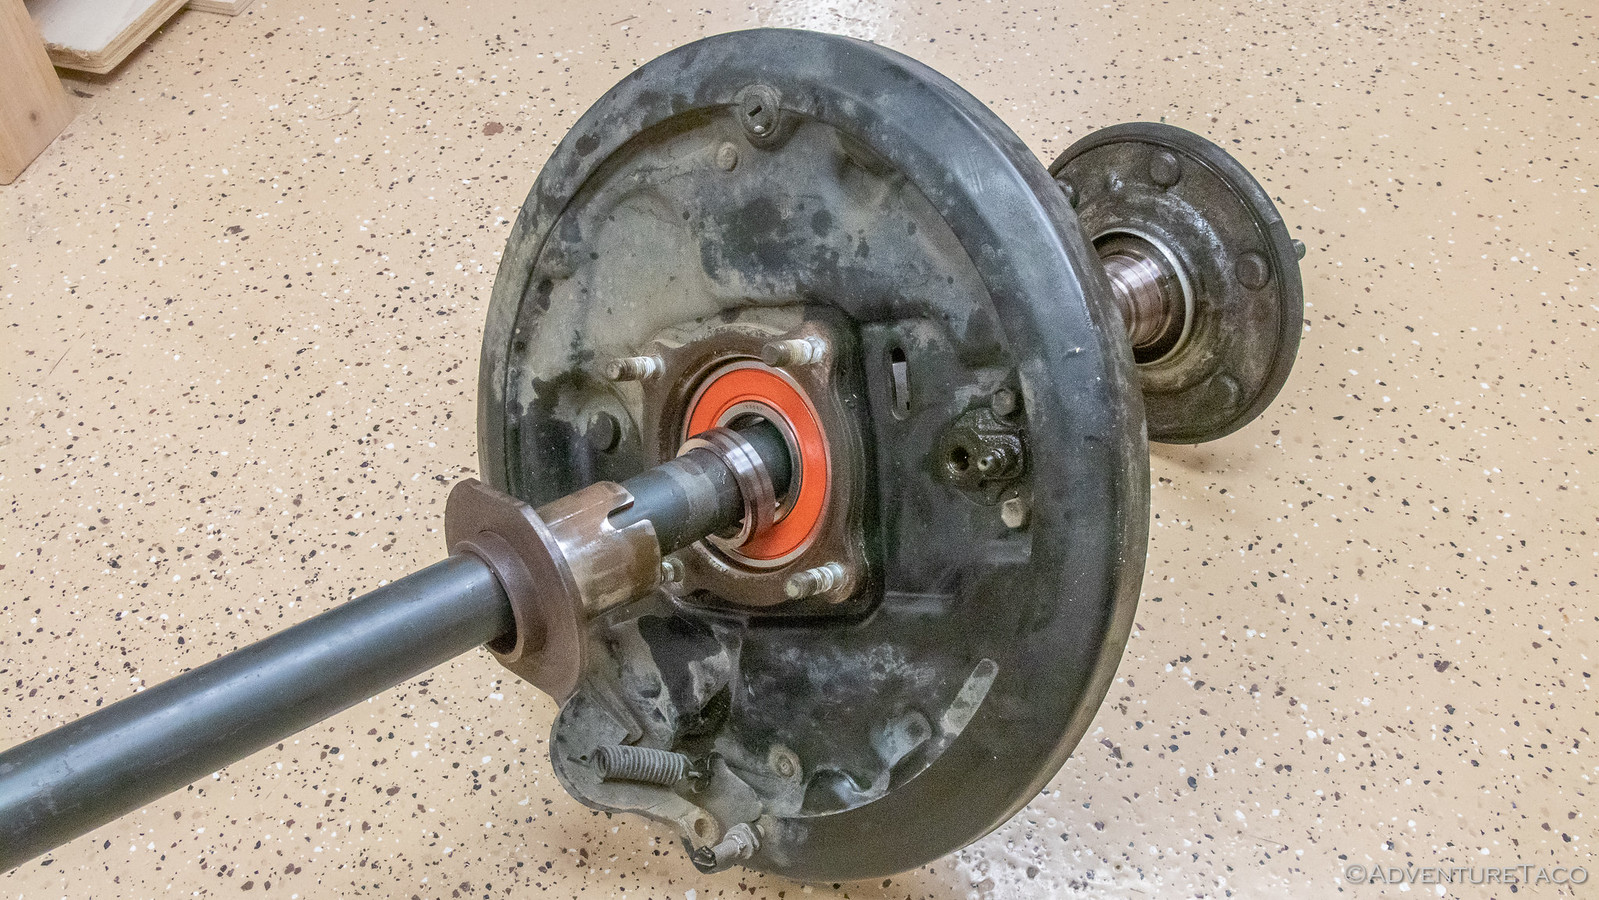
After lunch and some parts clean-up, I was ready to start pressing components back together. This is essentially a reverse of removal, so the axle bearing was up first. A bit of grease on it's outer race and the matching bore so things would slip past each other easily, I used the bearing driver SST to support the brake backing plate, and a 3" ABS cleanout to carefully press in the bearing. It's not a tight fit, so the ABS works well - both as a match for the outer diameter of the bearing, and also because if you're deforming the ABS, you know you're doing something wrong.
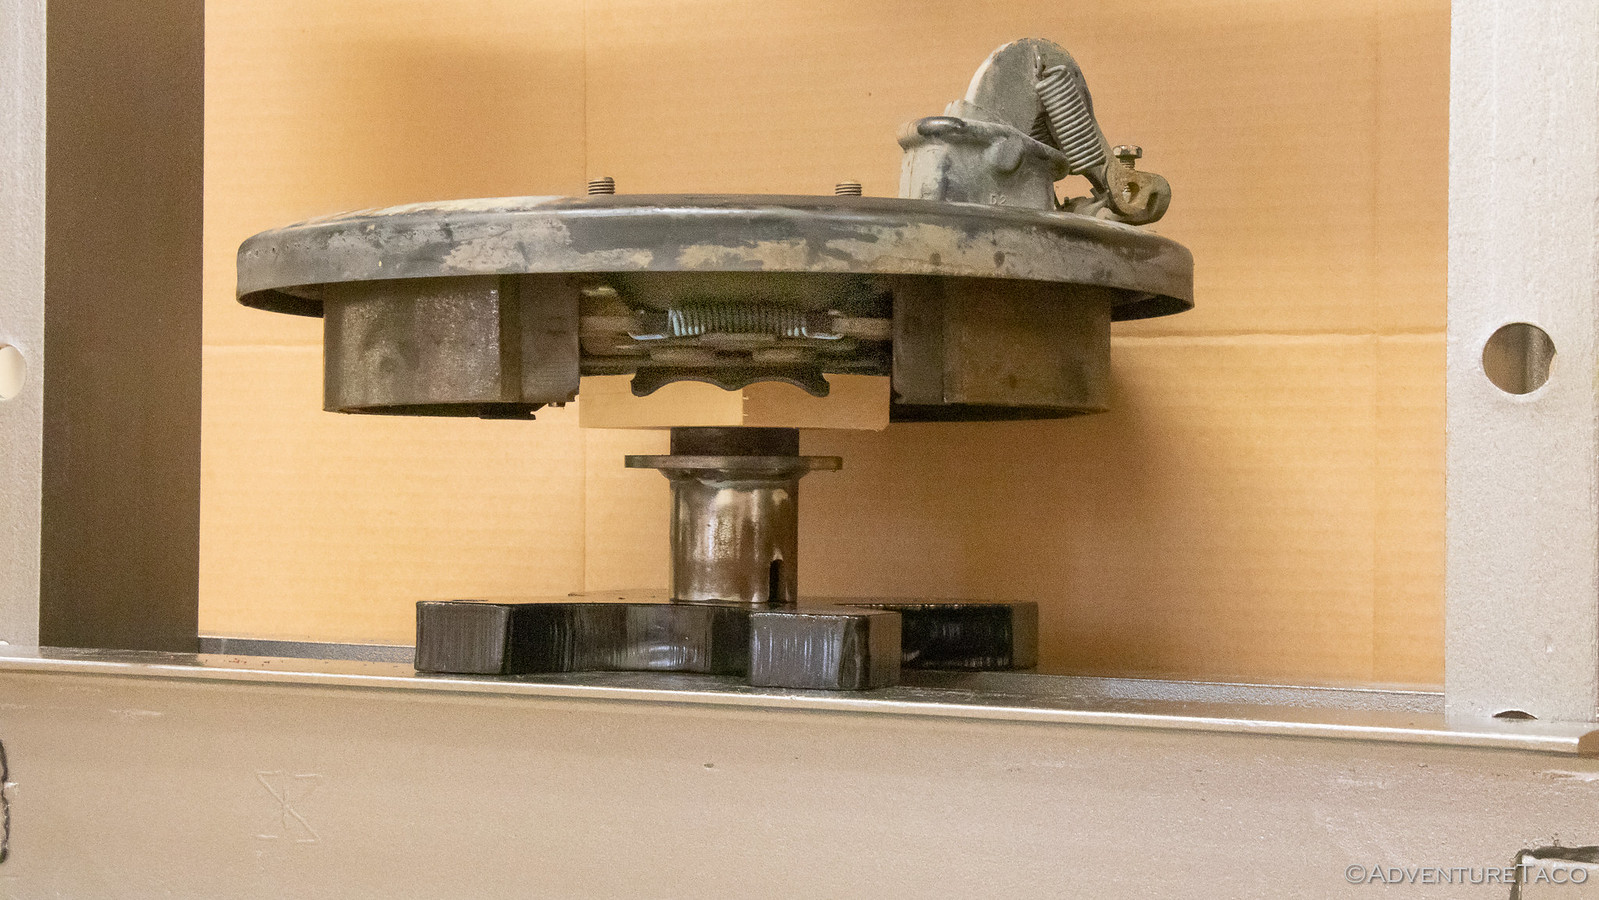
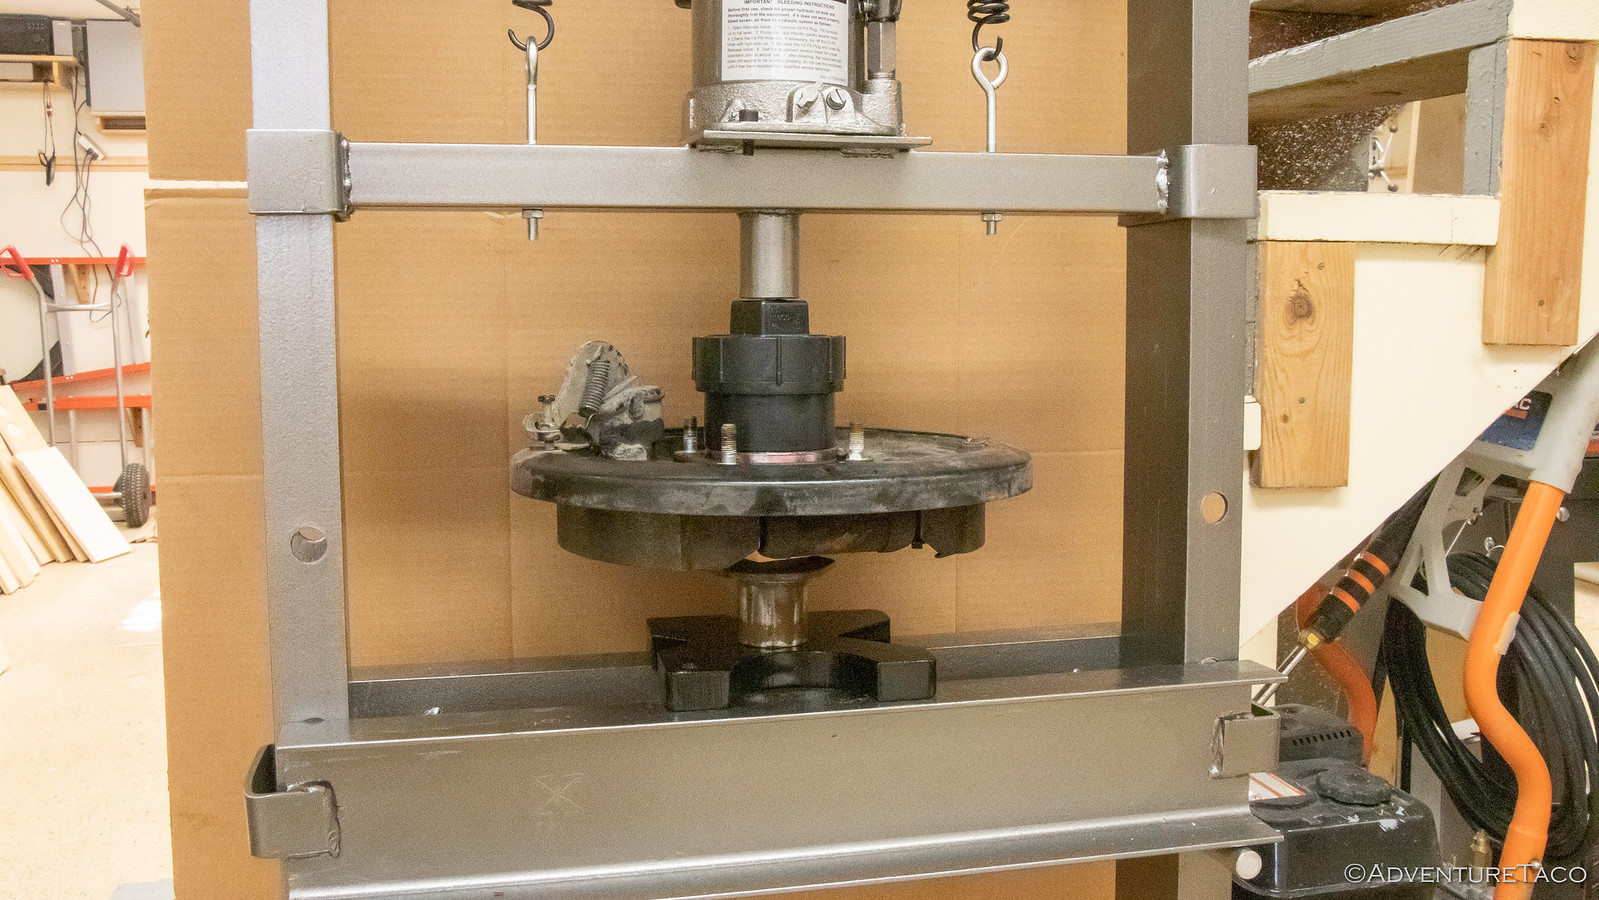


After the bearing is in the brake housing, it was time to press that - and the outer retainer (which used to be the inner and has a wear mark on it) onto the axle. With the bevel on the retainer facing away from the bearing, I got everything set up using the Bearing Driver (and the Rear Wheel Axle Bearing Puller) and into the press before easily pressing everything together.
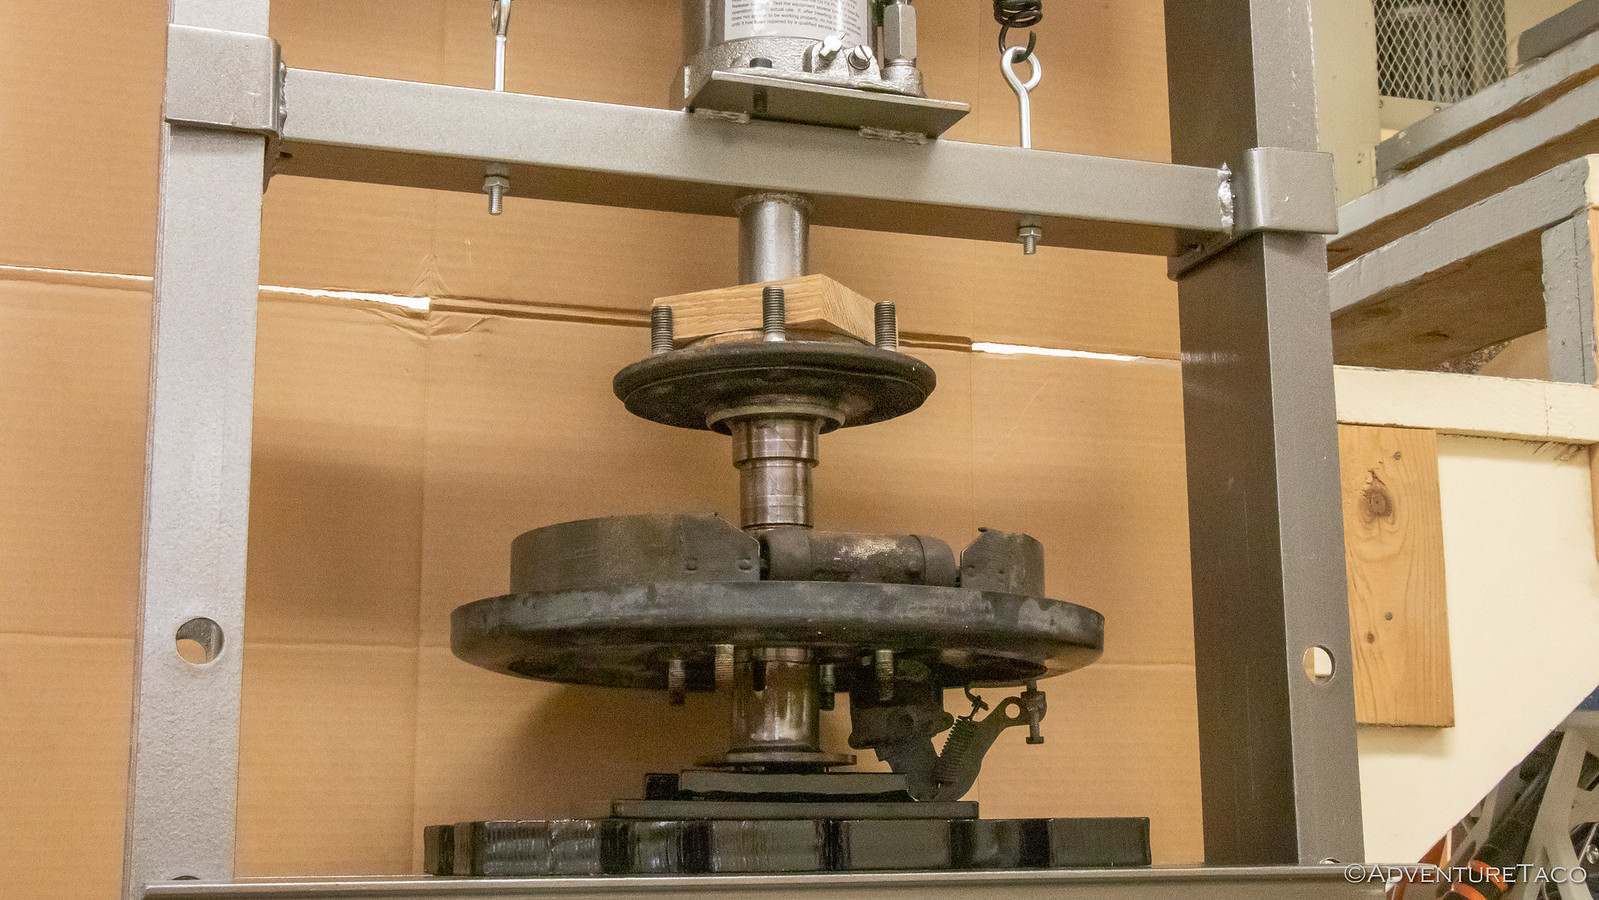


Then, continuing our reversal of the removal, a new snap ring before greasing and putting the ABS tone ring and inner (was outer) retainer in place to be pressed. Note: the tone ring is installed with the solid side toward the diff, and the retainer has the bevel away from the diff, to better mate with the axle seal that was redesigned by Toyota a few years ago.

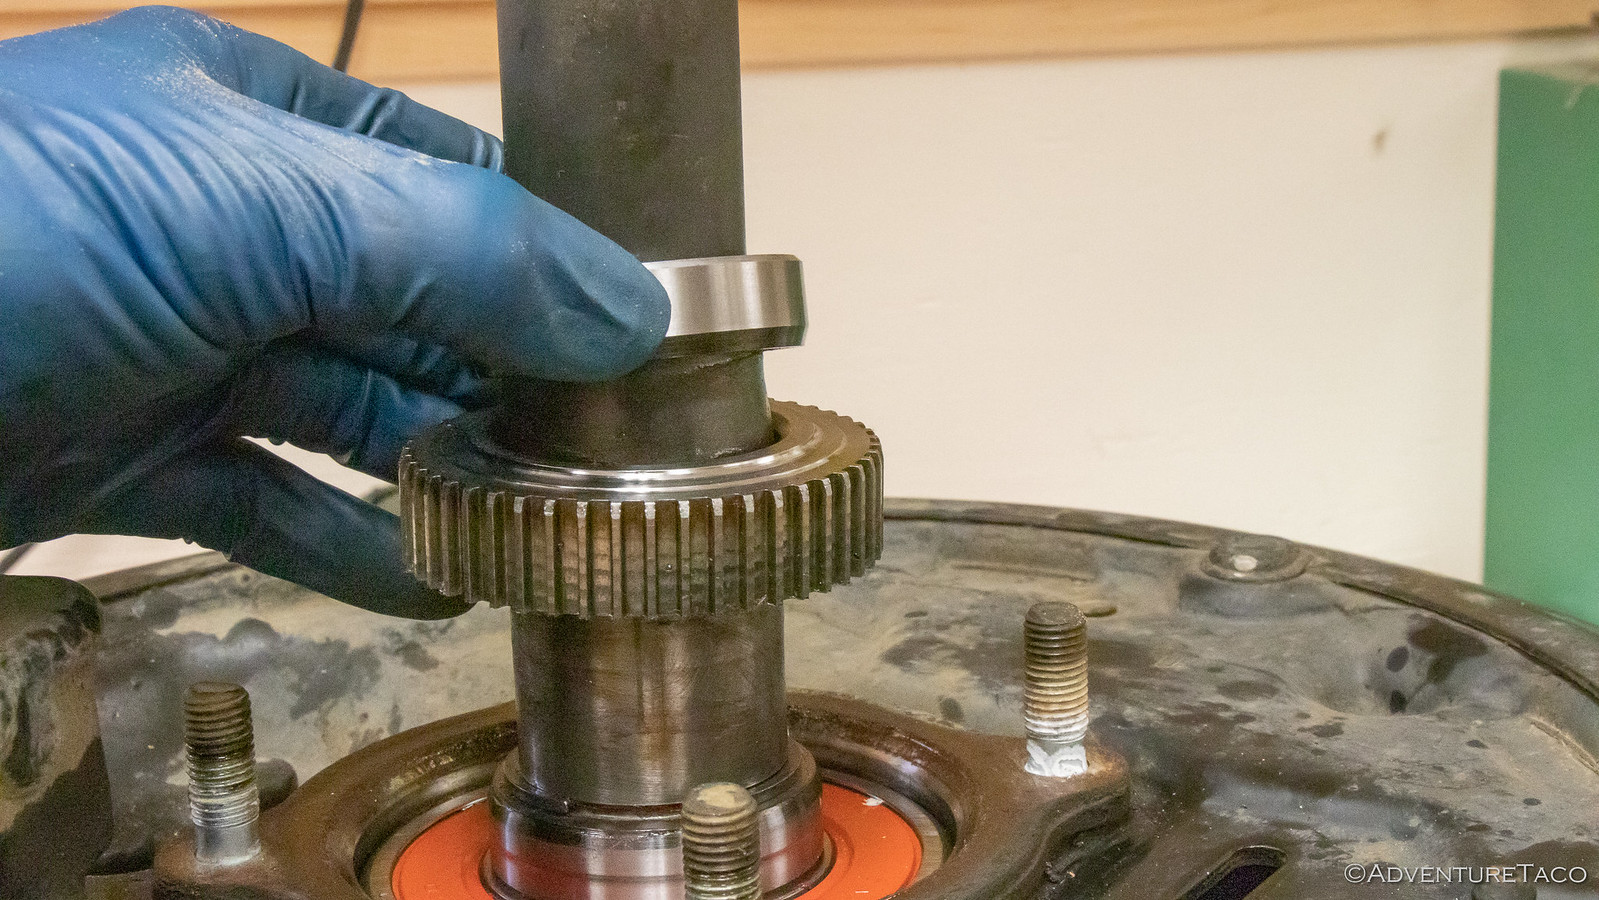


And then, it was back to the press, where I once again used the Bearing Driver and the Rear Wheel Axle Bearing Puller to drive the two rings onto the axle. The key at this point is to ensure that the inner retainer ends up in the perfect position - so that the axle seal rides right in the middle of the flat surface. To achieve this, press the two rings on and utilize the fabulous access hole in the Bearing Driver SST to monitor the progress.

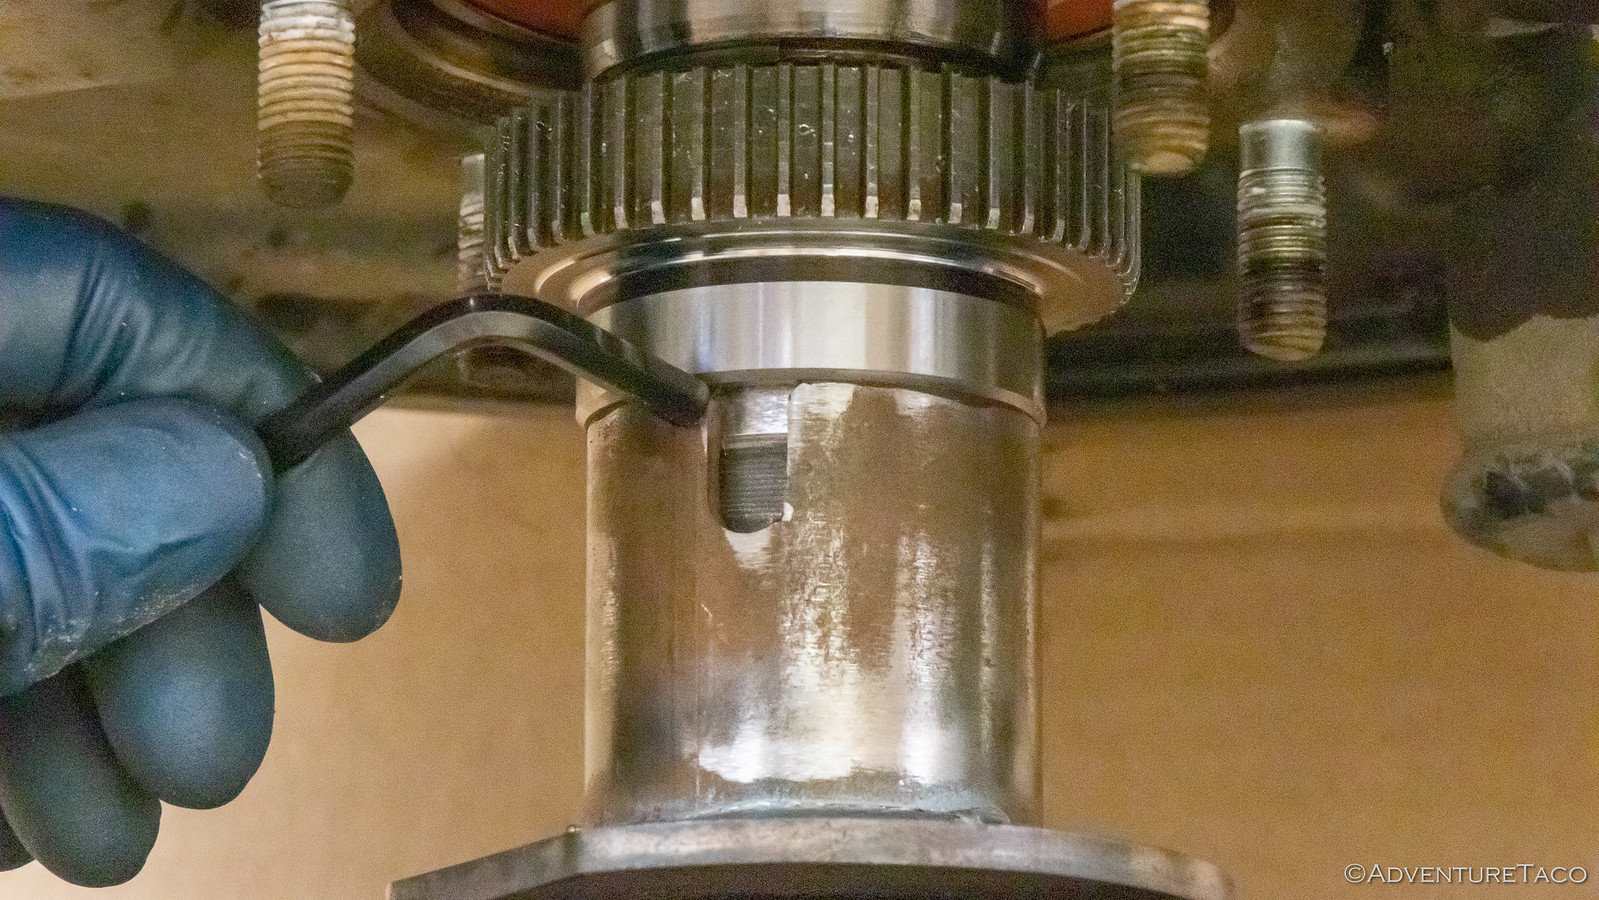
When you start to see polished axle showing below the inner retainer, slow down. You will ultimately want 3- to 5mm of polished axle showing in order for everything to line up. So when you get to 3mm - which you can measure with a 3mm Allen wrench - stop. I went to 5mm initially, and it was too far! (an easy fix with the Bearing Puller and Tone Ring tool, but something I could have avoided).

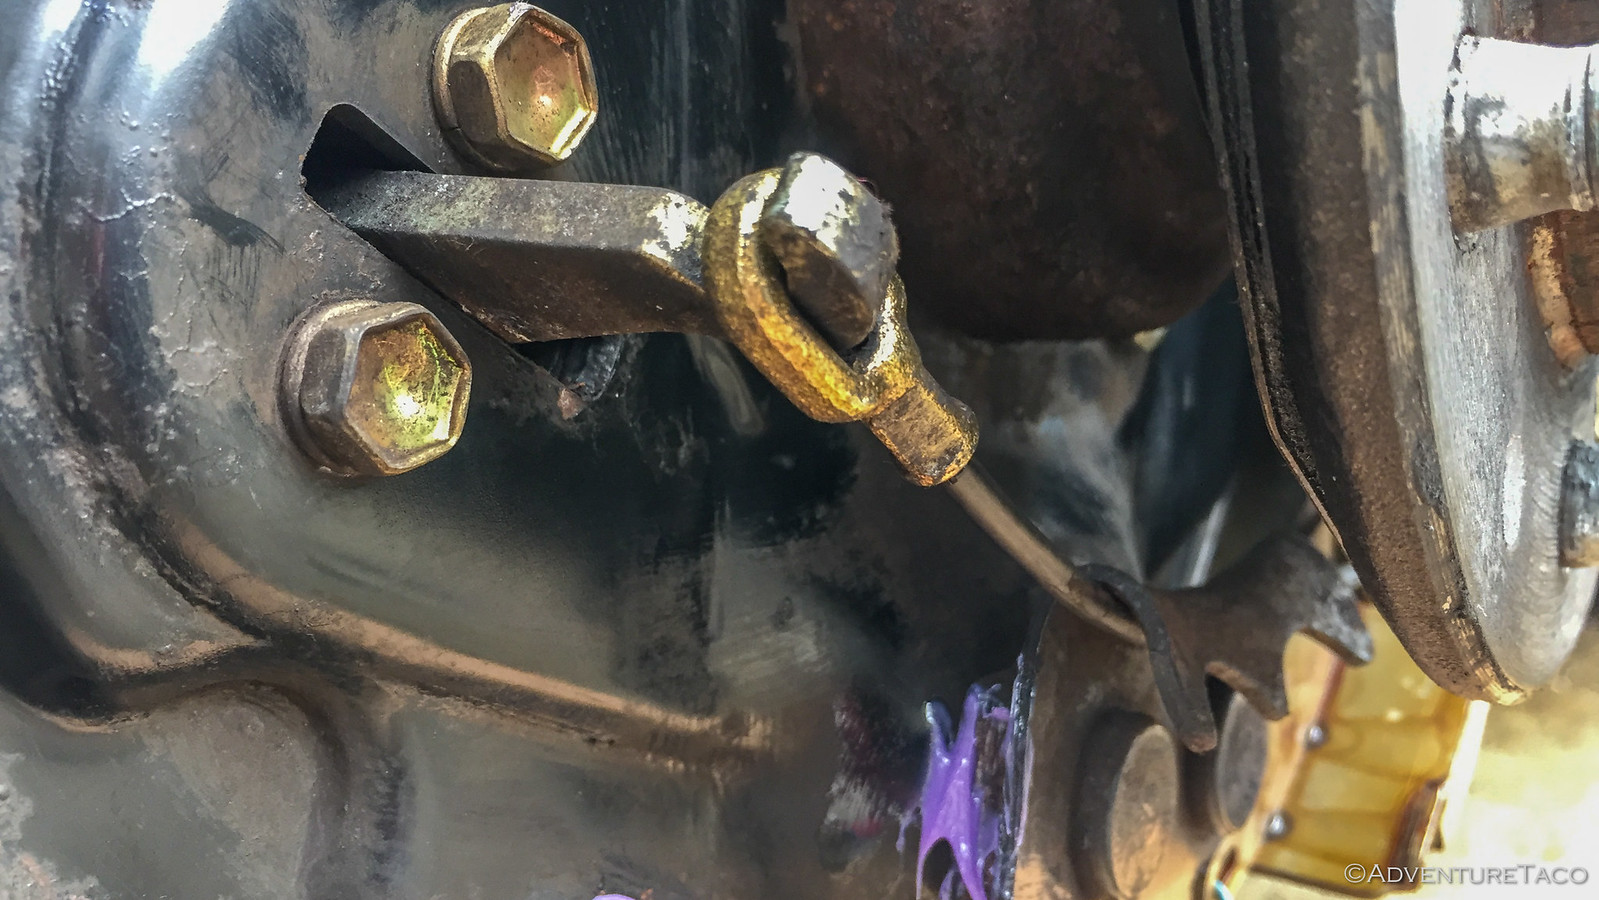
To see if the inner retainer was in the right place, it was finally time for me to replace the axle seal. And it was nearly 4:00pm! I headed out to the truck and attempted to pull out the old seal using some pliers. No success - the seal was in there good, and despite mangling the seal (while being very careful to not mangle the race), it wasn't budging.

Dang! I'd heard that using the slide hammer in the OTC 4579 Seal Puller Kit made this super-easy, but I'd decided I could probably get it out another way and save the hundred bucks. Dummy. I quickly realized my folly, but it was too late - getting the kit was going to take four days - time I didn't have - and so I did the only thing I could do - panic.

No, I'm kidding. I actually futzed around for a bit after looking at the design of the OTC kit and came up with what I can only call a contraption that I hoped would solve my problem - fashioned to hook the seal in a couple of places, then allowing me to hit the maple block with a hammer to pull it out.


It worked, terribly. So if you're reading this - just buy the OTC 4579 kit and don't lose a few years of life due to stress.


The seal might have been mangled, but it was out and I was relieved. I immediately set about installing the new seal - first heating the axle housing with a heat gun and freezing the new seal - just to give myself as much chance as possible to get it in easily.

It worked great, and seated just fine using the OTC 4507 Seal Driver Kit.
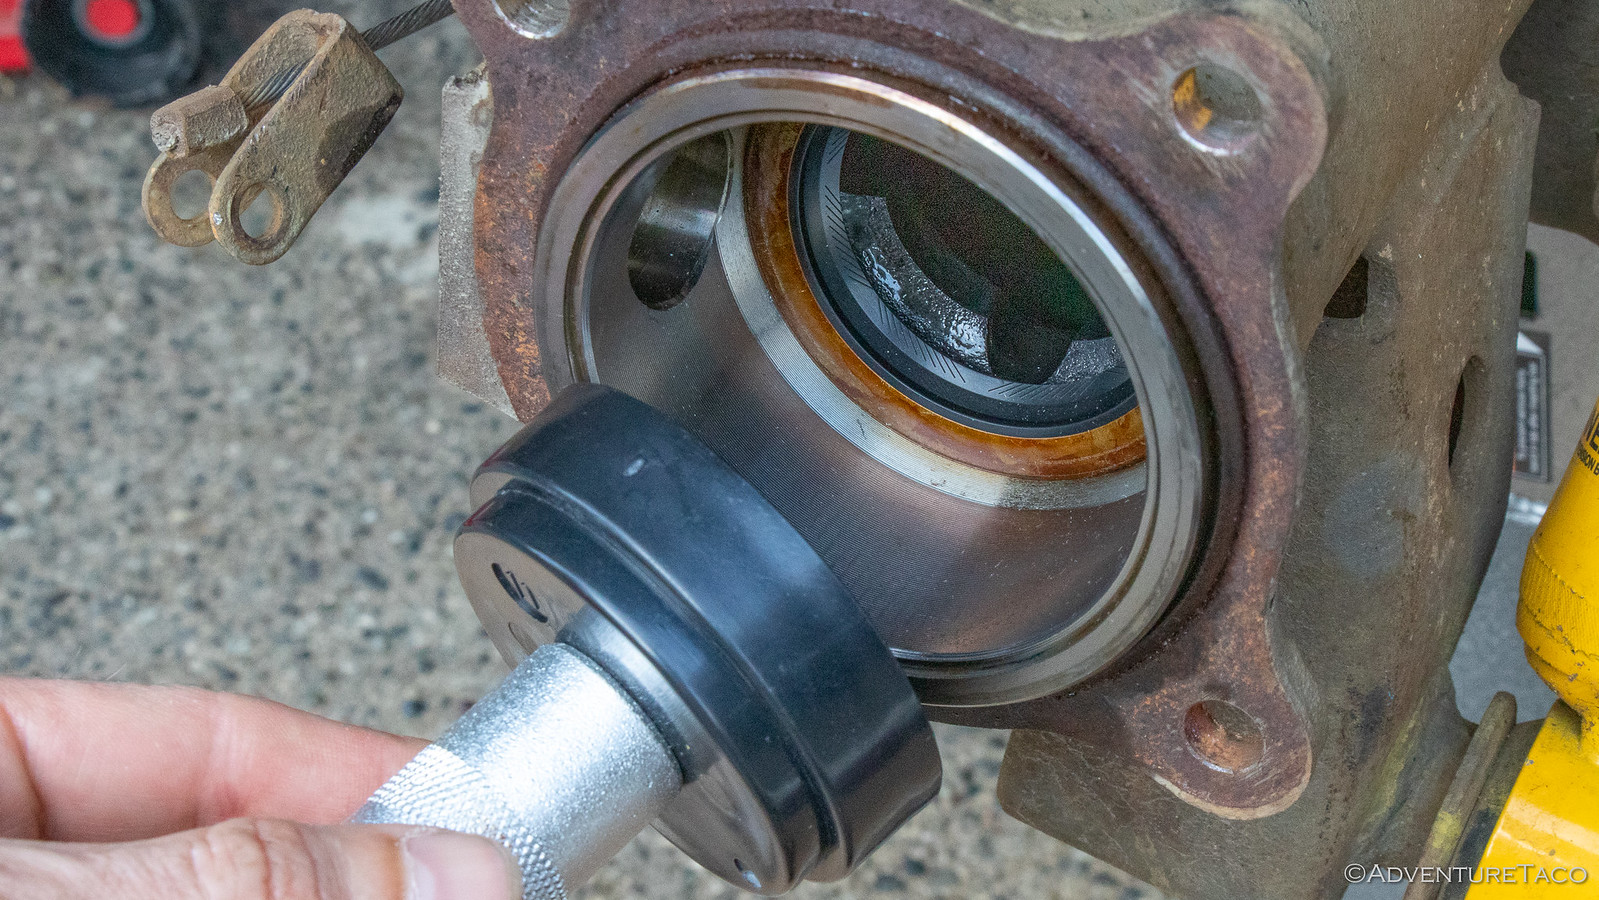

Having that done meant that I could test the position of my inner retainer on the axle, so I drew some lines with a marker and inserted the axle into the housing. A few turns to get the seal to rub off some of the marker, and I knew I had a problem.


I'd pushed the retainer on 5mm, but it was too far. It was back into the shop where I used the Rear Wheel Axle Tone Ring Puller (have I mentioned that this thing is awesome?) to quickly pull the retainer and tone ring 2mm up the axle. And the next test fit was perfect!


Now, it was just a matter of replacing the largest o-ring I've ever seen on the end of the axle housing, and then buttoning everything back up - torquing the nuts that hold the backing plate to the axle housing to 48 ft-lbs, and making sure the ABS sensor and brake line connections were "tight enough."
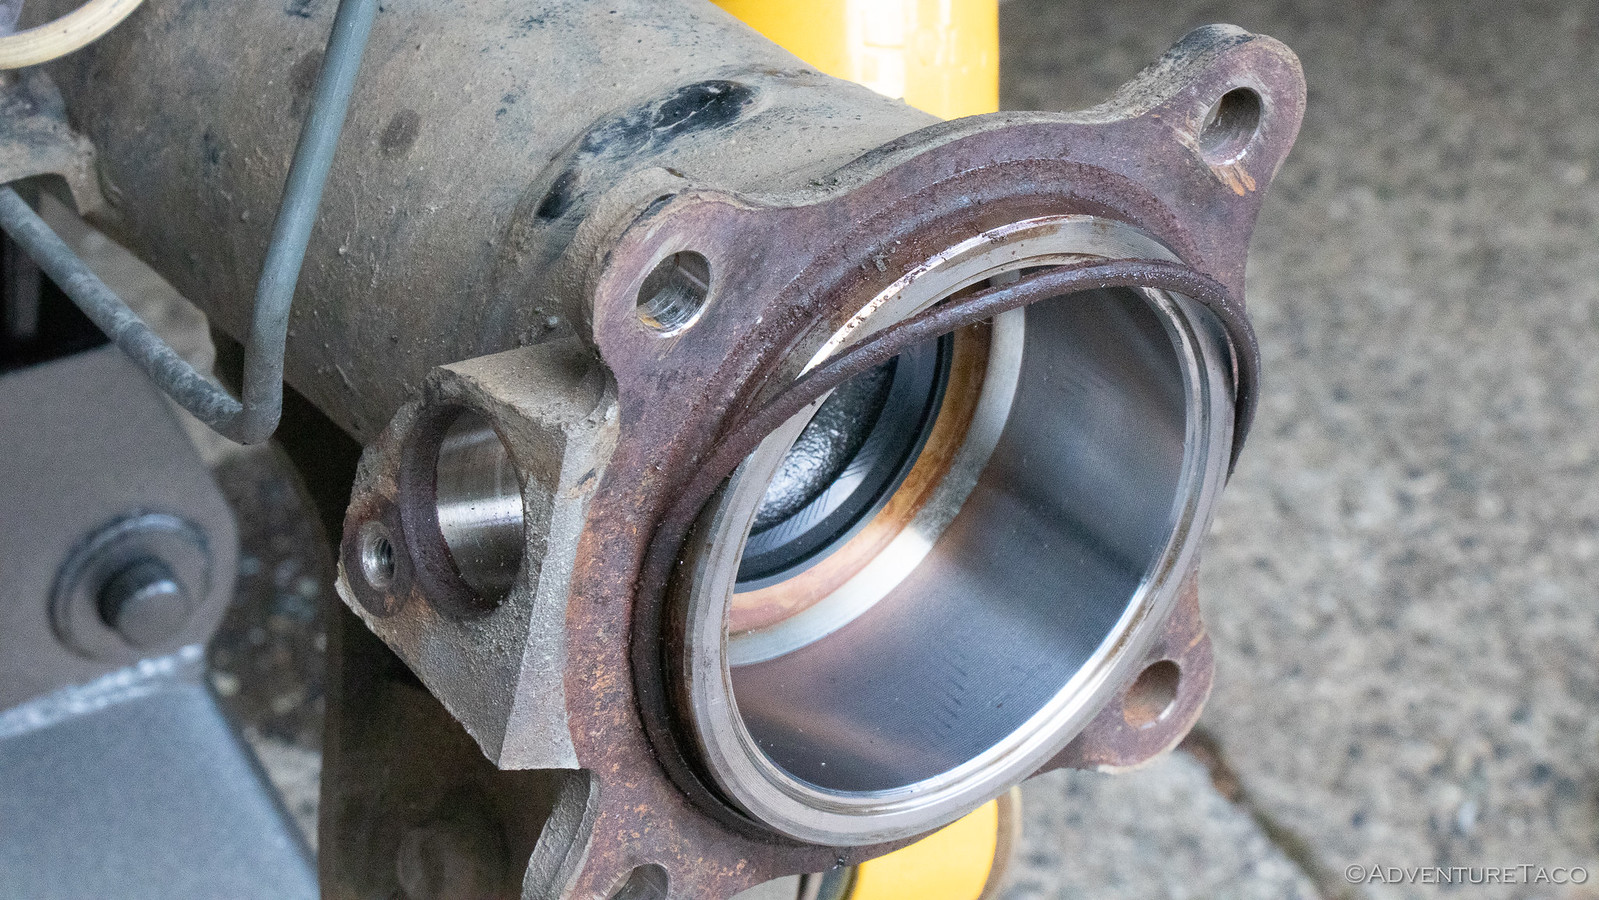
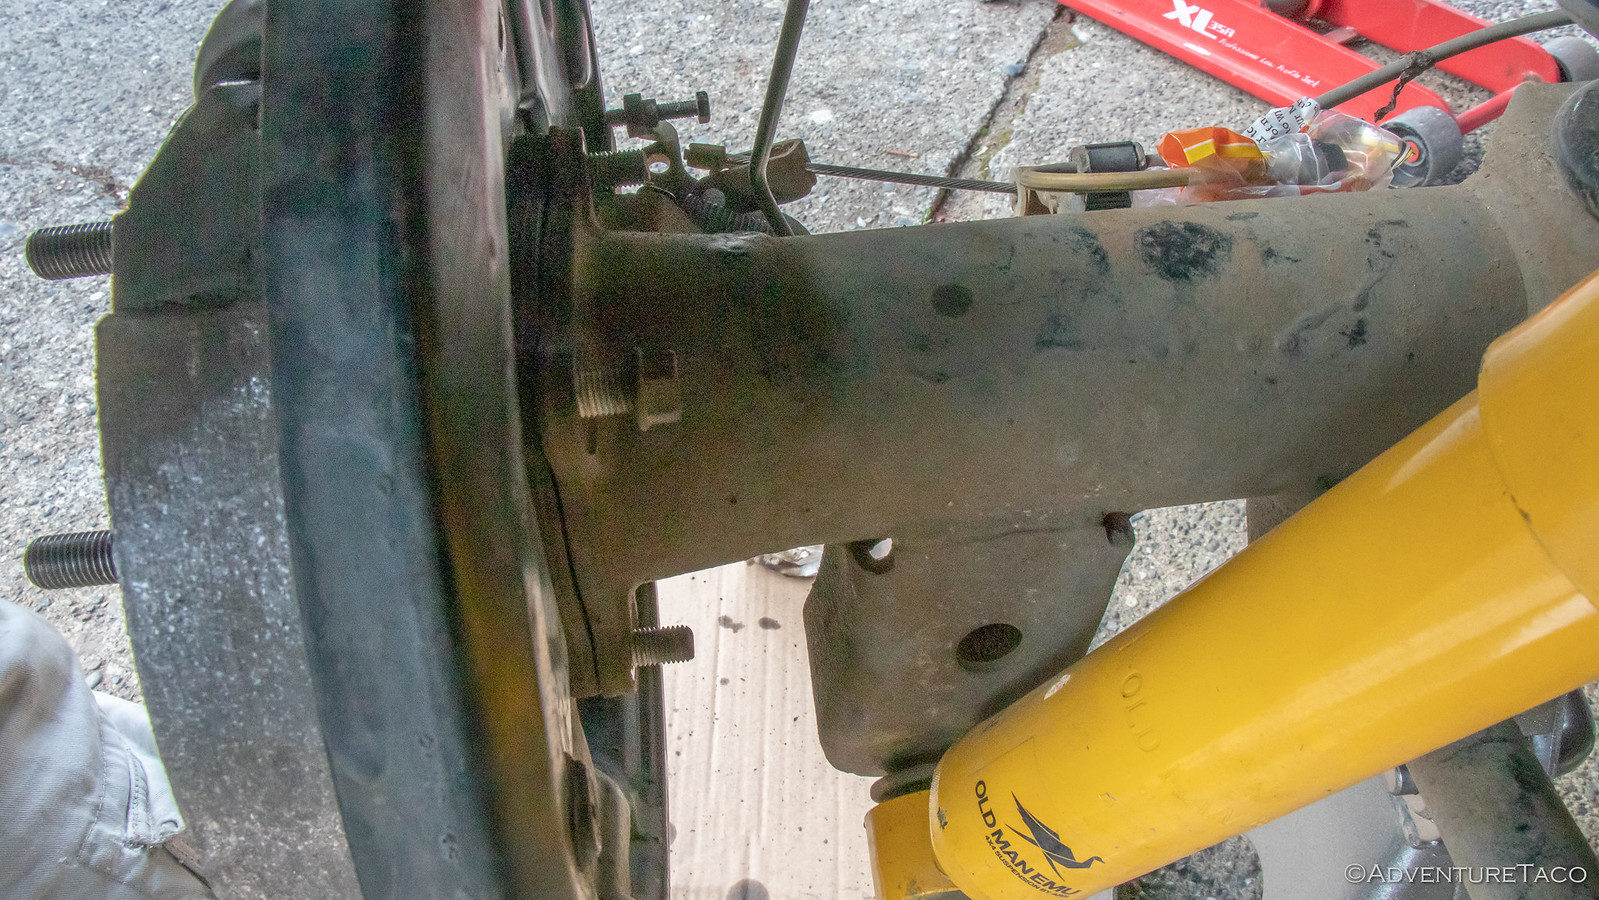


It was 5:30pm, and I'd finished the first side.

As one does, I figured it was the perfect time to start on the second side. :rofl:

It turns out of course, that I now had a better idea of what I was doing, and I didn't have to take any photos - so I was able to go a bit faster. And by a bit, I mean that I completed the entire process in about a quarter of the time - just under two hours - and with fewer mistakes.

By 7:45pm or so, I was buttoning everything up - the day a long one, but a successful one. I left refilling the rear diff with gear oil and bleeding the brakes for the following morning, but those things are easy enough to do that I wasn't at all worried.

It was dinner time, and I was famished. :hungry:

- - - - -​

Of course, now that I've addressed the axle seals, my next project is replacing the rear brake shoes. You know, because the current ones are saturated with diff oil from the previously leaky seals. :frusty:
 
Building a 5th Gen (2010+) 4Runner Storage Platform
August 25, 2019.

I've built a couple of storage platforms in the past - a slide-with-a-slide style platform for my 1st gen Tacoma, and a fridge-slide style for my 3rd Gen 4Runner - so when a buddy of mine asked for help building one for his 5th Gen 4Runner, I was happy to help.

The goal was relatively simple for this build - a simple platform with some L-track to secure loads, and a way to level out the back of the 4Runner to sleep at night. No fridge slide (yet), but the ability to add it in the future. And, lastly - two slide-out tables to provide room to make lunch, or set various items on when stopped.

48654243528_b14977b52a_h.jpg

We got started as with any woodworking project - by purchasing the necessary materials. Not much needed for this project - just a single 5'x5' sheet of ¾" Baltic birch plywood, and three pieces of L-track. And of course some screws and glue to secure everything together.

48654600741_18e94c582f_h.jpg

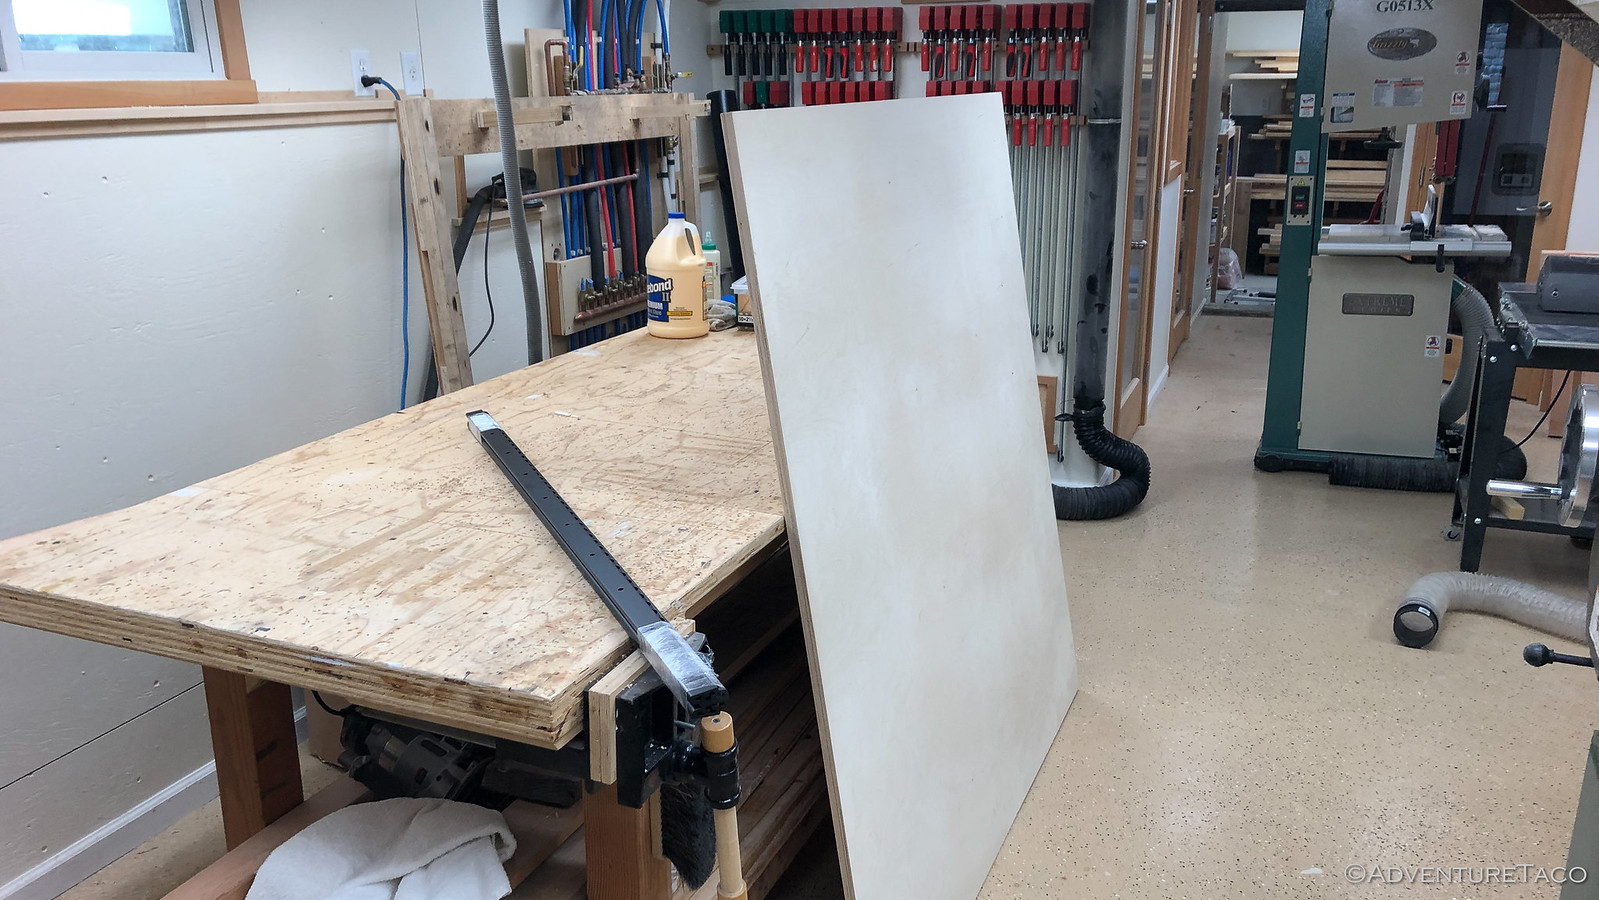
Next was breaking down the plywood into the requisite components. We used a combination of the Makita Track Saw and table saw for this operation, quickly breaking the plywood down to the requisite dimensions, the main platform being 43" wide and 40" deep. We also took a couple minutes to glue up the bottom supports that would hold it 2¼" off the floor, so the glue would have a bit of time to set up before we attached them to the underside of the platform

48654243328_eb310a18a0_h.jpg


48654600446_5a3dc6742f_h.jpg

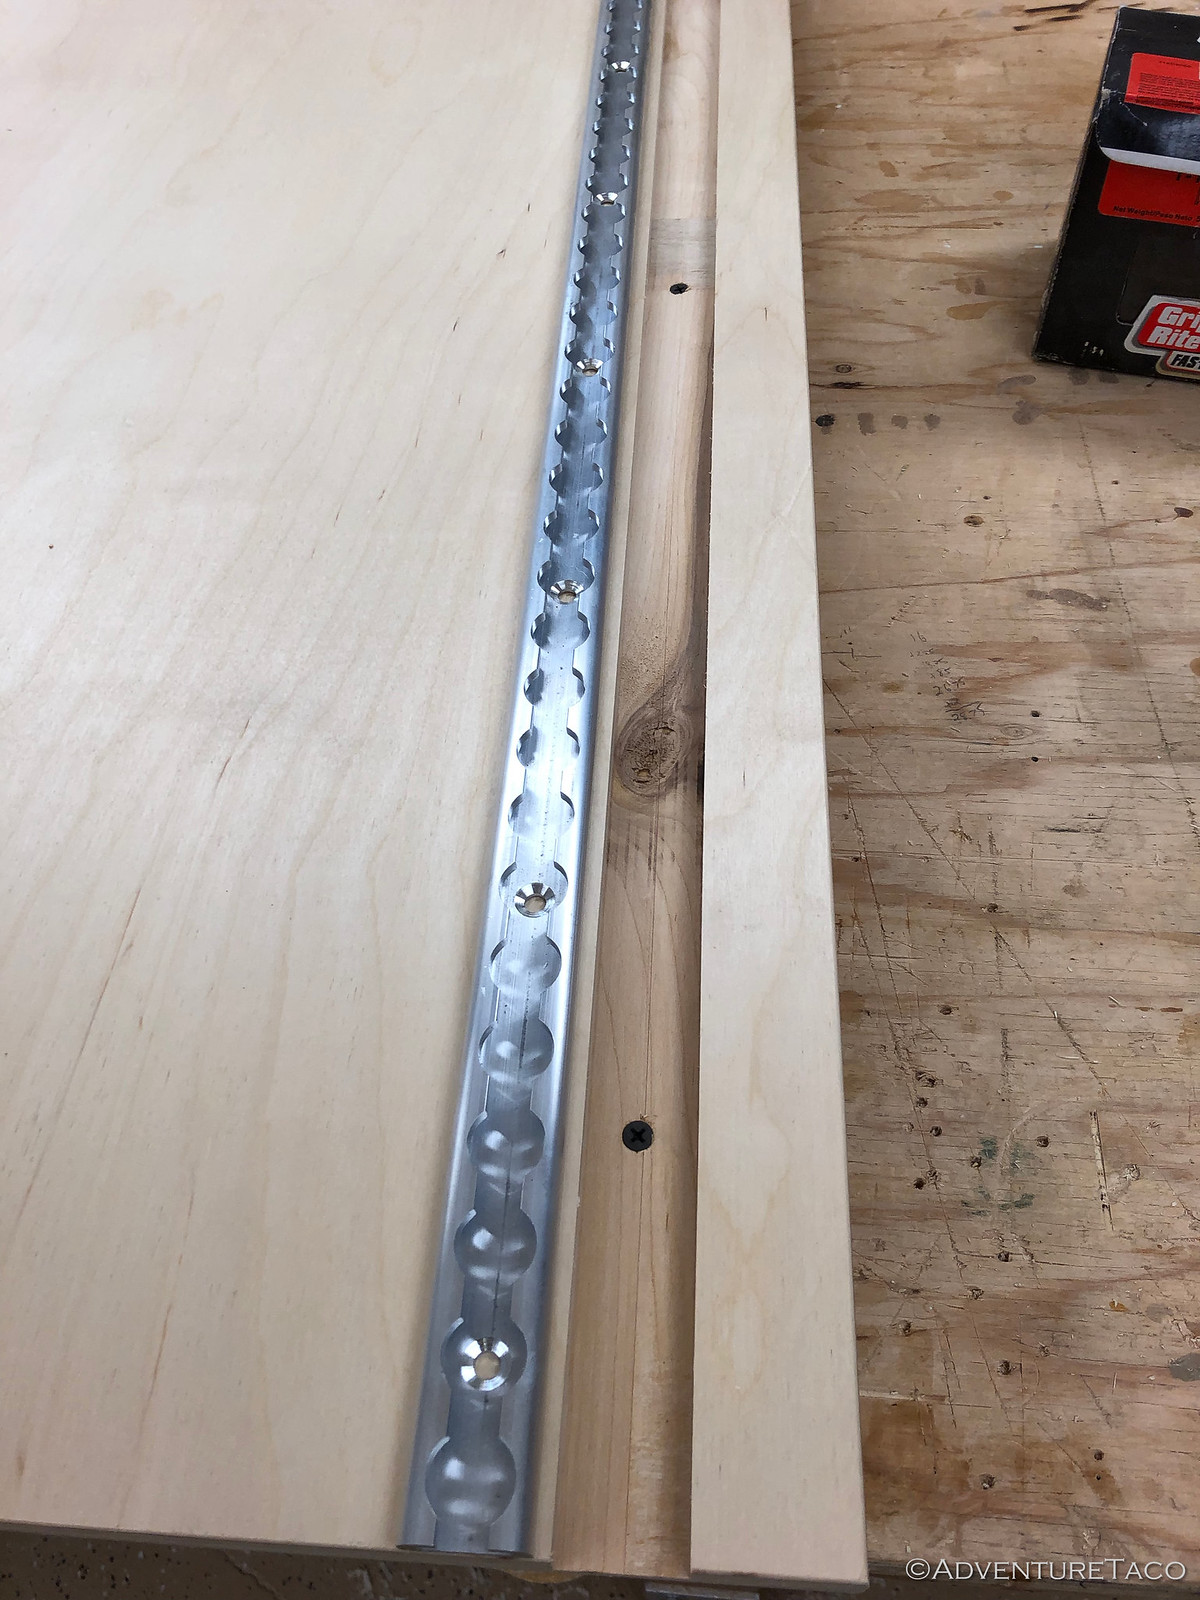
From there, it was time to cut some dados and rabbits on the platform - the dados to accept the L-track that would be used to secure loads, and the rabbit along the leading edge of the underside to allowing it to sit further forward, for a flatter, more continuous sleeping platform.

48654600366_9b589bb2ce_h.jpg


48654243038_51f23b24f1_h.jpg

Machining of the platform was nearly done at this point, the only thing left to do was drilling a couple holes and countersinks for the M6x1.0 70mm that will secure the platform into the existing tie-down locations. Then, a 1/8th inch roundover eased all the edges for a nicer feel when moving the platform around.

48654600121_a0708f477e_h.jpg


48654747662_021795ca49_h.jpg

By this point, the glue on the three runners we'd glued up at the beginning was set up enough that we could attach them to the bottom of the platform. These runners raise the top of the platform up approximately 2", so that it's level with the rear seats when they are folded down.

To keep things clean, we secured them through the dados we'd cut for the L-track, making sure that the screws wouldn't interfere with the holes for the L-track itself, which we attached next - the alignment of the supports now adding extra meat for the L-track screws to bite into.

48654242583_1ac78930ef_h.jpg


48654242393_4844065854_h.jpg


48654599566_2430fa1057_h.jpg

The platform at this point - if it was going to be used only for storage and sleeping - could be done, but we decided that a pull out shelf would be a nice addition, and would use some of the "wasted" space below the platform to boot!

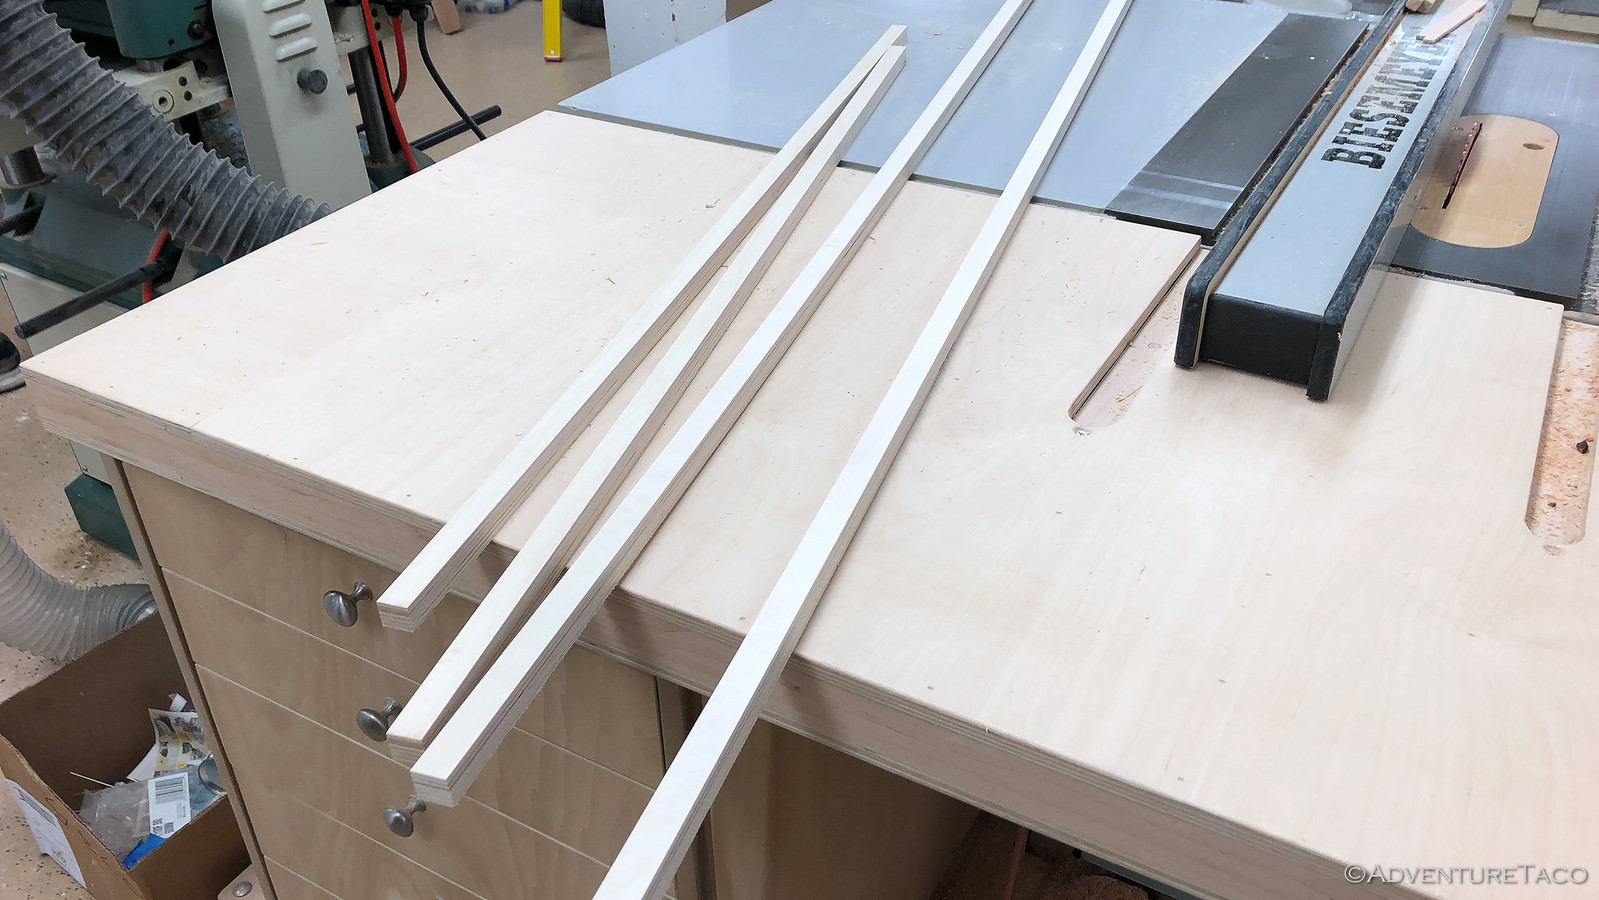
So, we measured the width between the runners and whipped out a shelf on the table saw, as well as some runners that would keep it aligned as it was pulled in and out via a finger-sized recess routed into the bottom of the shelf.

48654599421_89c93d33b3_h.jpg


48654747037_10cd68469e_h.jpg


48654241843_715b75e822_h.jpg

And with that, construction was complete and it was time for a test fit. Platform and securing bolts in hand, we headed out to the 4Runner where we removed the two front cargo loops (and their associated bolts) so that our bolts could take their place.

48654599086_778aed4549_h.jpg


48654241653_b5d0183298_h.jpg

It fit great! And it was functional to boot - much more so than the standard configuration of the storage area of a 5th gen 4Runner. The tie-down rails of course allow for many more ways to store bins and boxes in the back, and the fact that the area is now flat for sleeping is a huge plus.

Of course, not everyone may need a flat area for sleeping - a RTT or ground tent may fit that bill. In that case, the platform supports can easily be made taller, drawers added below the platform for even more storage. Or a simple drawer-slide system can be added to the top of the platform for a fridge, as I did for my 3rd gen 4Runner.

48654748702_6c7e6b7339_h.jpg

And the great thing is that it's all just wood - so it's easy to tweak over time should you ever decide to change things up a bit as your camping style evolves.

- - - - -​

Interested in Your Own Storage Platform?

5th gen 4Runner Storage platforms are for sale! Made from 3/4" Baltic birch plywood, they are strong enough to support just about anything you throw at them, whether it be a full load of gear, a fridge, or even a couple of people sleeping in the back of the truck.

Several configurations are available to suit your own camping needs, and I'm happy to consider customization's at your request. More info available at adventuretaco.com/store/5th-gen-4Runner-Storage-Platform/.

Basic platform - $350 + shipping*
  • 3/4" baltic birch plywood platform 2¼" above the existing rear storage floor (aligned with folded down rear seats).
  • Two (2) L-tracks, one along each side to secure loads.
  • One pull-out shelf, approximately 18" wide.
* local pick-up available and recommended as shipping of this large platform is expensive. Shipped platforms require partial assembly and come with screws, detailed instructions, and all necessary holes pre-drilled. Only a screwdriver is required for assembly. Shipping can result in the scuffing of a platform, which is cosmetic only - it will still function perfectly (and it's going to get banged up in your truck if you use it anyway).

Additions
  • Second pull-out shelf. $50
  • Third L-track in center of platform. $75
  • Fridge drawer/slide to fit your fridge. $100 (Note: moves second (included) L-track to center of platform)
  • Taller platform supports to allow gear storage below the platform. $35-$50
  • Paint - clear polyurethane on the top and sides of the platform, as well as any pull-out shelves. $100
 
Not sure how I overlooked this, but I am in awe of your craftsmanship. I admire your willingness to tackle a job yourself and figure it out. Not many folks these days put forth that effort.
 
Completely in love with this thread! Looking into the 4Runner world for a "capable camping vehicle" for myself, the lady, and the four kiddos (4-legged kind). Dad's pushing for a Tacoma because I do need to tow a boat with whatever future vehicle we end up with, but that's just not practical with the dogs (honestly I think he just wants to be able to borrow it). Im still deciding between a 3rd gen and the better tow capacity of a V8 4th gen, but this thread is easily pushing in a certain direction!

Also, living vicariously through the AdventureTaco thread
 
4Runner Accident, and the Saga of Repair

If you own vehicles long enough, it's a safe bet that one will be in an accident. Luckily for us, when the 4Runner was hit, no one was in it. This is the story of what happened, and the saga that followed.

So, it was the first Friday in December when @mrs.turbodb drove the 4Runner a few miles to a school where she volunteers as a tutor, around 10:00am. I'd gone to help a buddy with some landscaping at his place.

49535928442_81edff8134_h.jpg

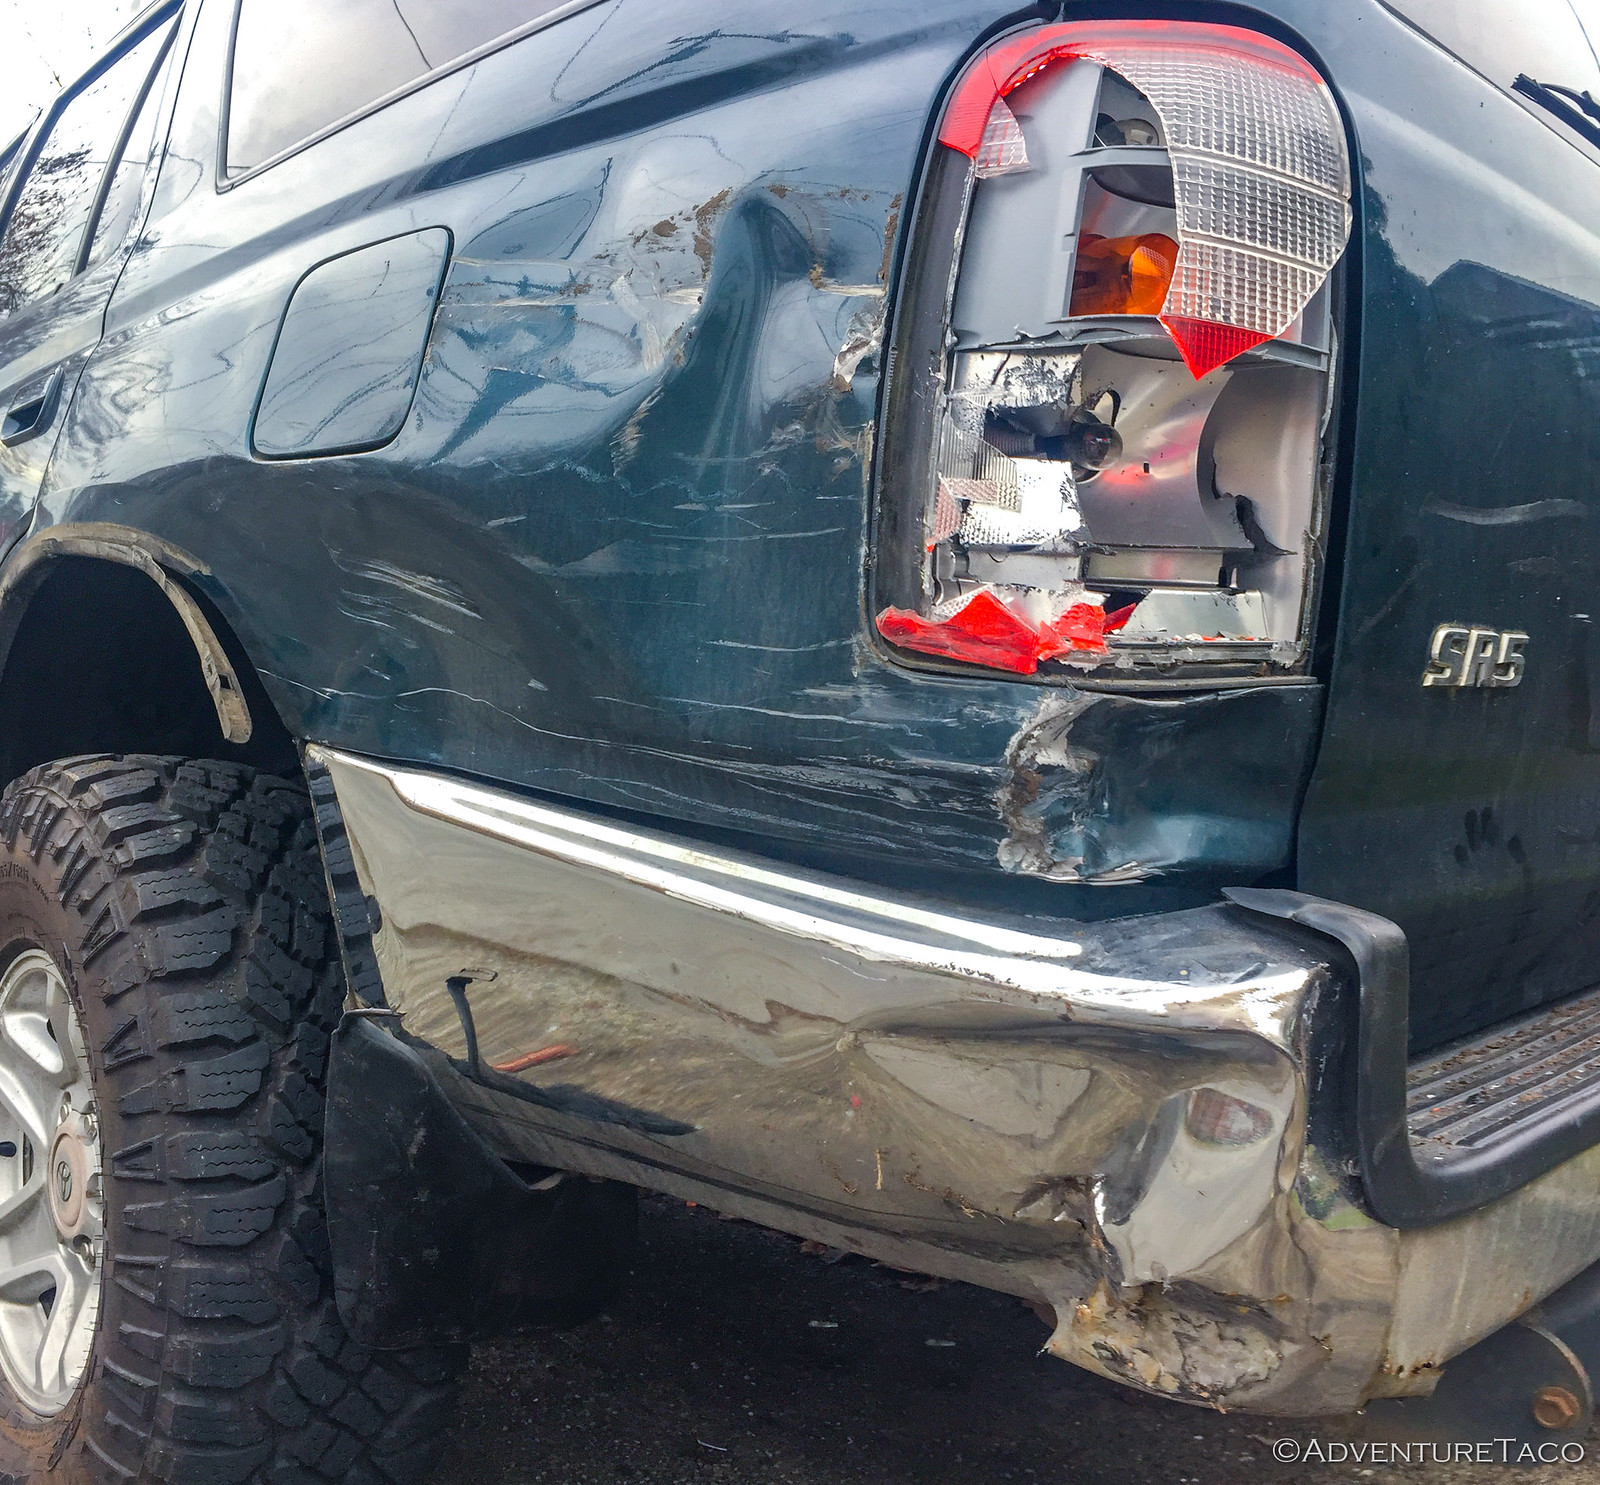
He and I were eating lunch when @mrs.turbodb called to let me know that a 17-year old girl had plowed into the 4Runner when it was parked outside the school.

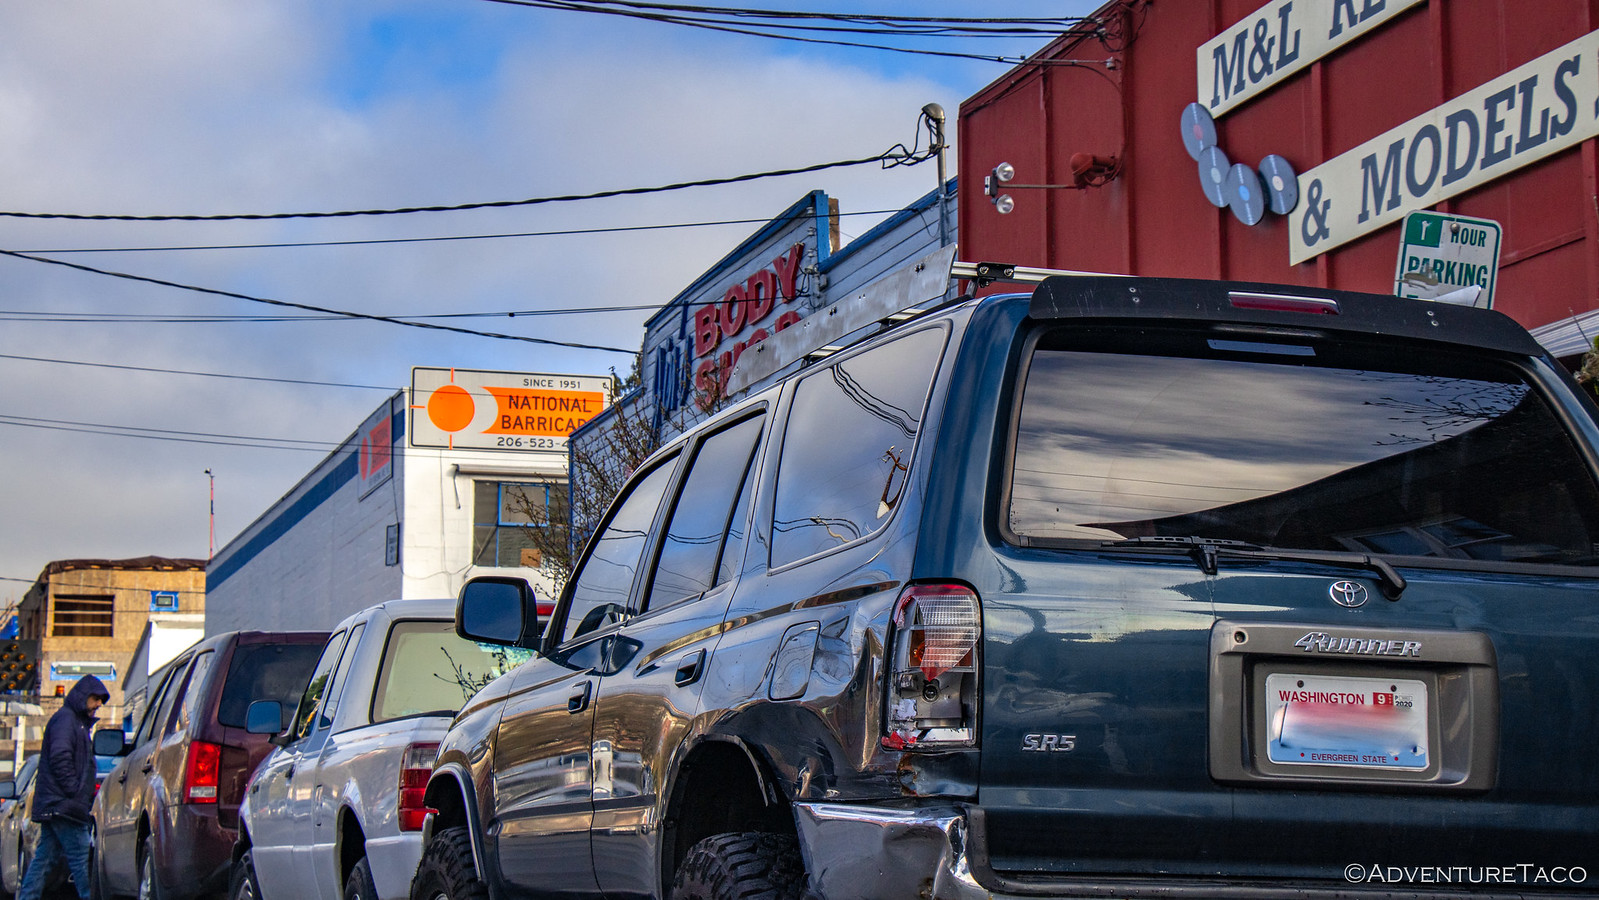
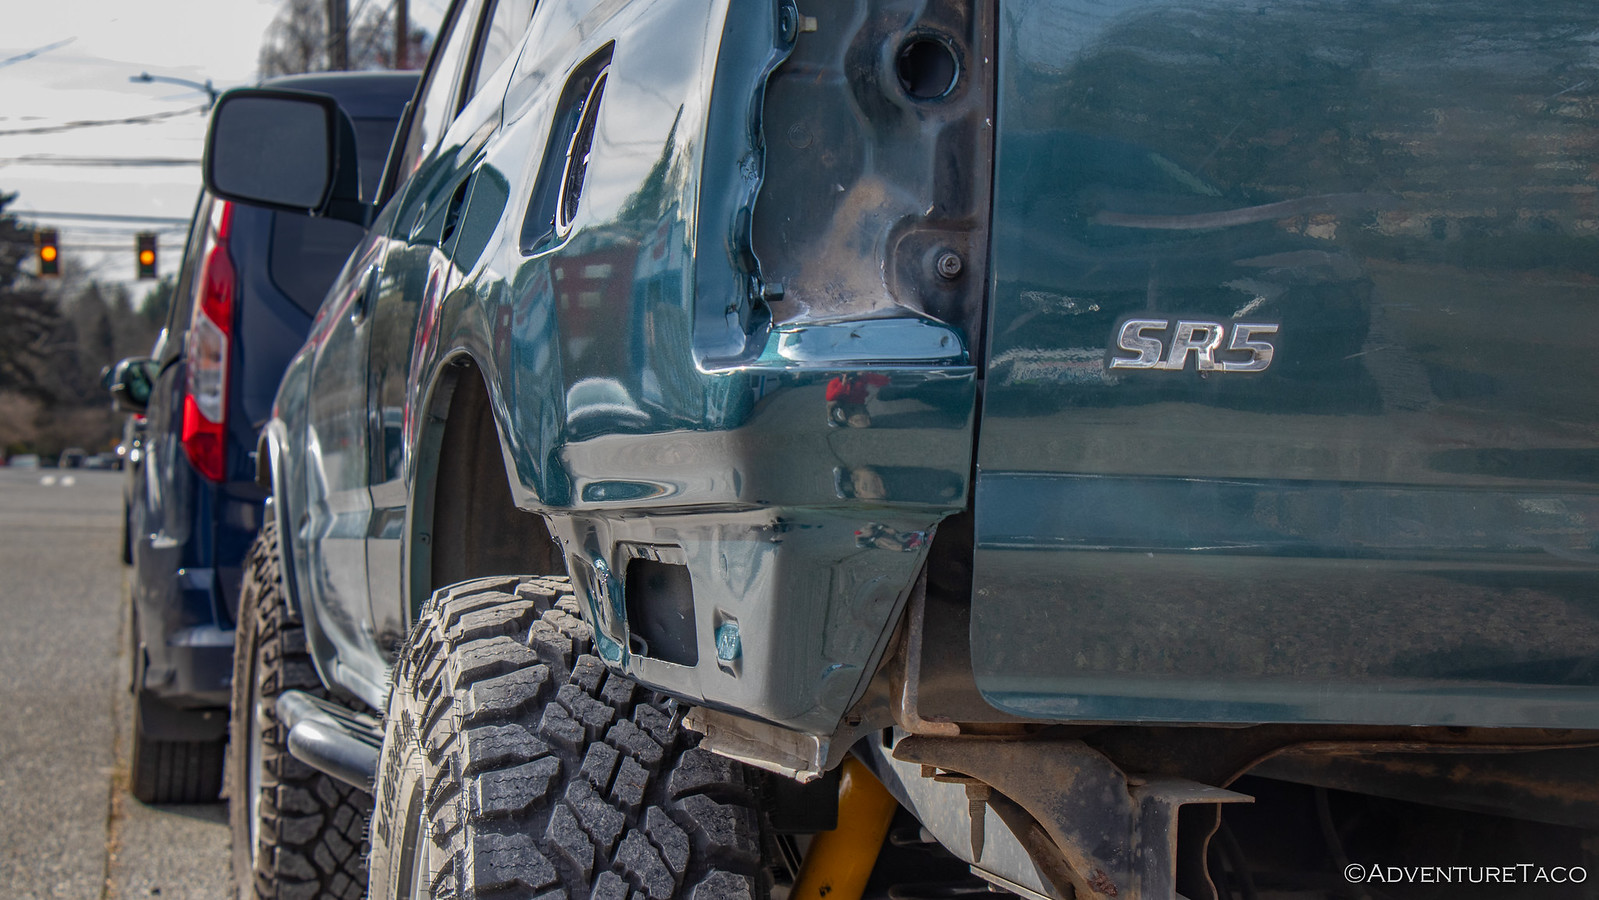
She'd made a left hand turn, and was accelerating down the street when she decided that she just had to turn around and reach into the back seat to grab something. Doing so caused her to turn the wheel, and before she knew it, she'd drifted right and crashed into the driver rear corner of the 4Runner, pushing it into the car in front of it.

Not. Awesome.

Luckily for us, the girl had called her mom - they apparently lived a block or so away - and they had the wherewithal to go into the school to ask if the 4Runner (and second vehicle) belonged to any of the staff. Not a fun call to get over the intercom, if you're @mrs.turbodb, who came out to find the 4Runner still entangled in the Suburban that had hit it.

49535203153_33672c5a30_h.jpg

That's not me.

49535202993_066eec8c31_h.jpg


49535927922_fbf452304b_h.jpg

After exchanging insurance info, and waiting for a tow truck to come untangle the vehicles, @mrs.turbodb headed home and set about finding shops where we could take the 4Runner for repair estimates. You see, we knew that because it was an old vehicle, that it wouldn't take much for it to be totaled - and we wanted to get all of our ducks in a row so we were just a bit more educated on what it would take to fix our family adventure-mobile.

Our first estimate was the next afternoon, and let me tell you - it wasn't pretty. I wasn't at the shop when they looked the truck over, but the estimate came back at a little over $7100, and the guy writing the estimate advised @mrs.turbodb to start looking for stock parts on Craigslist that we could swap in - for the nice aftermarket parts I'd installed, which we could sell for more than they'd pay - to the 4Runner when the insurance company totaled it.

Needless to say, I felt like $7100 was a little high for a rear quarter panel and trim, rear bumper, and a taillight assembly, and @mrs.turbodb had already arranged several other appointments for estimates, so I didn't worry all that much at this point.

Over the next several days as we got six more estimates that ranged from $2300 - $5300, I waited for Safeco - the other person's insurance - to contact me and let me know the next steps. Five days and several of my own calls later, I was still waiting.

Finally, Safeco got back to me and let me know that they were accepting 100% liability. "Well, that's good," I thought, and within five minutes, I'd emailed them to ask what the next steps were.

49535927737_06dfea198a_o.jpg

Two days later, I heard back. Unfortunately, by that time we were all out of town - we'd been planning a trip to Hawaii for over a year - and we weren't planning to return for 10 days, at which point @mrs.turbodb and I were heading to California and the Mojave Reserve to do a bit more exploring than we'd been able to during our trip along the Mojave Road the year before. I sent Safeco an email letting them know I'd get back to them in early January, and proceeded to have a great time in Hawaii and on our Mojave Redemption trip.

49535927722_f83771985f_h.jpg


Our first day in the Mojave National Preserve was a bit... unusual.

I returned in January to find out that the Safeco agent was now out of town - without a stand-in - for another week. I wasn't thrilled about that, but I figured it was no big deal - we'd gotten the ball rolling in December and now it was just a matter of finding out where Safeco wanted me to get a couple quotes so we could start the negotiation.

I called every day after the agent was supposed to be back in the office, and three days later I was able finally able to get in touch. They gave me a list of Safeco-approved repair shops, and I made appointments at two of them - Service King and Gerber Collision - over the next several days.

49535927647_ed37a2c6be_h.jpg


Not the actual locations I would visit.

My first appointment was at Service King. When I arrived, the place seemed reasonably clean, the vehicles there were definitely nicer than ours, and the quote I got was right in the middle of the range of all the previous quotes at $4144. In fact, it was at the low end of the quotes that called for replacing the rear quarter panel - a $1200 part that would require cutting out and welding in a new panel - vs. the cheaper quotes which called for pulling out the dents as much as possible and then repairing the quarter panel.

The estimator at Service King let me know that the quote amount was likely right on the edge of what Safeco would deem a total loss, so they'd have to get approval before actually doing the work. That was fine with me, since I still needed to head over to Gerber for their estimate. I thanked the estimator and let him know I'd be in touch, and then waited five days for my final appointment.

My experience at Gerber was - to say the least - a bit different than the experience I had at Service King. Both @mrs.turbodb and I went to this appointment, and when we arrived, the receptionist asked us to wait in a couple of chairs for a few minutes until the estimator was free. The thing was, he was sitting right next to her - and we could see he was surfing the internet on his computer. Strange. After about 5 minutes, he was ready to see us, and asked that I pull the 4Runner into the shop. That was no problem - it was raining outside at the time - so I backed in and got out to show him the damage. Immediately he said, "Well, that's definitely totaled," to which I tried to explain that I didn't actually want the truck to be totaled - I wanted it to be fixed.

He was having none of that, letting me know that it didn't matter what I wanted - as he walked around the vehicle, snapping photos inside and out. This was a bit disconcerting, but I figured I might as well just get the estimate from him and then head over to Service King, so I bit my lip and followed him back into the office, where he told me, "It'll be about 10 minutes to write up the estimate." That was fine with me, so we waited.

After 10 minutes, he looked up from his computer and told us we should leave - he'd handle letting Safeco know that the 4Runner was totaled. Confused, I told him that I didn't want him communicating with Safeco at all - I was just here today to get a quote, and that I'd still like that quote so I could add it to the set of quotes I'd already gotten. "You're not getting a quote," he said.

Shocked, I asked why and got an answer that I don't even recall. But, I soon realized that he really wasn't going to give me a quote, and so I asked that they remove all of my personal information from their systems and not communicate anything to Safeco. "Not going to happen," was the response I got, "Once we enter your information in our system, we can't remove it." There wasn't much I could do at that point, so I left and texted Safeco with my experience.

49535698001_2c404984e1_h.jpg

The reaction I got from Safeco was pretty great at this point, I thought, and so I contacted Service King and setup an appointment for the first time they had available - 26 days later in February! Not ideal, but I figured that it was a good sign that they were busy, as it likely meant they did great work. It was 1:34pm, and I was happy - the 4Runner was going to get fixed!

:yay: :yes: :yay:​

You can imagine my surprise when I looked at my phone the next morning and saw a text that Safeco had sent just two hours later - at 3:47pm. Needless to say, my heart skipped a beat.

49535202478_0285e8c4c5_h.jpg


Wait, what?

I immediately got on the phone - though now with a new total loss adjuster - and discovered that the decision to total the vehicle was based on an estimate from (you guessed it) Gerber Collision! I was also running into a wall in trying to reason with Safeco that they'd already approved the work at Service King - that apparently didn't matter because the review of the vehicle value happens in parallel with arranging to get it fixed (to speed things along, I suppose, though I was never explicitly told this).

It was during this call that my new adjuster also sent me Safeco's total loss settlement statement, the relevant page of which below, highlighting, mine. You'll note that they'd valued the vehicle at approximately $4000 for salvage, and would give me a little over $1400 if I wanted to keep the 4Runner. Oh, and they were insistent that it all be done in two days - which was going to be tough for me given that I was in the middle of prepping to leave on my next trip to Death Valley.

49535697886_5e6f586415_h.jpg

I took some time to look everything over, and then sent my new adjuster an email stating that I'd like them to reconsider totaling the vehicle, along with reasoning for why I thought that two of the estimates - one at Service King, and one at a local shop (Jim's Body Shop), should be viable to get the 4Runner fixed, as they were both below the ~$4000 salvage value of the vehicle.

49535202363_b35110680c_h.jpg

Less than an hour later, I received an email from Safeco, and I was relieved to hear that they were once again OK with me getting the 4Runner fixed - though I'd need to do it at my local shop, and they wouldn't guarantee the work for the lifetime of the vehicle.

49535697731_1a38fec4bf_h.jpg

Thinking that things were looking up, I also sent a few other things to the Safeco adjuster that she'd requested I send in order to get the most value for the vehicle - the idea being that if the value was higher, that it might be OK to fix it at Service King, where they'd replace the rear quarter panel rather than fix it. I sent:
  • 4 comparable (similar age, mileage, features) 4Runners that I found across Craigslist, eBay, and KSL showing sale values ranging between $5995 and $10,500
  • All of the receipts for the aftermarket work and parts installed on the vehicle in the previous year, which totaled $6368. I knew that they'd pro-rate the value of these items, but I figured they were still worth including.
It wasn't long before the adjuster got back to me. Given the comparables and receipts I'd sent, they were willing to increase the value of the 4Runner by a ridiculously insignificant $300 - :rofl: - an amount that wasn't enough to warrant fixing at Service King. Over the next few days, I questioned that $300 adjustment - were the $1000 tires and, not to mention the custom roof rack, sliders, and beefed up suspension really "worthless?" I never got any answers to my questions from Safeco - but ultimately didn't really worry about it because I figured was still getting the 4Runner fixed at Jim's Body Shop.

And with that, I left for my Death Valley Connections trip - figuring that I'd set up the appointment at Jim's upon my return. For a couple days, I had a splenditacular time in the California desert, and it was only as I was traveling over the heights of the Last Chance Range that I happened to get cell service for a few minutes. Long enough to download the emails, but not long enough for me to still have service when I noticed the following in my inbox:

49535202278_e93d2ee895_o.jpg


Wait, what, again?! Especially interesting, given that I made no such request.

This got my blood pressure up a bit - again. This was the second time that Safeco had told me that I could get the 4Runner fixed and then later changed their mind and called it a total loss. And this time, it seemed as though they'd already notified the DMV that this was what was happening - without even consulting with me that I wanted to retain the vehicle if they totaled it!

Determined not to let it affect the rest of my trip, I put it out of my mind and had two more great days exploring the northern reaches of Death Valley National park. That park really is a special place, with an endless number of destinations to see and explore.

And so, as I found myself driving home on Super Bowl Sunday, I sent a quick email to Safeco letting them know - again - that I did not agree with their previous email, and I reiterated that I wanted to get the vehicle fixed at Jim's Body Shop, as they'd previously agreed just a week prior. The response I got was disheartening to say the least.

49535202253_528b4489d8_h.jpg

Not knowing what to do at this point, I decided that I needed to speak with someone who knew more about all this than I did, and who would be more likely to be on my side because they didn't have skin in the game - so I decided to call my own insurance carrier - Geico. I'd hesitated to do this previously since I knew doing so could cause my rates to go up - even though the vehicle was parked, and the incident was in no way my fault, but at this point I really had no other choice.

The person I talked to at Geico was great. Her first inclination was to just have me file a claim through Geico, get the 4Runner fixed that way, and then Geico would go after Safeco on my behalf, since Safeco had assumed 100% liability for the accident. However, because I don't carry comprehensive coverage on the 4Runner, it turns out that this option wasn't available.

Side note about my insurance philosophy: I view insurance as something that should be used to offset the risk of catastrophic loss - loss that would cause significant financial hardship should it occur. As such, whenever possible, I self-insure. I choose my deductibles to be as high as possible, and I carry only the coverages that I couldn't bear the financial cost of myself. I do this because I know that insurance companies exist - in today's age - to make money. They are betting that their clients premiums will be more valuable than the amount they have to pay out in claims. Knowing that, I make the same bet - that if I keep and invest my premium, that it will be more valuable in the long run, assuming that any claims I have are not catastrophic. I recommend that everyone take this approach, though in doing so, it's important to be honest with yourself about what would be catastrophic financially - as it is a different amount for everyone.

Next, she offered to call Safeco on my behalf and try to get to the bottom of what was going on. With more knowledge in the industry, we both thought that was a reasonable idea, and she put me on hold while she spent a few minutes with the Safeco adjuster. Unfortunately, the Safeco adjuster was even less forthcoming with Geico - my agent remarking that the Safeco adjuster seemed "downright rude." Strike two.

The last option Geico gave me was to call the Washington State Insurance Commissioner. This it turns out is a consumer advocacy group that reviews cases like this where insurance companies jerk around consumers, to make sure that nothing untoward is going on. And, while it would likely mean a bunch more time and hoops to jump through, I realized that it was all my agent at Geico could do, and I thanked her profusely for her time - it'd been over an hour that she worked on this - that morning.

49535698906_a262a00941_h.jpg


A last resort?

Before opening a case with the Washington State Insurance Commissioner, I decided to give Safeco one last call and see if I could work things out with them one final time. All I really wanted was to get the 4Runner fixed (at no cost to me) so we could continue to use it as our family adventure vehicle. The current situation - with an owner retained value of $1451.72 and my cheapest estimate from Jim's Body Shop being $2603 - definitely wasn't that.

Mentioning the Insurance Commissioner to Safeco definitely brought out an entirely different approach to the conversation from their side. I'm sure that's because getting the commissioner involved increases both the time and risk to Safeco, and in their business, time and risk are costly. And so, after being placed on hold a few times while she talked to her management, the Safeco adjuster eventually came back to the call and let me know that they could increase the amount of the payout to the cost of the repair at Jim's Body Shop, but in doing so they would still need to record the 4Runner as being totaled.

That wasn't ideal for me, but it was definitely better than having a totaled 4Runner and only half the money needed to fix it, so I agreed. It was only later - as I researched my next steps to getting the 4Runner re-titled and fixed, that I discovered a cool little provision in the Washington state vehicle code: a title only gets branded rebuilt/totaled if the vehicle is less than 20 years old at the time of the accident. So, while I still had to go to my local title office to get a new title, it's essentially identical to the previous one.

#SmallWins

I've now got an appointment scheduled at Jim's Body Shop to get the 4Runner fixed and already, Jim's has impressed me - twice. The first time was when I went back just to verify that they thought the estimate was solid - since I'll be paying out of pocket, I didn't want to find out that it'd end up costing $5000 to fix the 4Runner when they got down to it. They very cheerfully took a look at the 4Runner again and validated their initial estimate - so that's good. Then, when I stopped in to actually schedule the work - I asked if they'd be OK with me supplying the replacement parts. By purchasing those myself, I could save a few hundred dollars over what they'd charged on the estimate, and they were totally cool with that.

So, at this point, my hope is that I'm getting what I wanted: We're keeping the 4Runner and not paying out-of-pocket for repairs. And, I guess I'm also happy that I'm done dealing with Safeco and their flip-flops. My hope - and we'll see if this pans out - is that Jim's will actually let me take a few photos as they do work to the truck. If they do, that'll be awesome, but regardless there's bound to be one more story to this saga!
 
Look at that Bod! Fixing the 4Runner

If you missed the first part of this story, you may want to read 4Runner Accident, and the Saga of Repair when you're done reading this.

It was a Monday morning when we showed up at Jim's Body Shop in Seattle. Arriving a few minutes after they opened, they were in the process of assessing where they were on their various projects and one of the guys made an off-hand remark that they might be "overbooked." I wasn't worried though - in my dealings with Umberto, he'd seemed genuinely interested in working on the 4Runner - and a few minutes later we were handing him the key and showing him two things: first, all the parts we'd brought for replacement (turned out I could get them cheaper than he could). And second, that the tailgate wasn't closing quite right after the accident, so that he could make sure to get that working correctly as he straightened the sheet metal.

"No problem, we'll take care of it," said Umberto.

49714015513_65edd6a1c4_h.jpg


49714015963_b17aa3f2c5_h.jpg


49714871407_beb490ba91_h.jpg

Well, from there it was a lot of "no work" for us. With an estimate of "about a week," until we got the 4Runner back, it was now just a waiting game. Anyone who knows me, knows that I'm not a big fan of waiting; I like doing. I'd considered asking if I could come to visit and take photos as they were working on the 4Runner, but decided that I'd probably be a better customer if I just let them do their thing. :spy:

Jim's does happen to be reasonably close to where we drop off and pick up @mini.turbodb for school, so each day I wandered by to check in on the progress. In the beginning, it was quick and dramatic - the various bashed bits removed and the quarter panel pulled back out to its original shape, and some filler applied.

49714556446_153e15230d_h.jpg

Then, it sat for a couple days. Understandable given that there always seems to be a fleet of vehicles in various states of repair at Jim's, and a constant flow of happy customers going in and out.

On Friday, I showed up and the 4Runner - usually parked outside while they were working on other jobs - was nowhere to be found. @mini.turbodb and @mrs.turbodb happened to be there with me this time, and when Umberto noticed us poking around he beckoned us inside - the 4Runner was in the paint room. Painting had not yet begun.

But it was sanded, prepped, and ready to go. And it looked great. I could see after the sanding that places with filler were quite well done - the quarter panel itself had been mostly restored to its original shape. Very cool!

49714871987_98826517e1_h.jpg

Well, I don't know exactly when it got painted, but when I stopped by on Monday, it was back outside and looking spiffy. Really, that rear quarter panel and door (which had been blended) were the best looking parts of the 4Runner at this point.

49714868862_c1ebc5a5be_h.jpg


49714869422_cf3097c899_h.jpg

The next day @mrs.turbodb got a call from Umberto - the 4Runner was ready. Happy to get it back, I headed down and happily forked over the under-the-original-estimate amount that Umberto told me was the final cost, and thanked everyone in the shop profusely. The truck looks great, and while I lost too many hours of my life arguing with Safeco about it, now it's back in action and ready for it's next adventure!

49714554806_293a3d03c3_h.jpg

I can say with no hesitation that I highly recommend Jim's Auto Body. I don't know if Jim is even really around anymore, but as long as Umberto is, you'll be in great hands!
 
Last edited:
Looks fantastic. They did a great job. Always a good feeling to get your truck back after it’s fixed.

You’ve inspired me to look for another 3rd gen. Had 2. A few Taco’s. Most recently a 2018. But never jelled with me.

Search for a 5-sp SR5 begins!
 
Replacing Rear Brakes on the 4Runner

I've been putting off rear brake shoe replacement on the 4Runner for quite a while. In fact, it's been almost six months to the day since I replaced the rear axle seals, and I've needed to do the job since then - the gear oil that leaked out through the brake drums, having contaminated the rear brake shoes. But, I didn't want to replace the shoes at the same time I replaced the axle seals because it was my first time doing the seal job and I wanted to make sure the new seals were working correctly before I risked ruining a second set of brake shoes. Then, the 4Runner was in an accident, and I wasn't sure if we were going to get to keep it.

All that is now in the rear view mirror, so the only thing keeping me from getting the brakes in (better) working order was my own procrastination. Relying only on information from other sources, I'd somehow worked this up in my head to be a very difficult job - lots of parts to keep track of, difficult springs to remove and install. Trouble waiting around every turn.

But, when we finally got a day of nice weather, I figured there was no better time than the present to just dive in and get it taken care of. And, as it turns out, it was easy!

:yay:​

If you're here just looking for a step-by-step guide on the process, I've written that up along with the parts and tools you'll need to do the job: Step by Step Tacoma Rear Drum Brake Shoe Replacement (also 4Runner). Or, for a bit more *story* keep reading below.​

The first thing of course was to grab the parts that'd I'd purchased six months ago. This was easy since all the parts - to do both sides - come in one convenient box: Toyota Drum Brake Shoe Kit (04495-35230).

49714576421_733caa77e3_h.jpg

Tools also turned out to be quite simple - as projects go. In addition to jacking up the truck and removing the rear wheel, the only tools I needed for the brake job were:
I got started by lifting the rear end of the 4Runner off the ground and removing the wheel. I decided to do only one side at a time so I could reference the other side if something went terribly wrong, and because I wasn't sure if it was going to start raining and I'd need to pack everything up as quickly as possible.

49714891037_82f68bb74c_h.jpg

Removing the brake drums - the big metal bits that cover all the guts - was easy, and I knew it would be. I'd left the brake shoes - the guts inside the drum - relatively loose when I'd done the rear axle seals, and so in no time I was to the part of the process that worried me the most - removing the upper spring that pulls the shoes together.

From everything I'd heard, this was a major pain in the keester - sometimes a pain enough to require a special pair of pliers that are designed specifically for this operation. Armed with just a pair of vise grips, I grabbed onto the spring and voila, it released.

Really easily as far as I was concerned.

49714035803_73b763cea4_h.jpg

The rest of the disassembly went just as smoothly as the first step (for lots of photos and detail, check out Step by Step Tacoma Rear Drum Brake Shoe Replacement) and it took mere minutes to have all the parts laid out and cleaned up. And that was with me taking photos and trading phones since my Google Pixel battery seems to be the weakest battery ever to exist, turning itself off when the ambient temperature dips below 47°F. :rant:

49714892717_23eb2018fb_h.jpg

Removal of all the parts having been easy, I wasn't all that concerned about reassembly. There aren't really that many parts, and everything seemed reasonably self-explanatory given that I'd paid even a little bit of attention as things were removed. Probably the most complex bit was knowing which holes held the ends of various springs, and there was a pattern to that as well.

49714577106_bf16e3d115_h.jpg


49714036753_171b7c9727_h.jpg

Soon enough, all the parts were greased up and reassembled; I was ready for the fitting of the drum and final adjusting of the shoes. This was the second element that I'd heard was hard to get right, but again I seemed to get lucky or something because I pulled it off without a hitch. All I had to do was:
  1. Initially, push the brake shoes towards each other as far as possible, compressing the cylinder.
  2. Fit the drum over the shoes to check fit.
  3. Remove the drum, use the brake shoe adjuster to push the shoes apart slightly and then check the drum fit again.
  4. Repeat step 3 until the drum fit snugly - but not tight/forced in any way - on the shoes as it is installed.
  5. Use the emergency brake in the cab to do the final adjustment of the shoes.
The first side of the 4Runner took me something like 45 minutes or an hour, the second side half that at most. In fact, having done this only twice now, I'd say that this was one of the easier jobs - at least assuming the rear brakes aren't rusted away - that I've done from the perspective of having to be meticulous and pay close attention.

And boy, is the braking ever better! My old shoes were quite obviously full of gear oil and not doing the job they should have been.
 
Love this thread. Lots of helpful information, and good commentary paired with it!
Looking forward to seeing more!
 
Into the Forest
Any other year, a trip to Icicle Creek near Leavenworth, WA in early June would be our second or third visit of the season. But with everything going on this year, the Forest Service delayed opening of the road - generally used to access campgrounds and trailheads until after Memorial Day weekend. In fact, even as we visited, all of the developed campgrounds and several of the trailhead parking lots were still closed to encourage social distancing and prevent the spread of the virus.

Still, as we drove up Icicle Creek Road, we found ourselves happy to be able to get out. We had our fingers crossed - hoping that the site where we usually camp would be open and available, its status of "developed" or "undeveloped" in a grey area as far as we were concerned.

49988928933_592ede2b0f_h.jpg

The first site we checked - closer to the river and where we'd previously done some safety maintenance, with a nice beach right next to camp - was occupied. More than a bit surprised given that it was a Monday afternoon, a quick look at the site (as we turned around) provided a bit of relief - at this particular time, it wasn't an ideal spot to camp - large puddles of water filled much of the camp area, and the entire beach was submerged under a river bursting at its banks.

Even with the first site occupied, we were reasonably sure that we'd have our second - and what has become our primary over the years - site all to ourselves. Especially early in the season, access to this site is limited to those willing to cross a relatively deep water body - but one that we've had enough experience with to know that what lies beyond is worth it!

49989693157_7003f641bc_h.jpg


49988934543_9898278611_h.jpg


49989698347_baeb3e6536_h.jpg


49989698092_24a537fbda_h.jpg

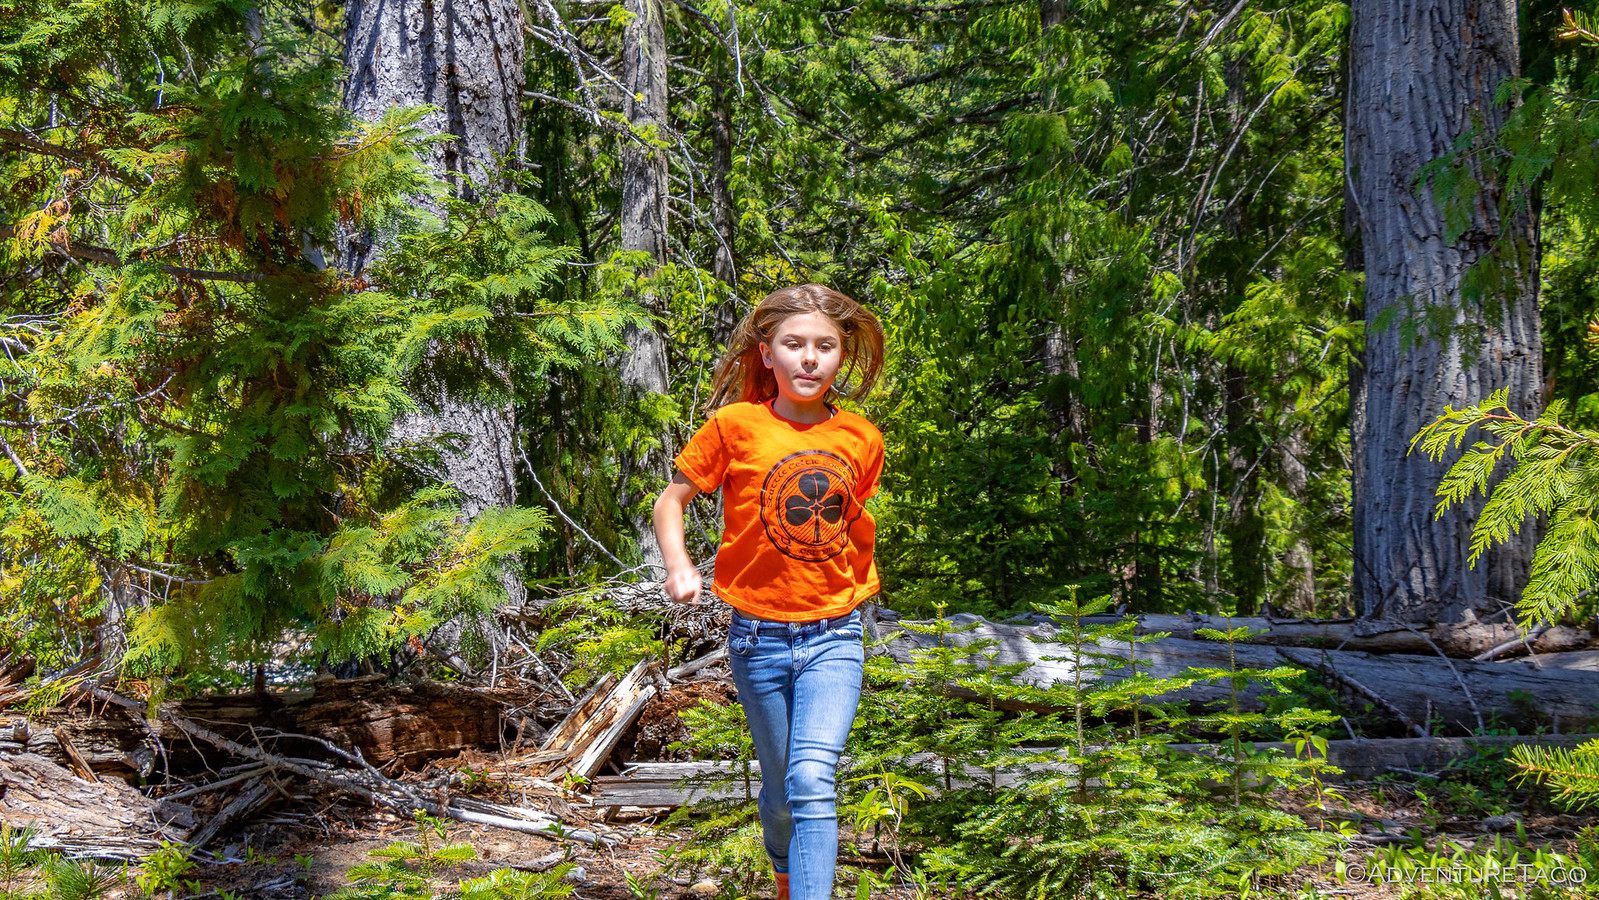
Into camp - and by the looks of it, as the first visitors of the season - I hadn't even turned the engine off before @mini.turbodb flung open her door and bolted out into the forest!

After months of seclusion at home, it was time to explore, and great to be out!

49988933768_61d0d52db9_h.jpg

@mrs.turbodb and I pulled a few things out of the 4Runner and then set off in search of the small one. We knew we'd find her down by the river, and sure enough that's just where she was - just sitting there on a log, as happy as could be.

49989697657_d4ea429d7c_h.jpg


49989697492_d7ca254d97_h.jpg

As she heard the click of the camera, she turned, a huge smile on her face. "I'm so glad we could come here, it's so nice to go camping!" Funny how it's often such a struggle to get her into the truck to go - the couple-hour ride, so horrible - and yet once we're out, @mini.turbodb has the time of her life.

49989451241_8e7fb1d15f_h.jpg

The river - as we'd noted at the first camp site - was bursting. Perhaps the highest we've ever seen it, none of the gravel bars that we often spend hours reading on while skipping rocks and playing in the shallow water, were above the water line. Interestingly, this also resulted in a much quieter experience - turbulence and rapids now completely submerged under the flow.

49989696782_00e046f786_h.jpg

Eager to explore some of her favorite places, @mini.turbodb informed us that we needed to go check out the waterfall. "Want to run with me?" she asked?

Pretty much every parent said:
You go right ahead, we'll catch up.

49989450716_a3ae4290e0_h.jpg


49989696382_95264065b4_h.jpg

There was much running on this trip - likely a combination of the freedom and desire to take advantage of every minute possible.

We arrived at the waterfall to find it nearly non-existent. There was - to be sure - an indication that some anomaly existed in this part of the river, but a fall of water, there was not.

No matter, this was still a spot to soak in the sweet spring air and listen to the crashing water.

49989696182_5723803912_h.jpg

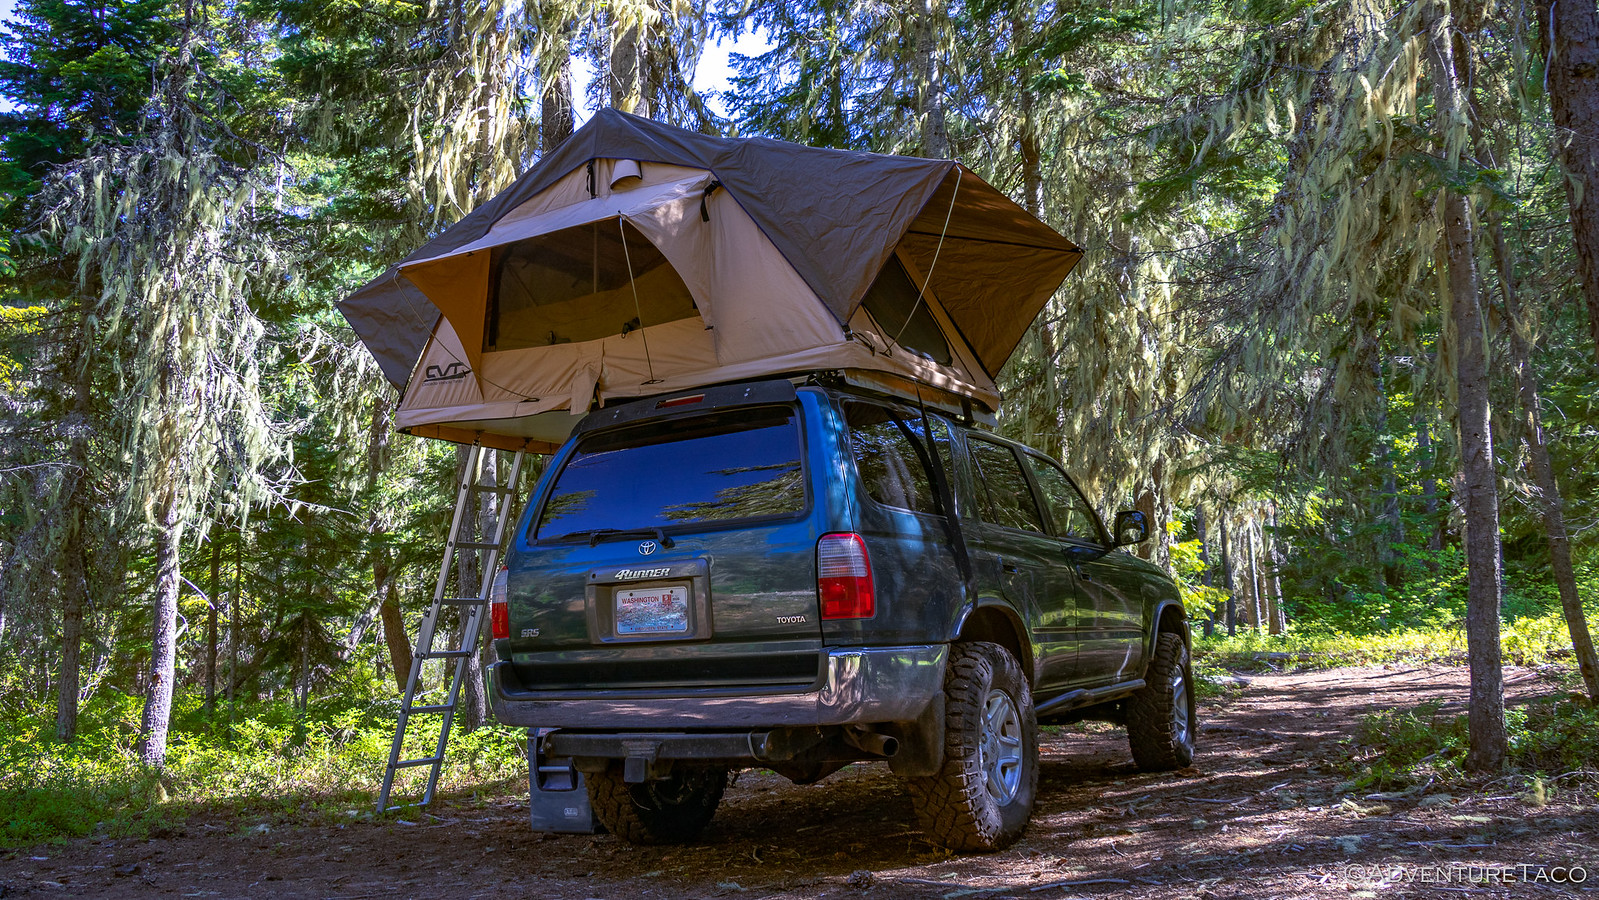
We explored several areas around camp over the next hour or so - some of them together, and some of them solo excursions by @mini.turbodb while we got camp and the tent setup on the 4Runner. This situation really does work well - adults upstairs in the tent, and the kiddo downstairs on the storage area sleeping platform (shameless plug - also available for 5th gen (2010+) 4Runners here).

49988931773_9ec242f10e_h.jpg

With a few more hours of daylight, @mrs.turbodb suggested that we go for a bit of a walk - back along Icicle Road - to a bridge affording a splendtacular-but-usually-too-crowded view of the creek. Her hope was - today - that things would be different with generally fewer people around - a side effect of our weekday visit and the lack of open campgrounds.

Along the way, more play for smalls.

49988931608_f7f740f73e_h.jpg

The bridge wasn't all that far away, and even with several distractions on the way, we arrived in less than half an hour, with zero complaints about distance from @mini.turbodb. That - looking back on it - was a missed opportunity, we should have capitalized on that situation and continued our hike! :wink:

49988931353_312495dc58_h.jpg


49989695462_1dcfb88b0c_h.jpg

Just as we'd hoped, the usually-crawling-with-people rapids and swimming hole were devoid of other humans, and after watching the water rush by for a few minutes from atop the bridge, @mini.turbodb scooted herself down near the water and perched herself on yet another overlook.

49989695367_c052493af7_h.jpg

Water really is one of @mini's favorite things - it's one of the reasons I think we keep coming back to this spot - and no matter the time of year, she's always playing in or around the creek, still young enough to enjoy getting wet and dirty, not at all worried what her clothes might look like when she's done...


Don't miss the rest of the story, and all the remaining photos that don't fit here (due to max post size). Hopefully that can change in the future, but until then...

Keep reading the rest here
Into the Forest


.
 
Olympic-Sized Views to Obstruction Point
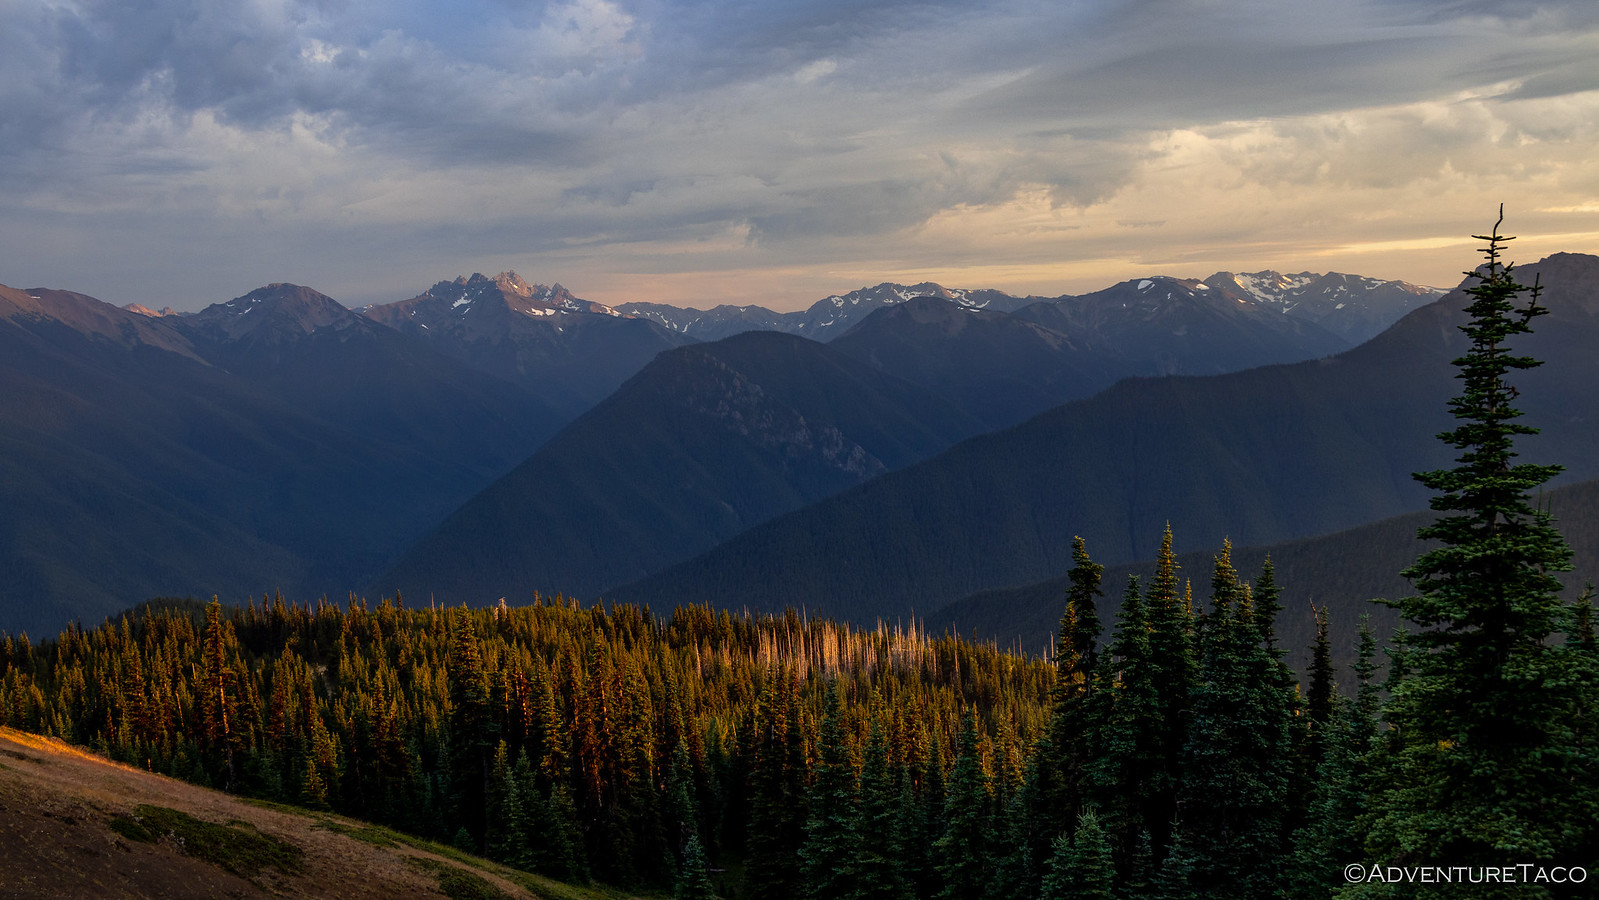
Summer is a great time in the state of Washington. While much of the rest of the year might be dreary and gray, the long days and clear air between mid-July and September are nothing short of perfection for getting out to enjoy the mountainous terrain in the western part of the state.

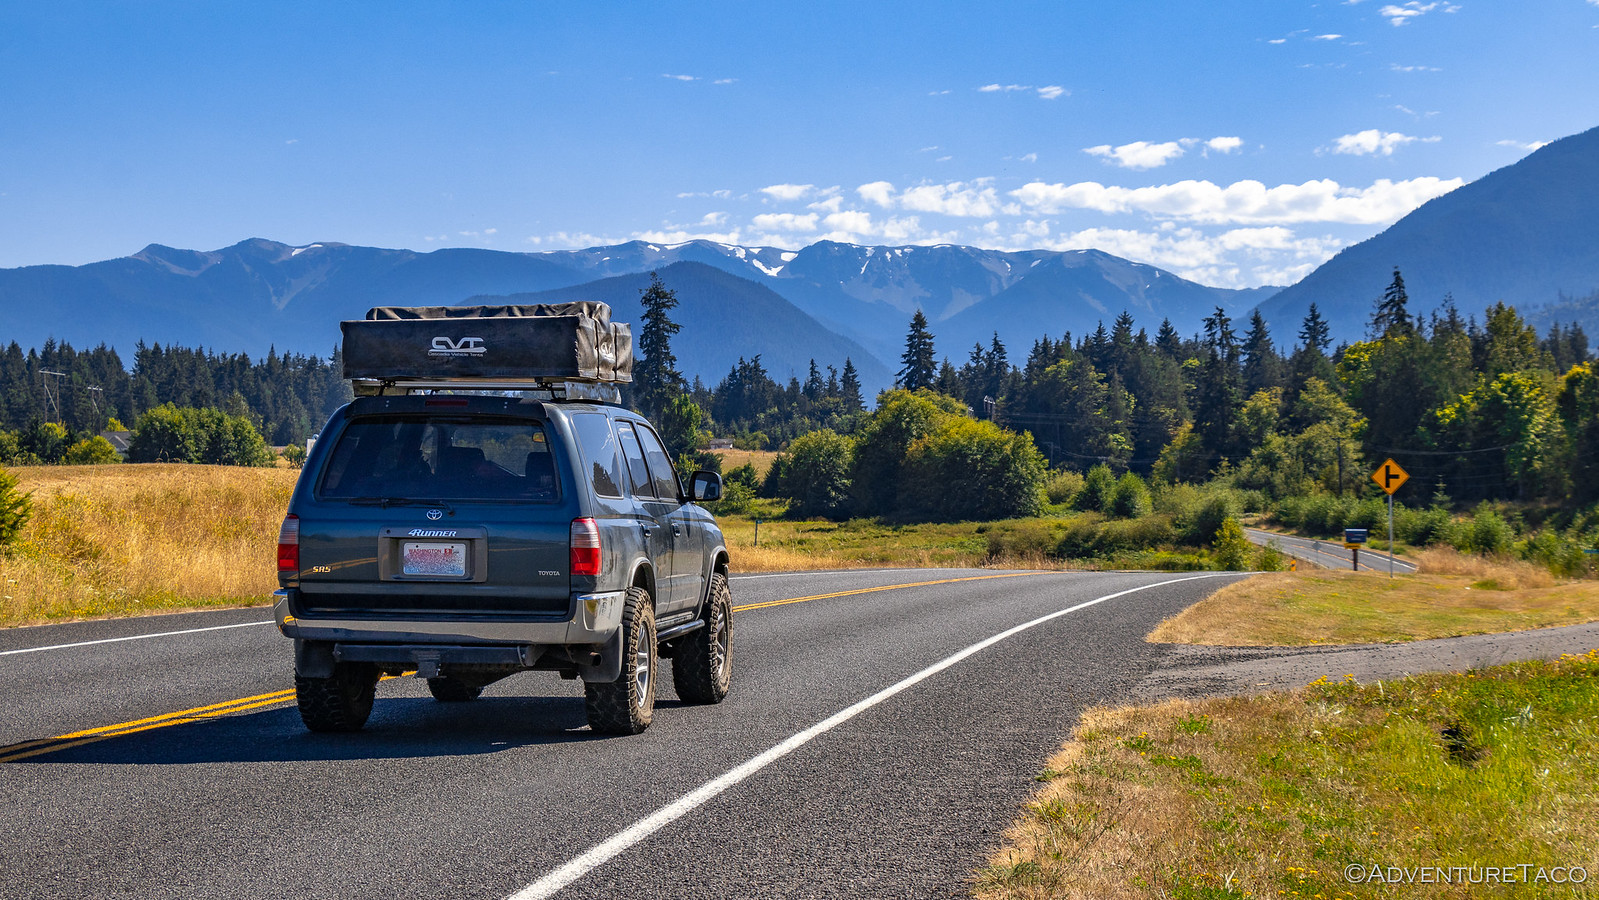
And this time, we were headed as far west as we could go - all the way to the Olympic Peninsula, for an epic hike along one of the highest ridges around.

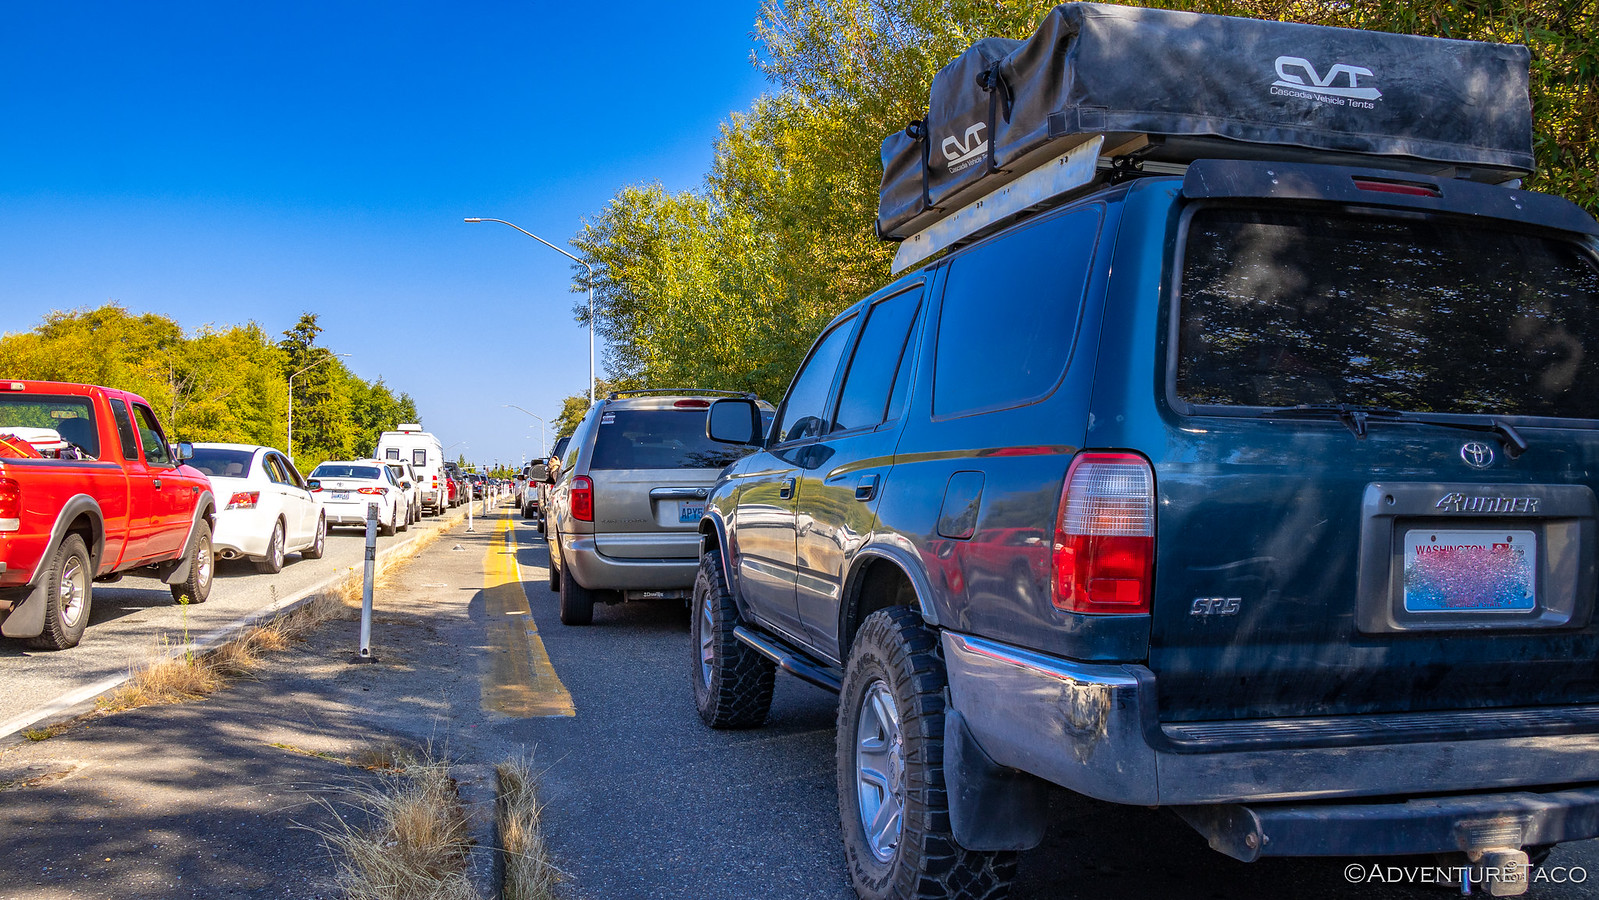
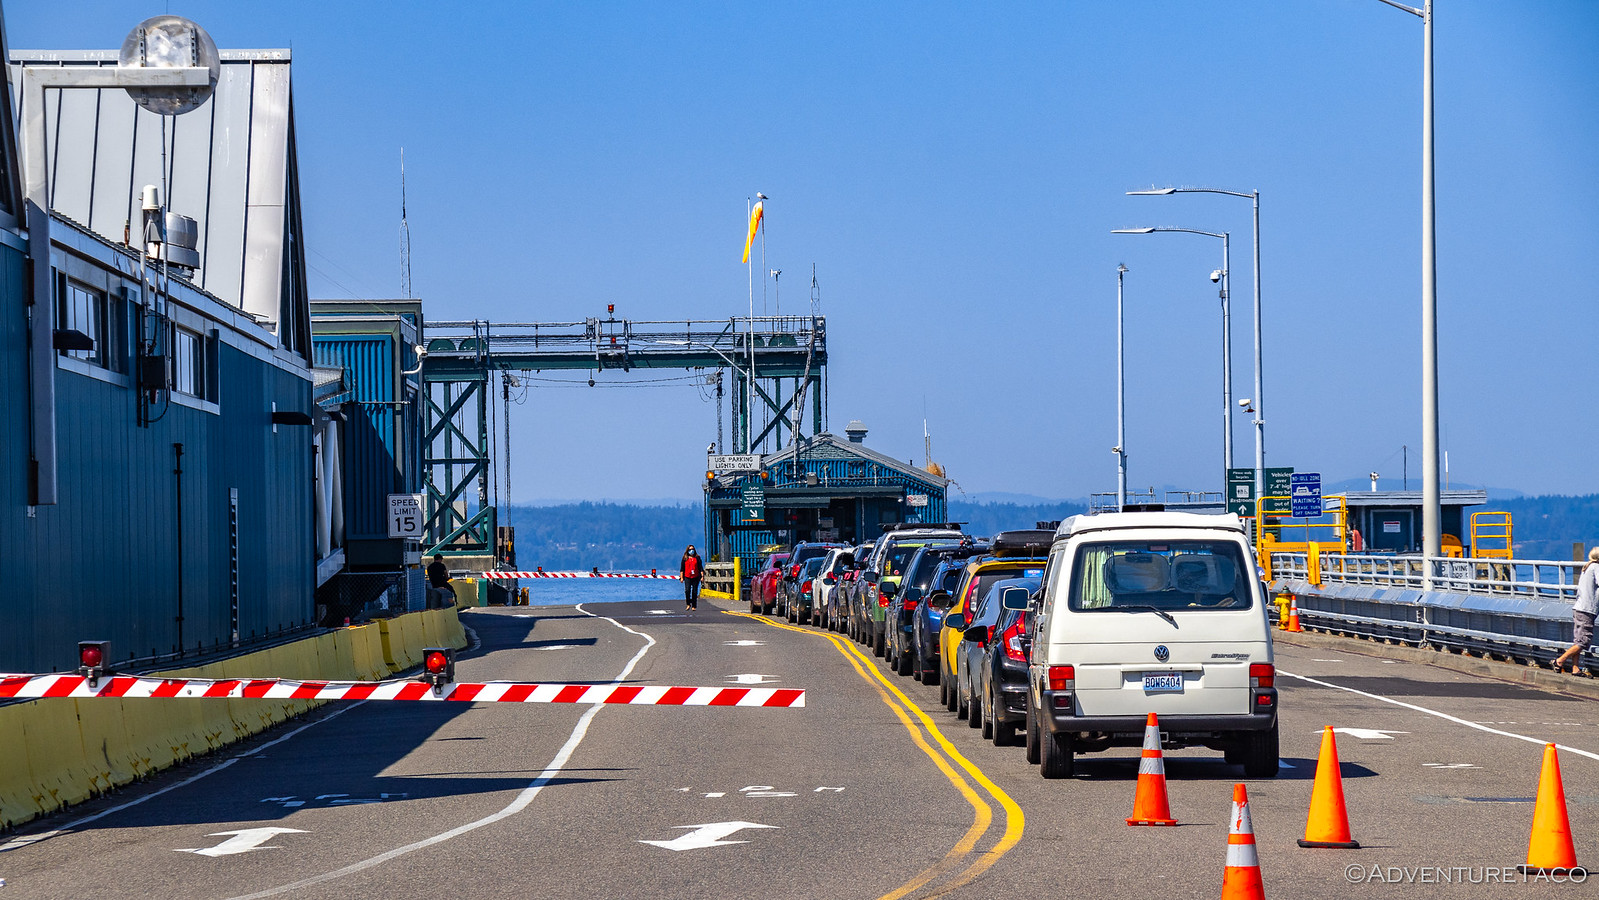
Keen to get the trip off to a good start, we made a quick stop at Family Donut - a new shop we'd recently found - for some of the best donuts I've ever eaten. It's a good thing too, because about 15 minutes later we were parked - the engine off - waiting for a ferry to take us across the Puget Sound.

50254049786_85a7403236_o.jpg


50254049711_fd44eddd50_h.jpg

It turns out that someone the-opposite-of-smarter than me had made the decision to reduce the number of ferries running on the weekends in the middle of summer. We ended up waiting over three hours for our ferry to arrive.

50254049426_99049e9150_h.jpg

One can't complain too much on a ferry however - the views are always so nice as you glide across the water.

50254226227_b97b1b4ae4_h.jpg


50253386663_e10982cb23_h.jpg


Oh look, there are the other two ferries that run this route. Still operational on the less-crowded weekdays, it turns out. (What?!?)

Hungry again, we made a quick stop for lunch before heading up Deer Park Road towards the campground and trailhead that we'd call home for the next couple of days. Already, things were looking up - literally - as the mountains we'd be exploring rose in the distance!

50254225962_0096380960_h.jpg

Now, one of the reasons we'd made an early start was that the campground we were going to - Deer Park - is a no reservation location with only about 20 spots. With amazing views, it fills up quickly, even on a Sunday night. And, perhaps predictably as we pulled in just before 5:00pm, everything was full.

Dang.

Bummed, we pulled into an overflow parking spot and weighed our options: we could head back down the eight mile dirt road and find a wide spot in the road to set up (a dusty) camp; we could head home and try again some other time; or we could see if someone with a spot would let us share.

A bit awkwardly, and with my face covered in a mask, I approached the folks staying in what is arguably the best spot in the campground. A quick look at their reservation ticket showed that they'd been there for a couple nights, and this was going to be their final night before heading home.

Well, it turns out that Carol and Rick (of Edmonds, WA) couldn't have been nicer. After a brief chat, they were happy to let us park in front of their car and open up the tent on our 4Runner. They even invited us to join them around their camp fire (we didn't, since we didn't want to intrude), and to put a tag on the site marker reserving it beyond the end of the their stay!

50254225727_4377b25744_h.jpg

As @mini.turbodb scampered off to explore, @mrs.turbodb and I unfolded our chairs in the shade and pulled out our Kindles for a couple hours of relaxation, with a pretty nice view.

50254048566_3033555b11_h.jpg


50254225277_1eff110fe1_h.jpg


If you find yourself reading a good book here, savor it.

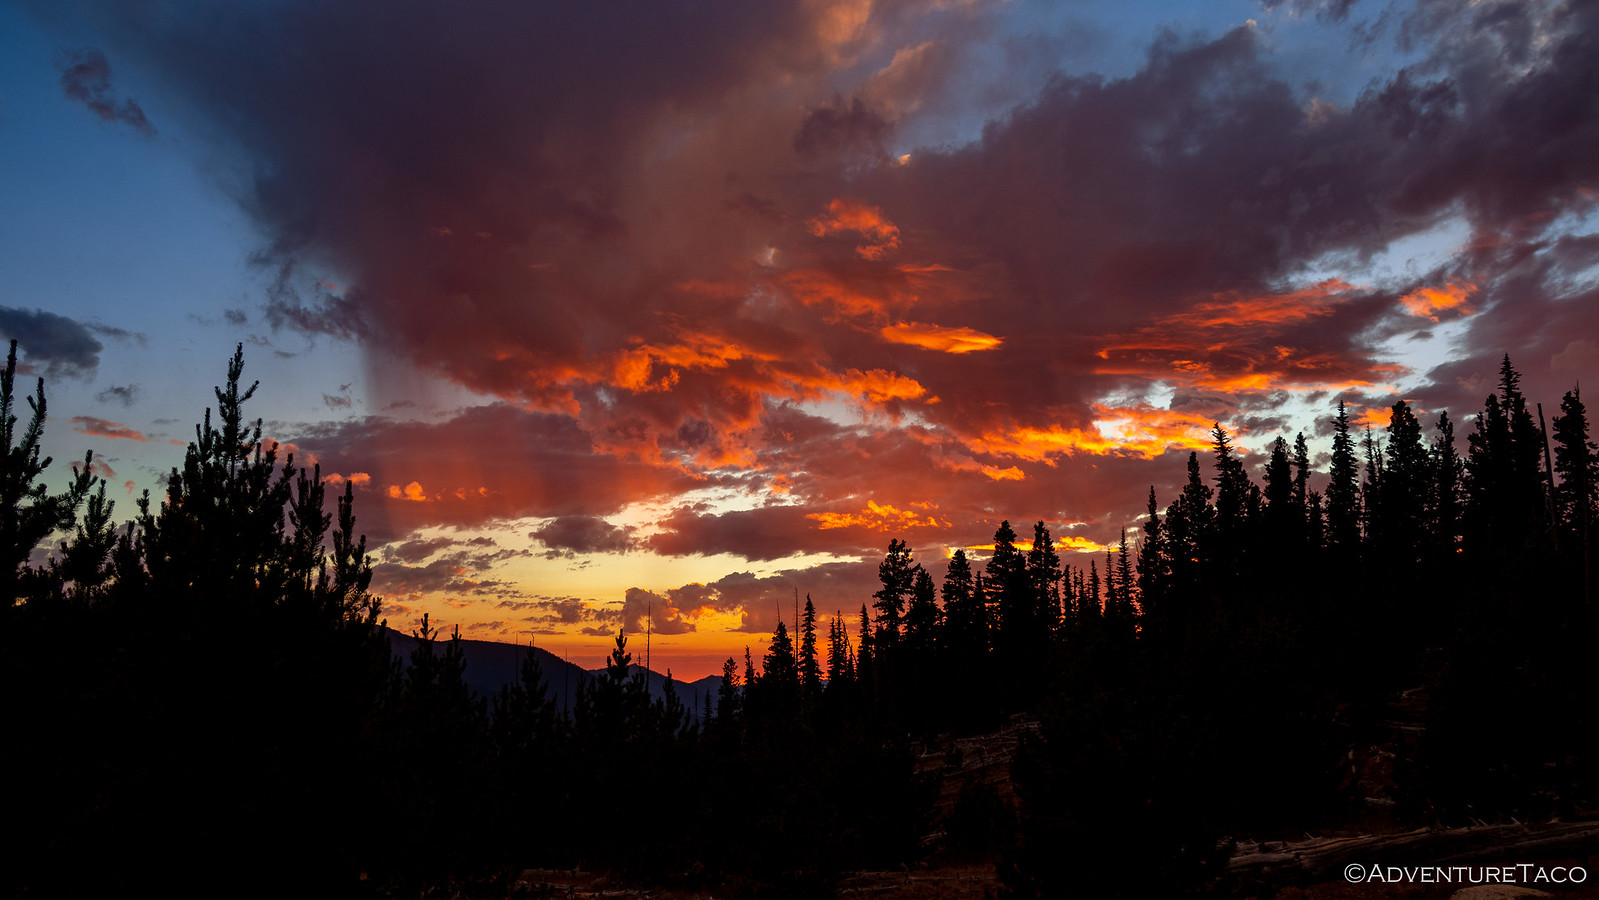
Having eaten a very late lunch just before heading up to camp, we all decided that dinner wasn't really necessary, and as the sun started to get lower on the horizon, we figured we should gain a little elevation to take it all in. The road behind camp wound up Blue Mountain - a perfect place to enjoy the display.

50253385618_7e99bc08fd_h.jpg


50254048001_9c8a090981_h.jpg


50254224907_ed9159f089_h.jpg


This looks amazing. What you can't see are the gnats! Luckily, they were concentrated at this rock outcropping.

50253385263_bb0c43010b_h.jpg


50254047661_2b87e88964_h.jpg


50254047466_3d10613831_h.jpg

With the sun below the horizon we made our way back to camp just as a heavy rain shower started! We'd checked the weather prior to the trip and there was no precipitation predicted, but hey, at least we hadn't deployed the tent yet!

The rain didn't last long at all - perhaps 5 minutes - and in the end, it significantly reduced the dust, which was perfect. We just hung out in the 4Runner, @mini.turbodb already in her cozy little bed.

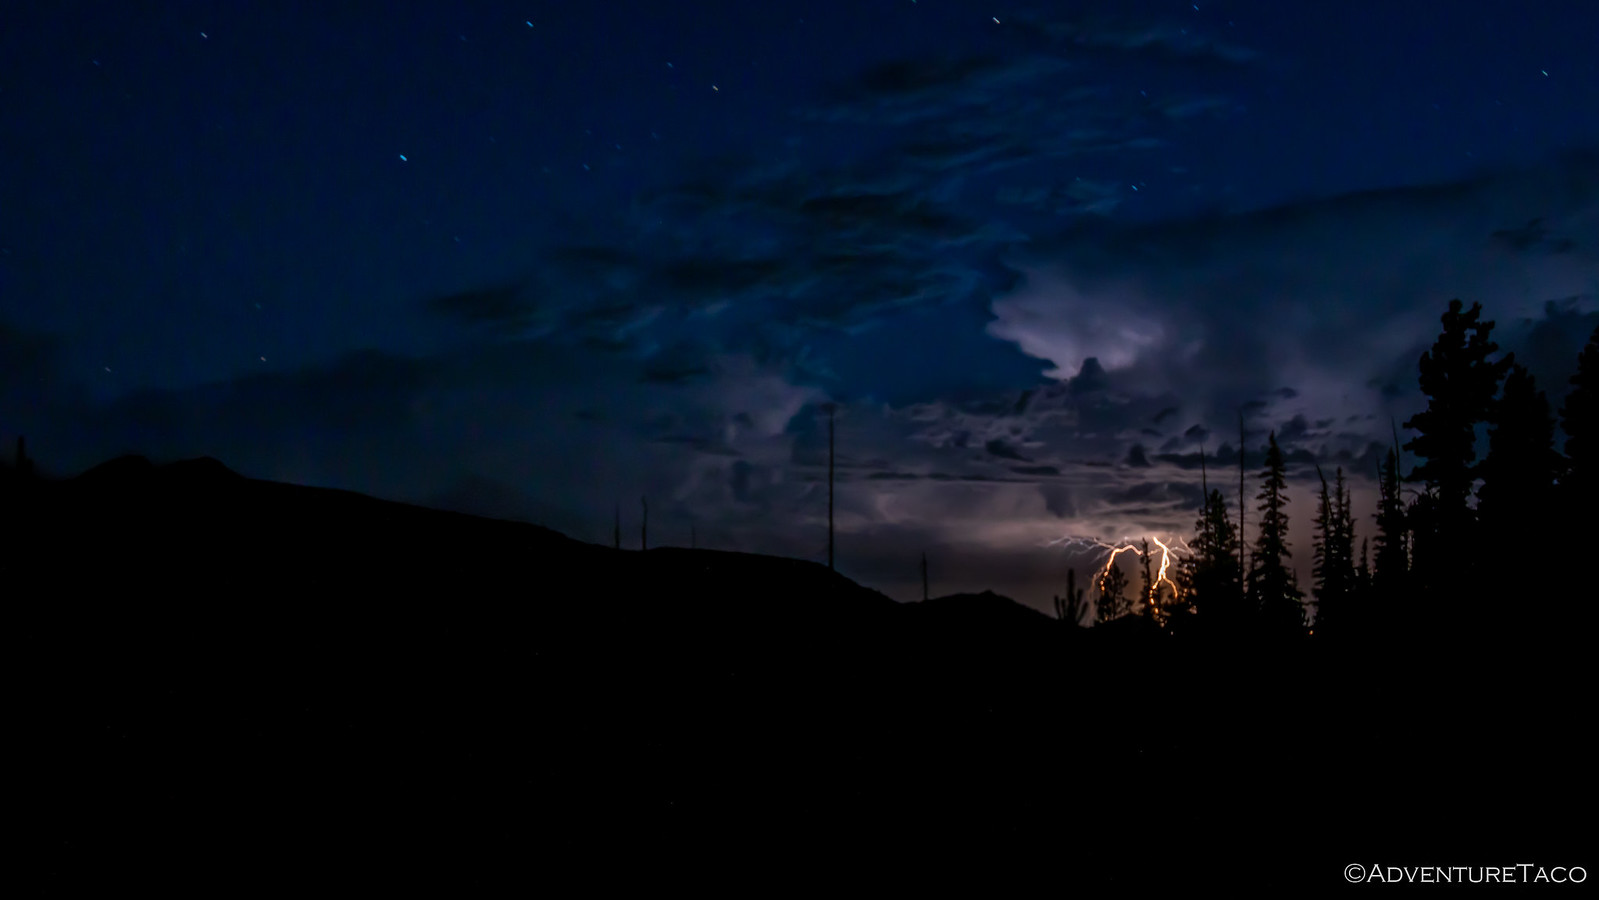
With hugs goodnight, we climbed out of the truck to set up the CVT, and were immediately distracted by the main storm, a distant several miles to the north. Lightning - and plenty of it - illuminating the sky as the storm tracked eastward.

50254224362_fc752e173a_h.jpg

The dozen or so other folks around us also noticed, and it was a bit humorous to see all of them packing up and talking in hushed tones about the safety of being "out in the open" when the storm was so far away. We chuckled as we unfolded the tent on the roof of the 4Runner and confidently climbed in, as other campers considered the "safest" place to go in these dangerous times.

We knew, the safest place to go was "to sleep." :rofl:

The Hike

The next morning we were up bright and early - our alarm set for 5:50am, so we could pack up and roll out of camp by 6:15am. We did this as quietly as possible so as not to wake Carol and Rick, and we left a couple chairs and our kitchen box to hold camp while we completed our trek.

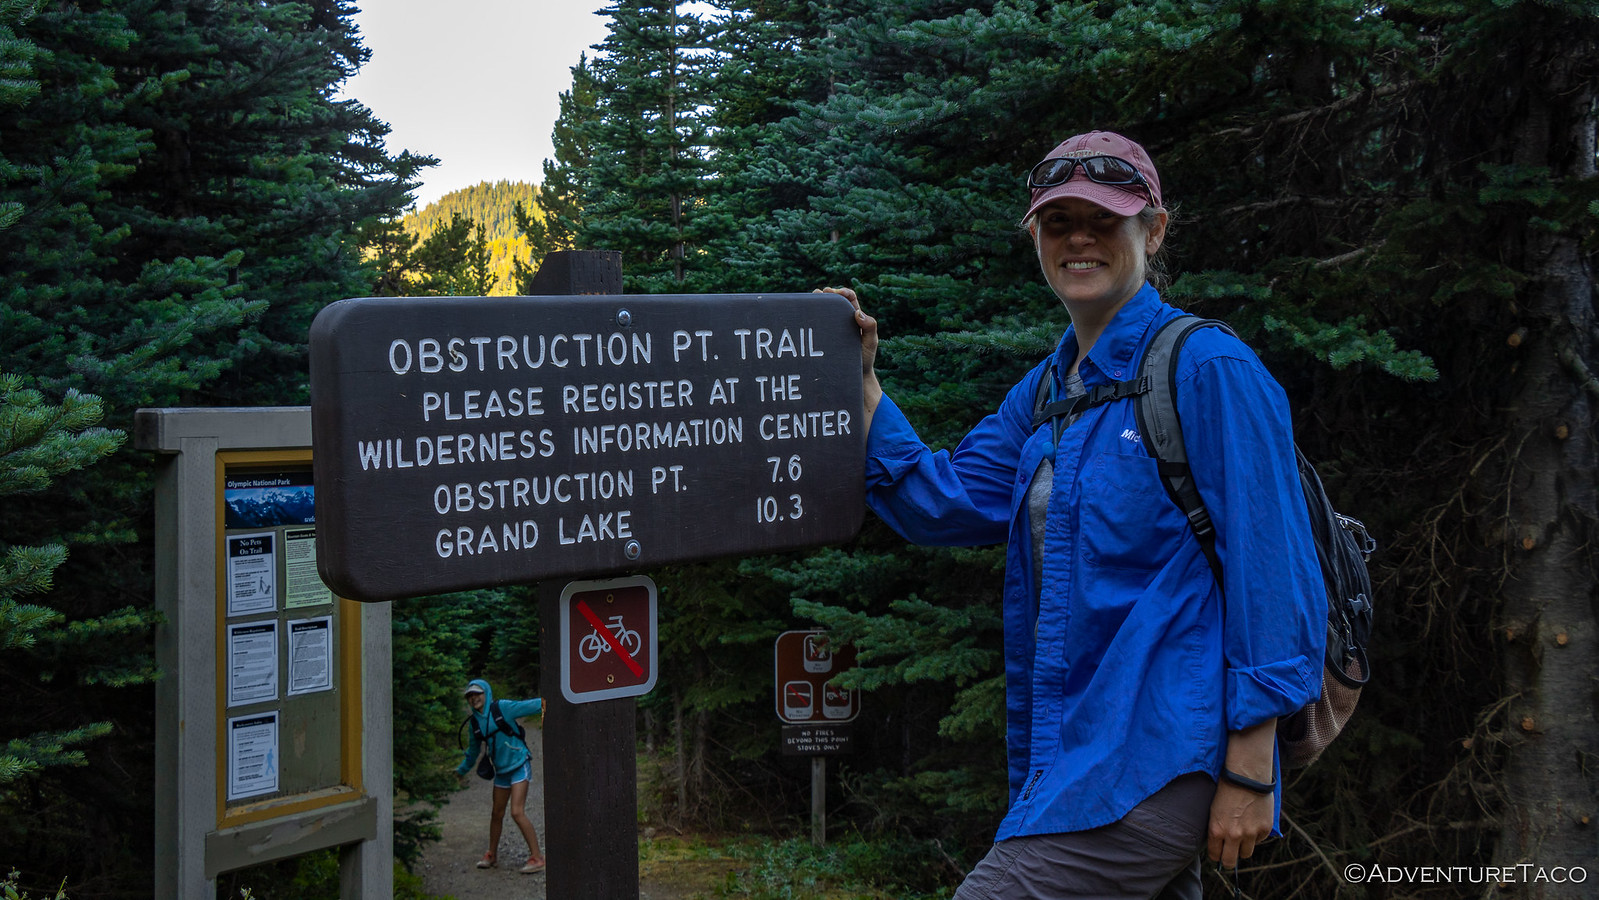
The trailhead was less than a mile away, and after a quick breakfast, lunch making, and setting up of todo(link)the solar panel to keep the fridge running through the day, it was time to set off for Obstruction Point.

50253384773_2c490a06de_h.jpg

This is no short hike. At a little over 15 miles round trip, it was going to be a trek for all of us, and I'd warned the small one about this several times in the preceding week.

"I'm going to need you to do your best complaining," I told her. "I'll be sure to point out the most difficult sections as we come to them, so that you can strive for overachievement in those sections. Don't disappoint me!"

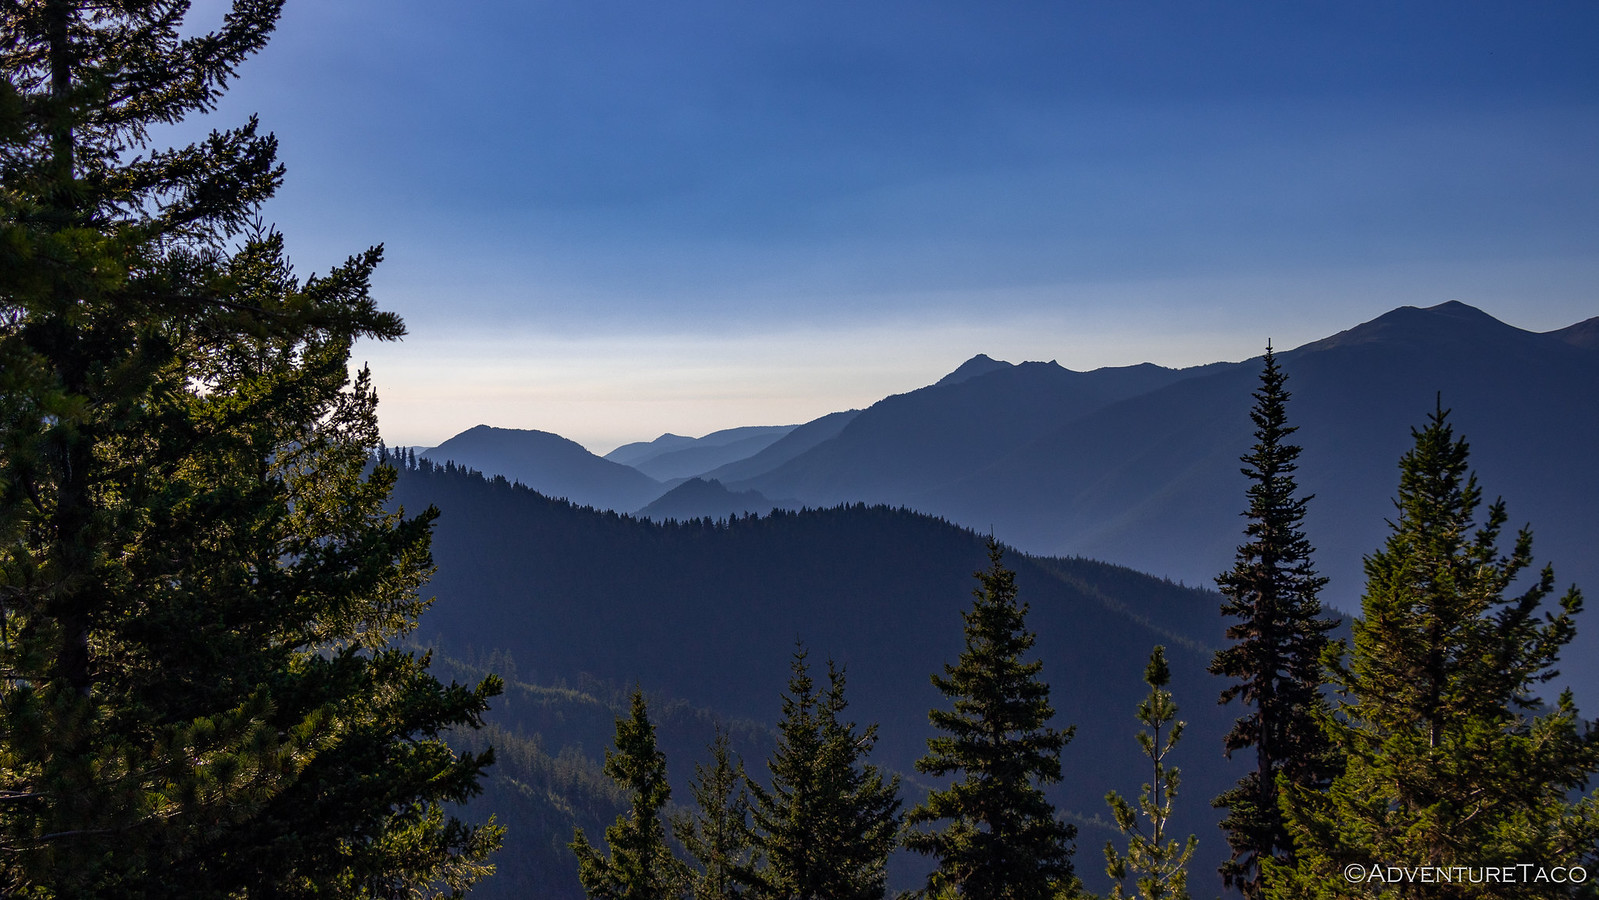
Of course, we'd also promised amazing sights, and even as we started down through the forest, the morning moisture in the air made for great views.

50254046946_2591bf768a_h.jpg

"Hey kiddo," I called as she ran ahead, "I just want to point out to you that this part is downhill now, but when we're all tired and ready to be done, this last section is going to be uphill and steep! I need you to whine as much as possible at that point, OK?"

That got a good laugh.

The first mile and a half of the trail makes its way along a forested ridge, and in the cool morning air we found plenty to keep ourselves entertained. A toad, hopping along, found its way from my hands to those of the child, squeals of joy escaping her lips as it sat for a moment before hopping off into the brush.


Don't miss the rest of the story, and all the remaining photos that don't fit here (due to max post size). Hopefully that can change in the future, but until then...

Keep reading the rest here
Olympic-Sized Views to Obstruction Point


.
 
Looks like you are having some good adventures so far.

And... Family Donut is AMAZING. The family that runs that shop is super nice too. Those are some of the best donuts in Seattle.
 

Members online

Forum statistics

Threads
278,315
Messages
3,554,104
Members
248,016
Latest member
Advally Service

Trending content

Back
Top