Twheat's Build and Adventure Thread

Twheat40

New member
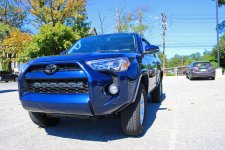
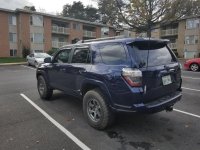
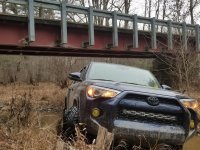
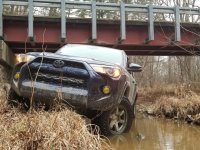
Hey guys. Meet Reba! (dumb name I know)

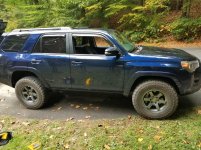
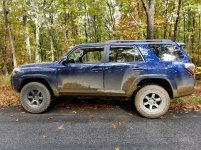
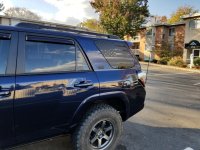
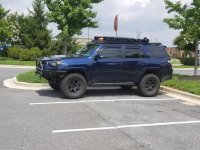
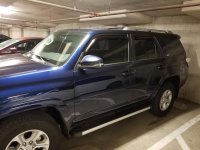
2017 Nautical Blue SR5P. Picked it up in Tennessee in June 2017. I have a lot of plans for upgrades and hopefully a lot of adventures to come. I hope you guys enjoy the thread!!

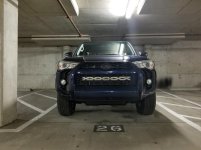
Now:
side bumper.jpg


Original:

20170722_223732.jpg


Exterior:
Window Tint
EGR Window VIsors
Nox-Lux Emblem Covers
MicTuning 32" Light bar behind Grille
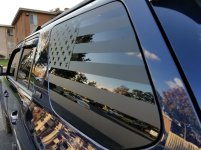
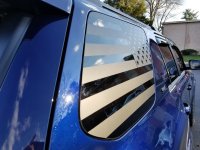
American Flag Vinyl Decals from Overlook Graphics
ARB CKMA12 Single Air Compressor
Prinsu full length roofrack with dual plano cases and traction boards
Solar Shower
Solar panel
Plasti-Dip Roof rails

Interior:
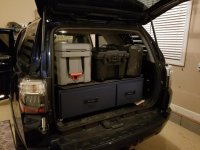
Home built drawer system
Dometic CFX-40W Fridge
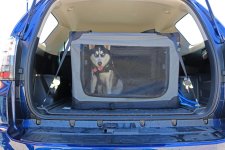
Dog Crate
Tablet Cradle Mount
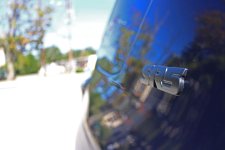
Dashcam
Fire Extinguisher

Communication:
Uniden520XL CB
Firestik 4' Antenna and door jamb mount
Baofeng Handheld Ham radio

Suspension/Wheels:
OME Shocks with 885's and 895e's
Level8 MK6 17x8
295/70R17 Cooper MTP
255/80r17 Cooper ST Maxx

Armor:
Mobtown Weld on Rock sliders
CBI Full front bumper with 3 hoop protection

Recovery:
Smittybilt XRC 9500 lb winch
Snatch strap
Tree saver strap
3 Hard shackles
Soft shackle
Hitch mounted shackle receiver
Snatch block

Coming Later:
Full Skids
Rear Bumper
Snorkel
Maybe LT??


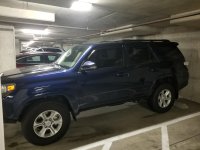
These are the pictures from when I Plasti-Dipped the roof rails and installed the Nox-Lux Emblem Covers. The Plasti-Dip turned out better than I expected, and only needed a little touching up. The emblem covers are awesome and don't look way better than I was hoping.
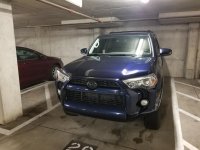
20170803_211252.jpg
20170803_211304.jpg

I didn't get any pictures of the rear emblems, but they look good.
 

Attachments
  • 20170722_223732.jpg
    20170722_223732.jpg
    128.9 KB · Views: 1,772
  • 20170803_211252.jpg
    20170803_211252.jpg
    121.2 KB · Views: 1,994
  • 20170803_211304.jpg
    20170803_211304.jpg
    127 KB · Views: 1,756
  • side bumper.jpg
    side bumper.jpg
    139.5 KB · Views: 673
Last edited:
Register to hide this ad
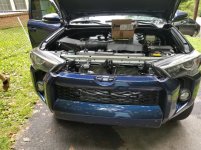
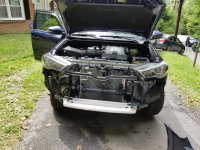
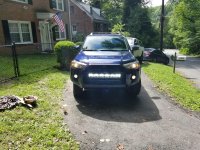
Today I went over to EatSleepTacos (TacomaWorld member) house and we installed my MicTuning 32" Light bar behind the Grille. This was a lot more work than we had originally hoped, but it turned out great. We had to remove the front bumper to make enough room to be able to install the light bar and the mounts, which he created by bending some aluminum plating we picked up from Home Depot.

20170808_110408.jpg

20170808_144742.jpg

We were able to get the light bar in without much issue and were able to use the bolts that were already in the metal bar. From there it was wired using the wiring harness, also MicTuning, which went straight to the battery and then up to the dashboard. I didn't get any pictures of this part, as we were kinda crunched for time. We were able to get the bumper back on without any issues and everything worked just fine.

20170808_153833.jpg

20170808_163801.jpg
 

Attachments

  • 20170808_110408.jpg
    20170808_110408.jpg
    140.3 KB · Views: 1,668
  • 20170808_144742.jpg
    20170808_144742.jpg
    137.9 KB · Views: 1,675
  • 20170808_153833.jpg
    20170808_153833.jpg
    135.2 KB · Views: 1,670
  • 20170808_163801.jpg
    20170808_163801.jpg
    120.7 KB · Views: 1,671
Last edited:
Looks great so far!

However, I'd personally pass on painting the stock wheels. From my experience either A) the time spent properly prepping them for paint would be better served earning money to buy the wheels you really want, or B) they come out looking super ghetto.

If neither of those are a concern, go nuts!
 
Looks great so far!

However, I'd personally pass on painting the stock wheels. From my experience either A) the time spent properly prepping them for paint would be better served earning money to buy the wheels you really want, or B) they come out looking super ghetto.

If neither of those are a concern, go nuts!

Honestly, I'm still not totally sold on painting them vs getting aftermarket rims, but I'm probably gonna try it to see how it turns out, and if it turns out bad, then just replace them. I just haven't able to find a good solid black aftermarket rim that I really like.
 
So no major upgrades have been done yet. I am in the process of getting some new wheels and tires. Well, new to me anyways. I'm picking those up on Oct. 15th.

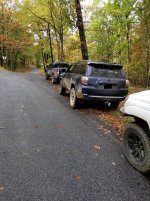
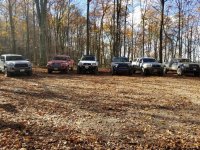
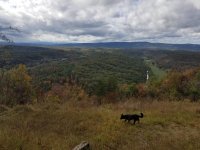
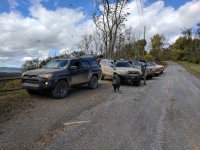
So today I met up with EatSleepTacos from the Tacoma World forum to try on his wheels and tires since those are the same tires I'll be getting soon. Also cleaned up the 4runner a bit and took some pics with the dogs. All pictures were taken by him.

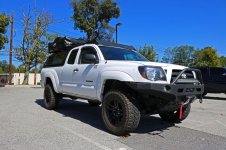
He has a nice 2005 Taco that has a lot of work done to it. This is his thread on TW if anyone is interested.
https://www.tacomaworld.com/threads/the-lair.495066/
 

Attachments

  • IMG_1157.jpg
    IMG_1157.jpg
    148.9 KB · Views: 1,490
  • IMG_1165.jpg
    IMG_1165.jpg
    116.8 KB · Views: 1,494
  • IMG_1177.jpg
    IMG_1177.jpg
    143 KB · Views: 1,492
  • IMG_1187.jpg
    IMG_1187.jpg
    144 KB · Views: 1,500
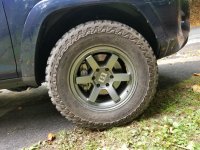
So it has been a very eventful past couple days. On Sunday, I met up with a guy from TacomaWorld (yes, I know a lot of people from that site) and bought his wheels and tires that he had on his 4runner. They are ST Maxx 255/80r17 on the Level 8 MK6 Gunmetal Wheels. So far I am loving this set up.

There is a little rub when I crank the wheel all the way around, but it isn't nearly as bad as it would be with 285's.


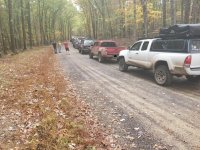
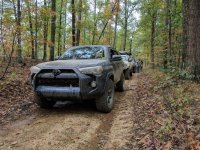
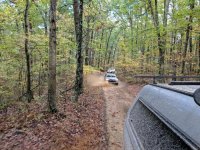
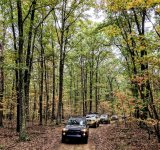
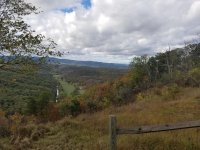
Then yesterday I took a trip up to Green Ridge State Forrest with a bunch of Tacomaworld people. We drove around for a good long time, which I was okay with since this was Reba's maiden voyage off the road. The new tires worked wonderfully and nothing broke. It is a very beautiful place. I did not take all of these photos, so I cannot take credit for them. But unfortunately I do not know her username on Tacoma world, so credit for the ones I did not take goes to Lauren.
 

Attachments

  • 20171008_154052.jpg
    20171008_154052.jpg
    141 KB · Views: 1,483
  • 20171008_154032.jpg
    20171008_154032.jpg
    140.6 KB · Views: 1,451
  • 20171009_105802.jpg
    20171009_105802.jpg
    135.7 KB · Views: 1,451
  • goo to go.jpg
    goo to go.jpg
    131.9 KB · Views: 1,441
  • good2.jpg
    good2.jpg
    133.6 KB · Views: 1,429
  • IMG_20171009_122143.jpg
    IMG_20171009_122143.jpg
    140.8 KB · Views: 1,420
  • IMG_20171009_130632.jpg
    IMG_20171009_130632.jpg
    143.3 KB · Views: 1,435
  • IMG_20171009_130919.jpg
    IMG_20171009_130919.jpg
    140.9 KB · Views: 1,438
More pics from Green Ridge

Some more pictures from the trip, plus one in my apartment parking lot when I got home.
 

Attachments

  • 20171009_145514.jpg
    20171009_145514.jpg
    137.4 KB · Views: 1,443
  • 20171009_145507.jpg
    20171009_145507.jpg
    137.8 KB · Views: 1,426
  • 20171009_145452.jpg
    20171009_145452.jpg
    137.3 KB · Views: 1,413
  • IMG_20171009_150350.jpg
    IMG_20171009_150350.jpg
    137.5 KB · Views: 1,418
  • good.jpg
    good.jpg
    127.3 KB · Views: 1,451
Bilsteins are mono-tube shocks, OME are twin tube shocks
OME coils work better with twin-tube shocks
Thank you for the heads up. I know a few people who run that set up. None of them have had issues, but I'm always open to better ideas. Do you have a better option for around the same price?
 
Bilsteins are mono-tube shocks, OME are twin tube shocks
OME coils work better with twin-tube shocks

Could you elaborate on this? Genuinely curious. I've ran OME coils with 5100s on my last truck for a year w/o ill effect. It's probably one of the most, if not most common combos on the Tacoma. People seem to prefer them to the OMEs because they have a slightly longer travel and ride a bit softer. OMEs seem to last longer though, but either seems to last years.
 
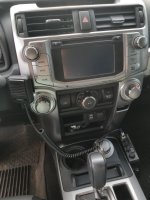
This week, we were able to get the CB radio installed. I ordered the Uniden Pro520XL CB, the 4' FireStik antenna, the antenna spring, and the Firestik door jamb mount all from amazon for around $80.

I decided to have it mounted to the passenger side of the center console. There is plenty of leg room on the passenger side, and it is still within reach. We ran the wiring behind the head unit, to the driver's side, and out through the firewall to the battery.

paint.jpg

20171025_113016.jpg

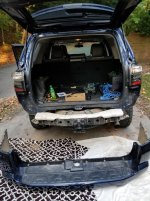
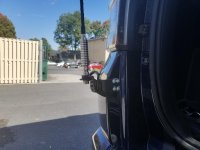
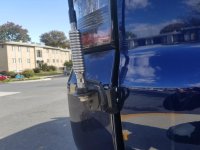
With the CB installed, we had to install the antenna. I decided to mount it to the rear bumper using the door jamb mount. We removed the rear bumper, drilled 4 holes for the mount as well as a hole for the wires to go through the bumper, and put a metal plate on the back side of the bumper to give the mount more stability and take some stress off of the plastic. Since it is mounted to plastic, we ran a ground wire through the bumper and down to the frame. The antenna cable is ran through the bumper, over to the passenger's side, and follows the frame forward until it comes to the rubber grommet just below the front passenger seat. We ran it through the grommet, and up out of the carpet right next to the CB.

paint2.jpg

20171025_113055.jpg

20171025_113036.jpg

We angled the antenna back some so the lift gate would clear the antenna without any issues. Everything worked fine and the signal was great given the fact that it is mounted in the plastic. We were able to communicate with it and everything came in loud and clear.

20171023_130444.jpg
 

Attachments

  • 20171025_113016.jpg
    20171025_113016.jpg
    141.1 KB · Views: 1,269
  • paint.jpg
    paint.jpg
    123.6 KB · Views: 1,275
  • 20171025_113055.jpg
    20171025_113055.jpg
    120.9 KB · Views: 1,259
  • 20171025_113036.jpg
    20171025_113036.jpg
    118.9 KB · Views: 1,272
  • paint2.jpg
    paint2.jpg
    140.6 KB · Views: 1,264
  • 20171023_130444.jpg
    20171023_130444.jpg
    137.2 KB · Views: 1,245
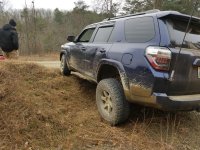
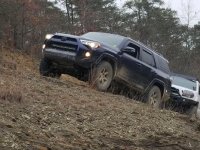
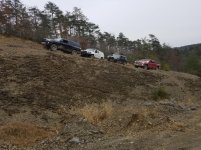
This weekend I went back to Green Ridge with some guys from Tacoma World. Two were in bone stock Tacos and wanted to get some light offroading in before the end of the year, as well as some easy experience. We also ran with a prerunner with a couple upgrades who had slight problems with the muddy hills, but nothing a tow strap couldn't handle. Overall we had a very fun day.

20171110_115722.jpg

20171110_115738.jpg


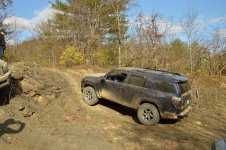
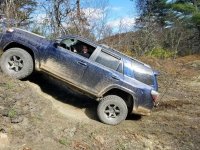
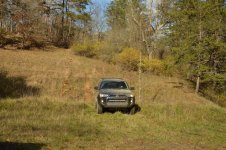
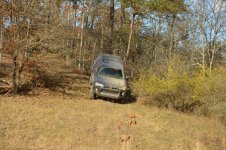
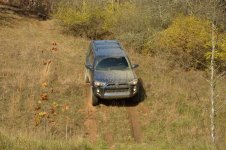
I worked up the courage to do an obstacle that I've wanted to do for a while, but didn't know if I had the ground clearance or not. I did it twice and managed to just barely scrape the fuel tank skid plate on the second time. It's amazing how much difference the smaller wheel base makes.

38311437002_ad878a2262_k.jpg

20171110_135019_100.jpg

20171110_135341.jpg

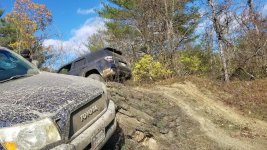
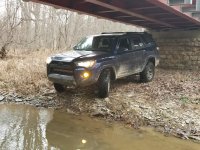
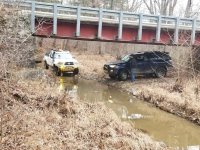
We also managed to find another obstacle not far from the first one. It wasn't as technical, but it was definitely just as fun.

38286746106_1e3121c45c_k.jpg

26567482799_329b2b14b2_k.jpg

38286773666_787b0a8069_k.jpg
 

Attachments

  • 20171110_115722.jpg
    20171110_115722.jpg
    138.2 KB · Views: 1,190
  • 20171110_115738.jpg
    20171110_115738.jpg
    138.6 KB · Views: 1,174
  • 20171110_135019_100.jpg
    20171110_135019_100.jpg
    137.5 KB · Views: 1,195
  • 20171110_135341.jpg
    20171110_135341.jpg
    133.5 KB · Views: 1,198
  • 38311437002_ad878a2262_k.jpg
    38311437002_ad878a2262_k.jpg
    131.3 KB · Views: 1,175
  • 26567482799_329b2b14b2_k.jpg
    26567482799_329b2b14b2_k.jpg
    131.8 KB · Views: 1,177
  • 38286746106_1e3121c45c_k.jpg
    38286746106_1e3121c45c_k.jpg
    127.2 KB · Views: 1,172
  • 38286773666_787b0a8069_k.jpg
    38286773666_787b0a8069_k.jpg
    132 KB · Views: 1,174
Here is the video from the first obstacle at GR.

<iframe width="854" height="480" src="https://www.youtube.com/embed/8cl93wkQir8" frameborder="0" gesture="media" allowfullscreen></iframe>
 
Got my American flag decals in from Overlook Graphics this week. Since today was decently warm, I decided to go ahead and put them on.

Everything went on just fine and mostly straight.

20171116_150548.jpg

20171116_150559.jpg

20171116_150606.jpg
 

Attachments

  • 20171116_150548.jpg
    20171116_150548.jpg
    136.3 KB · Views: 647
  • 20171116_150559.jpg
    20171116_150559.jpg
    128 KB · Views: 608
  • 20171116_150606.jpg
    20171116_150606.jpg
    129.2 KB · Views: 631
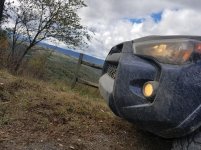
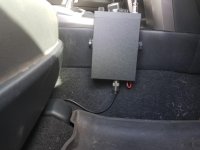
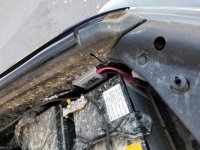
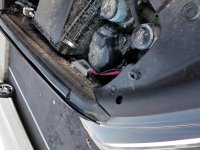
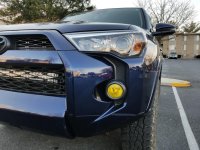
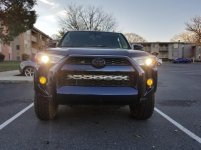
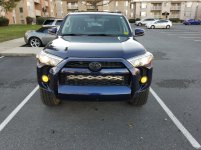
While driving down the road the other night, I realized just how awful the stock headlights are in the 4R. I couldn't see shit. I decided to upgrade to a set of HIDs. I went with the Kensun HID kit. I bought it on their website and received it in the mail 3 days later. I also decided to upgrade the fogs as well, but decided to go with the Lamin-x yellow film for now. Eventually I want to get the Morimoto Type T fog light kit.

The ballasts for the HIDs were very slim and I was able to attach them to the metal right below the plastic trim around the engine bay.

20171207_152936.jpg

20171207_152932.jpg

The Lamin-x film was easy to put on. Just apply it, remove the handling tabs, and push it underneath the plastic around the fog.

20171207_152822.jpg

Very happy with just how much brighter the HID is vs the stock halogen bulbs. Haven't tested the fogs at night, but I'm happy with the yellow look on the truck.

20171207_153344.jpg

20171207_153339.jpg
 

Attachments

  • 20171207_153339.jpg
    20171207_153339.jpg
    137.2 KB · Views: 599
  • 20171207_152936.jpg
    20171207_152936.jpg
    132.8 KB · Views: 591
  • 20171207_153344.jpg
    20171207_153344.jpg
    136.6 KB · Views: 583
  • 20171207_152932.jpg
    20171207_152932.jpg
    135.4 KB · Views: 588
  • 20171207_152822.jpg
    20171207_152822.jpg
    136 KB · Views: 587
Some picture from GR 08DEC2017.

GR 08DEC_1.jpg

GR 08DEC_2.jpg

GR 08DEC_3.jpg

GR 08DEC_5.jpg

GR 08DEC_6.jpg

GR 08DEC_7.jpg

GR 08DEC_8.jpg
 

Attachments

  • GR 08DEC_1.jpg
    GR 08DEC_1.jpg
    137.5 KB · Views: 536
  • GR 08DEC_2.jpg
    GR 08DEC_2.jpg
    142.8 KB · Views: 533
  • GR 08DEC_3.jpg
    GR 08DEC_3.jpg
    135.4 KB · Views: 536
  • GR 08DEC_5.jpg
    GR 08DEC_5.jpg
    140.6 KB · Views: 529
  • GR 08DEC_6.jpg
    GR 08DEC_6.jpg
    143 KB · Views: 536
  • GR 08DEC_7.jpg
    GR 08DEC_7.jpg
    142.1 KB · Views: 541
  • GR 08DEC_8.jpg
    GR 08DEC_8.jpg
    142.1 KB · Views: 537
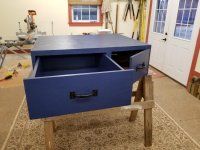
This week I took a trip back home to TN to see my family for Christmas. While there, I took some time to use my Dad's tools and help, along with my grandpa, to build a drawer system for the 4R. It is mostly plywood. We used blue paint because we already had the paint, so we didn't have to buy any, and it almost matches the 4R.

20171225_161539.jpg

20171226_191301.jpg

It has a drawer on the left, with a cabinet on the right for my future on-board water system I have planned. I am thankful I was able to make the trip, as well as work with two very skilled and knowledgeable craftsmen. On top you can see my Christmas haul. I now have a cooler, a plano case, and some tools of my own, as well as more camping gear. This has been a wonderful week and a wonderful Christmas.
 

Attachments

  • 20171225_161539.jpg
    20171225_161539.jpg
    126.6 KB · Views: 573
  • 20171226_191301.jpg
    20171226_191301.jpg
    121.8 KB · Views: 569
Last edited:
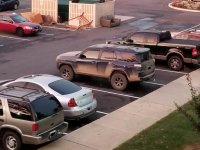
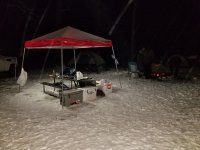
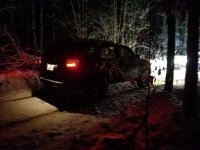
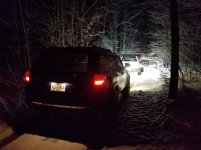
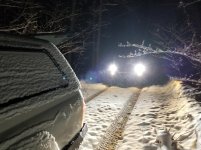
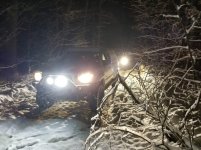
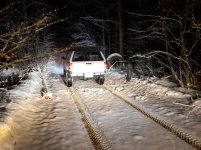
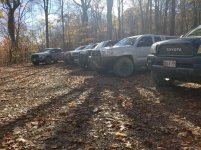
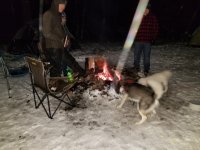
This weekend, I went camping and wheeling in Green Ridge again with a couple guys from TacomaWorld. It was snowing and we thought it would be a great opportunity to get out and have some fun.

Also, I am working on a few new pieces for the truck. Hopefully the next couple months will bring some upgrades to the truck, but for now, nothing has changed. Once I get these couple of mods, I should be able to start running some Rausch Creek trails and some AOAA trails, but for now, I'm keeping the 4R away from anything too rough.

tretr.jpeg

tg.jpeg

treert.jpeg

retet.jpg

dfsfds.jpg

retert.jpg

sdfs.jpg
 

Attachments

  • dfsfds.jpg
    dfsfds.jpg
    111.7 KB · Views: 479
  • retert.jpg
    retert.jpg
    132.4 KB · Views: 491
  • retet.jpg
    retet.jpg
    103.2 KB · Views: 470
  • sdfs.jpg
    sdfs.jpg
    136.6 KB · Views: 487
  • tg.jpeg
    tg.jpeg
    117.3 KB · Views: 469
  • treert.jpeg
    treert.jpeg
    118.7 KB · Views: 475
  • tretr.jpeg
    tretr.jpeg
    130.2 KB · Views: 476

Members online

Forum statistics

Threads
278,311
Messages
3,554,082
Members
248,016
Latest member
Advally Service

Trending content

Back
Top