Fried Rice
Junior Member
After a few years of having a Pioneer AVH-4200NEX head unit installed with an iDatalink Maestro using the generic Toyota Land Cruiser Firmware (as documented in other threads), I decided to get to the bottom of the install differences once and for all and update the installation in my 2008 Urban Runner.
To do this, I spent the $ on a T01 harness that would get used in any other 4Runner installation and went over it with a multimeter to understand how it is wired. Once I understood the T01 harness, I reflashed my Maestro using the T01 Firmware, updated my wiring and I now have access to TPMS data (pressure and temp!) in my Pioneer head unit.
I have documented all the relevant connections in the charts below. There are a couple of key differences in the OBD-2 interface between the generic Land Cruiser install that iDatalink recommends for Urban Runners and the T01 harness connections:
1. The OBD connection utilizes three wires - CANH, CANL and the K-Line.
2. The OBD circuits connect to different pins on the Maestro when utilizing the T01 firmware. This is why you can't wire it like a Land Cruiser and flash it as a 4Runner!
When you purchase a Maestro RR, you get the black 18-pin connector that would be used for a generic installation that includes the SWI circuits and the OBD circuits. What you do not get is a connector for the GREEN connection on the Maestro RR. This connection is important because you need to connect the Urban Runner's switched +12V input to one of the pins in order for Maestro to know the vehicle is running so that it can begin looking at OBD data. If you don't make this connection, your Steering Wheel Buttons will still work, but OBD Gauge functions will not. Without the mating connector for the GREEN connection, you have to find a single pin connector to use for that accessory switched connection. I had a single wire header connector laying around and was able to use that.
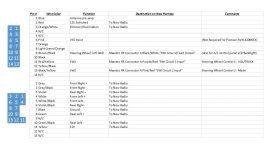
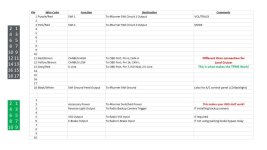
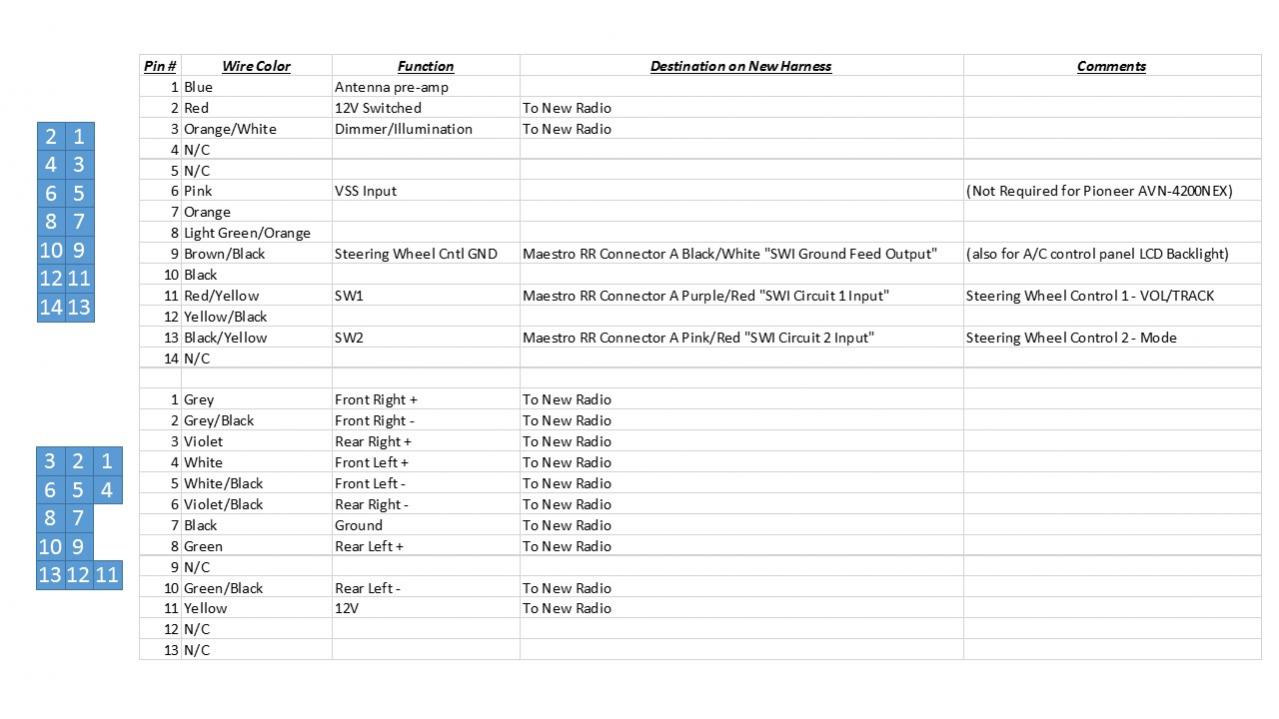
With all of this said, here are the connections to the Urban Runner's Radio Harness. This is a duplicate of information I have previously posted in another Urban Runner install thread:
Here are the connections for the Maestro RR. Note that this diagram is looking at the back of the wire connectors. From the GREEN Connection, you can also make the reverse signal output and E-brake connections if you want.
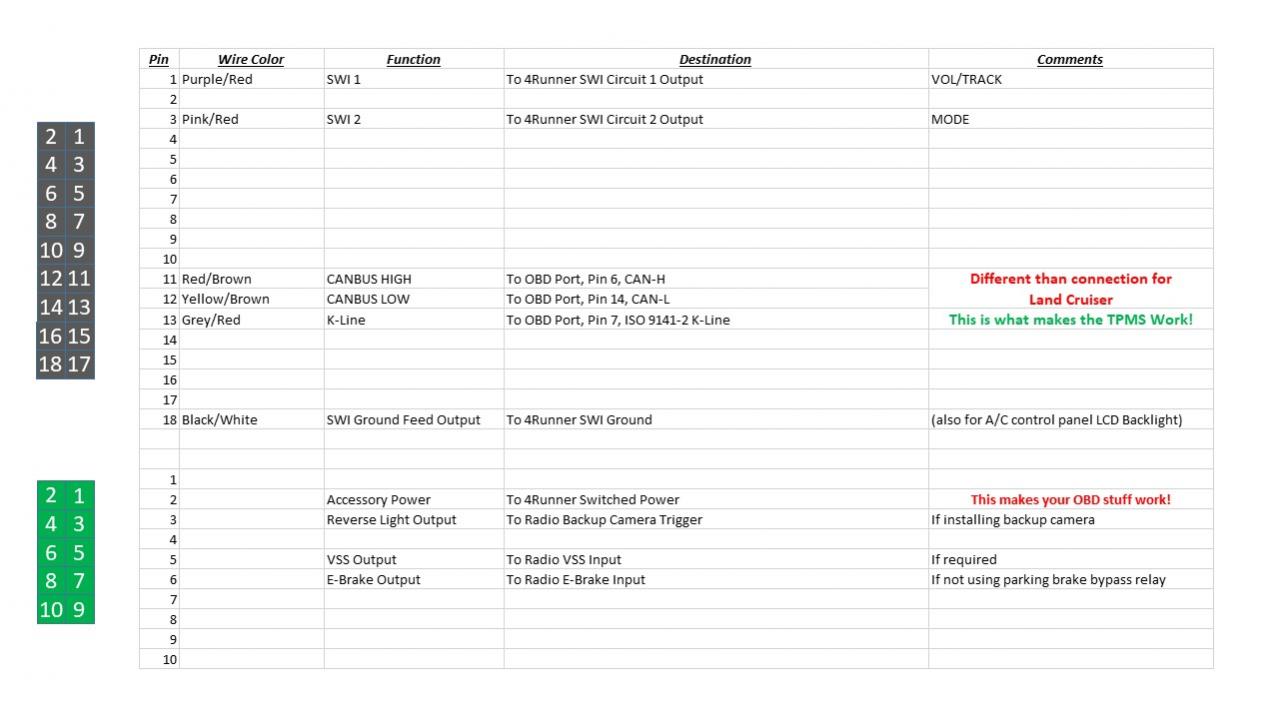
So, if you wire your 4Runner up to the Maestro using the info in the two images above and Flash your Maestro as a 2003-2009 4Runner utilizing a T01 Harness, you will have the full functionality of your iDatalink Maestro compatible head unit!
Good Luck and Happy Viewing of your TPMS data on your Urban Runner's Head Unit!
To do this, I spent the $ on a T01 harness that would get used in any other 4Runner installation and went over it with a multimeter to understand how it is wired. Once I understood the T01 harness, I reflashed my Maestro using the T01 Firmware, updated my wiring and I now have access to TPMS data (pressure and temp!) in my Pioneer head unit.
I have documented all the relevant connections in the charts below. There are a couple of key differences in the OBD-2 interface between the generic Land Cruiser install that iDatalink recommends for Urban Runners and the T01 harness connections:
1. The OBD connection utilizes three wires - CANH, CANL and the K-Line.
2. The OBD circuits connect to different pins on the Maestro when utilizing the T01 firmware. This is why you can't wire it like a Land Cruiser and flash it as a 4Runner!
When you purchase a Maestro RR, you get the black 18-pin connector that would be used for a generic installation that includes the SWI circuits and the OBD circuits. What you do not get is a connector for the GREEN connection on the Maestro RR. This connection is important because you need to connect the Urban Runner's switched +12V input to one of the pins in order for Maestro to know the vehicle is running so that it can begin looking at OBD data. If you don't make this connection, your Steering Wheel Buttons will still work, but OBD Gauge functions will not. Without the mating connector for the GREEN connection, you have to find a single pin connector to use for that accessory switched connection. I had a single wire header connector laying around and was able to use that.
With all of this said, here are the connections to the Urban Runner's Radio Harness. This is a duplicate of information I have previously posted in another Urban Runner install thread:
Here are the connections for the Maestro RR. Note that this diagram is looking at the back of the wire connectors. From the GREEN Connection, you can also make the reverse signal output and E-brake connections if you want.
So, if you wire your 4Runner up to the Maestro using the info in the two images above and Flash your Maestro as a 2003-2009 4Runner utilizing a T01 Harness, you will have the full functionality of your iDatalink Maestro compatible head unit!
Good Luck and Happy Viewing of your TPMS data on your Urban Runner's Head Unit!