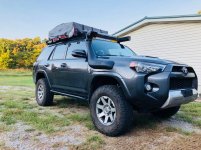
TerraCrawler's Build Thread

Front Runner Monsoon Bag

Link to Front Runner Monsoon Bag

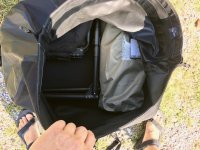
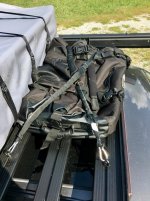
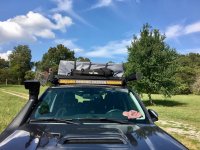
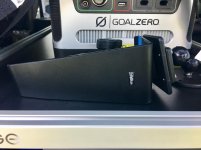
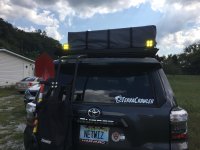
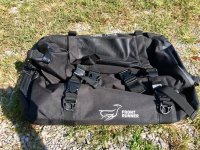
I picked up the Front Runner Monsoon Bag, because you can never have enough space! I wanted to get some items out of the cab and I had about 18" or so available on the roof. Camp items like chairs, annex and maybe even the Skottle. The bag is weatherproof, has a rolltop design like a typical dry bag. You can see in my pics below there is an air release valve which allows air to exit easily when rolling it up.

You get LOTS of tie downs, straps an buckles. I use it with the Front Runner Stratchits. The Front Runner Expander chairs fit this thing perfectly, you could easily put 4 in this bag and still have room to the side. Bag has some nice beefy rubberized grab handles as well and a convenient storage pouch on top. All of it is kept nice and neat by a weighted bar that keeps everything from flapping about.
 

Attachments

  • IMG_3493.jpg
    IMG_3493.jpg
    137.8 KB · Views: 1,091
  • IMG_3497.jpg
    IMG_3497.jpg
    142.7 KB · Views: 1,051
  • IMG_3499.jpg
    IMG_3499.jpg
    138 KB · Views: 1,043
  • IMG_3501.jpg
    IMG_3501.jpg
    138.6 KB · Views: 1,032
Proclip / RAM iPad Mount

Link to Proclip 4Runner Console Mount 834492
Link to RAM Mount RAM-HOL-AP14U iPad Holder
Link to RAM Mount RAM-B-202U 2.5" Round Plate with 1" Ball
Link to RAM Mount RAM-B-347U 2"x1.7" Base
Link to Ram Mount RAM-B-201U Arm

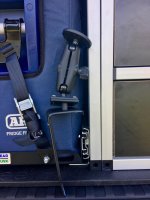
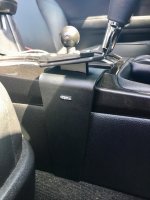
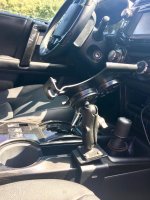
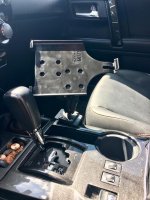
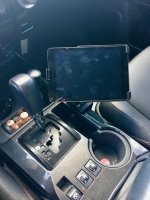
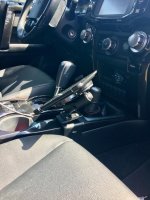
There are certainly many threads on how to best secure an iPad. I tried the RAM Mount POD HD, which secures to the seat bolt. This does not work very well for the 4Runner, because the 4Runner seat bolt is at an angle, and this part is straight. Some users have hacked it by bending or cutting it, but at the end of the day, its just not that secure and actually takes up considerable room from the passenger side. Other users have screwed into the console, used cupholder mounts, many ideas out there.

What I have done I believe to be the cleanest way to do things. Proclip makes a super nice mount that is designed just for the 4Runner. It just snaps into place, no drilling and has some adhesive tape that will not leave any permanent marks. Once you have the Proclip, you can use a RAM Mount base, Arm, and then a device holder. I prefer to use the metal RAM Mount stuff. These are parts that start with RAM in the part #. If the part starts with RAP then that is a composite part. True, the Proclip itself is composite, but it seems to hold just fine, I used screws to secure the RAM Mount base to the Proclip its rock solid.

If you like a longer Arm, RAM also makes those. It's a very versatile system.
 

Attachments

  • IMG_3480.jpg
    IMG_3480.jpg
    132.1 KB · Views: 1,546
  • IMG_3481.jpg
    IMG_3481.jpg
    118.5 KB · Views: 1,521
  • IMG_3482.jpg
    IMG_3482.jpg
    138.3 KB · Views: 1,500
  • IMG_3483.jpg
    IMG_3483.jpg
    136.1 KB · Views: 2,663
  • IMG_3484.jpg
    IMG_3484.jpg
    132 KB · Views: 1,581
  • IMG_3485.jpg
    IMG_3485.jpg
    136 KB · Views: 1,522
  • IMG_3486.jpg
    IMG_3486.jpg
    139.1 KB · Views: 1,499
  • IMG_3487.jpg
    IMG_3487.jpg
    142.1 KB · Views: 1,553
Baja Designs Work Lights

Link to Baja Designs Work Lights (Amber Work/Scene)

I got these ran fairly easy, here is a link to the thread on that.

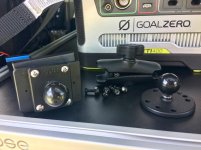
I have these ran to my SPOD so installation was a snap. I will use these when reversing at night or for extra visibility when offroad. The work scene lights give a very wide pattern, but you can change lenses to change the light pattern. I bought these as a pair, when you do so you save a bit of money.
 

Attachments

  • IMG_3526.jpg
    IMG_3526.jpg
    129.9 KB · Views: 1,006
Blue Sea 6-port Fuse Block

Link to Blue Sea 6-port Fuse Block

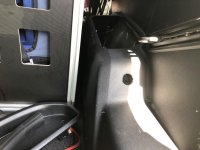
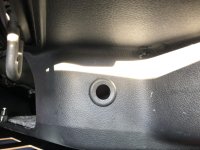
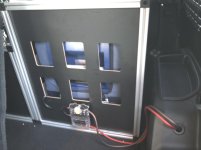
I really like the Blue Sea stuff. Although they also make a 12 port model, the 6 I felt was plenty. I secured it to the back of my Goose Gear freezer cabinet and ran 8awg through the wheel well area. I used a rubber grommet so its nicely finished. So today I go from the battery, through an inline fuse, and then to the Blue Sea. Fridge is a circuit on the Blue Sea, I plan to also add a few USB connections. Very soon I will be running 6 awg and putting a National Luna Power Pack back there, and will slave the Blue Sea off that, so all connections will still goto the Blue Sea but fed from the Auxiliary Battery, which is likely to be another 100Ah Odyssey. I will likely remove the 8 awg just because space is a bit of a premium in the rockers.
 

Attachments

  • IMG_3535.jpg
    IMG_3535.jpg
    135.7 KB · Views: 929
  • IMG_3536.jpg
    IMG_3536.jpg
    137.8 KB · Views: 952
  • IMG_3543.jpg
    IMG_3543.jpg
    118.7 KB · Views: 954
Fuzeblocks FZ-1

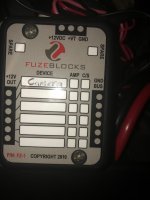
I use this fuse box as a basic power distribution for the cab area. What I like about it, is its very compact and allows you to do either constant or switched power for each circuit! I wish Blue Sea had something like that. I use a Blue Sea 5025ST in the back attached to my National Luna Battery Box, because basically all that stuff is constant. But in the cab area, I want the option.

For example, I have my Dashcam hooked up switched. If I hooked my radar detector to it, I would also want it to be switched.

I bought it direct from https://www.fuzeblocks.com for $96.99.......definitely heck them out.
 

Attachments

  • IMG_5145.jpg
    IMG_5145.jpg
    127.7 KB · Views: 555
National Luna Dual Battery System

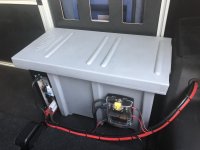
The National Luna Dual Battery System is well known. I have seen a number of people with various problems with these and other systems, but I did settle on this and its been working well. I have an Odyssey 100A Group 31 battery installed. Everything is self contained, you only need to run power/ground to the main battery. It's "Portable" so you can remove it.

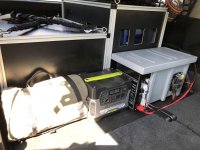
It fits perfectly in the void behind the seat and the Goose Gear Fridge box. It comes with everything you need. The standard electronics do not allow you to bridge the batteries/override isolation, which is useful for jump starting, winching, etc, but with he optional Controller you can do this.

I attached it to the Goose Gear plate system using the anchors GG uses to attach items. You could also strap it to loop anchors as well. It has built in meters, some Anderson connectors, and a few outlets. The newer revised version of this box has some USB and a charging port, but they are on the backside of the battery box, and depending on how you install it, it may be not accessible.

I bought the box from Equipt1 for about $550.00, maybe a little less since I got it at Overland East.

I connect the Anderson plug to a Blue Sea 5025ST, where I can breakout several circuits. Right now my CB, Fridge and a 10ft run to my Goal Zero Yeti 400, which I attach to the chaining port, so I can use all the USB's and inverter goodness on the Yeti 400 and have it use my National Luna as well. I can quickly detach the Yeti and move it wherever I want.
 

Attachments

  • IMG_5139.jpg
    IMG_5139.jpg
    134.9 KB · Views: 471
  • IMG_5148.jpg
    IMG_5148.jpg
    134.3 KB · Views: 461
National Luna Dual Battery Controller

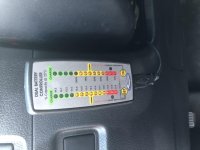
This is the optional controller for the National Luna Dual Battery System.

I paid about $95 from Equipt1.

It comes with a few meters of cord but you can also buy a longer cord. I have mine mounted just to the left of steering column with double sided tape.

It shows readouts for both batteries. It allows you to bridge the batteries for jump starting. You cannot do this in the portable battery box without this controller. You can also set an audible alarm or turn off the display (unless there is an alarm). you can do both of these two functions from the battery box, but more convenient to do from the controller. Its nice to be able to see how things are charging as you are driving. They make a display that looks similar, called the "Monitor" (as opposed to "Controller"). The Monitor just gives the readouts, it does NOT allow you to bridge the batteries. Its only $35 but I would say spring for the Controller. Controller is plug and play.
 

Attachments

  • V7YNRm4TQe+wM5jUlDb1Xw.jpg
    V7YNRm4TQe+wM5jUlDb1Xw.jpg
    131.4 KB · Views: 465
Love the goal zero setup! Have to dig into it more and check out exactly what you did, but looks awesome.

Your lift kid looks super rad as well. Do you have any good profile shots of your rig after the lift?
 
Slee Offroad Universal Battery Terminal Extensions

Purchased at: Slee - Battery Related Products
Price: $49 for the pair

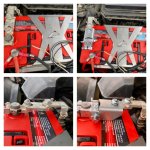
I am using a rather large 100Ah battery. The stock terminals have difficulty reaching, so I had hacked together some parts, including a Blue Sea bus bar to make my terminals reach. This works, but its not ideal.

After some time, I purchased the Slee Offroad Battery Terminal Extensions. I kept seeing these in various Instagram posts and really liked them. Here is a picture below of my before setup on the left and my after setup using the Slee terminals on the right.
 

Attachments

  • fullsizeoutput_1f08.jpg
    fullsizeoutput_1f08.jpg
    103.9 KB · Views: 346
Love the goal zero setup! Have to dig into it more and check out exactly what you did, but looks awesome.

Your lift kid looks super rad as well. Do you have any good profile shots of your rig after the lift?

here is a profile shot post lift
 

Attachments

  • IMG_5153.jpg
    IMG_5153.jpg
    139 KB · Views: 333

Members online

Forum statistics

Threads
278,306
Messages
3,554,044
Members
248,016
Latest member
Advally Service

Trending content

Back
Top