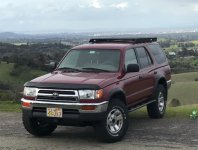
JZiggy's "Grown Up" 4Runner Build

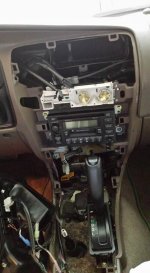
I need to see what an Auto/4WD looks like with the center trim pulled up to know where a bracket could mount. Want to take a picture for me?
. This doesn't help you does it Jordan ?

IMG_0176.JPG
 

Attachments

  • IMG_0176.JPG
    IMG_0176.JPG
    95.9 KB · Views: 792
If GM had a 1/4 of the attention to detail that you put into your build, their cars would be riding like a Lexus.
Love that little rubber strip that you added to the CB radio bracket to protect the paint!
 
Last edited:
Agreed. Like the thought and attention to detail, most recently on that support you added.

I'm not a CB guy, but I believe Firestiks don't need a ground plan, aluminum not being desirable. So, relocation on top would be fine. Would need to consider clearance with such an antenna up there though...

There are remote fold-down antenna options too. If mounted on the rack, it would just lie down on the rack when not in use. Here's one, at least for a Ham radio antenna. About at the 3:45 mark...

YouTube
 
Last edited:
Hint: it's really not hard to change the bearings on your power steering and AC idler pulleys. Just take a punch and push back the metal hold the washer to the pulley, press the bearing out, press in a new one, replace the washer, and use a punch to push a little of the metal back over the washer.

Bearing is a 6301 type, I used Nachi brand. $5 on eBay. If anyone wants me to rebuild one for them I'm happy to do it if you pay for parts and shipping.

Ne3B9Fi.jpg

Thanks for posting this. I have been wanting to get my Power steering idler bearing replaced.

My complements on your work. I really admire the attention to detail you put into each little thing. Great build thread.
 
I've had a cargo attic on the rear roof for some time now. It's a handy mod especially for when camping in the truck. I recently discovered a nifty product by Kamchatka Gear that they call a "cargo hammock." It fit very nicely on the mounts and is more functional and looks cleaner. Very happy with this mod.

QTH4PeJ.jpg


0qQUBi7.jpg
 
After getting my Rocky Mtn Antero roof rack I decided the hardware needed to be upgraded. A black rack with shiny stainless hex bolts just looked off to me. I sourced some black-oxide coated, stainless, button head bolts and oversized washers to replace them.

mXTpRMc.jpg


vhZUA3c.jpg
 
I've had a cargo attic on the rear roof for some time now. It's a handy mod especially for when camping in the truck. I recently discovered a nifty product by Kamchatka Gear that they call a "cargo hammock." It fit very nicely on the mounts and is more functional and looks cleaner. Very happy with this mod.

QTH4PeJ.jpg


0qQUBi7.jpg

Ever since I saw yours, I've been thinking of one. Nicely executed.

Having had yours for a while, any thoughts regarding additional improvements or refinements? At times I find myself thinking of not a stretchable net or material, but a rigid but removable shelf, loft-like. The forward edge, near the rear seats, would have a 90, contoured to the headliner to prevent "blow-outs" or to keep contents from getting pushed out the other side. I envision that the brackets I install could accommodate such, or a net/mesh material...

Keep-up the great work.
 
Ever since I saw yours, I've been thinking of one. Nicely executed.

Having had yours for a while, any thoughts regarding additional improvements or refinements? At times I find myself thinking of not a stretchable net or material, but a rigid but removable shelf, loft-like. The forward edge, near the rear seats, would have a 90, contoured to the headliner to prevent "blow-outs" or to keep contents from getting pushed out the other side. I envision that the brackets I install could accommodate such, or a net/mesh material...

Keep-up the great work.

Hey Tony,

This material is not elastic but the whole thing does stretch somewhat. The goal is to push soft items up onto the ceiling with some preload to keep them from moving around. Jackets, hats, towels, packs of diapers...

When camping in the truck the hammock is nice to hang a lantern on and a safe spot to put glasses and stuff.

The hammock needs to be taut when not in use to stay out of your rearview mirror view. Helps for it to be light too so it's not oscillating with a lot of force as the suspension cycles.

My first iteration on this was a Raingler cargo net. In fact this kit is what provided the mounting points that go behind the interior panels. Here it is in use during a family trip:

YdzRTmn.jpg


Turns out this cargo net was way too heavy and heavy duty for this job. I could also never quite get it to lay up out of the way of rear view.
 
Skid plate maintenance...

I seem to have drug my Savage Skid over a lot of rocks during the Mojave Rd run. I recall that one whoop where I got a foot of air, which might account for the 1/4" bend. Set the skid between two 2x4's, put on my John Henry hat, and pounded it back straight. Paint's drying now.

MIxEfvA.jpg


gKNvge7.jpg


You can see the crease here

cw8ojF4.jpg
 
Just wanted to mention that I have a few extra of these plastic stoppers lying around and would be happy to mill them down and ship them to other members who are experiencing this problem with CB mounts. I used the exact same fix for [MENTION=109927]ltsr[/MENTION] as I did on my own so I feel pretty confident that this should work for most folks.

Any chance you have a passenger side one of these laying around?
 
I was inspired by the air filter design of my vintage Honda riding mower. It uses a paper filter with a foam wrap. For years I have taken off the foam everyone once in a while, bathed it, and oiled it with a squirt of engine oil. It sure does collect a lot of dirt and the paper filter never seems to show any accumulation.

I wanted to try a similar approach with the 4Runner. After a dusty ~50mi trail ride last year my new-ish paper filter was shot. When I installed a new OEM one I added an oiled piece of Uni foam trimmed to fit. The filter cartridge just kind of jams it into place in the bottom of the airbox. This foam flows pretty well so I was not concerned about power loss.

Brand new foam next to the new paper filter

3gyMzgG.jpg


After oiling with Uni spray oil

flT80Tj.jpg


After this point I drove the truck approximately 4000 miles. There were a few hundred miles of offroad driving, 200 of which were in the desert, but at no point was it particularly dusty.

Here's the filter taken off showing the inner surface that is up against the bottom of the paper cartridge

hJOkgiV.jpg


Flipped over to see the business end -- this is where the dirty air meets the foam filter. Clearly it has captured some stuff and the paper filter has remained very clean! Because the foam is jammed against the inlet tube you can see there are some dead spots but overall the surface is pretty evenly dirty. This means the air is able to flow pretty well underneath it.

7oNmJ0r.jpg


After a wash in solvent, soapy water, and rinse with clean water

iSQi3pZ.jpg


I'll pop it back in after reoiling it and try again in a few thousand miles.

My hope is that this foam can:
- Improve the overall efficiency of the air intake system (less dirt coming in)
- Protect the paper cartridge during super dusty events. The foam can just be replaced on a frequent basis during this type of service. Possibly could have two or three so a clean on is always handy.

I drove a lot of long hills and stuff in northern CA during this 4000 interval. I noticed no power loss. That's saying a lot since I only have 150HP at best to begin with! I figure if I lost even a couple HP I'd be able to notice.

So... yeah! :party:
 

Members online

No members online now.

Forum statistics

Threads
278,306
Messages
3,554,045
Members
248,016
Latest member
Advally Service

Trending content

Back
Top