2001 SR5 Build Thread!

RMGulchin1

New member
Finally can start my build thread here!

Purchased in April 2019:
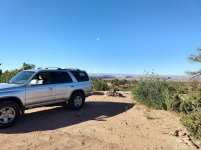
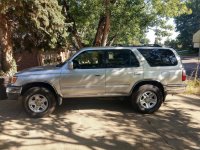
2001 SR5 4WD with 170,000 mi and just about zero rust. Engine is clean!

Immediate fixes:
- Rear axle shafts and bearings
- E brake replace
- ABS ring
- Valve cover gaskets
- Spark plugs
- Battery and terminals
- Coolant flush, radiator cap, thermostat
- Front/rear brakes and rotors
- Shifter bushings replace.

Up and running smooth.

Recent mods:
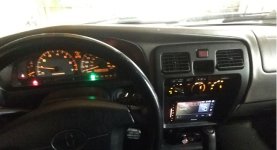
- LED dash and interior lights (amber dash, white interior).
- Plasti-dipped front grille and wheel trim (bumpers to follow).
- Bluetooth stereo upgrade.
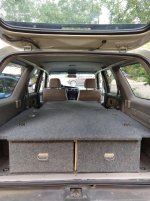
- Sleep platform build.

Suspension:
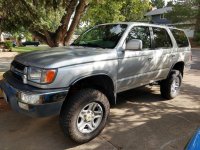
- Toytec Boss 3" lift
- Adjustable upper control arms
- New sway bar bushings and end links

I want 500,000 miles!!
 

Attachments

  • IMG_20190918_090741032_HDR.jpg
    IMG_20190918_090741032_HDR.jpg
    139.5 KB · Views: 832
Register to hide this ad
Upcoming projects list:

Fixes:
- Headlight replacement
- Steering gear replacement
- Front CV replacements
- Exhaust replacement (eventually)

General:
- New tires / wheels (thinking 285/70/17)
- Deep engine cleaning and detail
- Replace wheel well liners
- Plasti-dip front/rear bumpers
- Under-carriage detail and coating

Interior:
- Mount interior portable battery cell
- Front seats replacement
- Floor insulation

Exterior Mods:
- Roof rack + light bar (eventually)
- Front bumper + winch (eventually)
 
Wheels + Tires

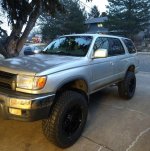
Wheels and tires are on!

285/70R17 Falkan Wildpeak ATW3 tires on AO Lonestar 17" wheels.

Doesn't appear to be any rubbing--but will probably push my wheel well liners forward an inch or so tomorrow.
 

Attachments

  • tires.jpg
    tires.jpg
    105.5 KB · Views: 554
Coming along nicely! I just picked up an '00 SR5, also in CO and about 90% of my center console lights are out, will take a close look at your LED dash updates, thanks for posting.
 
Very nice! I'm in Boulder also. Once you get the dash pulled apart the LEDs were one of the easier replacements so far. The hardest part was not putting them in upside down which I did several times and then had to go back in. I recommend not repeating my stupidity and turning the car on to check the lights before screwing things back into place.
 
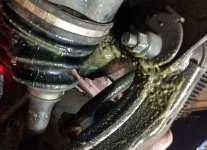
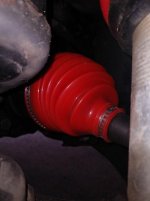
New inner CV boots installed. Blew both of them after the lift as shown above. Silicon in red, looks nice!
 

Attachments

  • IMG_20200118_145810024.jpg
    IMG_20200118_145810024.jpg
    16.4 KB · Views: 475
Next to-do list:

- Front & Rear bumper removal (just broke the heads off of a bolt on the front and back so great start. Will have to machine those out probably). Plan is to undercoat the insides of the bumpers then apply plastidip and clear coat.

- Been scouring the internet for a low profile, sort of cheap roof rack. I just need to mount a rifle box and Hi-Lift. Want to extend the current roof rack about 6 inches longer also.

- Very minimal rust underneath the car. Just a few spots. Going to wirebrush them anyway and apply rustoleum undercoat.
 
Next to-do list:

- Front & Rear bumper removal (just broke the heads off of a bolt on the front and back so great start. Will have to machine those out probably). Plan is to undercoat the insides of the bumpers then apply plastidip and clear coat.

- Been scouring the internet for a low profile, sort of cheap roof rack. I just need to mount a rifle box and Hi-Lift. Want to extend the current roof rack about 6 inches longer also.

- Very minimal rust underneath the car. Just a few spots. Going to wirebrush them anyway and apply rustoleum undercoat.

The CURT roof racks are usually cheap on craigslist and can be mounted lower using simple hardware. food for thought.
 
Nice progress. I just picked up a 97 a couple weeks ago. And had to do head gaskets. Luckily they weren’t blown so no damage. Got it back out and running today. Now to do the LED interior lights because I can afford that lol. Keep up the great work will be following.


Sent from my iPhone using Tapatalk
 
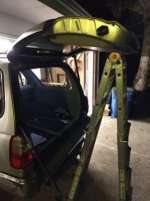
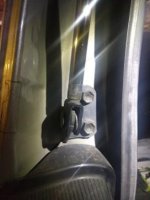
Replaced Rear Lift Supports

These things were sagging up to 50% in the cold this winter. Super quick, super easy swap.

Picked em up here: Amazon.com: Qty (2) Toyota 4Runner 1996 1997 1998 1999 2000 2001 2002 Rear Hatch / Liftgate Lift Supports Struts Strong Arm 4286: Automotive

$40 for the two of them. KINDA disappointed they did not come with replacement hardware too though.

Ladder worked great for holding it open while I worked. This thing is heavy, definitely recommend the ladder (or other inanimate support).
 

Attachments

  • IMG_20200123_190254278.jpg
    IMG_20200123_190254278.jpg
    20.2 KB · Views: 394
  • IMG_20200123_190023489.jpg
    IMG_20200123_190023489.jpg
    13.4 KB · Views: 354
Stripped Bolts

Attempted to remove the stock roof rack to check it out and also the front and rear bumpers: stripped bolts / broken heads everywhere.

Plan is to remove the front/rear bumpers, then wash/sand/& undercoating on the whole thing (as well as the hitch). This should hold them over until I can get some new ones. Also replace all the hardware that I can get to while in there.

What's the best way to get stripped bolts, stuck bolts, and broken heads out if I plan to replace them anyway? I've been trying an EZ-Out kit but it hasn't done jack squat.

Note to self: end caps for the roof rack rails-
00278-35967 front left roof rack cap
00278-35968 front right cap
 

Members online

Forum statistics

Threads
278,305
Messages
3,554,042
Members
248,016
Latest member
Advally Service

Trending content

Back
Top