mynameistory's not-a-build thread

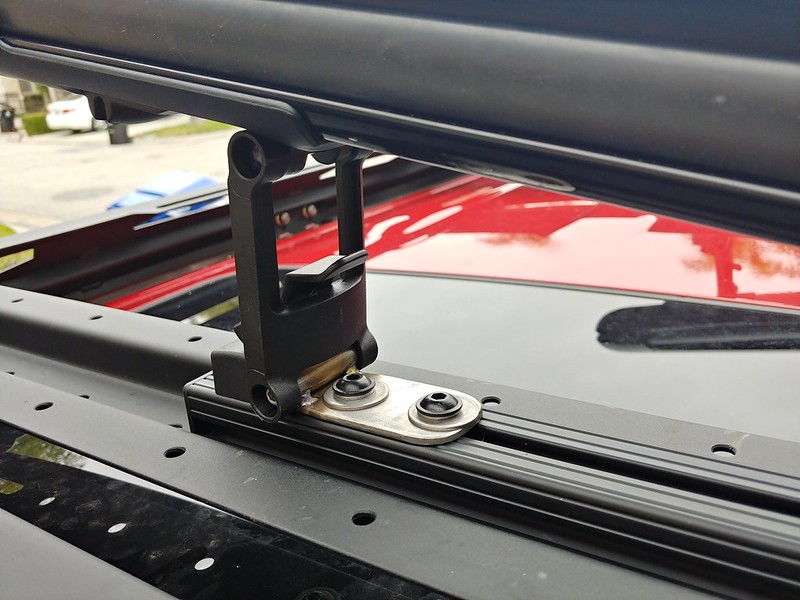
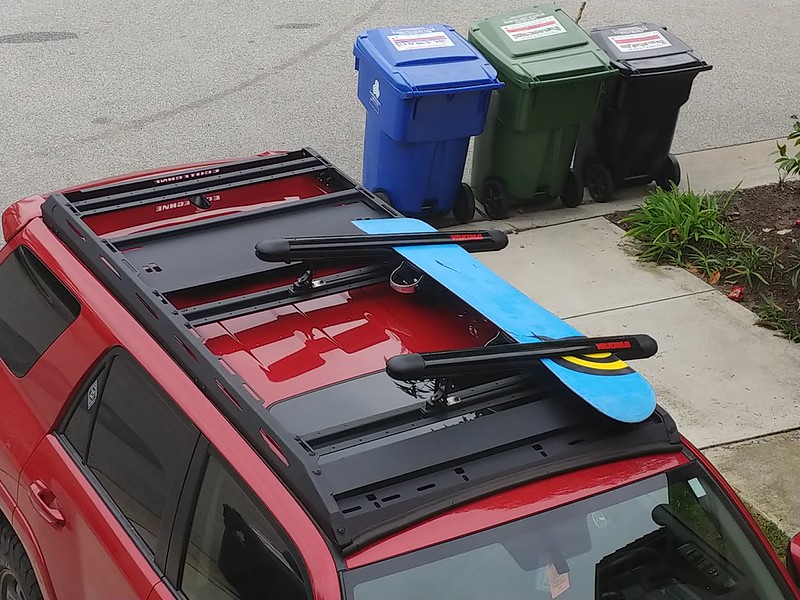
Finally got some ski racks mounted. The Yakima Fatcat set can carry 4 snowboards (if there's enough clearance to mount 2 upside down). I love to snowboard and get out any chance I can. It's been tough with the baby but if I'm lucky, my wife will let me take the day.

YouTube

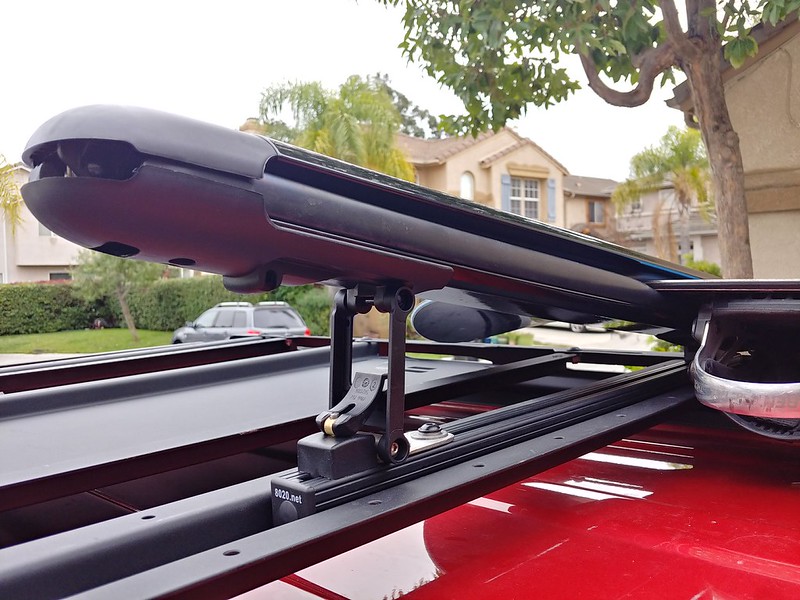
The first set of mounts I designed and made up really sucked. They were too tall, ugly, and a pain to install and adjust. I gave in and ordered a couple of two foot chunks of 1.5" T-slot. Yakima makes a kit to attach to slotted bars (called the SmarT-slot kit). They're made for Yakima crossbars, but with a bit of filing they work just fine in normal T-slot.

46034629504_3ee4dedd0b_c.jpg


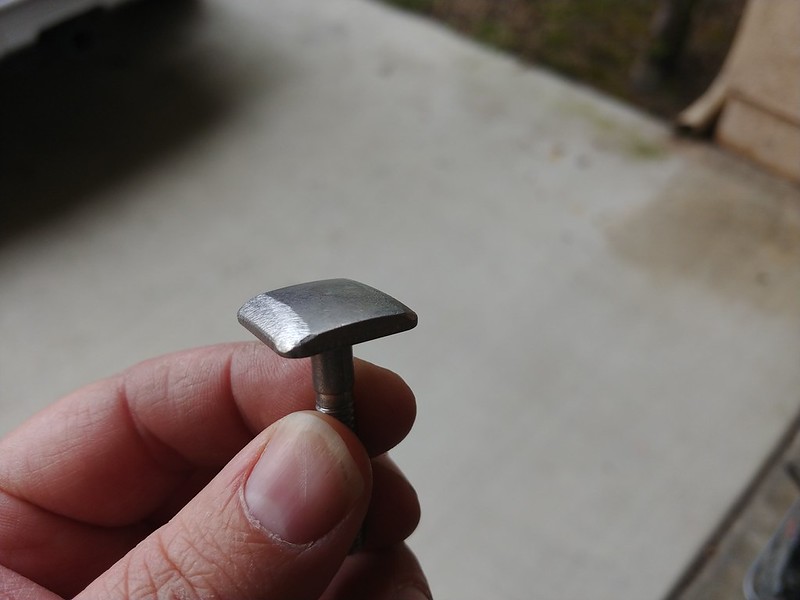
The standard mounts are flat, but they have a convertible piece on one side if you need more clearance. This way I can go from 2 boards to 4 boards when needed. The wrap mounts come with the provision to make these work, but I had to make my own since I was using different mounts. It's a stainless 1/4" spacer welded onto some drilled flatbar. There's a corresponding piece inside the flatbar.

46034629364_2e8d3a8629_c.jpg


46706750812_37f3042e66_c.jpg


The racks work well and are solid at highway speed. I'm happy with them.

32884239228_dd32a43a6f_c.jpg


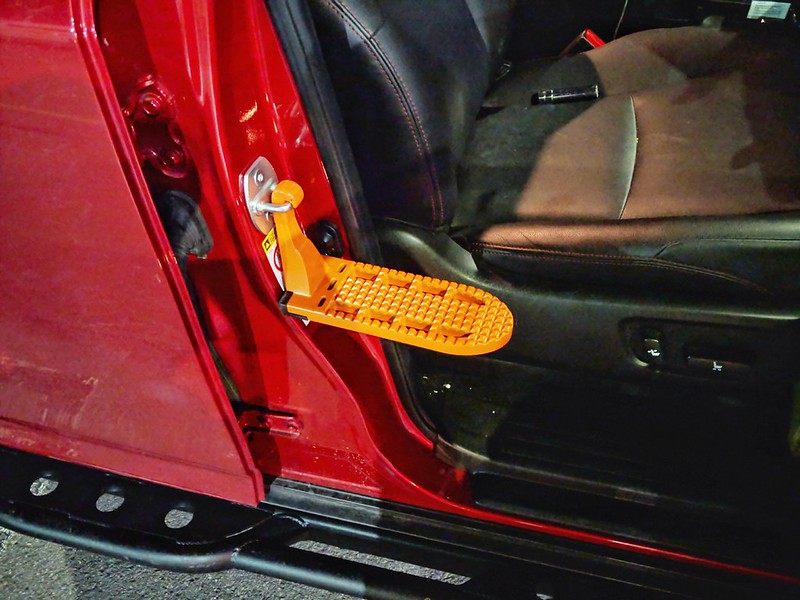
Also really helpful during the install was this little doohickey. It's called the Moki doorstep and it hooks into your door latch to provide a sturdy step for extra reach on your roof rack. There are plenty of Amazon and eBay knockoffs but I decided to support the original creators. This piece is a lot sturdier and the padding for protecting your paint is much better engineered than the knockoffs. It's also 4 times as useful as a Gobi ladder for a fraction of the price. Fight me.
32821843398_fdd1c68ba7_c.jpg
 
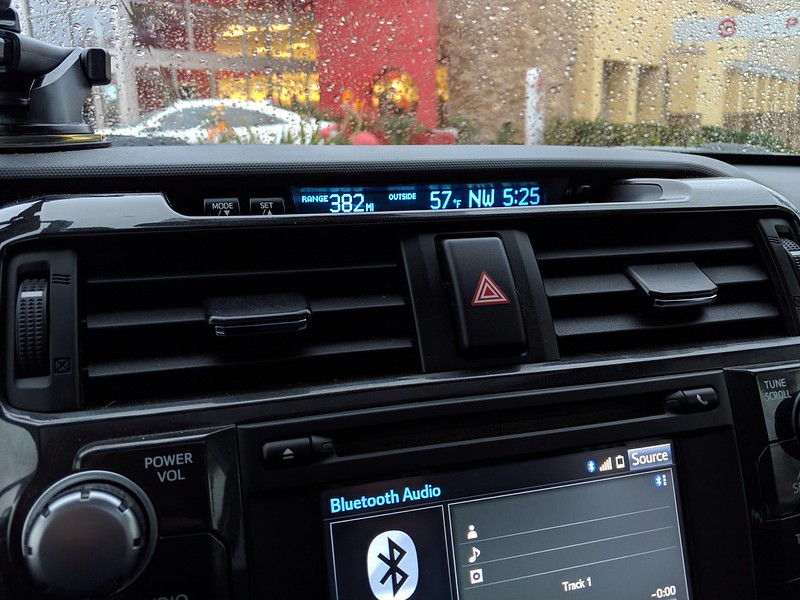
This is a cool little factory addition made possible by Old Red!

46384887704_b1bc00c478_c.jpg


All 5th Gen 4Runners used to have this info display in the center of the dash that displayed the clock, compass, outside temp, and MPG/range (from 2010 to 2013 the display was orange). After the 2014 refresh, all of this information was relocated to the tiny center screen in between the gauges in the cluster.

Toyota must have eventually decided to eliminate this redundant source of info and repurposed this location as a cheaper digital clock across all models. However, the display stayed for one year after the dash/lighting change to blue, and it's available only in the 2014 Trail. Besides the normal display, it also shows prompts when you toggle crawl control/multi-terrain select.

Check out Old Red's 2015+ AMD thread for info on how to do this conversion with the adapter harness he created! You'll need to take apart the dash and add the harness, as well as source your own display (this one came out of a junkyard in Cape Cod).
 
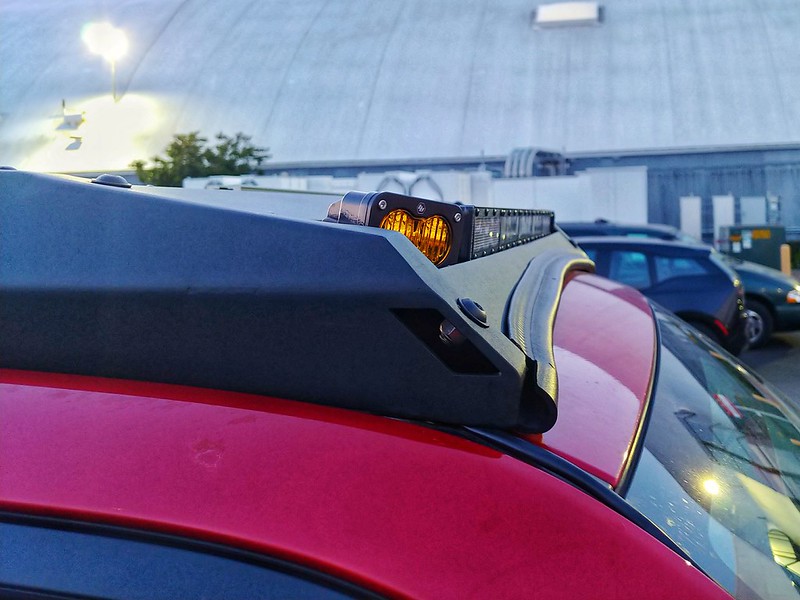
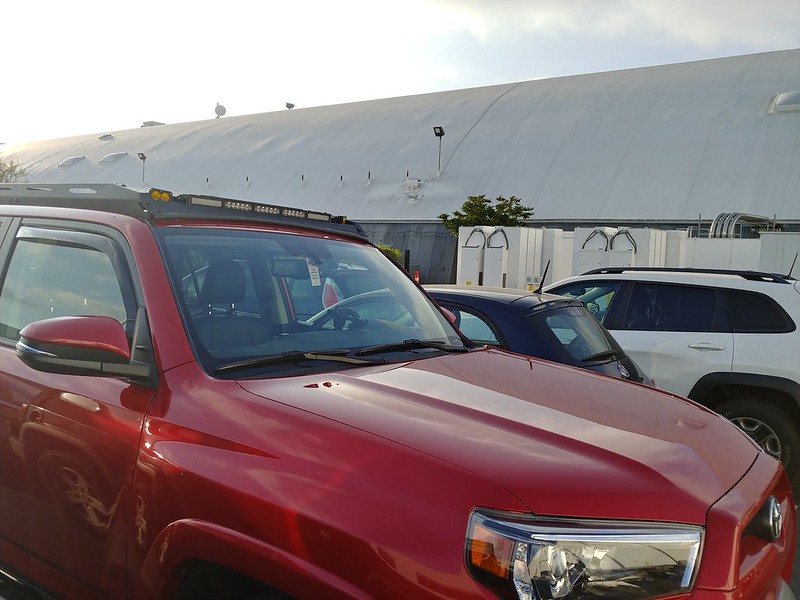
A few months ago I got it into my head that my truck simply didn't have enough overlanding points, and that the slot on the front of my roof rack looked a little empty. Let's get some lights!

There are a TON of options out there, everything from cheap eBay junk to setups that cost thousands of dollars from Baja Designs or KC HiLites. Like almost everyone, I wanted to select parts that worked for my needs (ok, nobody needs a light bar, so make that wants) and a good value for my dollar. So I ended up somewhere in the middle.

40891177423_f0c7256be3_c.jpg


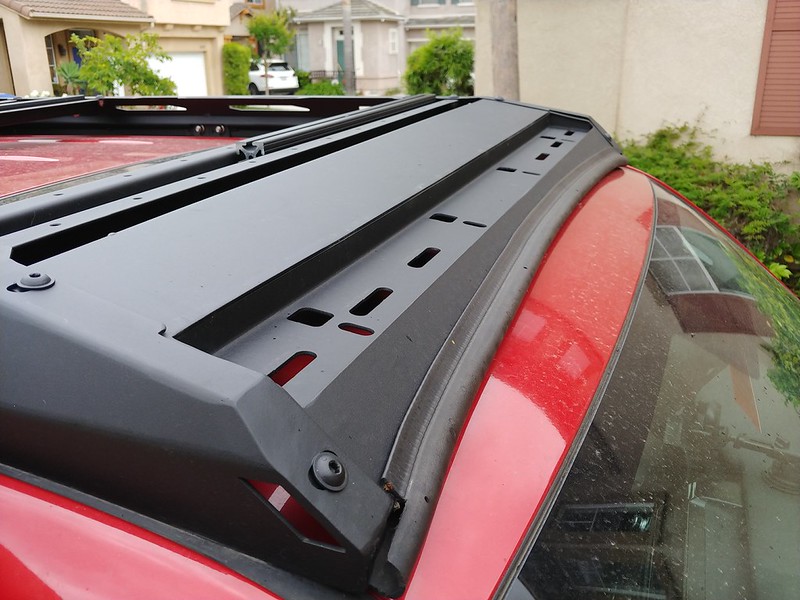
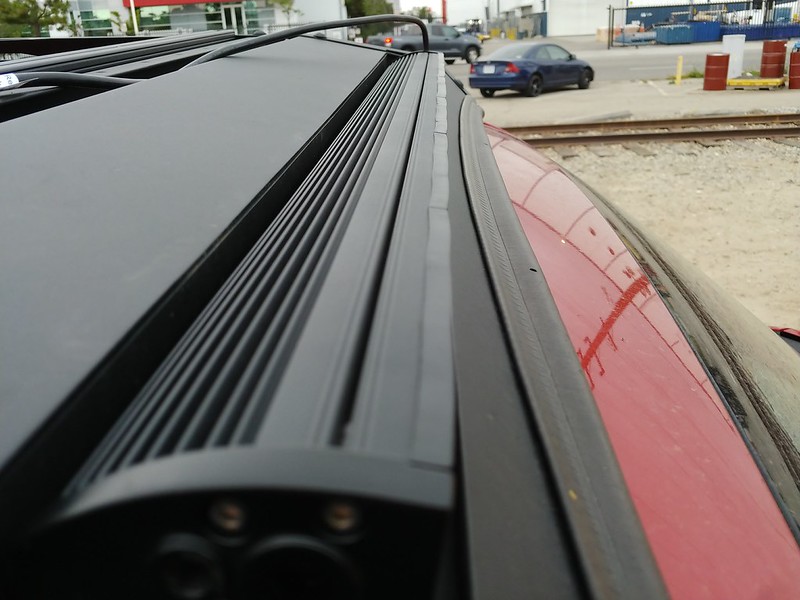
I started by figuring out what I could fit. The slot on the V2 Ecotechne racks is about 3" thick by 42" wide, and about a half inch deep. Right away, most of the big dollar bars were out. As cool as the S6 and Gravity bars are, they're simply too big and bulky to fit up there (they're also expensive and pretty overkill for my purpose). I wanted to find something that fit neatly into the slot and didn't stick out a mile. I started to look at "mid range" light bars.

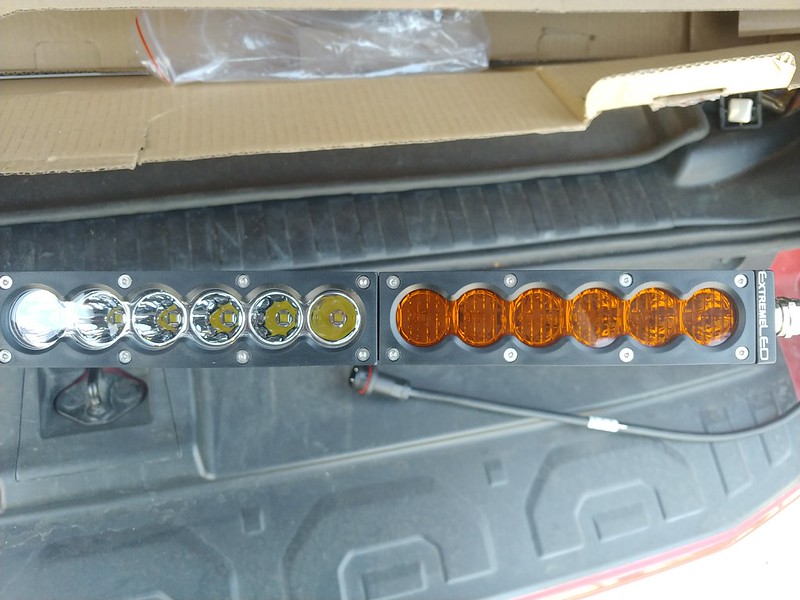
I'd seen a few people run bars from ExtremeLED, and the smaller 38" bar would fit neatly. So, I ordered one to give it a shot. Shipping was fast and packaging was protective. It fit where I wanted.

46941488445_1297dbb987_c.jpg


40891180183_cd5f06ebba_c.jpg


46941488175_4b27704341_c.jpg


However, when I did a test fit using the provided harness, I quickly realized that this wouldn't be a great solution for a roof bar. Here's my review that I left for it after returning the bar. By the way, they have an excellent support staff that processed my return quickly and were very helpful.

I bought this light with the intention of installing it on my roof rack. I know that mounting lights on the roofline comes with the risk of producing too much glare on the hood, but I decided to try due to its description as a spot pattern. However, the optics on this bar seem way too scattered to be a true narrow-angle spot. They are simply LED chips with shallow reflector cones mounted over them. I had to aim the light way too high in order to reduce hood glare to an acceptable level, making this bar less useful than I hoped. The amber end lights also didn't seem to contribute much brightness, even when used by themselves- they don't produce much "fill light" like I hoped that they would. When the center section is on, you can hardly see the ambers at all. Finally, the faceplate covers seem to be made of a phenolic style plastic, which is fine but they appear to distort a lot during assembly when looking at the bar from the side. They may be sturdy but it gives the light a cheap look.

At least the lights in the center section are bright, but I would call the overall beam pattern disorganized. While it has a lot of output, I'm not sure it's very usable for anything other than a vague flood of light. And the BRIGHT white glare on the hood meant that my eyes were being dazzled unnecessarily, reducing the utility of the light where I wanted.

Overall, the X6S bar appears to be a stout, compact, and inexpensive light bar option; but it would not work for my application. I care much more about how the lights will work than how they'll look on instagram.


So it was back to the drawing board. Unfortunately I wasn't able to take pictures of the light working and the hood glare, as I only did preliminary testing with no permanent bracket installation.

While I was processing the return, I spent some time emailing Diode Dynamics about their bars. They advertise that their lights are the few (or only) that use Total Internal Reflection (TIR) optics for their LED chips that results in usable driving patterns and keeps wasted/spilled light to a minimum. A lot of companies advertise whatever technology or techniques they're using, but I believe only a few companies that sell quality products know their stuff inside and out; and can back it up. There's a YouTube video with a presentation from their development engineering team. It doesn't have flashy graphics or any marketing, but it does have a lot of detail about how they're using the TIR optics in their bars. If you're not a lighting engineer (I'm not) it will probably bore the pants off of you.

YouTube

Whether or not their claims were legitimate or pure marketing, I was willing to give it a shot as it was a bar that met my size and budget requirements. I spoke with a rep and had all my questions addressed (thanks Matthew). Since they do not sell a 36" (6 section) bar, I was trying to figure out what to do with an "odd size". The 42" bar would be a challenge to mount, as it would take up the whole rack and leave no room for brackets (at least without getting really creative).

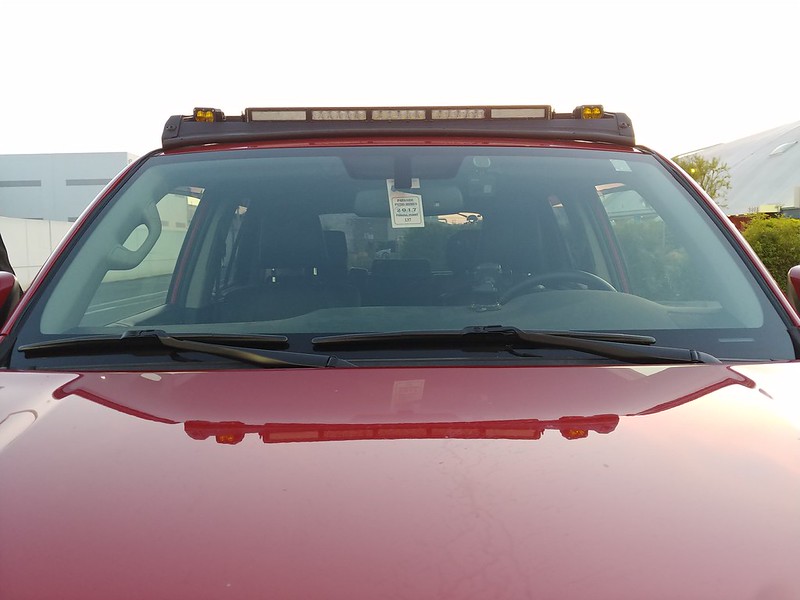
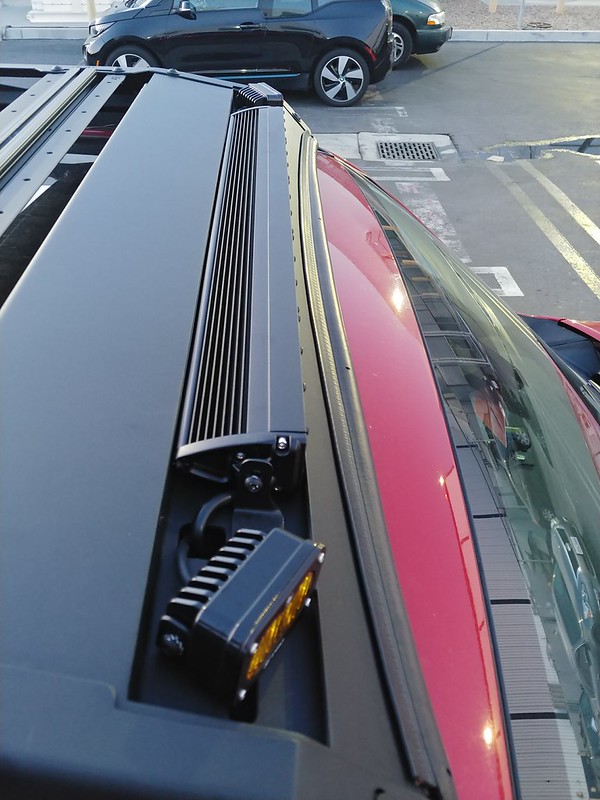
So I decided to get a 30" bar from Diode Dynamics and then flank it with a set of smaller lights that could be aimed independently. I ordered the bar in the combo pattern, meaning that the outer two segments have flood optics while the center three have a spot pattern.I ordered 2 extra spot lenses for $3 each just in case the flood lenses gave me the same glare problem on the hood. I found a great price for S2 Pro lights from BD and decided to use those as ditch lighting on the corners.

48253195221_3d04384f79_c.jpg


48253194426_050537cd81_c.jpg


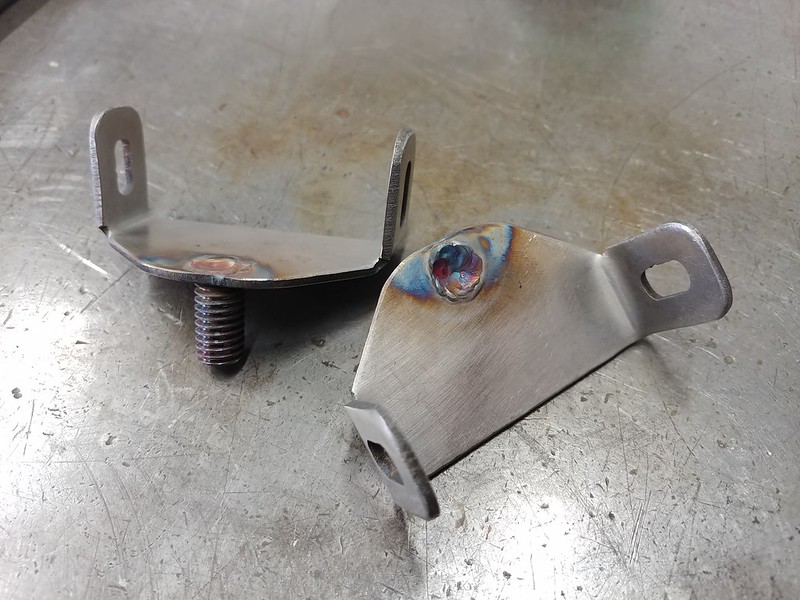
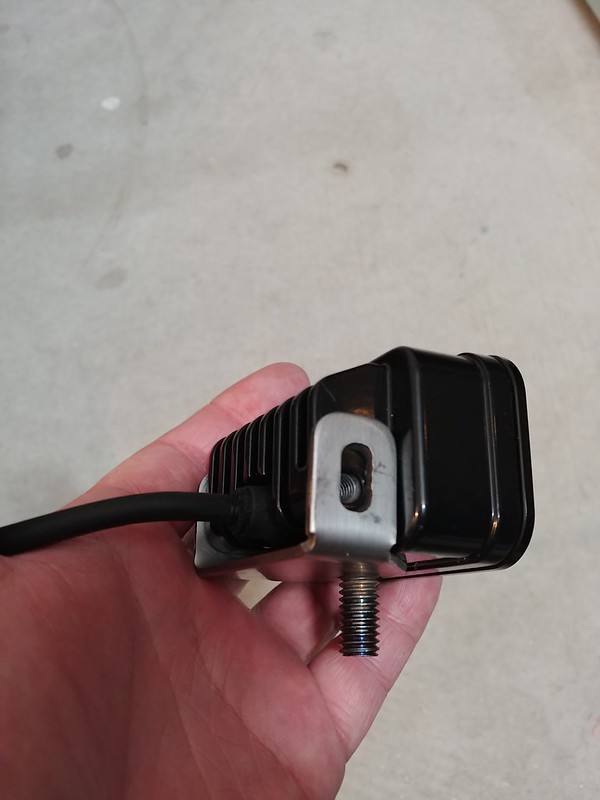
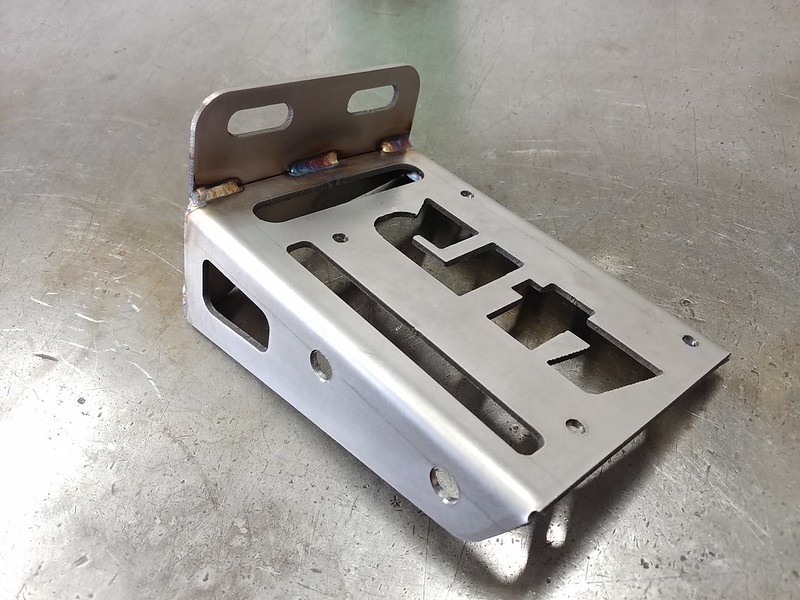
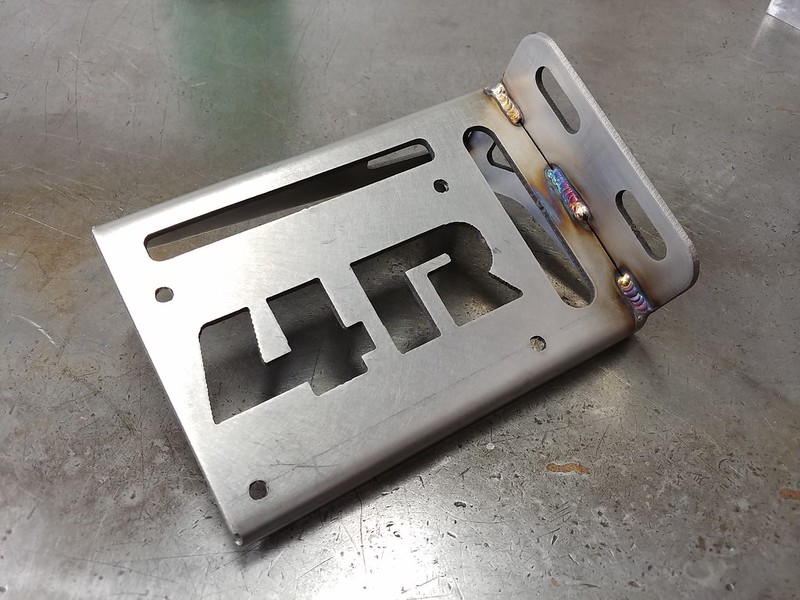
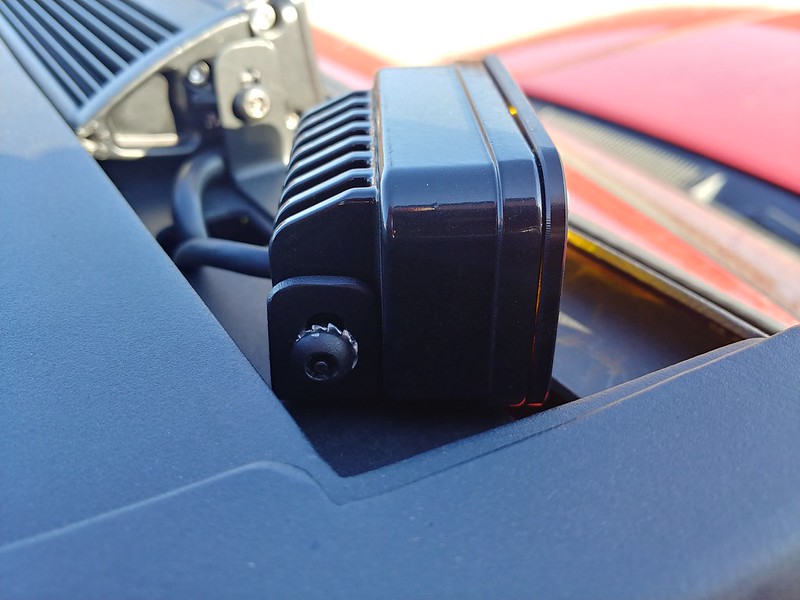
It took me a while but I was able to design and cut out some stainless brackets to have as low of a profile as possible. The brackets for the S2 lights basically allow them to be mounted flush, as I welded a 3/8" stud to them instead of having a separate bolt with a head. The main bar brackets are pretty simple 90º designs, but I needed them in custom dimensions in order to fit the cutouts already present in the roof rack fairing. I also made my own bracket for a Blue Seas fuse box.

48253265032_82791d8929_c.jpg


48253195561_765d4f0377_c.jpg


I also spent some time organizing and purchasing all of the extra junk (wiring, fuse box and mounting bracket, relays, switches, heat shrink tubing, connectors, hardware, etc.). In fact, I spent more on all of these incidentals than on the actual lights themselves! Make sure you leave yourself plenty of budget for this stuff. The DD bar had a Deutsch connector but I decided to change everything to weatherpack to keep it consistent (I also already have a weatherpack crimper for assembling connectors).
48269011912_19c035c4aa_c.jpg


48253173541_e93b434434_c.jpg


48634073721_709425deeb_c.jpg


48253173516_32c1f466d9_c.jpg


48253243857_decd64fd61_c.jpg


For what it's worth, the Diode Dynamics bar is only a little more expensive than the X6S bar from Extreme (for any given size). However, I think the quality is miles ahead. The faceplates are machined aluminum and have O-ring seals. The lenses look and feel more purposeful, and the end plate castings have proper ports (one is used for a waterproof cable outlet for the wiring, and the other side has a vent installed). I'd be interested to check out a Baja Designs bar to see how much more robust it is, I know they have a serious racing pedigree. In any case, I was very impressed with the construction of the Stage Series bar.

After setting it up and aiming the bar to merge with the low beams at a range of about 80-100 feet, I'm extremely happy with the output. The hood does illuminate slightly when the lights are on, but it's a soft illumination without harsh white glare reflecting back into my eyes. The light is thrown far downrange and the flood lenses help diffuse the edges for transition visibility. I'll have to take some night trips to determine if my eyes get fatigued from the hood glow, but it is definitely MUCH better than the previous bar. It is really a usable pattern that can be aimed, instead of a glaring blob of brightness. The S2 lights are also insanely bright for their size, and provide proper ditch lighting that can be seen and used- unlike the other bar where they were integrated and barely noticeable.

48306193442_3336f2f1fe_o.gif


1. No lights
2. Morimoto 2stroke 2.0 LED low-beams
3. Low beams + Phillips 12793UNIX2 yellow fog bulbs
4. Xenon Depot Extreme LED hi-beams (with DRL module) and low beams (fog canceled)
5. Lows, fogs, and S2 ditch lights
6. Everything plus the DD bar

I'll detail a parts list, some things I learned, and things that I would do differently in the next post.

 
Last edited:
Here's a rough list of the parts I used and some I wish I didn't. I'll try to list only one-off items that might be unique to my install. GXL wiring, heat-shrink connectors, fuse taps, relays, etc. are all fairly common and you can use just about anything automotive rated.

For the switch wiring through the firewall, I bundled six 18ga GXL wires together and used MCMaster adhesive heat shrink (a huge pain in the ass to get therm all pushed through). After hitting it with the heat gun and passing it through the firewall grommet, I terminated each end with a weatherpack 6-pin connector.

McMaster parts used:
Adhesive, UV stable heat-shrink: 8195K33
Mesh sleeving: 9196K12
Silicone grommets that fit the plugged factory holes: 1061T15
Non-adhesive, UV stable heat-shrink: 8061K95

48253263072_044442bb38_c.jpg


48254626517_0fde9944c8_c.jpg


While I like how the fusebox and bracket turned out, I'm bummed that the relays I ordered will only install upside down on the Rago relay bracket. It looks very untidy, so I'm going to switch gears and build a Bussmann RTMR using a Shrockworks bracket and the Bodenzord guide. Honestly I should have done this from the start, but I wasn't sure if I'd be able to do the full install in time for my 4th of July trip. Plus it was a fun learning curve building my own.

At first, I used the adhesive heat shrink to wrap the 14ga GXL wiring and pushed it into the windshield channels going up to the rack. However, the bundles were just slightly too thick and they kept popping out and flapping on the highway. I switched to the non-adhesive tubing which was a bit smaller after shrinking, and these seem to stay in place much better. They're also UV resistant, so they should resist fading. I may add a small bead of butyl tape in the channel to keep them stuck in a little more securely.

I also tried to organize my wiring under the rack fairing a little more using adhesive zip-tie mounts, but those ended up debonding a few days later (heating/cooling/condensation cycles), so I'm not even bothering to include them in the parts list.

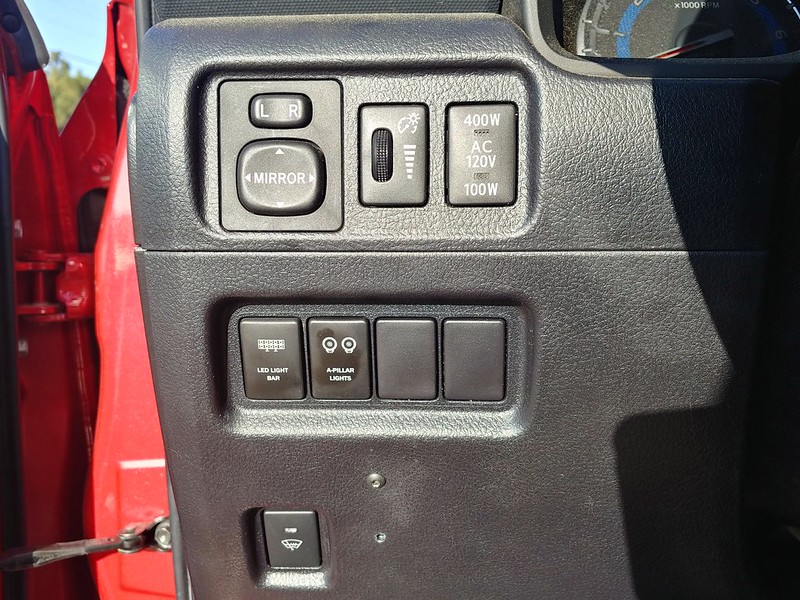
Switches are Air On Board Toyota push style, in blue that matches the dash lighting.

48254626447_c3ce401299_c.jpg


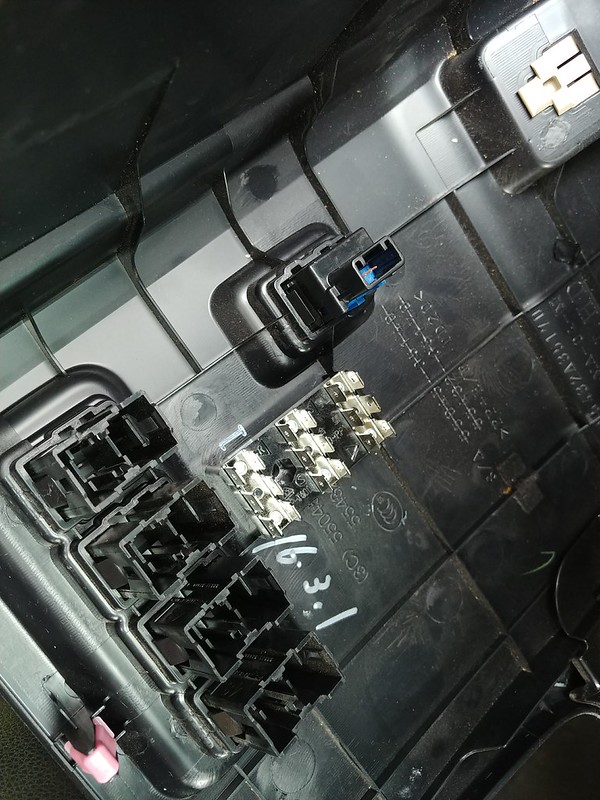
For connecting the switch circuits, I used a triple bus bar all the way from Germany- It was the only terminal block that did what i wanted with a small footprint. One bus has +12V from the fuse tap for the switch circuit power. I used the charging port circuit for the add-a-fuse, so the switches only get power when the key is in the ignition. The middle bus is +12V for the illumination circuit, and the third bus is either for pure ground or illumination ground, I haven't decided yet (the illumination dimming function is variable between 0 and 12V, and is what allows your dash to dim when you scroll the dial). If I hook it to pure ground, the switches will not dim along with the rest of the dash. However, I have some other things that would benefit from having an easily accessible ground bus.I still haven't tapped into illumination yet, so I'll figure that out later.

48253194091_05fba980b5_c.jpg
 
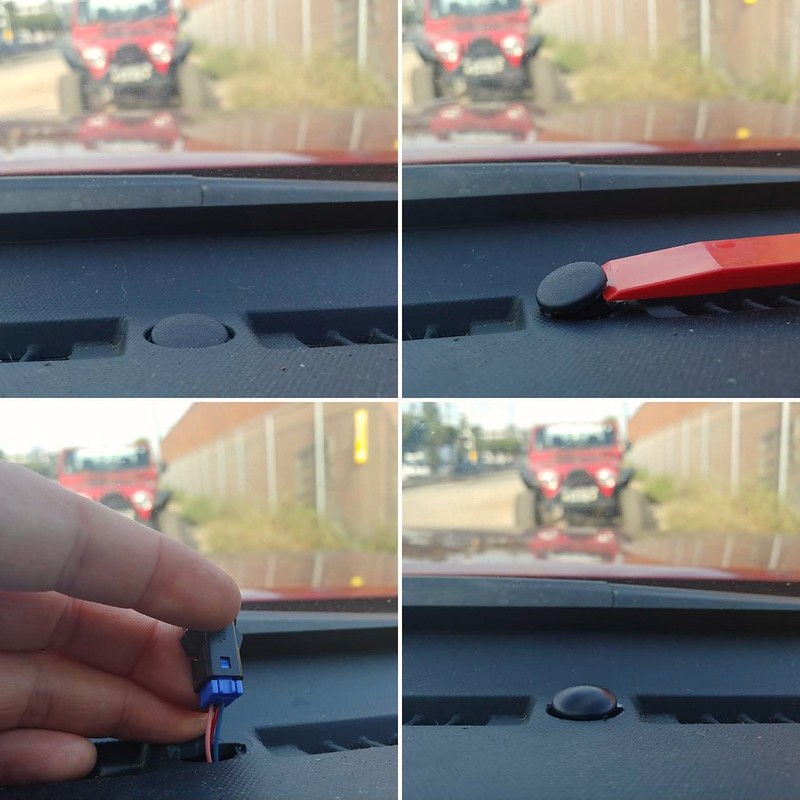
Last few things. First one is so easy and cheap, I can't really call it a mod. There's a dummy plug on the center of the dash that pops out easily. Not sure why, but Toyota must have decided last minute not to install the light sensor that was meant to go there- there's even a wire harness hooked up to it! (Not sure if all models have the harness, but it's easy to check for yourself). Got a cheap photo sensor from eBay thanks to Electro Boy's tip, and plugged it in. Now the dash lighting is a little more intelligent- if I switch on the headlights during the day, the dash will still be at full brightness instead of dimming.

48312586457_70d565387a_c.jpg


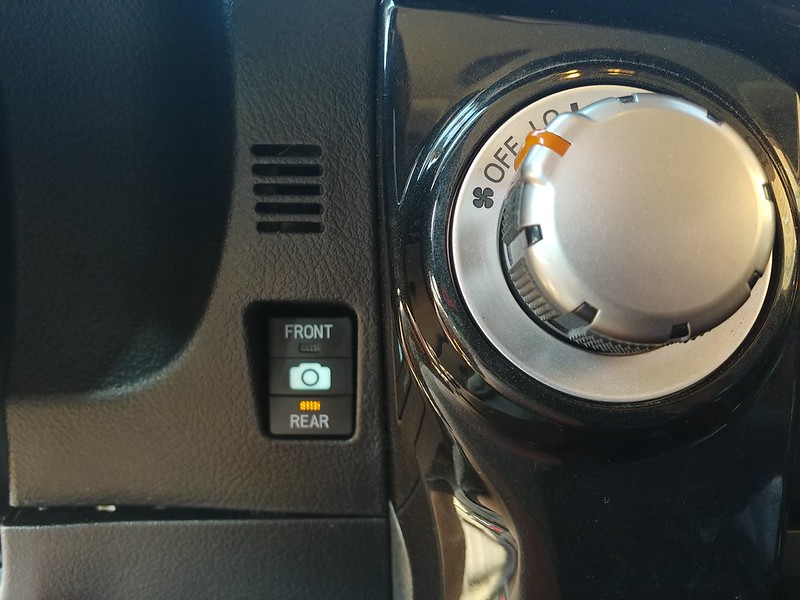
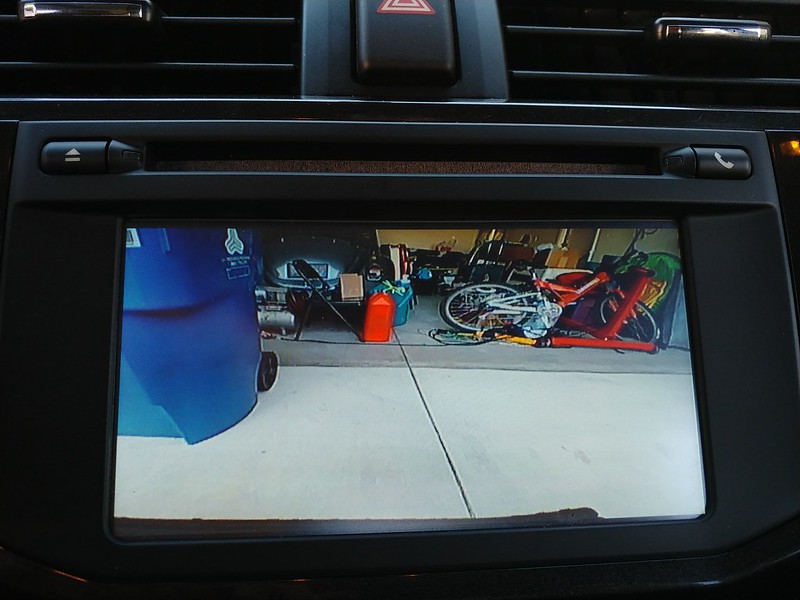
Finally, camera setup by anytimebackupcamera.com

This was a fairly easy install, with the hardest part being the RCA cable routing. RCA cable ends are very bulky, so pushing it through the firewall grommet and dash components was a real pain. Works well though, and I mounted the rocker switch in the old "party mode" blank near the ignition tumbler. Great for parking at the mall and self-spotting alike.

48253172436_befe08323d_c.jpg


48253243442_406d8699d6_c.jpg


48254626822_6c23e520e8_c.jpg


48327277426_683f97e1b4_c.jpg
 
Last edited:
Finally, camera setup by anytimebackupcamera.com

48253172436_befe08323d_c.jpg

Thank you for sharing the pix of your updates! I am interested in a front camera and wanted to ask you what the downward view is like. Any trouble seeing the ground right in front of the bumper? Is the supplied cable long enough to allow mounting the camera towards the bottom of the bumper?

Thanks!
 
Can you do a write up on how you mounted the front camera and what the camera view is like? I've been wanting to do this for a while, but never got around to it.
 
Thank you for sharing the pix of your updates! I am interested in a front camera and wanted to ask you what the downward view is like. Any trouble seeing the ground right in front of the bumper? Is the supplied cable long enough to allow mounting the camera towards the bottom of the bumper?

Thanks!

Added picture of the front cam in the original post. If you look closely, you can see my license plate frame in the very bottom of the camera view. So it's a good combination of forward and bottom. Should help a lot with parallel parking and blind spots on the trail. There was plenty of extra cable, you could mount it anywhere. This seemed good enough for me.

Can you do a write up on how you mounted the front camera and what the camera view is like? I've been wanting to do this for a while, but never got around to it.

The camera has a threaded extrusion that you use to attach it. I drilled a 5/16" hole in that part of the grill and then threaded the supplied nut on there. Make sure you don't lose it- I tried measuring it and it doesn't appear to be any common SAE or metric thread. I didn't even remove the grill- just the plastic fairing on top of the radiator that has the pop-off buttons. Reached down and tightened the nut while holding the camera from the outside.

Nice upgrades. Where did you get the old school/heritage Toyota stripe plate?

Look up @tacovinyl on Instagram, he has an online store.
 
Added picture of the front cam in the original post. If you look closely, you can see my license plate frame in the very bottom of the camera view. So it's a good combination of forward and bottom. Should help a lot with parallel parking and blind spots on the trail. There was plenty of extra cable, you could mount it anywhere. This seemed good enough for me.
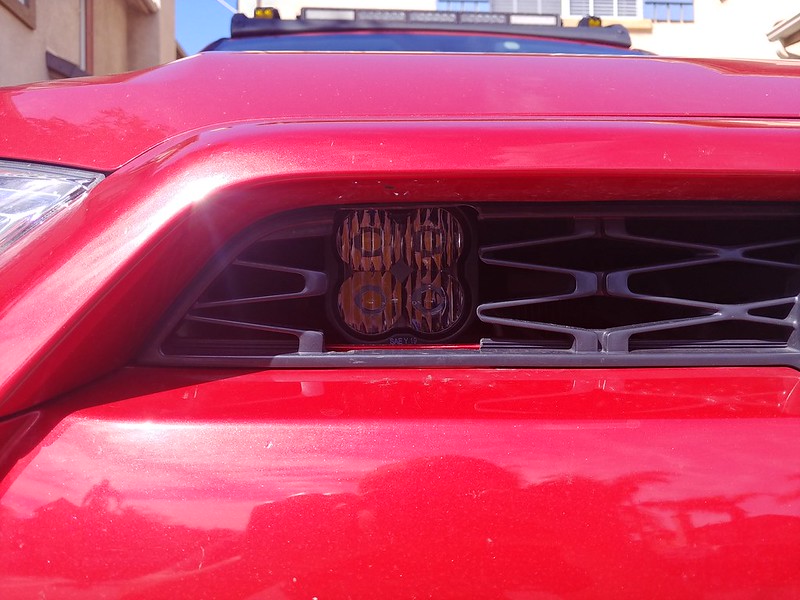


The camera has a threaded extrusion that you use to attach it. I drilled a 5/16" hole in that part of the grill and then threaded the supplied nut on there. Make sure you don't lose it- I tried measuring it and it doesn't appear to be any common SAE or metric thread. I didn't even remove the grill- just the plastic fairing on top of the radiator that has the pop-off buttons. Reached down and tightened the nut while holding the camera from the outside.


Look up @tacovinyl on Instagram, he has an online store.


Thanks for the brief overview of installing the front camera. Did you purchase the camera from anytimecamera or did you buy the camera separately? How would you compare the camera quality to the original backup camera?
 
Thanks for the brief overview of installing the front camera. Did you purchase the camera from anytimecamera or did you buy the camera separately? How would you compare the camera quality to the original backup camera?

Yes I bought the included camera as a kit. Other cameras might work but I'm not sure. This one uses a very small 4-pin connector to connect to the RCA cable assembly. Whatever you get, make sure it has the RCA connector and a power/ground included.

The image quality appears the same as stock but I can't be sure. It has a decent dynamic range, you can see it change exposure when you move from a bright to a shady area etc. There's no vehicle outlines obviously. It's enough to see clearly, though it will take some time getting used to the perspective and where the corners of your truck are compared to the camera view.
 
Finally got some ski racks mounted. The Yakima Fatcat set can carry 4 snowboards (if there's enough clearance to mount 2 upside down). I love to snowboard and get out any chance I can. It's been tough with the baby but if I'm lucky, my wife will let me take the day.

YouTube

The first set of mounts I designed and made up really sucked. They were too tall, ugly, and a pain to install and adjust. I gave in and ordered a couple of two foot chunks of 1.5" T-slot. Yakima makes a kit to attach to slotted bars (called the SmarT-slot kit). They're made for Yakima crossbars, but with a bit of filing they work just fine in normal T-slot.

46034629504_3ee4dedd0b_c.jpg


The standard mounts are flat, but they have a convertible piece on one side if you need more clearance. This way I can go from 2 boards to 4 boards when needed. The wrap mounts come with the provision to make these work, but I had to make my own since I was using different mounts. It's a stainless 1/4" spacer welded onto some drilled flatbar. There's a corresponding piece inside the flatbar.

46034629364_2e8d3a8629_c.jpg


46706750812_37f3042e66_c.jpg


The racks work well and are solid at highway speed. I'm happy with them.

32884239228_dd32a43a6f_c.jpg


Also really helpful during the install was this little doohickey. It's called the Moki doorstep and it hooks into your door latch to provide a sturdy step for extra reach on your roof rack. There are plenty of Amazon and eBay knockoffs but I decided to support the original creators. This piece is a lot sturdier and the padding for protecting your paint is much better engineered than the knockoffs. It's also 4 times as useful as a Gobi ladder for a fraction of the price. Fight me.
32821843398_fdd1c68ba7_c.jpg

Tory,

Your powder-sniffing prowess is admirable. Ever ridden in the NW?

I was curious about that Moki doorstep doohickey you mentioned... would it work on the 2nd row door latch? I'm setting up my roof rack system and the box I have sits toward the back, so I have to use the back tire to get up there since I'm not very tall.

I'm also motivated to update my profile info here on this forum based on reading yours. Haha!
 
Tory,

Your powder-sniffing prowess is admirable. Ever ridden in the NW?

I was curious about that Moki doorstep doohickey you mentioned... would it work on the 2nd row door latch? I'm setting up my roof rack system and the box I have sits toward the back, so I have to use the back tire to get up there since I'm not very tall.

I'm also motivated to update my profile info here on this forum based on reading yours. Haha!

Thanks! I've been to Whistler a couple of times before it was bought by Vail (and now it's not on the shared pass for me anymore). I'd love to explore more up there, but not sure how much traveling we'll do until the kid(s) gets a bit older.

So, funny thing about the rear doors-they do have that diagonal kick that prevents the step from sitting perfectly level. Also, I have noticed some minor dimples in the door sheetmetal due to the step- only on the rear doors. This doesn't bother me, but you might decide that it's a dealbreaker; or you might be skinnier than me and it won't matter.

The parts list is just a little joke- too many people take themselves so seriously on this site :biggrin1:
 
Thanks for answering my camera questions and supplying a photo of the forward view!

I've ordered the same kit and hopefully will have it soon.
 
A few upgrades over the past few months, again to the lights on the truck.

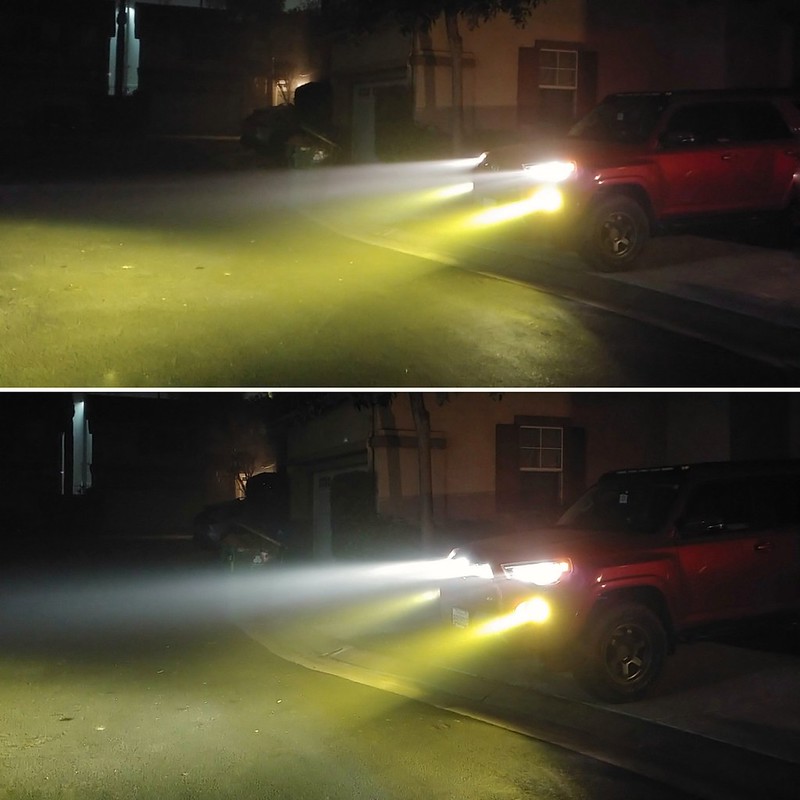
First off, I've removed all of the drop-in LED bulbs for the lows, highs, and fogs and returned to halogen lighting. While they made great initial impressions in brightness and color, they're absolute garbage at projecting the light far into the distance where you need it. LED lighting can be fantastic, but only when the housing and optics are designed for it. There's a great thread discussing this on Tacomaworld, and why drop-in LED bulbs are terrible despite their marketing claims:

3rd Gen HID vs LED vs Halogen H11 projector headlights | Tacoma World

However, I did at least upgrade the bulbs to H9 (low beams) and 9011 HIR (high beams). Both required the mounting tabs to be trimmed slightly, which was easily done with a small pair of tin snips. This allowed me to nearly double the stock output, while still retaining proper distance projection and focus. Additionally, halogen bulbs produce lots of infrared light as heat, which helps prevent the buildup of ice and snow. Though it looks like I may not be able to visit my favorite ski hills for the near future...

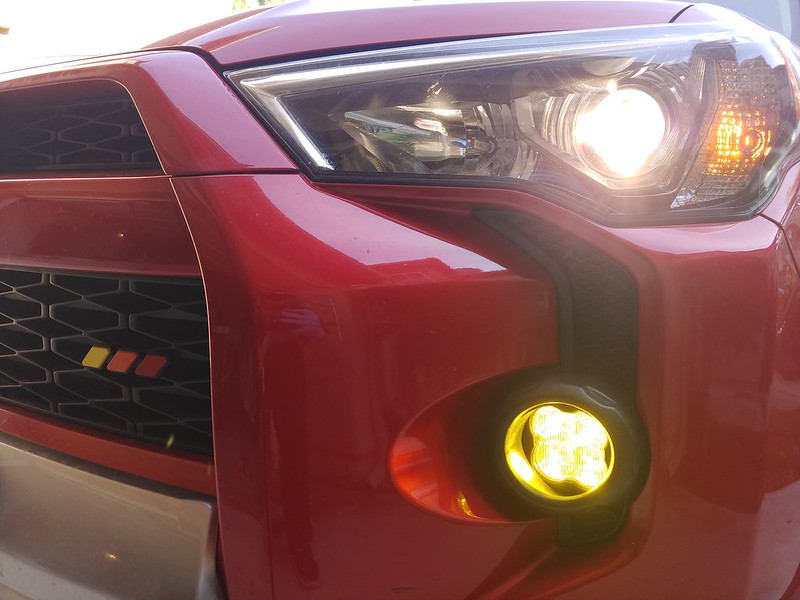
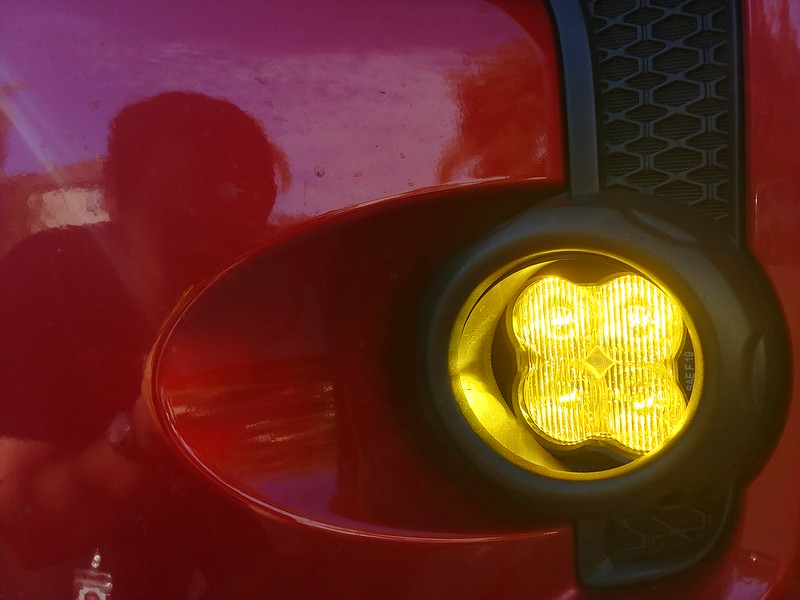
Next up were the fog lights. Late last year, Diode Dynamics released the new SS3 pods with their TIR (total internal reflection) optics. Similar to their light bars, these optics are much more advanced than standard projectors or reflector cones. They're designed to capture all of the light leaving an LED chip and direct it off of a controlled surface, which reduces unneeded glare and increases intensity. One step ahead of even their light bars, the lens is incorporated into the TIR optic itself, reducing inefficiencies of light transferring through different mediums. Again, here's a review on Tacomaworld where they completely trounce any other fog light on the market in terms of intensity and pattern width. Also, they're completely street legal and J583 compliant, unlike other "fog light" offerings from other companies.

The LED SAE J583 Fog Pod & Fog Light Review | Page 137 | Tacoma World

49243732577_fc1bf63b77_c.jpg


49243732897_4060dfe6a1_c.jpg


49243748142_509a74de67_c.jpg


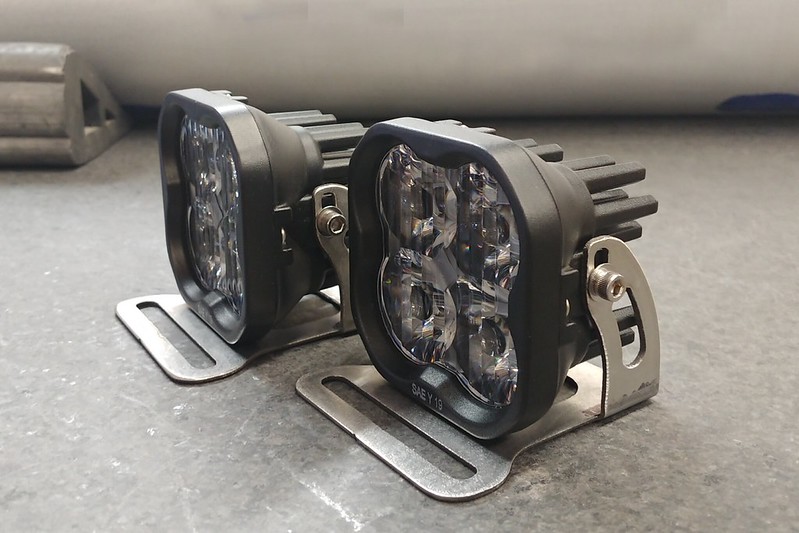
I also got a set of SS3 pods in their driving pattern, which are J581 compliant and legal to use as auxiliary high-beams. I wanted to mount them in the grill, to keep them a little more discreet. At the same time, auxiliary lighting should be mounted as high as practicality allows, to carry the light as far as possible down the road.

Auxiliary high beams should be mounted between 22” (min) and 54” (max) from the ground, on the same horizontal plane as far apart as practical.
https://www.govinfo.gov/content/pkg/CFR-2004-title49-vol5/xml/CFR-2004-title49-vol5-sec571-108.xml

Aux high beams should be mounted as high as practical to avoid shadows and the light being interrupted by changes in the roadway elevation. On my truck with a 2.25” lift and 1.5” larger tires, 54” will just hit the ditch light mount location. However hood glare is really counterproductive/harmful for your night vision, so I would keep them forward of the hood line.

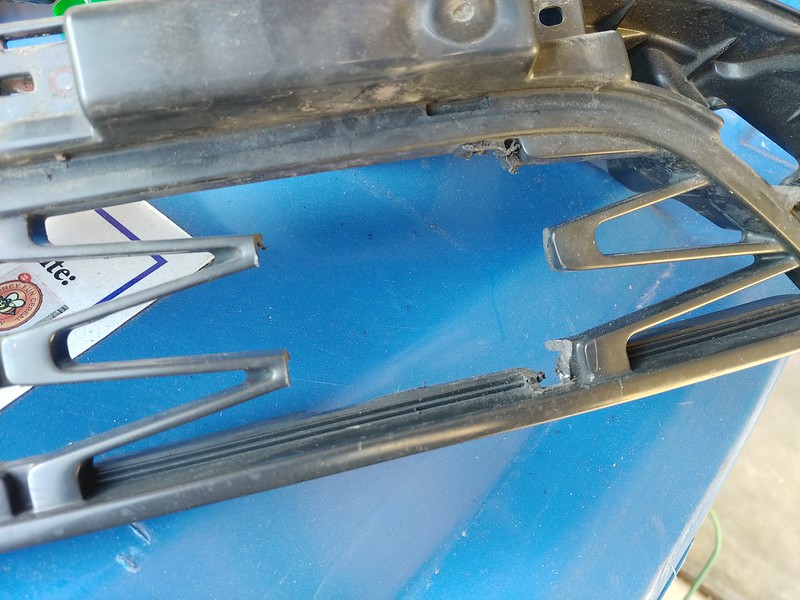
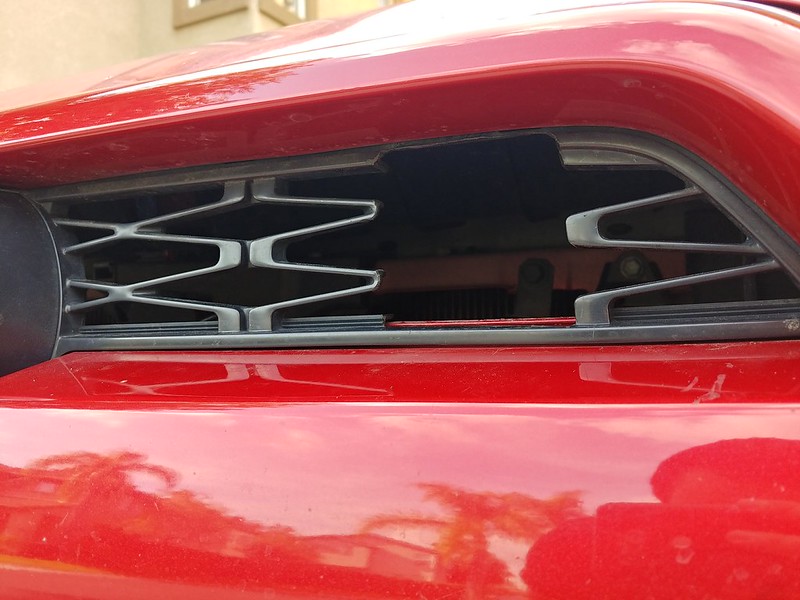
Instead of using a hidden light bar mount to fit behind the lower grill, like a Rago Fab unit- I decided I want to mount them in the upper grill, for the reasons listed above. I started cutting things up and played around with a few prototype brackets that attached to the grill mount crossbar, including some that placed them outside in front. Because of fitment and adjustability issues, I had much better luck bringing them back inside the grill.

49401801212_2254e56cd5_c.jpg


49401799262_a456d3c0ca_c.jpg


49632635048_ece09f1a49_c.jpg


49687567166_040368002b_c.jpg


49687033878_4fe767b2e8_c.jpg


49687868442_98b24aa883_c.jpg


49688596162_642ed3f598_c.jpg


49687806017_481eaa63af_c.jpg


49686977718_070b591636_c.jpg


49687511031_92da34015a_c.jpg


49687510776_88d5efcc62_c.jpg


49688596397_bc3d41a0e4_c.jpg


50643173161_a60bc56748_c.jpg


50302616402_e3a4a29c35_c.jpg


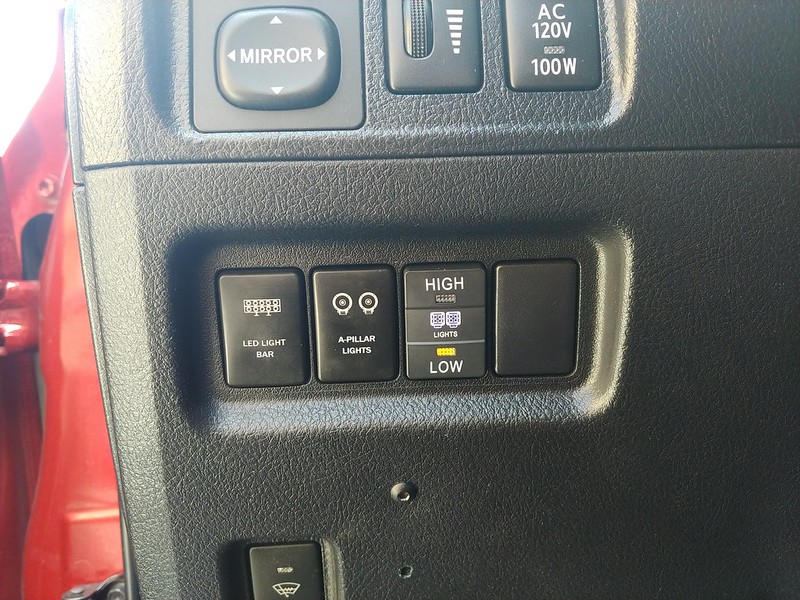
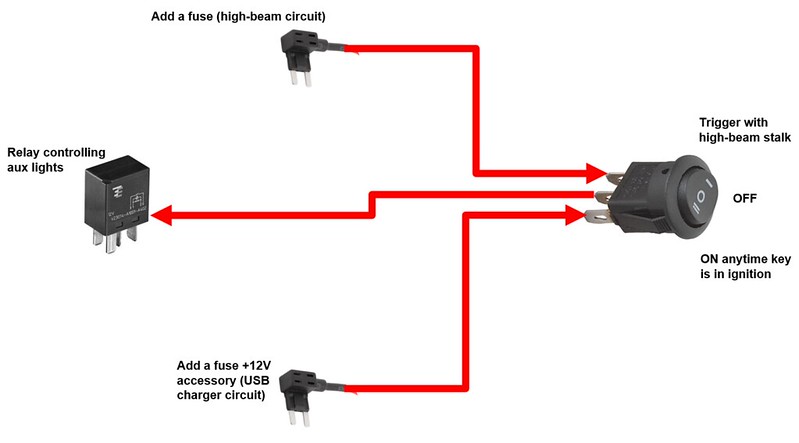
Although it took a few tries and a lot of prototyping, I really like how they turned out. My favorite part is that they're really tough to spot unless you're looking for them. They're insanely bright and throw light way down the road like a big set of old-school reflectors, but in a much smaller package. I hooked them up to a relay using a SPDT switch from AnytimeBackupCamera.com. LOW turns them on independently any time I want (off road etc.) while HIGH ties them directly to the high-beam circuit. This way I can control them legally on the road by dipping them as needed using the high-beam stalk. And of course, I can turn them off entirely when the switch is in the middle position.

This wraps up the current round of upgrades to my street-legal lighting setup. I'm looking forward to some long drives up the lonely 395 when this virus decides to take a hike!
 
Last edited:
I really like this, and i'm seriously considering the theft of your idea here. I have the SS3 yellow fogs and LOVE them, and i've been wanting the aux pods for driving to give off better light. I like the idea of getting more light when the low beams are on so I can use the fogs as well.

It appears you fabricated your own brackets? How would someone go about seating these in the grill if one does not have the ability to fab? Appreciate any help. Also any tips on how you ran the wiring. Cheers.
 
I really like this, and i'm seriously considering the theft of your idea here. I have the SS3 yellow fogs and LOVE them, and i've been wanting the aux pods for driving to give off better light. I like the idea of getting more light when the low beams are on so I can use the fogs as well.

It appears you fabricated your own brackets? How would someone go about seating these in the grill if one does not have the ability to fab? Appreciate any help. Also any tips on how you ran the wiring. Cheers.

I have a .dxf file of the bracket here, you would just need to have a metal shop cut it out and bend it for you. These lights are a little too heavy to attach with zip ties or whatever. Plus you wouldn't be able to aim them.

SS3 inverted bracket.dxf - Google Drive (if I remember correctly, this one isn't the final version. I ended up having to extend the ears about 0.200" or so).

The wiring is fairly straightforward, if you know your way around a basic 4-pin relay. The HIGH/LOW switch is actually being wired backwards from its intended orientation though. I tapped one of the high-beam fuses in the engine bay as a trigger wire and ran that through the firewall for the HIGH circuit on the switch. The LOW circuit is tapped into the accessory 12V charger, so it can turn on anytime the key is in. The switch now has a 12V OUT wire back through the firewall that goes to the relay trigger. This is how a single relay can control the light in three modes (anytime, high-beam only, or off entirely).

Also, heads up because the high beams use pulse width modulation to work in DRL mode. This means that if you have the HIGH switch activated and your daytime running lights are on, it will ping the relay very quickly, causing it to buzz and occasionally flicker the auxiliary lights. I'm working on an inline filter to prevent this.
 
Couple updates. First is removing the "Super Bright blah blah LED 921 reverse bulbs" that are covered in random LED emitters. Replaced them with Gy6.35 halogen bulbs as described in this thread here:
Gy6.35 HIR 921 reverse light upgrade (vs high power LEDs) | Tacoma World

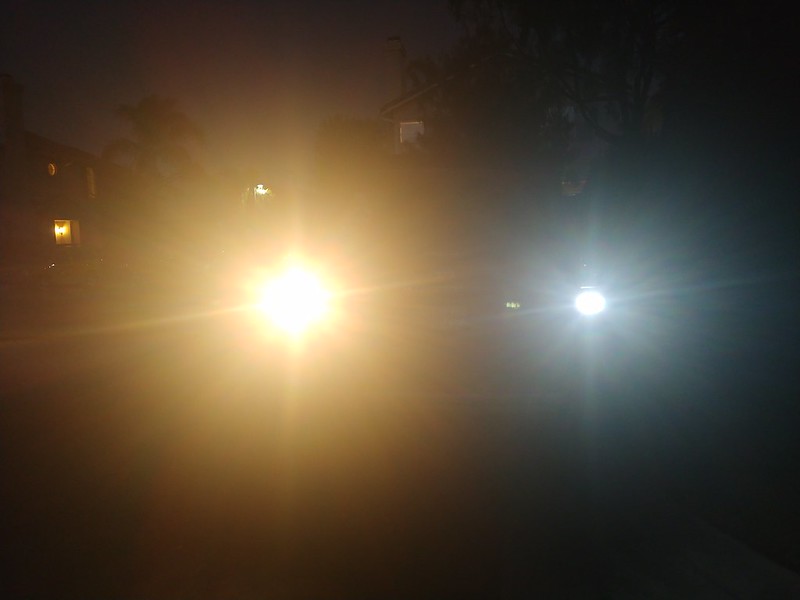
I'm finding out more and more that mashing LED blister packs into halogen housings is not the best idea. Halogen upgrade on the left, LED garbage on the right, the results speak for themselves:
49840086586_078408afaf_c.jpg


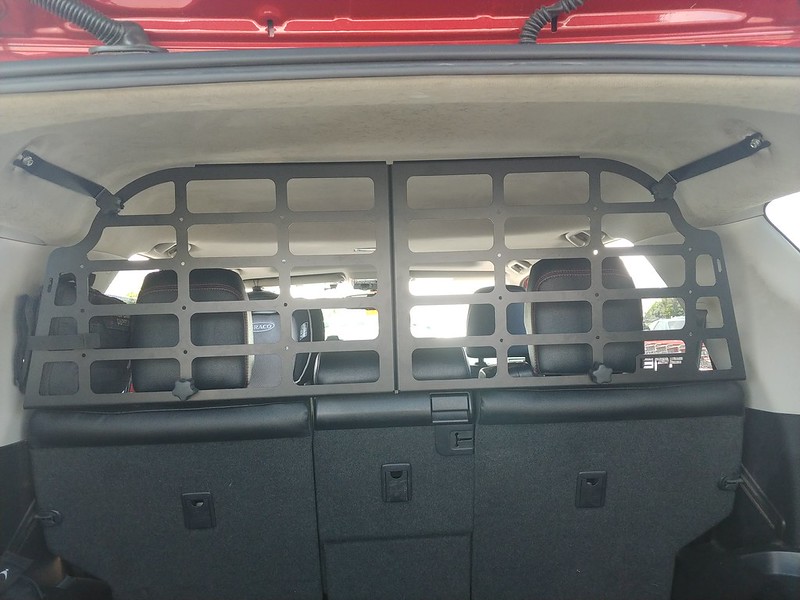
Next up is a pet barrier upgrade. The Raingler nets work great if you have laid back dogs, but one of ours is so persistent that she finds a way to wiggle around it every time. I bought the Bullet Proof Fabrication pet barrier (still on sale?) and it works phenomenally. It is also easy to add gear to. I attached a soft first aid kit in the dead space next to the headrest (front of the panel).

49840338562_492f1eac66_c.jpg
 
Lately I've been getting ticked off at the soft cargo rooftop bag I've been using for extra storage. It works okay at storing stuff, but is a pain to use when loading and unloading. Opening it and taking stuff out requires you to loosen and release all of the nearby straps, and then put them all back and re-tighten afterward. The zippers, while heavy-duty, can get fussy when you're trying to stuff the bag to capacity. So now I've made the jump to a rooftop cargo box.

Doing so meant that I needed a way to mount it, as the Ecotechne crossbars wouldn't work with the clamp system that Yakima uses. Originally I had thought of all kinds of different complicated mounts that would replace the box clamps, so I could bolt them to the Ecotechne bars. In the end, simplicity won out and I just made new crossbars out of aluminum tube and angle brackets. This is a Yakima Skybox 16, which fits the roofline without hanging off on either end. I thought about getting an 18 or 21, but I'm glad I didn't because this is about the largest size I'm comfortable with installing and removing by myself. I used security torx bolts on the crossbars for extra theft prevention.

50275433917_1458585931_c.jpg


50275433397_b1edf30ae5_c.jpg


50274597623_cfa688261d_c.jpg


So, am I happy with the decision? Yes and no. It's incredibly simple to use, getting items in and out is a breeze. It's lockable and waterproof, and you can't accidentally close it without locking it, as your keys won't come out until it's closed and latched (it also opens from either side). I'll be able to throw snowboards and all kinds of gear in there come winter, so I can ditch the need for extra ski racks. The only downside that I can figure is that it didn't end up being the limitless storage solution my brain had imagined it to be. You have to be able to pack things neatly inside so that the box will close, and you won't be able to fit everything due to the rigid construction. The soft cargo bag, as much as it sucked; was a lot more flexible at swallowing bulky and awkward gear. Overall, I think I prefer the new box for its quick use and aerodynamics though. It's even faster to take on and off the truck too, though now I need to figure out how to store it in my garage when I'm not using it.

If you're wondering how stupid it is to go through the trouble of installing a full-length roof rack just to end up with a cargo box that would have worked perfectly fine on a stock rack, the answer is: incredibly stupid. Maybe I'll move it to one side so I have more room for something like an awning, and then I'll feel less like an idiot. Until then!
 
I'm just going to rename this thread "How many lights can i jam onto my truck?"

So I finally got my hands on a set of OEM bi-LED headlights. Originally, I was hoping to get the single low-beam units from select 2021 trims for the sake of simplicity. However, I think it's a moot point now. I'll explain below.

Once the headlights were in transit, I contacted Dave Easa on Tacomaworld for help on adapters. We agreed on a plan for him to ship a pigtail with bare leads so I could connect to 12V and determine pin functions.

52038969923_b16ac967c6_c.jpg


52037878932_f17768f95a_c.jpg


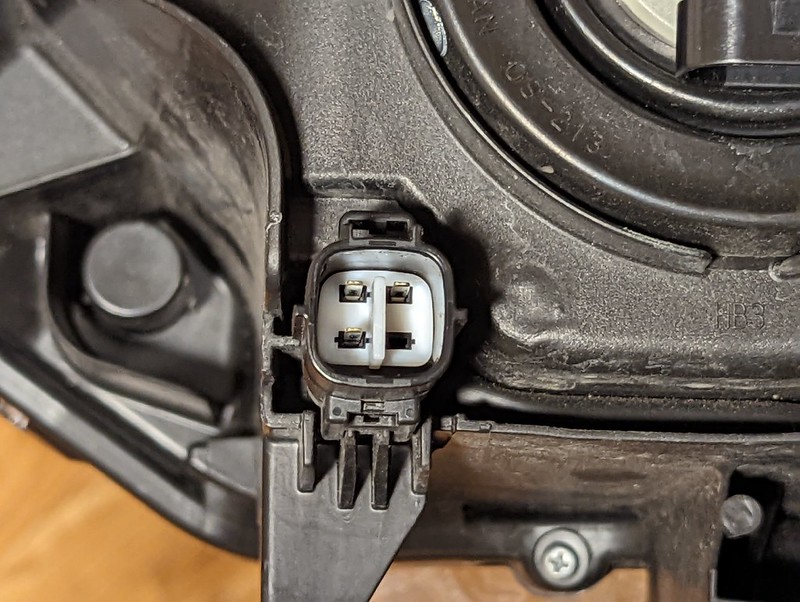
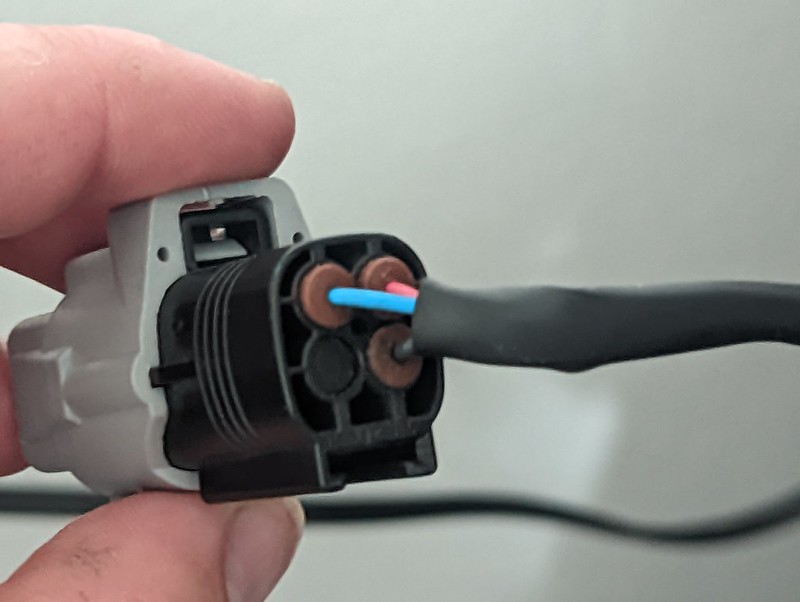
As most have figured out, red is to light the lamp, blue is to activate the high-beam shutter, and black is a common ground. What's interesting is that the connector appears to be the same for both types of headlights, with the populated pins dropping to 2 for the low-beam only units. That's not the only similarity.

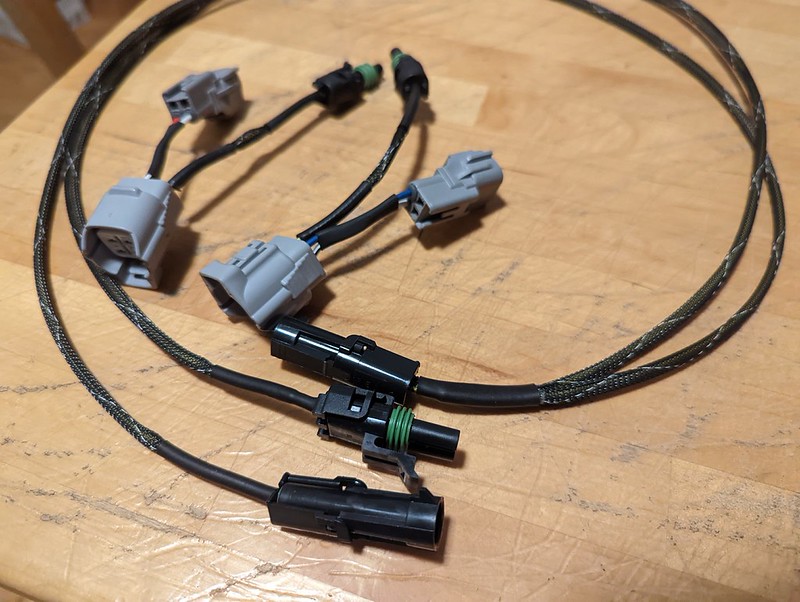
So Dave built me some harness adapters to go from the existing halogen connector on the truck to the new LED connector on the headlights. This way I wouldn't need to de-pin the connectors and I can easily return to halogen headlights if desired. But, we added an extra trick: an additional wire lead out of the shutter connection that can be controlled externally. I terminated it with a single weatherpack connector for my own harness.

52038952748_c1be9130cd_c.jpg


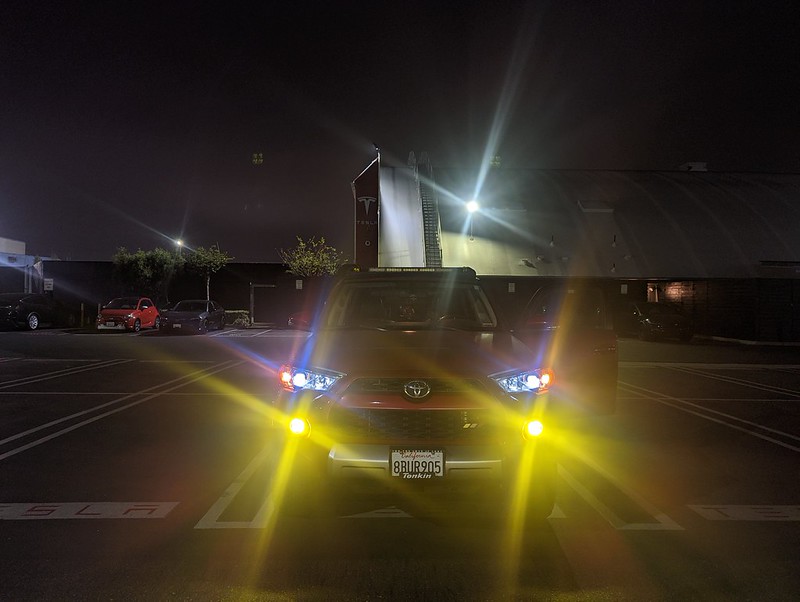
The lights work perfectly. Here they are paired with Diode Dynamics SS3 Max fog lights.

52039456125_a2ace296f8_c.jpg


52039189669_5c147b0a2c_c.jpg


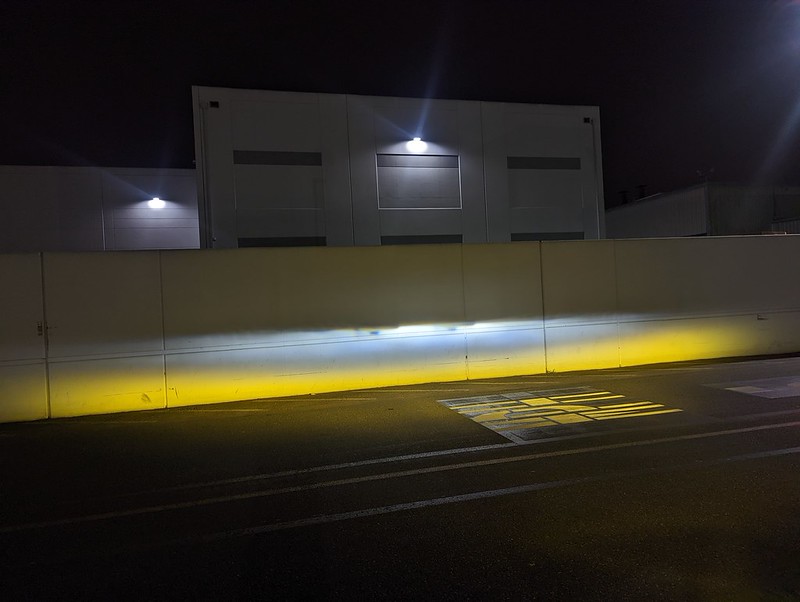
As with the low beam units, they have those goofy shadow artifacts in the beams, just below the cutoffs. My theory is that Toyota used the exact same projector for both models of headlights, and then just depopulated one of the wires for the "cheaper" trims. It would be really funny if someone opens up their SR5 headlights and finds inactive shutters in the projectors. I digress.

As for the custom harness, I made the old mistake of measuring once and cutting twice- it's too short between the headlights and I will need to remake it. However, I did connect it to the driver headlight and confirm that the shutters do activate when triggered with 12V!

Temporarily, I have the shutter circuit connected to the relay and switch that usually control my auxiliary driving lights. I'll need to add more relays to control my growing collection of lighting upgrades. Maybe a Bussman box or SPOD is in my future.

49688596397_bc3d41a0e4_c.jpg


Warning: If you attempt this mod, you will need to figure out a way to prevent your DRL mode from pinging the shutters. Older 5th gen 4Runners use PWM to dim the high beams for DRL duty. If you are using a trigger from the high-beam circuit (like an add-a-fuse etc.), you must not directly connect it to the custom connector. Otherwise, when you turn on DRLs you will rapidly signal the shutters at a high frequency, which may wear them out or destroy them.

50619643877_ab92400159_c.jpg


The way my switch and relay is laid out, I have dual control- meaning I can activate the shutters anytime in LOW and they toggle with the ordinary high beam circuit in HIGH. I can also can turn it off completely to avoid DRL buzzing the relay. However, the circuit can still be exposed if I forget to turn the switch off. Eventually I plan to build a capacitor filter to prevent the problem entirely.

Since I messed up my harness and need to wait for more wire sleeving to try again, I have not had any road experience with the quad high-beam setup. However, I am VERY impressed with the quality and intensity of the factory LED units in low beam in comparison to the older halogen units. As Crash shows in his test data here, the LED units are nearly twice as performant as the best halogen bulb upgrade and nearly three times as intense as the factory equipped halogen bulbs.

Also as suspected, the halogen reflectors are much better than the bi-LED only high beams, and they can get even better with a 9011 bulb upgrade. With an older truck and some custom wire harnessing, you can easily achieve a quad high beam setup for ultimate headlight performance! I will update when I get the new harness finished.

Dave on Tacomaworld was hugely helpful in making this happen. If you're interested in the same modification, you might want to contact him here. If it is popular enough, he might consider adding it to his custom wiring store here. He is an awesome dude and huge asset to the Toyota community.
 

Members online

Forum statistics

Threads
278,309
Messages
3,554,075
Members
248,016
Latest member
Advally Service

Trending content

Back
Top