What size hole punch to adjust King coilovers?

Road Bull

Senior Member
I had one, but can't seem to locate it. Does anybody know the size hole punch King uses in order to adjust the adjustable collar for their coilover?
 
Register to hide this ad
Okay. It is a 5/16th. I just picked up a couple of dinky Stanley 5/16th punches. I have a feeling that I better find my 5/16th tool that came with the Kings when I got them.

I am trying to raise the front up a bit. I am sitting at at about 22" up front and a bit under 25" in the rear. I was going to go for about 23" up front and I am about to toss my house trying to find that dumb punch... LOL. I HAD my hands on it less than a month ago thinking, Ah! glad I found that... Ha...:rant:
 
Funny this came up today...I was stuck trying to adjust my Icons this afternoon with a standard coilover spanner. Ended up watching a YouTube video where they used a 5/16" pin punch instead. I went over to Harbor Freight and bought the "Long Drive" pin punch set for $9 which has the 5/16 and a 3/8 (which actually fit the Icons better).
 
[MENTION=119532]Road Bull[/MENTION]

Did it work out?

How much did you raise the front and what is the ride like?

Also what is the measurement "of the gap" eg the threads?


Thanks :humble:
 
[MENTION=119532]Road Bull[/MENTION]

Did it work out?

How much did you raise the front and what is the ride like?

Also what is the measurement "of the gap" eg the threads?


Thanks :humble:

It worked out great!

It's a 5/16th punch. I had to go buy another because the ONE that came with my Kings went MIA.

Okay, so the shop that was going to move my SPC Light Racing UCA setting from the D to G setting, and do an alignment said that they could also crank the coilovers up 1" all for $40 under the table. I wasn't going to argue with them. I was ready to pay quite a bit more for gust the adjustment and the alignment. The tech said he had to remove the coils to make the adjustment.

BTW, 1 inch on Kings = 8 turns.

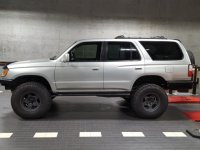
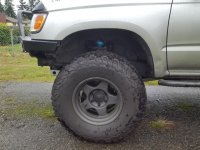
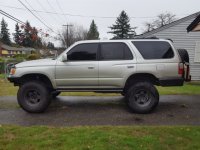
As far as preload, I would say I am almost dead set at 2.5 inches of preload on 600# coils. This gives me 23" of lift, hub to no flare fender. I am running my AOR front plate bumper loaded with a warn winch running steel cable. I also have full Savage skids. I have about 24.5" Lift in the rear witb the 4X Innovations rear swing out and the 861 coils out back.

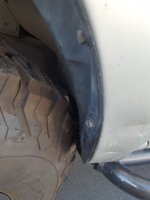
The G setting work out great. My tires were eating my wheel well up prior to me picking up the 3.5" backspace SCS F5's. So I went from a 4" BS to a 3.5" BS and my wheel well/ pinch welds weren't having it. This gives them plenty of room to move freely without contacting anything.

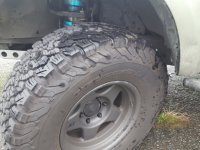
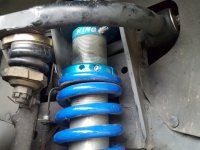
I went offroading last weekend, nothing extreme, but no contact even at full lock. I am super happy with it so far. Here are a couple before and after pics.

As far as the ride goes, I didn't find it harsh at all. But that is pretty subjective. I guess it didn't feel like my shocks got crappy all the sudden, if that helps.

 

Attachments

  • IMG_20171123_122315.jpg
    IMG_20171123_122315.jpg
    108.1 KB · Views: 1,775
  • IMG_20171025_192644.jpg
    IMG_20171025_192644.jpg
    85.2 KB · Views: 1,987
  • IMG_20171123_121611.jpg
    IMG_20171123_121611.jpg
    114.7 KB · Views: 1,786
  • IMG_20171123_121517.jpg
    IMG_20171123_121517.jpg
    120.9 KB · Views: 1,773
  • IMG_20171123_121713.jpg
    IMG_20171123_121713.jpg
    99.9 KB · Views: 2,265
  • IMG_20171128_203038.jpg
    IMG_20171128_203038.jpg
    122.2 KB · Views: 1,741
Last edited:
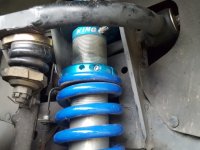
Thanks for sharing. When I saw this pic .... Holy crap ... It looks like you doubled the amount of thread showing. Glad to hear it rides fine. I plan to try and raise mine up at least another 1/2".

:)
 

Attachments

  • IMG_20171123_121713.jpg
    IMG_20171123_121713.jpg
    99.9 KB · Views: 1,761
Thanks for sharing. When I saw this pic .... Holy crap ... It looks like you doubled the amount of thread showing. Glad to hear it rides fine. I plan to try and raise mine up at least another 1/2".

:)

Yeah, I like where they are at now. But, yes, that DID get my attention when I saw what, "raise them up and inch" looked like in person. Hahaha.. I would drop them down if I start to get close to level with the 861s as time goes on.

I think they ship with very close to an OEM stock height. That is just a theory. But I raised mine up when I originally got them up about an inch.
 
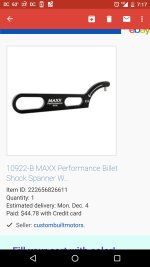
What do you think about this tool (pictured)?

It I'd a2.5" spanner wrench that seller says will adjust King 2.5" coilovers.

:bat:
 

Attachments

  • Screenshot_20171129-191748.jpg
    Screenshot_20171129-191748.jpg
    103.3 KB · Views: 1,756
What do you think about this tool (pictured)?

It I'd a2.5" spanner wrench that seller says will adjust King 2.5" coilovers.

:bat:

That's about what King offers as a spanner wrench. This looked promising too. https://www.polyperformance.com/king-shocks-2-0-2-5-t-handle-coil-nut-wrench/

The mechanic that adjusted them when my car was getting an alignment said that even with a punch, he had to take them out to adjust. He said that he also broke his punch in the process. These shocks, even taking the load off, still have a lot of resistance. Cleaning grooves and lubrication only go so far. I think he was having a problem accessing the adjustment holes with a standard, straight punch. So, perhaps a spanner wrench or an angled punch like the one I linked might be the ticket.
 
This one will do the same thing as the one you pictured Brian. Not quite as fancy though, but <$20. I’m not sure why King uses the punch style tool when most c/o’s traditionally use an actual spanner wrench :shrug:

Racerunner / Sway-A-Way Dowel Pin Spanner Wrenches


I have one similar I use on my SAW’s and it puts leverage on the collar too, not just the hole. I’ve heard stories of stubborn collars getting wallowed out with the punch style tools. The only downside is you need to really move things out of the way because this style spanner wrench is harder to use effectively with the UCA/ spindle in the way. Refer to my post#6 on this thread. http://www.toyota-4runner.org/3rd-gen-t4rs/210229-king-coilover-adjustment.html
 
This one will do the same thing as the one you pictured Brian. Not quite as fancy though, but <$20. I’m not sure why King uses the punch style tool when most c/o’s traditionally use an actual spanner wrench :shrug:

Racerunner / Sway-A-Way Dowel Pin Spanner Wrenches


I have one similar I use on my SAW’s and it puts leverage on the collar too, not just the hole. I’ve heard stories of stubborn collars getting wallowed out with the punch style tools. The only downside is you need to really move things out of the way because this style spanner wrench is harder to use effectively with the UCA/ spindle in the way. Refer to my post#6 on this thread. http://www.toyota-4runner.org/3rd-gen-t4rs/210229-king-coilover-adjustment.html

I agree. I think that ideally, a wrench is a better idea to distribute load on the adjustment collar. I think that whatever you get, it might not be a bad idea to find something to use as a cheater bar to give you better leverage. If I adjust again, I will buy a better wrench type tool for sure.
 
I have icons. And got their tool for the adjustment. But ended up using a punch. Because with a punch. You can turn it better where it's tighter and the adjustment tool won't fit.
 
Cross post from my build thread. I figure here is a good spot to share also.


On Friday I had my King shocks adjusted up. I wasn't able to get before and after measurements from fender to ground but I did take record the amount of shock thread showing. This seems to be the most universally accurate way to discuss amongst fellow owners.

Shocks: King coilover with # 600 spring. Model: Tacoma, not EXT


Factory setting: both shocks set to 1 & 1/8 thread showing

First adjust a few months ago:
• Passenger: 1 & 1/8" thread showing (factory)
• Driver: 1 & 4/8" thread showing
• Difference: driver side shock is set higher with 3/8" more thread showing

Now:
• Passenger side: 1 & 3/8" thread showing
• Driver side: just a hair under 1 & 9/16" thread showing
• Difference: driver side shock is set higher with 3/16" more thread showing


Drivers Side

NnnDRhO.jpg


4HHhJN2.jpg


Passenger Side

0tXnqZ8.jpg


lRPe0IR.jpg


--> King Coilover Adjustment instructions can be found here: http://www.toyota-4runner.org/3rd-gen-t4rs/210229-king-coilover-adjustment.html


:whistle:
 
I wonder if getting a cheap spring compressor took and using that would be a good idea... so there isn't much tension against the adjuster nut?

Think I may try that.

Sent from my SM-G950U using Tapatalk
 
I wonder if getting a cheap spring compressor took and using that would be a good idea... so there isn't much tension against the adjuster nut?

Think I may try that.

Sent from my SM-G950U using Tapatalk

They aren’t that hard to adjust

remove wheel with jack stand under frame
Have a floor jack under the lower control arm to take pressure off sway bar
Remove top sway bar link mount bolt. This will allow your lower control arm to drop down farther
remove lower shock nut. Lower jack an inch or 2 until pressure is off lower shock bolt then remove the bolt
Pull lower shock slightly out of the way and slowly jack lower control arm up until the upper control arm is not blocking the preload ring
Now you can crank on the preload ring with the top of the shock still mounted
Don’t worry that the bottom mount is rotating when you turn the preload ring, you can line up the mount with the control arm by inserting the preload ring tool through the lower mount and rotating it

It’s still not easy but I can usually do each side in about 20 minutes including getting a beer or 2 out of the fridge and getting everything put back together

A spring compressor works too but you will still have to do everything listed above plus remove the shocks and compress the spring. O’Reilly Auto Parts has a really good spring compressor they loan out if that’s the route you want to take.
 

Members online

Forum statistics

Threads
278,316
Messages
3,554,120
Members
248,016
Latest member
Advally Service

Trending content

Back
Top