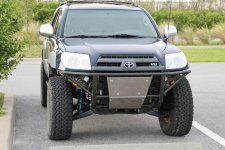
Pearl's mod/build LT rear/DK +3.5 LT/Custom Baja Bumper/Thorley Headers/Manual T-case

Super jealous of your suspension lol, good work. I’ll be following!


Sent from my iPhone using Tapatalk
Thanks, basically copying the Cali boys quite a bit. East Coast is so far behind with suspension tech. I learned about King, Total Chaos, and CaliFab rear links from some of the 5th gen guys, but when I started digging into 4th gen threads, [MENTION=87687]LTDSC[/MENTION] has one of the baddest Runners of all the generations. But anyway, not into building a typical Florida mud truck, thats been done to death and Ih8mud to boot. I like SPEED! Gimme several miles on a power line rd at 40 to 60 mph and I'm in heaven. I do wish I had sucked it up and done the LT front instead of the dual set up. I still have a lot to learn, but I don't think the stock length can keep up with the rear suspension.
 
Last edited:
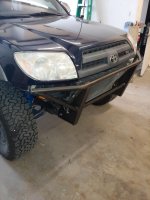
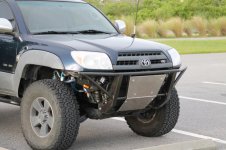
Baja Bumper nears completion/Apex Fabrication/Troymclure design

[MENTION=95421]Troymclure[/MENTION] [MENTION=87687]LTDSC[/MENTION] They say imitation is the sincerest form of flattery. Or you could say I'm just ripping you off. Killer design Jake!! This thing is really stout and the vertical tubes aren't even installed yet.
 

Attachments

  • 20190801_144823 - Copy.jpg
    20190801_144823 - Copy.jpg
    130.6 KB · Views: 951
[MENTION=95421]Troymclure[/MENTION] [MENTION=87687]LTDSC[/MENTION] They say imitation is the sincerest form of flattery. Or you could say I'm just ripping you off. Killer design Jake!! This thing is really stout and the vertical tubes aren't even installed yet.

its definitely a great look and perfect for what i needed.

Looks good!
 
its definitely a great look and perfect for what i needed.

Looks good!
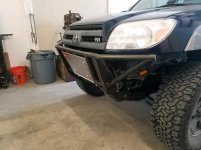
Thanks! I think it definitely looks better with the LT and bigger fenders on your Truck, so the boys at Apex made some small adjustments to bring it in to match the standard length. My uprights are narrower than yours for sure, and they chopped a 45* in the lower portion today for a better approach angle. Very happy with it though.
 

Attachments

  • 20190802_143159.jpg
    20190802_143159.jpg
    130.3 KB · Views: 930
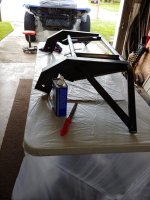
Sand, acetone, primer and paint. Doing the core support as well. Hoping the rain holds off.
 

Attachments

  • 20190803_093637_HDR.jpg
    20190803_093637_HDR.jpg
    136.3 KB · Views: 904
Bumper

Not sure about the color I painted it, but loving the look!!
 

Attachments

  • IMG_4450 - Copy.jpg
    IMG_4450 - Copy.jpg
    122.7 KB · Views: 926
  • IMG_4452 - Copy.jpg
    IMG_4452 - Copy.jpg
    106.3 KB · Views: 944
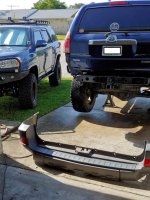
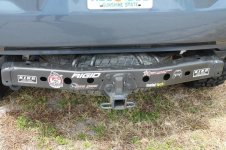
Rear Bumper Cover Delete

Continuing my assault on plastic covers. There are none on either the 4th or 5th gen. The hate is real lol.
 

Attachments

  • Rear Cover Delete.jpg
    Rear Cover Delete.jpg
    139 KB · Views: 892
Continuing my assault on plastic covers. There are none on either the 4th or 5th gen. The hate is real lol.


What kind of rear you gonna run? I’ve been keeping up with the build and she’s coming along nicely. With your suspension set up, anything else you do to it is just icing on the cake!


Sent from my iPhone using Tapatalk
 
[MENTION=109843]montijo505[/MENTION] Thanks! It keeps me outta trouble. No plans for a bumper, well maybe some decals like my 5th gen.
 

Attachments

  • Bumper decals.jpg
    Bumper decals.jpg
    125.1 KB · Views: 885
Awesome! That's a lot of shockage going on there lol


Here is everything mocked up (pass. side) with the hub installed. Have to put on roller tires for the tow truck over to the weld shop. Anthony over at Apex Fabrication-Merritt Island, will be ready to go on Monday. Still have to put the drivers side together over the weekend. I've outlined a couple tips for the tower gussets and where the reservoir brackets and the Boss (lower hoop support to the frame) gets welded to the shock hoop and frame. [MENTION=236676]TOTAL CHAOS[/MENTION] everything is going together quite nicely w minimal cutting and grinding on the tower gussets. Thank You!!
 
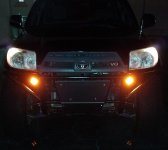
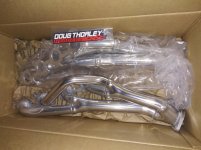
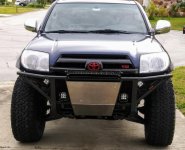
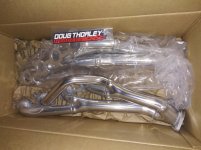
Waiting on hardware for my headers so I did some ugly grill make over. Had the paint laying around. Don't know if I like the red...
 

Attachments

  • 20200127_085842~2.jpg
    20200127_085842~2.jpg
    128.7 KB · Views: 791
  • 20200129_142235~2 - Copy.jpg
    20200129_142235~2 - Copy.jpg
    129.6 KB · Views: 818
DT LT Header install-remix

Sorry I messed up my formatting on my earlier header post, I used to be able to post pics with captions and forgot how or the site has changed. I will put these in series:


So with a TC/King dual shock set up w tower gussets done a year before the header GB, access to headers would be even more limited in an already tight space to work in. I had to decide whether to do the job myself or have my buddies (3rd Gen owner) shop do it. He glanced it over and said it might prove to be a good idea to pull the engine and replace rear seal (150K miles on truck), starter and a few other odds and ends. Timing belt only has 15k miles on it.

With my retirement looming in the next 10 years, I have to quit dumping money into these trucks and start saving lol. So I opted to go the painful route of doing it myself.

I have to say Doug Thorley's instructions were pretty helpful and I muddled my way through it. Took me 2.5 days working for a couple hours at a time so as not to get frustrated and make stupid mistakes.
 

Attachments

  • DT 1.jpg
    DT 1.jpg
    128.7 KB · Views: 730
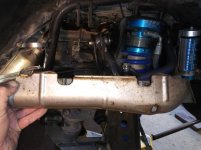
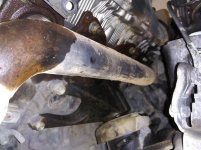
I hit all the hardware with Sea Foam Deep Creep a couple times the day before I started. First I raised the Runner on jack stands and removed the y pipe from the oem manifolds, removed the King secondaries, and then removed the driver side heat shield. I removed the CAI, then two bolts for the lower motor mount and jacked the passenger side of the engine up 2" and removed the 2 dip stick tubes and the heat shield.
 

Attachments

  • DT 3.jpg
    DT 3.jpg
    67.1 KB · Views: 789
Last edited:
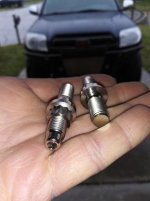
Working around the tower gussets to access the bolts behind it proved to be quite the socket attachment puzzle. Gaining the right angle with the right swivel attachments combined with a long extension and breaker bar was a brain teaser, but the Sea Foam did it's job and even with extreme angles they all came loose. I hit the studs with another shot of Sea Foam as they had to be removed with just as much care using a 7mm socket and the menagerie of extensions and swivels and a breaker bar. All this was 3/8" drive because I don't think 1/2" would clear a lot of the angles needed.
 

Attachments

  • DT 4.jpg
    DT 4.jpg
    79.5 KB · Views: 775

Members online

Forum statistics

Threads
278,317
Messages
3,554,128
Members
248,016
Latest member
Advally Service

Trending content

Back
Top