Home Menu

Site Navigation


User Tag List

Reply
 
Thread Tools Rating: Thread Rating: 2 votes, 5.00 average. Display Modes
Old 02-17-2011, 06:06 PM #1
dannyg dannyg is offline
Member
 
Join Date: Oct 2009
Location: Fl
Posts: 113
dannyg is on a distinguished road
dannyg dannyg is offline
Member
 
Join Date: Oct 2009
Location: Fl
Posts: 113
dannyg is on a distinguished road
How to: access and remove the subwoofer

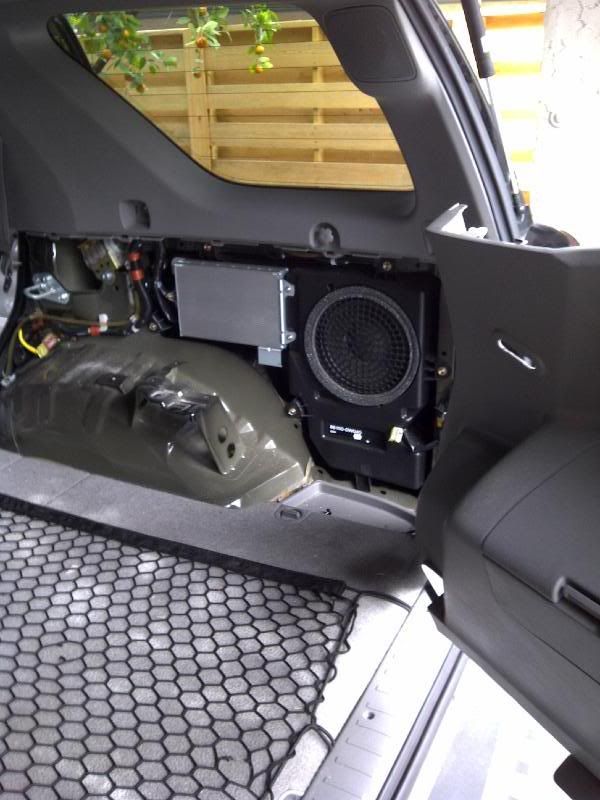
I wanted to replace my blown factory sub and couldn't find any instructions to removing the panel covering the sub and amp. It was a lot of trial and error but I took some pics along the way to make it easy for whoever else wants to do this.

You're going to need a flat head and philips screw driver, 14mm or 9/16 socket and 10mm socket, torx screw driver OR 7/64 allen key.

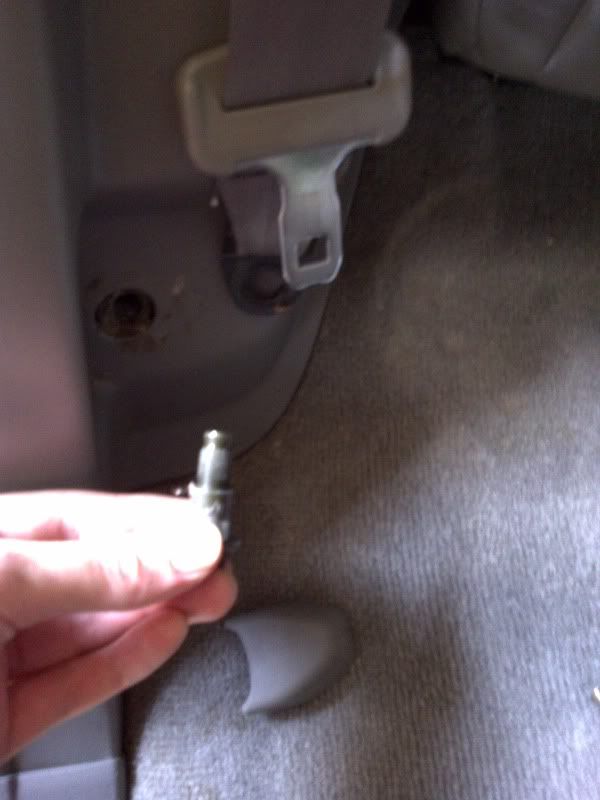
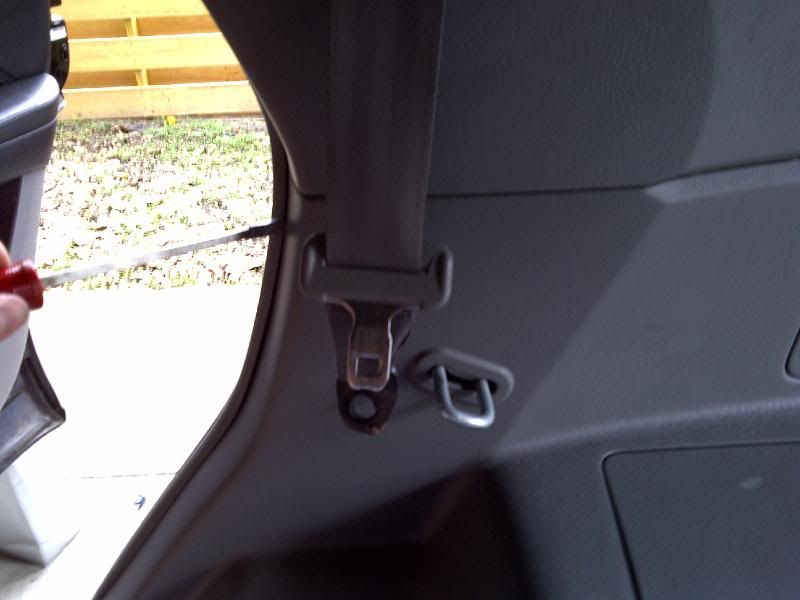
Start by removing the cover and unbolting the rear right seat belt where it bolts to the floor using the 9/16 socket.


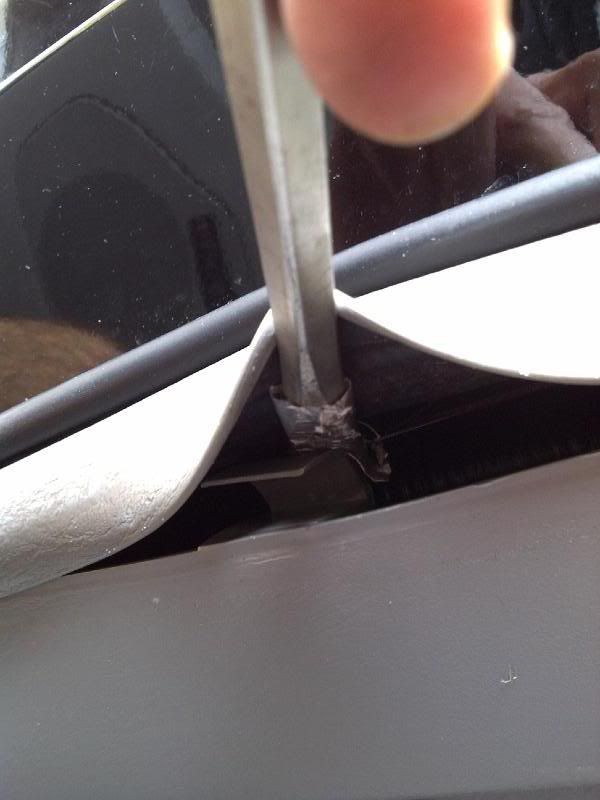
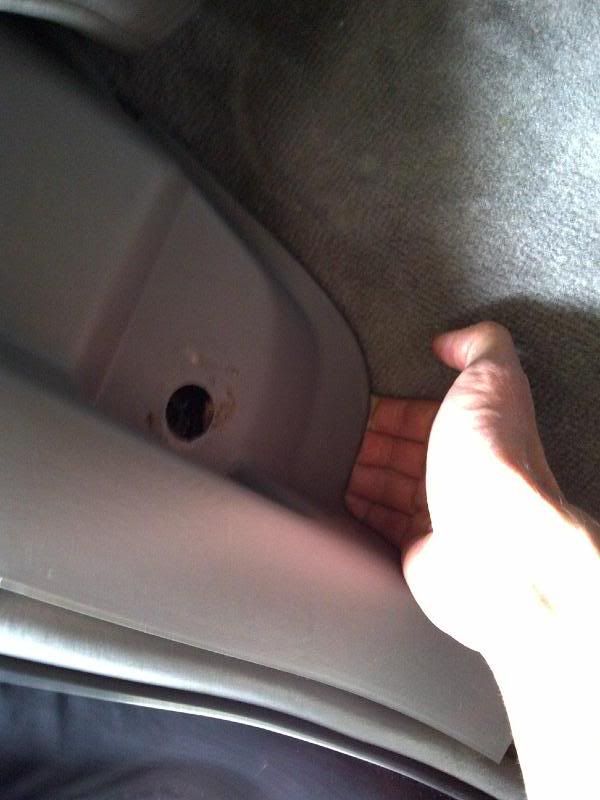
Now, using a flathead pop off the foot panel that is right there.


Take the philips head screw driver and unscrew the panel going across the very back of the cargo area.


Lift the panel to expose another screw that needs to be removed.


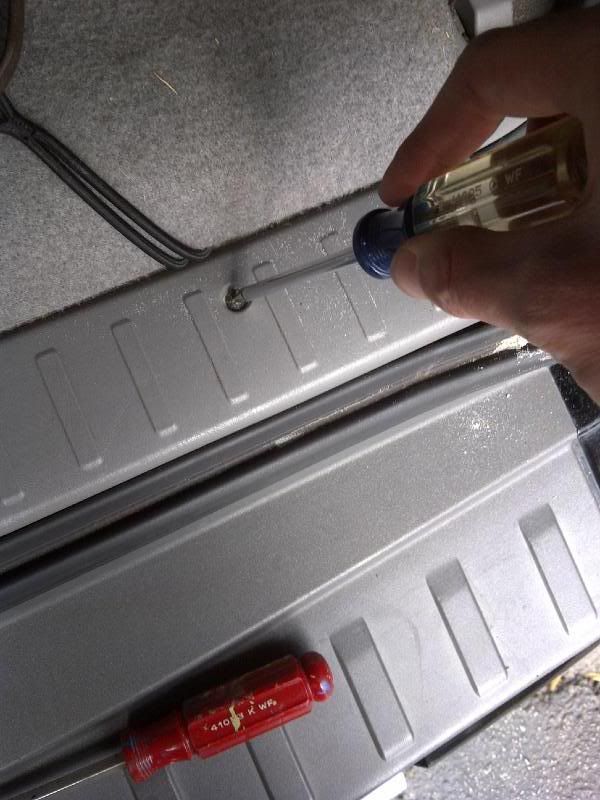
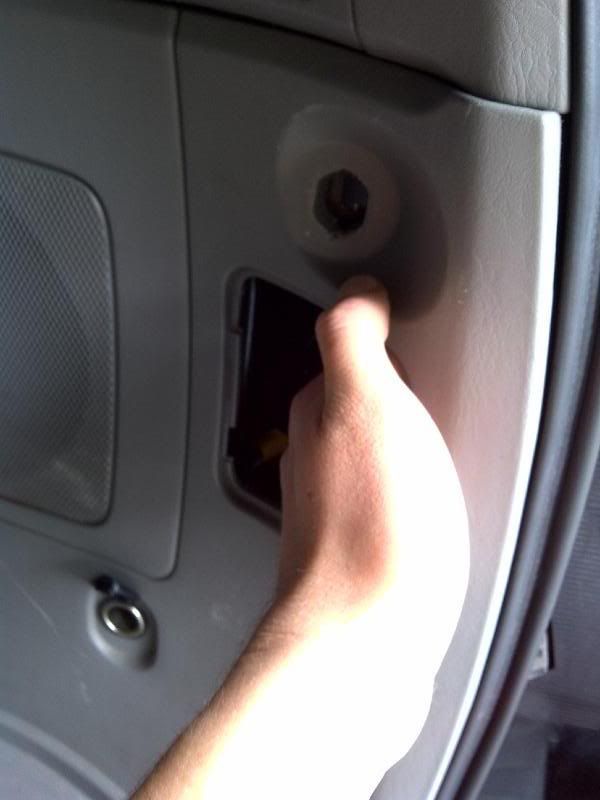
Unbolt the 10mm bolt in this little notch for the double decker cargo shelf.


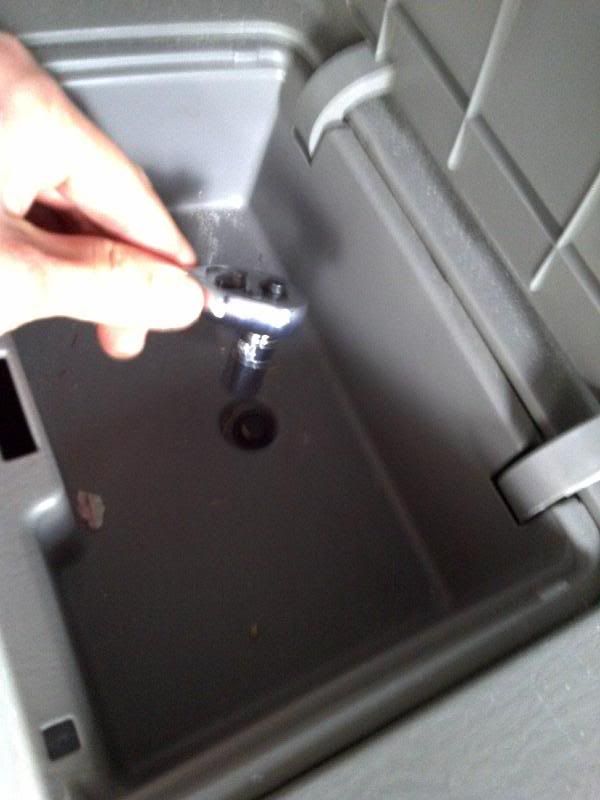
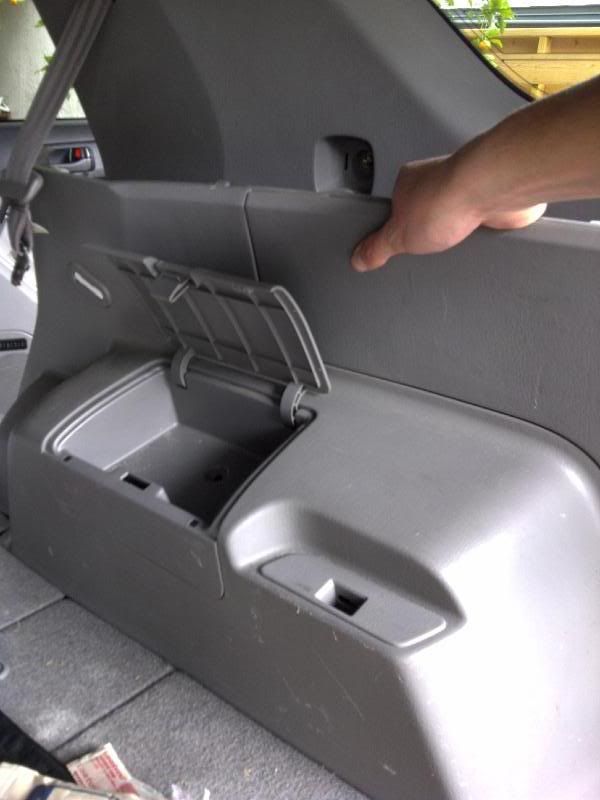
Open the compartment to reveal another 10mm bolt to be removed.


pull back the carpet underneath the storage compartment to reveal 2 screws to take out.


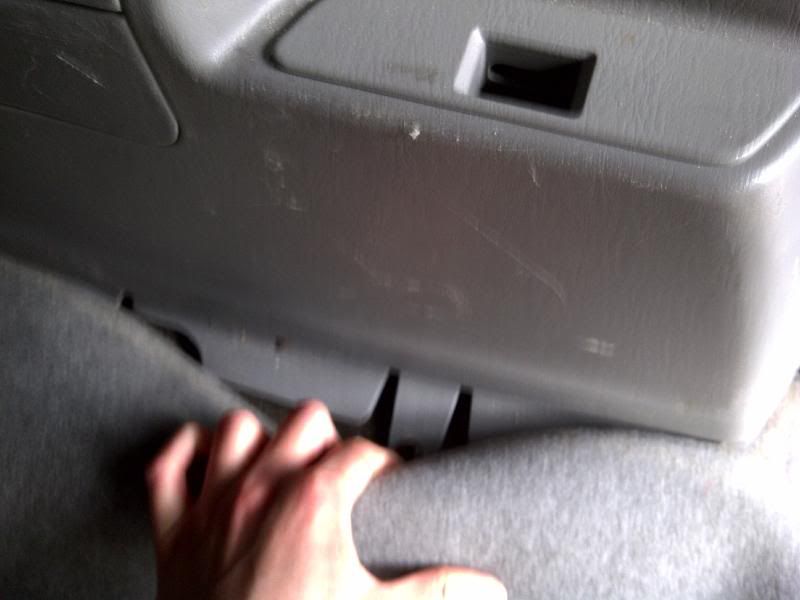
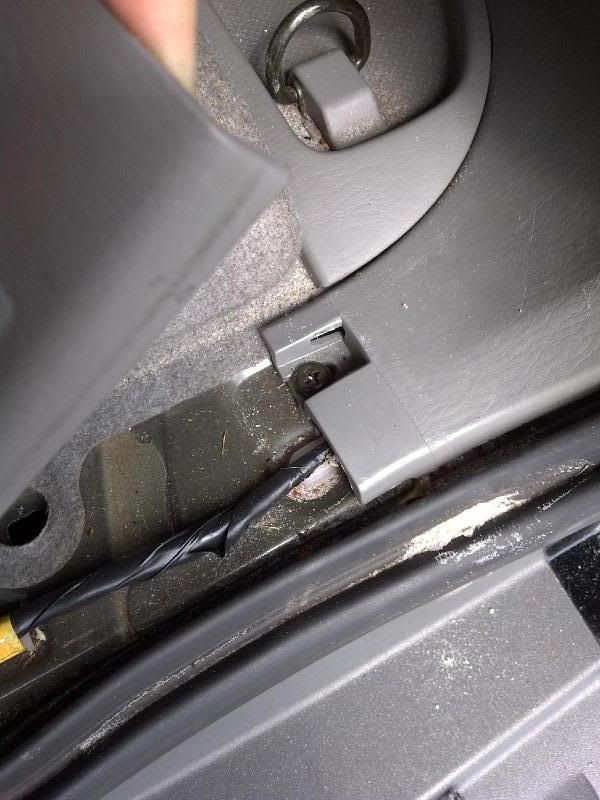
remove star cargo net hook by pulling on the edge with your fingers, it will pop out.

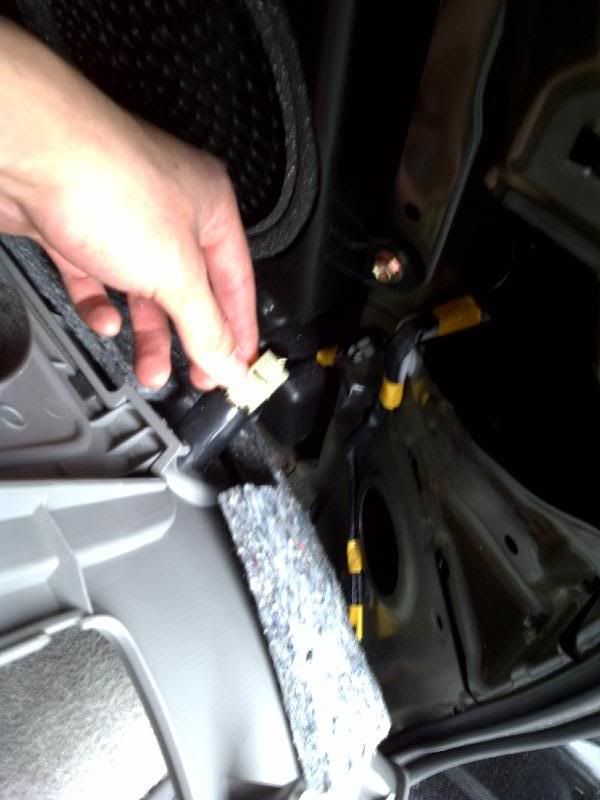
Now start pulling from that same opening, but don't pull it all the way out.
__________________
2003 Limited 4x4 v8

Last edited by dannyg; 08-03-2012 at 05:34 PM.
dannyg is offline   Reply With QuoteReply With Quote
Old 02-17-2011, 06:08 PM #2
dannyg dannyg is offline
Member
 
Join Date: Oct 2009
Location: Fl
Posts: 113
dannyg is on a distinguished road
dannyg dannyg is offline
Member
 
Join Date: Oct 2009
Location: Fl
Posts: 113
dannyg is on a distinguished road
Use the flathead to move aside the striping along the right rear door. Pop out the clips ( i think there were 3) holding the panel to the car. Don't just pull out the panel, these clips will break, use the screw driver to push down and get around the lip they're holding onto.


Now pull this side of the panel up from the bottom


Pull around all the edges to unclip the panel, and it should come free pretty easily.


make sure to disconnect the 12v power connection before pulling the panel all the way out.


Took me about an hour, but with a walkthrough like this it shouldn't take more than 20-30min.

The sub is held in place by 6 torx bolts. A 7/64 allen key worked though, i didnt have a torx driver.


Enjoy.
__________________
2003 Limited 4x4 v8

Last edited by dannyg; 08-03-2012 at 05:31 PM.
dannyg is offline   Reply With QuoteReply With Quote
Old 02-17-2011, 06:20 PM #3
ARK_SWAMP_RIDER's Avatar
ARK_SWAMP_RIDER ARK_SWAMP_RIDER is offline
Senior Member
 
Join Date: Jul 2009
Location: Arkansas
Posts: 4,239
ARK_SWAMP_RIDER will become famous soon enough ARK_SWAMP_RIDER will become famous soon enough
ARK_SWAMP_RIDER ARK_SWAMP_RIDER is offline
Senior Member
ARK_SWAMP_RIDER's Avatar
 
Join Date: Jul 2009
Location: Arkansas
Posts: 4,239
ARK_SWAMP_RIDER will become famous soon enough ARK_SWAMP_RIDER will become famous soon enough
Thanks for posting this for future reference. If you don't care, I'm going to add this to my write-up. There was a similar write-up hosted on a website, but that website isn't available anymore.
__________________
2003 Limited V8 - sold - Build Thread | JL Audio amp/sub | Icon stage 2 | 1/2" Body Lift | 265/70/18 Nitto TG G2's | 18" Limited wheels | Spidertrax | Clazzio's

2016 Trail Premium - Bilstein 5100 | Airlift 1000 | 285/70/17 Cooper AT3 4S | XenonDepot HID | RAV4 Blindspot Mirrors | Kicker Subaru Tweeter Upgrade | Lock'er Down Console Safe | Sprint Booster
ARK_SWAMP_RIDER is offline   Reply With QuoteReply With Quote
Old 02-17-2011, 06:29 PM #4
stanleybb50's Avatar
stanleybb50 stanleybb50 is offline
Senior Member
 
Join Date: Feb 2011
Location: Pittsburgh, PA
Age: 42
Posts: 1,332
stanleybb50 is on a distinguished road
stanleybb50 stanleybb50 is offline
Senior Member
stanleybb50's Avatar
 
Join Date: Feb 2011
Location: Pittsburgh, PA
Age: 42
Posts: 1,332
stanleybb50 is on a distinguished road
For some this might sound like a stupid question (currently shopping here).... but this is only on the limited - right? Wonder id the wiring is already there on the SR5? So with after-marker radio, could be easy hook up?

Excellent write up for sure.

Sent from my LS670 using Tapatalk
__________________
2006 T4R SR5 v8 4wd: Napa Ultra Premium Rotors; Weather Tech liners; AVS Ventshades; Westin Bull Bar; Hydrocarbon Delete; Blackhoused Headlights; Fog Light Mod; Sulfer TSB; Magnaflow 22" Muffler (#12586); Front: Bilstein 5100's set at .85" + Toytec 1" Net "Top1-T" Spacer = 2" total Front Lift; Rear: Cornfed 1" + Air Lift 1000; Plasti-Dip center grill + rear Toyota Emblem; JVC Bluetooth + HD Radio HDR81BT

http://www.toyota-4runner.org/new-me...purchased.html
stanleybb50 is offline   Reply With QuoteReply With Quote
Old 02-17-2011, 09:01 PM #5
dannyg dannyg is offline
Member
 
Join Date: Oct 2009
Location: Fl
Posts: 113
dannyg is on a distinguished road
dannyg dannyg is offline
Member
 
Join Date: Oct 2009
Location: Fl
Posts: 113
dannyg is on a distinguished road
Ya go ahead, your write up made inspired me to do this project anyway.

And i'm not sure about the sr5, i think the jbl system is still an option on it, so it would be the same as this if it has it.
__________________
2003 Limited 4x4 v8
dannyg is offline   Reply With QuoteReply With Quote
Old 03-31-2011, 11:11 AM #6
Steel409 Steel409 is offline
Junior Member
 
Join Date: Nov 2010
Location: Madison, WI
Posts: 24
Steel409 is on a distinguished road
Steel409 Steel409 is offline
Junior Member
 
Join Date: Nov 2010
Location: Madison, WI
Posts: 24
Steel409 is on a distinguished road
dannyg,

Awesome write up. The subwoofer on my '03 Limited just 'went' as well. What subwoofer did you find as a replacement? The Stealership quoted me $488 for the sub/box/amp combination, but I'd like to plug and play with a similar aftermarket speaker if possible as I'd prefer not to add a new amp, wiring, head unit, etc. etc. etc. Would like to keep it as stock as possible!
Steel409 is offline   Reply With QuoteReply With Quote
Old 03-31-2011, 05:08 PM #7
dannyg dannyg is offline
Member
 
Join Date: Oct 2009
Location: Fl
Posts: 113
dannyg is on a distinguished road
dannyg dannyg is offline
Member
 
Join Date: Oct 2009
Location: Fl
Posts: 113
dannyg is on a distinguished road
Quote:
Originally Posted by Steel409 View Post
dannyg,

Awesome write up. The subwoofer on my '03 Limited just 'went' as well. What subwoofer did you find as a replacement? The Stealership quoted me $488 for the sub/box/amp combination, but I'd like to plug and play with a similar aftermarket speaker if possible as I'd prefer not to add a new amp, wiring, head unit, etc. etc. etc. Would like to keep it as stock as possible!
I went with aftermarket sub and amp. I got an 8" polk audio mm840 svc sub. And a boston acoustics gta 400.1 amp. the system is 250 watt rms. I had to wire the amp under the passenger seat, splice into the factory speaker wires for signal, and put the sub in the stock location.

you don't have to get a new head unit to do this, i didn't. Basically the whole setup was about $230. It takes some time to hook everything up, but it was definitely worth it. It sounds much better, and there is more than enough bass. I think the stock replacement sub is more than $200 anyway, and its not very good. i'm not sure that there are many subs out there that you can just plug into and go. if you find one, the stock amp has so little output that it won't play at its full potential.
__________________
2003 Limited 4x4 v8
dannyg is offline   Reply With QuoteReply With Quote
Old 03-31-2011, 10:25 PM #8
ARK_SWAMP_RIDER's Avatar
ARK_SWAMP_RIDER ARK_SWAMP_RIDER is offline
Senior Member
 
Join Date: Jul 2009
Location: Arkansas
Posts: 4,239
ARK_SWAMP_RIDER will become famous soon enough ARK_SWAMP_RIDER will become famous soon enough
ARK_SWAMP_RIDER ARK_SWAMP_RIDER is offline
Senior Member
ARK_SWAMP_RIDER's Avatar
 
Join Date: Jul 2009
Location: Arkansas
Posts: 4,239
ARK_SWAMP_RIDER will become famous soon enough ARK_SWAMP_RIDER will become famous soon enough
I run a similar setup, well worth the cost. Link is in my sig for more info.
__________________
2003 Limited V8 - sold - Build Thread | JL Audio amp/sub | Icon stage 2 | 1/2" Body Lift | 265/70/18 Nitto TG G2's | 18" Limited wheels | Spidertrax | Clazzio's

2016 Trail Premium - Bilstein 5100 | Airlift 1000 | 285/70/17 Cooper AT3 4S | XenonDepot HID | RAV4 Blindspot Mirrors | Kicker Subaru Tweeter Upgrade | Lock'er Down Console Safe | Sprint Booster
ARK_SWAMP_RIDER is offline   Reply With QuoteReply With Quote
Old 04-09-2011, 02:39 PM #9
Steel409 Steel409 is offline
Junior Member
 
Join Date: Nov 2010
Location: Madison, WI
Posts: 24
Steel409 is on a distinguished road
Steel409 Steel409 is offline
Junior Member
 
Join Date: Nov 2010
Location: Madison, WI
Posts: 24
Steel409 is on a distinguished road
Gents,

Thanks very much for the responses. Much appreciated!

Any chance either of you put together a wiring diagram for the mod? I have no problem with modifying/fixing the mechanicals of my 4Runner, but I struggle when it comes to wiring. How did you know which wires to splice in to? Or how to wire the sub through the woofer box into the amp?

Thanks again!
Steel409 is offline   Reply With QuoteReply With Quote
Old 04-09-2011, 03:00 PM #10
gaterose's Avatar
gaterose gaterose is offline
Senior Member
 
Join Date: Mar 2010
Location: San Antonio, TX
Age: 39
Posts: 3,908
Real Name: Matt
gaterose will become famous soon enough gaterose will become famous soon enough
gaterose gaterose is offline
Senior Member
gaterose's Avatar
 
Join Date: Mar 2010
Location: San Antonio, TX
Age: 39
Posts: 3,908
Real Name: Matt
gaterose will become famous soon enough gaterose will become famous soon enough
Just wanted to add this about the "star hook/clip things" to make sure everyone is aware. It seems I keep seeing people breaking these or scratching stuff prying em out, and just having problems with them in general. I haven't seen a picture like this explaining how they work anywhere on the forum so here ya go.


It's like an anchor that is two pieces. The top/star piece slides out to make the other piece not grab


edit: on my 4r these pull out pretty easily using just my fingertips grabbing the outside edges of the star, I've never used a screwdriver, pliers, or any tool to pull them.
__________________
2017 Tacoma TRD OR - His
2014 4Runner Limited - Hers
'13 Silverado Z71 - Sold
'03 4Runner UnLimited - Sold

Last edited by gaterose; 04-09-2011 at 03:09 PM. Reason: mo' betta pix
gaterose is offline   Reply With QuoteReply With Quote
Old 04-09-2011, 03:17 PM #11
gaterose's Avatar
gaterose gaterose is offline
Senior Member
 
Join Date: Mar 2010
Location: San Antonio, TX
Age: 39
Posts: 3,908
Real Name: Matt
gaterose will become famous soon enough gaterose will become famous soon enough
gaterose gaterose is offline
Senior Member
gaterose's Avatar
 
Join Date: Mar 2010
Location: San Antonio, TX
Age: 39
Posts: 3,908
Real Name: Matt
gaterose will become famous soon enough gaterose will become famous soon enough
Quote:
Originally Posted by Steel409 View Post
..a wiring diagram for the mod? I have no problem with modifying/fixing the mechanicals of my 4Runner, but I struggle when it comes to wiring. How did you know which wires to splice in to? Or how to wire the sub through the woofer box into the amp?..
You have to buy an amp wiring kit which usually comes with a diagram. It is just:
Power - battery-fuse-wire to amp (the amp wiring kit)
Ground - to grounding bolt under the back seat
Remote - tap anything that's only hot when the car is turned on like the cigarette power outlets or if you're picky tap into a wire on the JBL amp that is only powered when the JBL amp is on. I think it is the white wire w/ blue stripe on the amp connector.
Sub - speaker outputs on amp into JBL box to sub

I ran my speaker wire through the same rubber grommet that the JBL speaker wire ran through.
__________________
2017 Tacoma TRD OR - His
2014 4Runner Limited - Hers
'13 Silverado Z71 - Sold
'03 4Runner UnLimited - Sold

Last edited by gaterose; 04-09-2011 at 03:19 PM.
gaterose is offline   Reply With QuoteReply With Quote
Old 10-23-2013, 10:25 PM #12
noshortcuts's Avatar
noshortcuts noshortcuts is offline
Member
 
Join Date: Jul 2013
Location: bay area, ca
Posts: 109
noshortcuts is on a distinguished road
noshortcuts noshortcuts is offline
Member
noshortcuts's Avatar
 
Join Date: Jul 2013
Location: bay area, ca
Posts: 109
noshortcuts is on a distinguished road
Thank you...

I'm doing a set up similar to Ark Swamp's on my 06' Limited and this helped me prep the car quickly.

I've already installed the Pioneer deh-80prs head unit. There was nothing wrong with my JBL synthesis unit but the Pioneer adds some wanted features (for me mainly bluetooth phone calls and high quality DACs that bypass my Ipod's DAC).

Now I'm upgrading the subwoofer and going with:
  • Alpine MRV-M500 Mono subwoofer amplifier - 500 watts RMS x 1 at 2 ohms
  • Alpine RUX-KNOB Remote Bass Level Control Knob for PDX-M12 and PDX-M6
  • 8W1V2-4 - JL Audio 8" Single 4-Ohm Car Subwoofer
  • KnuKonceptz KCA Complete 4 Gauge Amp Installation Kit
If I'm not in music nirvana after this, I'll likely do the rest of the speakers too. But I hope this is the end for now.
noshortcuts is offline   Reply With QuoteReply With Quote
Old 03-18-2014, 08:07 PM #13
lambohaha's Avatar
lambohaha lambohaha is offline
Member
 
Join Date: Oct 2013
Location: Florida
Posts: 128
Real Name: Avery
lambohaha is on a distinguished road
lambohaha lambohaha is offline
Member
lambohaha's Avatar
 
Join Date: Oct 2013
Location: Florida
Posts: 128
Real Name: Avery
lambohaha is on a distinguished road
I used this to install the "amp bypass" harness supplied by Crutchfield and I gotta say .. WOW! Thanks for the amazing write up. Hope fully tomorrow I'll be installing the head unit but for now I wanted to get a head start by running the harness from the JBL amp to the front of the T4R. I laid it in the clips in the channel with the rest of the vehicles wiring from the rear to the front and then behind the passenger kick panel and at the moment they are resting in the glove box until I can connect to the receiver.
__________________
"My neighbors listen to good music whether they like it or not"
lambohaha is offline   Reply With QuoteReply With Quote
Old 03-18-2014, 09:34 PM #14
CookieRoe's Avatar
CookieRoe CookieRoe is offline
Senior Member
 
Join Date: Mar 2010
Location: Chester County, PA
Age: 48
Posts: 3,804
Real Name: Ed
CookieRoe is a jewel in the rough CookieRoe is a jewel in the rough CookieRoe is a jewel in the rough
CookieRoe CookieRoe is offline
Senior Member
CookieRoe's Avatar
 
Join Date: Mar 2010
Location: Chester County, PA
Age: 48
Posts: 3,804
Real Name: Ed
CookieRoe is a jewel in the rough CookieRoe is a jewel in the rough CookieRoe is a jewel in the rough
thumbs up!

Wow, never saw this write-up. Looks great. Gotta do this when the weather turns nice. I have to get to the amp and splice into some wires or possibly replace the damn thing. (long story: I still haven't fully enabled the voice nav on mine and I swear the side speakers cut out from time to time).
__________________
Current: 2005 V6 Limited 4x4. SOLD: 2000 HiLux Surf SSR-G, 1997 HiLux Surf SSR-X Limited

CookieRoe is offline   Reply With QuoteReply With Quote
Old 04-05-2014, 08:36 PM #15
rlock8 rlock8 is offline
Junior Member
 
Join Date: Apr 2014
Location: San Diego, CA
Posts: 1
rlock8 is on a distinguished road
rlock8 rlock8 is offline
Junior Member
 
Join Date: Apr 2014
Location: San Diego, CA
Posts: 1
rlock8 is on a distinguished road
Sub Woofer Replacement

Quote:
Originally Posted by dannyg View Post
Use the flathead to move aside the striping along the right rear door. Pop out the clips ( i think there were 3) holding the panel to the car. Don't just pull out the panel, these clips will break, use the screw driver to push down and get around the lip they're holding onto.


Now pull this side of the panel up from the bottom


Pull around all the edges to unclip the panel, and it should come free pretty easily.


make sure to disconnect the 12v power connection before pulling the panel all the way out.


Took me about an hour, but with a walkthrough like this it shouldn't take more than 20-30min.

The sub is held in place by 6 torx bolts. A 7/64 allen key worked though, i didnt have a torx driver.


Enjoy.
Thanks for posting. This saved me a lot of time.
rlock8 is offline   Reply With QuoteReply With Quote
Reply


Posting Rules
You may not post new threads
You may not post replies
You may not post attachments
You may not edit your posts

BB code is On
Smilies are On
[IMG] code is On
HTML code is On

Forum Jump

Similar Threads
Thread Thread Starter Forum Replies Last Post
BO001R-05 11/30/2005 Body - Sunroof Components and Service Procedures CBR_GUY_IA TSB 1 01-17-2020 02:40 PM
NV010-02 11/28/2002 Interior - Front Seat Squeak/Creak Noise CBR_GUY_IA TSB 1 02-19-2019 01:26 PM
How to remove rear bumper fascia? emyhre 4th Gen T4Rs 8 10-28-2012 02:12 PM
How to remove starter 4runnen Maintenance/Detailing 1 11-27-2011 08:00 PM
taco whip mod 4rnr4me 3rd gen T4Rs 11 12-14-2010 09:48 PM

Powered by vBadvanced CMPS v3.2.2

All times are GMT -4. The time now is 02:46 PM.

Powered by vBulletin® Version 3.8.11
Copyright ©2000 - 2024, vBulletin Solutions Inc.
Search Engine Optimisation provided by DragonByte SEO (Pro) - vBulletin Mods & Addons Copyright © 2024 DragonByte Technologies Ltd.
Feedback Buttons provided by Advanced Post Thanks / Like (Lite) - vBulletin Mods & Addons Copyright © 2024 DragonByte Technologies Ltd.
User Alert System provided by Advanced User Tagging (Lite) - vBulletin Mods & Addons Copyright © 2024 DragonByte Technologies Ltd.
***This site is an unofficial Toyota site, and is not officially endorsed, supported, authorized by or affiliated with Toyota. All company, product, or service names references in this web site are used for identification purposes only and may be trademarks of their respective owners. The Toyota name, marks, designs and logos, as well as Toyota model names, are registered trademarks of Toyota Motor Corporation***Ad Management plugin by RedTyger
 
Copyright © 2020