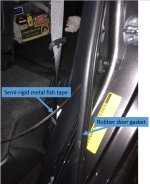
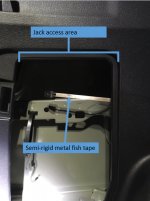
Now I know the proper procedure for removing this cover. Unfortunately while I did not know what I was doing and learning on the go I did not take proper pictures from the procedure, just few photos why some sas already disassembled.. But during the process I learned how to do it. So here it is. This is the easy version: without third sit and no sliding cargo tray. Reference to the pictures in parenthesis
You need to remove the trunk floor as the styrofoam gets in the way.
1. Fold the rear sits flat, it will be easier without them in the way.
2. Remove the two front cargo ties bolted to the metal floor(Ref.1). Lift the plastic cover near the D-ring (it will fold back) and expose a bolt (10mm socket wrench). Remove the bolt and the whole cargo tie with surrounding plastic can be removed.
3. Remove the plastic trim between the rear sits and cargo floor (it is shown laying up site down on the folded sits). There is one clip exactly at the center (Ref.2). Just pull the trim up and it will be easy removed.
4. Remove the plastic trim between between the cargo floor and rear hatch seal (it is shown laying on the folded sits). No need to remove the weatherstripping. It will be easier to remove it if rear tie downs (Ref.4) are also removed (the same way as the front tie downs)
5. There are several clips holding this trim down to the floor (Ref.3), but they can be easy lifted up.
6. On both ends this trim is latched to side panels (Ref.5).
This is a tricky one. The trim is "wrapped around" the plastic belongs to side trims (Ref.a) It also has two hooks holding it closer to center line of the trim (Ref.b). So first spread the trim unlocking its outside from the side trim plastic then it will be easy to unhook center. Lifting the whole thing helps so you can put your fingers under it, that is why you need to remove the rear tie-downs.
6. Now under that trim you will see the felt floor has a white plastic channel that is hooked up to white plastic tabs holding some wires (Ref.6). Unhook these tabs from the channel (Ref.c) and then you will be able to remove the felt floor.
7. Finally remove styrofoam plate from the floor and you will see bare painted metal.
Second step is to remove all bolts and screws holding the side panel.
1. There are two screws holding the panel to the floor (at the wheel well). Philips screwdriver take them out (Ref.7).
2. One bolt is under the rear upper tie down (plastic hook looking like a T). First turn the "T" clockwise 90 degrees. After that it will pop out exposing bolt under it. This is long bolt with Philips head. Take it out.
3. Two bolts are under the round plastic cover. One is on the side of the wheel well, the other is on the all in recessed plastic (Ref.8). First remove the round plug. It has a slot at the bottom. I have a screwdriver with the end bent 90 degrees. Pull the round cover by the bottom where the slot is. It easy pops out exposing 10mm hex head bolt. Remove both.
4. Finally the rear sit belt anchor. Remove the plastic cover - spread it from both sides and it will be easy to remove it exposing 14mm hex head bolt. Undo the bolt but remember how the sit belt is oriented so you don't twist it when installing back.
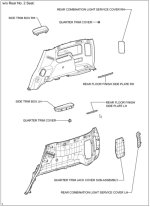
Now all clips. This is very intimidating part. Some clips release easy some require a little force. It will be easier if you remove tire changing tools cover and plastic cover to access tail lights. This way you can put your hand under the plastic and pull it from behind.
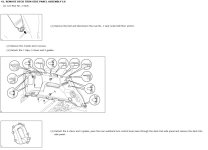
Work slowly from the rear to the front (Ref.A). When you try to pull the black plastic and you see the upper trim is following, there is a hook in the bottom part grabbing the upper part (Ref.B). Use the trim tool to unhook these two parts.
At some point I had the rear side of this panel away from the metal that I could put my hand behind and using short philips screwdriver and remove two screws holding the "tray" on the wheel well cover. When these two screws are removed there is no need for "brute force" to remove the tray.
When trey is out you have more access to behind the panel which will help with pulling clips at the front part of the trim.
I did not take the whole panel out - three front clips were very stubborn: one near the bottom of the door opening and two near the door around the rear sit back "hook". I did not need that as like Antman I could access behind this panel after partially removing the rear door weatherstripping.
When I was installing everything back I did not put these two screws to "tray". As you can see on the picture below the tray has small hooks all the way around so I thought these two screws are just overkill. This way I have easy access to the space under the tray (like Antman did, just without breaking tabs).
The rest was just pulling wires and connecting them. The ground spot is just above the taillight cover, so I needed to guide only one wire from the front. I used water sealed 10A connectors I got from ebay. They will easy survive and protect contacts in winter conditions in Europe. Now my rear fog lights are fully operational.


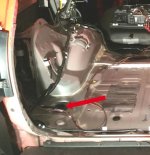
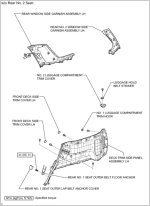


 because, breaking things gets expensive so better to learn from you! Good Luck!