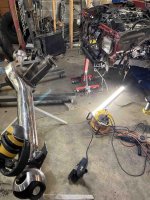
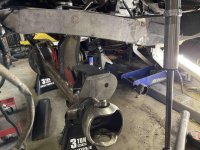
1st Gen 4Runner Solid Axle Swap and 1UZ Engine Swap

NotKewl

New member
Things are about to get funky up in this shop. Got a buddy who has tasked me with helping him swap in a Lexus 1UZ V8 engine into his 1st gen 4Runner (1988) and ditch the IFS for a Toyota solid axle. Oh boy, this is a first for me, and judging on the searches we did, the first either of us has seen. We've seen 1UZ swaps in stock 1st gens, 2nd gens, and 3rd gens (2UZs came stock in 4th Gens). And of course, doing a SAS is nothing new when keeping a stock engine (22R, 22RE, 1-3VZ, etc). But we haven't found anyone who has done both at the same time. We've looked to find answers to issues we are running into. So, I guess we're making it up as we go along.

So here goes...

  • The ride is a 1988 Toyota 4Runner IFS all stock with 33" Boggers.
  • The Engine is a Toyota 1UZ-FE donated by a 1992 Lexus LS400.
  • The Axle is a first-gen narrow Toyota solid axle from a 1984 4Runner.
  • The shocks are Radflo 2.0 Coilovers
  • The rest... we are making it up as we go!

The Vehicle:
 

Attachments
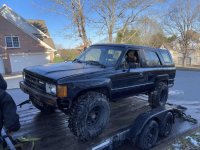
  • 001-First Arriving.jpg
    001-First Arriving.jpg
    138.7 KB · Views: 4,641
Last edited:
Register to hide this ad
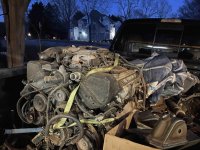
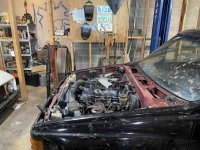
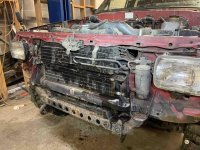
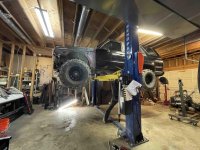
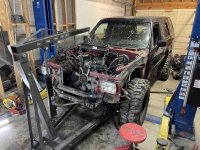
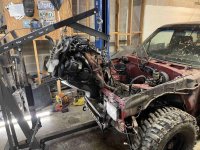
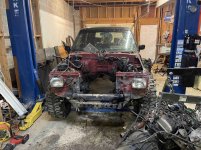
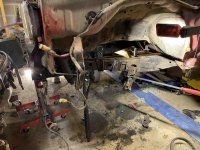
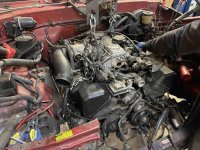
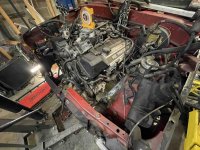
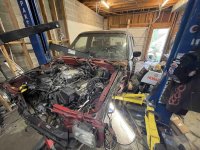
The first night the 4Runner was unloaded and driven into the shop. The front fenders, hood, grille, and bumper were removed. Up in the air to remove the drive shafts and loosen the trans/transfer case cross member (taking it all out as one assembly for ease).

Then the front radiator support was cut temporarily to make getting the old drivetrain assembly out and the bigger engine/drivetrain in and out easy for mock-up (This thing will go in and out of the 4Runner many many times before she's finally sat at home). The radiator, all electronic connections, throttle cables, exhaust, etc. were all removed and finally, the old 22RE and transmission/transfer case came out without a fuss. All in about 4-5 hours.
 

Attachments

  • IMG_2856-lr.jpg
    IMG_2856-lr.jpg
    141.3 KB · Views: 4,363
  • IMG_2860.jpg
    IMG_2860.jpg
    141.9 KB · Views: 4,353
  • IMG_2863.jpg
    IMG_2863.jpg
    134.4 KB · Views: 4,229
  • IMG_2875.jpg
    IMG_2875.jpg
    143.1 KB · Views: 4,520
  • IMG_2880.jpg
    IMG_2880.jpg
    143.5 KB · Views: 4,366
  • IMG_2888.jpg
    IMG_2888.jpg
    142 KB · Views: 4,322
Day 2

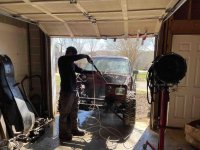
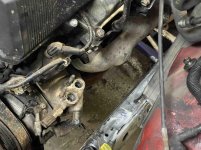
The next day the 4Runner gets pushed out of the shop a bit to degrease and pressure wash the engine bay and IFS components to make it a little easier to get them all out.
IMG_2890.jpg

IFS elimination/SAS isn't difficult. Swapping an engine isn't difficult. But doing both at the same time is a bit of a challenge. The engine MUST go in and get permanently mounted BEFORE the SAS is performed. The reason is that I need to know where the engine will sit so I can calculate where to position the solid axle and suspension components so they will not bind or hit the oil pan. And also to keep it at the desired ride height with all the proper geometry and clearances, the engine had to come up a little, axle forward a bit, shock towers modified a bit, then engine over to passenger side a bit to clear steering linkage, etc. and so forth.

Also, here's another rub with this combo of customization, at least in my shop. Yes, I have a lift, but I'm limited on space near the lift in my tiny basement shop. Put the 4Runner on the lift for SAS and leave it there, no problem (like I did with the 3rd gen SAS/insane build). But I can't install an engine in this shop with a vehicle on the lift because there is no room to maneuver the cherry picker due to the wall, workbench, and some other objects in front of the lift.

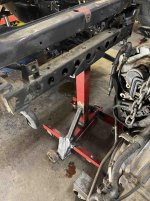
Solution: My buddy came up with an ingenious solution that I fabbed up quickly. A simple jig made from an old crappy engine stand and some scrap tubing to mount on the front frame cross member. This will allow the engine to be put in with all the IFS suspension cut off, give plenty of room to measure and maneuver, and allow the vehicle to still be pushed forward to go on the lift for final assembly/testing later.
IMG_2913.jpg

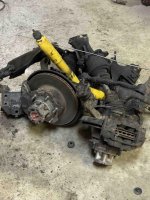
Now the IFS can come off!

IMG_2919.jpg

IMG_2929.jpg

Now with a clean frame we can check the coil over shock tower placement...

IMG_2940.jpg

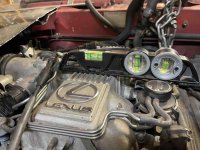
Then put the engine in for fitment! A nudge here, wiggle there, snip and cut there and voilà, ready for engine mount fabbing.

IMG_2941.jpg

IMG_2948.jpg

IMG_2949.jpg

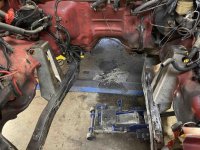
Now we are off to the races, the frame is free of the IFS suspension. The Axle is cleaned and ready for building. The engine is positioned perfectly and ready for motor mounts to be fabbed up. Next we strengthen the frame.
 

Attachments

  • IMG_2890.jpg
    IMG_2890.jpg
    137.1 KB · Views: 4,310
  • IMG_2913.jpg
    IMG_2913.jpg
    140 KB · Views: 4,253
  • IMG_2919.jpg
    IMG_2919.jpg
    140.7 KB · Views: 4,291
  • IMG_2929.jpg
    IMG_2929.jpg
    137.3 KB · Views: 4,198
  • IMG_2940.jpg
    IMG_2940.jpg
    140.1 KB · Views: 4,315
  • IMG_2941.jpg
    IMG_2941.jpg
    142.8 KB · Views: 4,606
  • IMG_2948.jpg
    IMG_2948.jpg
    141 KB · Views: 4,276
  • IMG_2949.jpg
    IMG_2949.jpg
    135.1 KB · Views: 4,193
Last edited:
Hey everyone, I'm the buddy. I thought I had an account but it's been so long I couldn't find anything.


I've had a list of first gens and love them. This build has been in the works for awhile, but finding someone confident enough to do it, has been the struggle.

The engine is actually a 92 sc400. Has the factory rear sump oil pan, and the big rods.
I will be going sheet metal intake and full standalone, with auto transmission still.

The sas isn't just an sas. It's actually a 4wheel underground 3 link. ( I think the title should be changed. Sas are easy. 3 link not so much ) plus these are badass kits and really the best and easiest thing out there.

My goal and game plan is a 4-6" lift range, with all the flex. I don't want a monster truck, shooting for a badass daily, mountain trip capable, or beach trip capable. I will likely one day turbo it as well. ( I'm crazy I know)

So here we go guys.
 
The engine is actually a 92 sc400. Has the factory rear sump oil pan, and the big rods.
LS, SC, I knew it was one of those xx400's. in 1992 everyone liked big rods! :thumb3:

I think the title should be changed. Sas are easy. 3 link not so much
a SAS is a SAS as far as I'm concerned. 3 links, 4 links, Leafs, Magic beans, whatever. Easy to me. :lol:

...finding someone confident enough to do it, has been the struggle
Well, you should have come to me first. :lol:
Either way, going to be a fun build. Let's engineer it! :cheers:
 
Last edited:
nice! following, look forward to see how you get everything to fit. details on exhaust routing, steering shaft, and how axle placement and coil towers all fit together are getting me excited!

Your gonna love the 4wu link ride.

its ALL been done a few times at least. Ive got a number of build threads somewhere, not too inspired to hunt them down atm.

an 89. long progression. but linked with a 1uz
My Anorexic Toy | Pirate 4x4

funny, i actually have the 1uz and pile o parts to swap in the garage, 4wu linked my 87 runner, and was hot do do the swap ..... all back in 2013. Life
Now ive got another 87 T4R and gonna put it in there, linked of course. eventually

hope you'll inspire me.
 
By the looks of exhaust ( laying under there with the link held up where I think it will land ) it will be tight, but won't be too bad.

Steering shaft, I'll have to upload pictures, but I think we will be okay with a normal straight one, just longer. We have motor slightly passenger side.

We are pushing axle forward a little, and I am not going to used this to it's full potential. I won't be going crazy flex, I won't be doing any hardcore shit.

This will be a low ride height, mostly daily. I have seen a couple linked 1uz, but all on big tires and off road rigs. So being tucked up in there is a big difference in mine, vs most others.

Hurry up and get back to it. I am going fancy standalone and intake. One day I'll get bored and turbo it.

I'll check out your thread here shortly.
 
This will be a low ride height, mostly daily. I have seen a couple linked 1uz, but all on big tires and off road rigs. So being tucked up in there is a big difference in mine, vs most others. My 87 sits at 24.5" frame rail ht. with the front 4wu kit

I'll check out your thread here shortly Not my Thread

.

post lots of progress!!
all good shi*

 
Very well.

Have any flat ground pics? What size tires?

Also not sure where you guys measure frame height to get these numbers. The stock ifs was sitting around 24" at the front crossbar


I need to upload pictures, and Brent needs to post updates lol


post lots of progress!!
all good shi*

 
The sas isn't just an sas. It's actually a 4wheel underground 3 link. ( I think the title should be changed. Sas are easy. 3 link not so much ) plus these are badass kits and really the best and easiest thing out there.

.
SAS is an interchangeable term like SAC which a 4WUG link kit is considered.
My goal and game plan is a 4-6" lift range, with all the flex. I don't want a monster truck, shooting for a badass daily, mountain trip capable, or beach trip capable. I will likely one day turbo it as well. ( I'm crazy I know)
what coil springs/bump stops/limit straps are you going with?
How about your steering system? full hydro may not be the best for a DD
 
Annnnd Quick update... I've been balls to the wall with a new job and kids the last few months. :shrug:

BUT!!! August is coming up and when I get back from working south FL the last week of July (I know so horrible working with clients on the beach for a week) I plan on getting back in the shop and getting some shit done.

Life happens... :yield:
 
SAS is an interchangeable term like SAC which a 4WUG link kit is considered.

SAS is as SAS does. And life is like a box of random parts, you never know what you're going to get... unless they are clearly marked similar to a box of chocolates. :yo:
 
SAS is an interchangeable term like SAC which a 4WUG link kit is considered.

what coil springs/bump stops/limit straps are you going with?
How about your steering system? full hydro may not be the best for a DD


Staying stock with ifs box, the 4wu kit has everything else included.
 
More Progress... Got some generic (but very useful and strong) motor mounts. We got those lined up and tacked in. Engine level pushed back properly and lined up where the hood will still shut while allowing for the most clearance for the axle.

IMG_5005.jpg

A little trimming of the motor mounts...
IMG_5011.jpg

Level the engine and tack the mounts in...
IMG_5015.jpg

Align the steering box mounts and tack that in...
IMG_5020.jpg

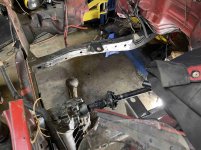
And yank the engine out again to burn in the right engine mount and the steering box mount. Leaving the left engine mount with just sturdy tacks because we may have to cut it depending on axle top link placement.

IMG_5023.jpg
 

Attachments

  • IMG_5005.jpg
    IMG_5005.jpg
    128.4 KB · Views: 2,447
  • IMG_5011.jpg
    IMG_5011.jpg
    135.2 KB · Views: 2,434
  • IMG_5015.jpg
    IMG_5015.jpg
    135.7 KB · Views: 2,409
  • IMG_5020.jpg
    IMG_5020.jpg
    135.9 KB · Views: 2,639
  • IMG_5023.jpg
    IMG_5023.jpg
    138.2 KB · Views: 2,473
Last edited:
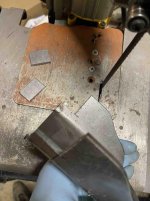
Next, the engine goes back in after the mounts are welded up. And I clean up the axle and I weld in support plates to the stops.

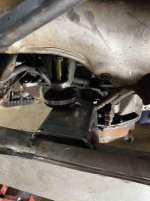
Engine goes in but won't line up because we put on the transfer case (which later needs to come off again to clear the link mounts)
IMG_5030.jpg

ALMOST THERE... Just a little more!
IMG_5031.jpg

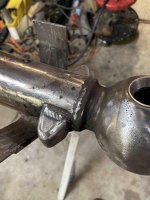
Stop tabs are reinforced for strength...
IMG_5038.jpg

Such a nice clean axle now...
IMG_5041.jpg

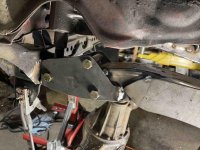
Getting the axle in place and all the link mounts mocked up. Most likely going to need to notch the frame on passenger side for maximum tuck at full bump.
IMG_5126.jpg
 

Attachments

  • IMG_5030.jpg
    IMG_5030.jpg
    141 KB · Views: 2,430
  • IMG_5031.jpg
    IMG_5031.jpg
    133.1 KB · Views: 2,411
  • IMG_5038.jpg
    IMG_5038.jpg
    131.6 KB · Views: 2,430
  • IMG_5041.jpg
    IMG_5041.jpg
    140.5 KB · Views: 2,439
  • IMG_5126.jpg
    IMG_5126.jpg
    137.7 KB · Views: 2,558

Members online

No members online now.

Forum statistics

Threads
278,311
Messages
3,554,082
Members
248,016
Latest member
Advally Service

Trending content

Back
Top