3rdGEN Stereo/Interior Showoff Thread!!!!!

Jason B said:
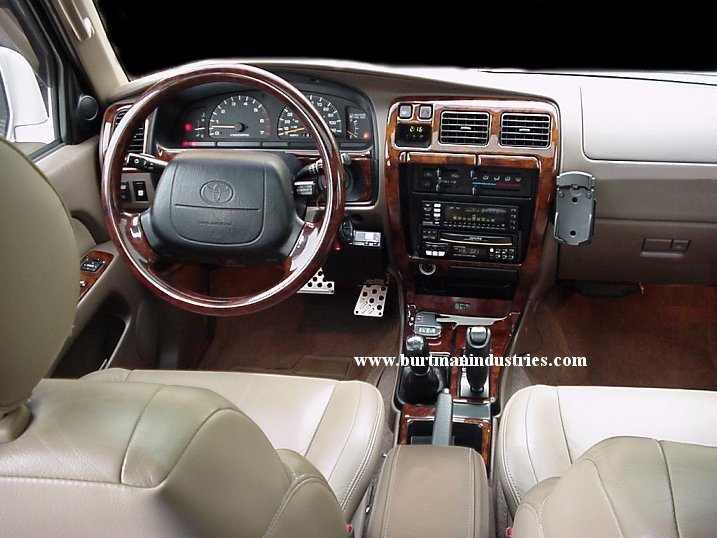
4run_fcm_4wd_96-98.jpg

i thought you drove a silver or gold 4runner?
 
alpine0000 said:
anyways, here are some of my mods to show off.

IMG_1879.jpg


IMG_1887.jpg


IMG_1870.jpg


IMG_1900.jpg


IMG_1889.jpg


IMG_1771.JPG

wow. did you custom did those headrest screens? or did you bought it like that? but i got my gauges from ebay.com. you could never go wrong. LOL. it's a risk though.
 
alpine: how often do you use the GPS because way down the line im thinking of getting a flip up screen and GPS is more $$
 
Jason B said:
I have some, BUT some of the logo's won't line up 100%.. 01-02's had some small changes and there are no specific gauges for 01-02's.

http://www.burtmanindustries.com/zoomprod.php?id=4run_99-02_ind_gaug

what do you mean by "the logos wont line up"? i thought you took out the old guage faces and installed the new ones in place of them. do you install them "over" the old ones, and thats what you mean by it wont line up? or are the numbers slightly off position so that the needle is slightly inaccurate? for example, speed and tach numbers arent exactly lined up where the stock ones were, so maybe the needle is over 50mph on the new guage but your really going, oh, say 52mph?

thanks for the info!
 
Last edited:
broncosi said:
alpine: how often do you use the GPS because way down the line im thinking of getting a flip up screen and GPS is more $$

i use the GPS all the time. but then again, i travel a whole lot. thats just me though, you may not even need GPS living your lifestyle. its just something you have to evaluate :)

im always going on roadtrips to ski resorts in the winter with my buddies, and always going to beaches and other road trips in the summer. also, its useful when just going new places around town, dont have to worry about mapquest and stuff.

but if you only drive to and from work, and never go anywhere new, dont spend the money.
 
trd_style said:
wow. did you custom did those headrest screens? or did you bought it like that? but i got my gauges from ebay.com. you could never go wrong. LOL. it's a risk though.

i did install everything in my truck myself. however, i did not fabricate the headrests and cut into them. a company called Myron & Davis makes the tv's prefabbed into the headrest. i bought them like that, then replaced my stock headrests and wired them up to the headunit.

i would have bought alpine tv's and installed them into the stock headrests myself, but as all of us 4runner owners know, the stock headrests are really tiny. tv's are just too big for the stock headrest
 
My 2 cents worth.

Slim PS2 in the glove box
4Runner_Interior_03.jpg


Internally wired and connections placed in the rear center console
4Runner_Interior_04.jpg


8" screen
4Runner_Interior_07.jpg


Screen quality
4Runner_Interior_08.jpg


Kenwood headunit
4Runner_Interior_09.jpg


Some shots of my current project... a cargo area that holds all of my amps, subs, as well as organizational storage compartments. This is a work in progress still. The last photo is the current state of the build. I should be done sometime next month.

Beginning plans
BoxBuild_01.jpg


Top View
BoxBuild_04.jpg


2 forms made... lots of work still to do
BoxBuild_11.jpg


False floor for amps & stuff!
BoxBuild_36.jpg


False floor installed... with the Infinity 10" sub
BoxBuild_38.jpg


Another view...
BoxBuild_40.jpg


I'll post more when I get a chance to work on it some more.
 
alpine0000 said:
what do you mean by "the logos wont line up"? i thought you took out the old guage faces and installed the new ones in place of them. do you install them "over" the old ones, and thats what you mean by it wont line up? or are the numbers slightly off position so that the needle is slightly inaccurate? for example, speed and tach numbers arent exactly lined up where the stock ones were, so maybe the needle is over 50mph on the new guage but your really going, oh, say 52mph?

thanks for the info!

the reverse gauges will overlap your stock gauges. and about accuracy, it MUST be accurate. i'm sure most companies has diagram them exactly to look like the stock ones. even if it's over 2+ mph, that shouldn't be approved.
 
hey ErikJeanna, i like your install! that's just too much work for me. LOL. why don't you fiberglass the speakers instead? so you won't get any gaps in between the wood and the walls? also, did you install the overhead screen? i plan to do it also but still researching of how to take apart the headliner and where to wire and stuff.
 
trd_style said:
hey ErikJeanna, i like your install! that's just too much work for me. LOL. why don't you fiberglass the speakers instead? so you won't get any gaps in between the wood and the walls?
Sounds like a good idea... when are you coming over to teach me how to glass? :headslap:

I would LOVE to have glassed this whole thing, but since it's such a major project and I've never done it before... figure I'd stick with what I know.

trd_style said:
also, did you install the overhead screen? i plan to do it also but still researching of how to take apart the headliner and where to wire and stuff.
Yeah... I did it myself. TRULY myself. It would have been much easier to have someone there to at least hold the damn thing in place while I tried to measure it's center, drill holes, screw it in place, etc. But, it all ended up working out fine. Amazing what you can do with your shoulder or your chin as placeholders.

Headliner is easy. If you have a sunroof/moonroof, just pull off the trim piece (it's like a ring around the opening). Once you do that, you can access the headliner by pulling it down. For wiring, you just take off the floor pieces near the door. This will allow access to the B-pillar (seatbelt part). You just unsnap that off and run your power wiring down the driver side and your RCA's down the passenger side to avoid noise. Put it all back in reverse.

If you have anymore questions, feel free to PM/email me.
 
ErikJeanna said:
Sounds like a good idea... when are you coming over to teach me how to glass? :headslap:

I would LOVE to have glassed this whole thing, but since it's such a major project and I've never done it before... figure I'd stick with what I know.


Yeah... I did it myself. TRULY myself. It would have been much easier to have someone there to at least hold the damn thing in place while I tried to measure it's center, drill holes, screw it in place, etc. But, it all ended up working out fine. Amazing what you can do with your shoulder or your chin as placeholders.

Headliner is easy. If you have a sunroof/moonroof, just pull off the trim piece (it's like a ring around the opening). Once you do that, you can access the headliner by pulling it down. For wiring, you just take off the floor pieces near the door. This will allow access to the B-pillar (seatbelt part). You just unsnap that off and run your power wiring down the driver side and your RCA's down the passenger side to avoid noise. Put it all back in reverse.

If you have anymore questions, feel free to PM/email me.

truthfully, i never fiberglass before. i only used bodyfiller. which is plastic stuff. similar process but a little more work. i found this website that shows you how to fiberglass. pretty neat too! http://web.njit.edu/~cas1383/proj/main/

i'm trying to find a way to fiberglass a screen right on the buttons for the sunroof and maplight. so that's why i asked how to take out the headliners. i'll see if i could work with it and relocate my buttons for my sunroof somehow. since i'm kinda tired of my 4runner doesn't have ENOUGH bright lights for the interior.

has anyone have problems with their dome light not being bright enough? i added 2 white LEDs and it still isn't as bright as i thought it would be. i'm planning to do a WHOLE LED project on the dome light, i'm soo pissed of it since... along time ago. LOL.
 
trd_style said:
has anyone have problems with their dome light not being bright enough? i added 2 white LEDs and it still isn't as bright as i thought it would be.
I went this route and they sucked. The color was right, but you couldn't see squat. So, I tossed the bulbs and put my stock ones back in. They need to come out with a really nice HID system for the interior. This seems to be superior to regular bulbs and LED's.
 
UPDATE!!!

I dedicated several hours today to carpeting the boxes... they turned out great!!! BTW - the black dot on the one on the left is spray paint. I had already carpeted it, and was screwing on the shackle when I tilted it forward to get to the back of the shackle... when all of a sudden I hear this "hissss" sound. Turned out when I tilted it forward, it contacted the can of black spray paint. It was just my luck that the nozzle was pointing RIGHT SQUARE at the box. Of all the luck... I was so pissed!!! I got about 60% of it up, but it's still definately noticeable. Next step is to carpet the false floor then wire it up. That should be done by Memorial Day weekend... we'll see how that goes.

Well, onto the pics... enjoy!

BoxBuild_57.jpg


BoxBuild_58.jpg


BoxBuild_61.jpg


BoxBuild_62.jpg


BoxBuild_63.jpg


BoxBuild_65.jpg
 
Well, I had another productive day working on the box... got about 7 hours in today. I finished with the build and the speakers are now INSTALLED!!! Woo hoo... I still have to wire everything up, but hopefully I can do that on Sunday. Well, here are the photos of it actually finished looking:

This bolt attaches through the box with a rubber gasket and a washer where the tigh-downs used to go. The gasket should keep an air-tight seal.
BoxBuild_67.jpg


This goes where the cargo canopy cover went... carpeted to match since you can see like 1/2" of it
BoxBuild_68.jpg


Another angle
BoxBuild_69.jpg


The screw that threads into the existing hole of the canopy
BoxBuild_71.jpg


BoxBuild_74.jpg


BoxBuild_73.jpg


BoxBuild_75.jpg


BoxBuild_76.jpg
 

Members online

Forum statistics

Threads
278,307
Messages
3,554,053
Members
248,016
Latest member
Advally Service

Trending content

Back
Top