4D Build Thread

Scratch and dent

New member
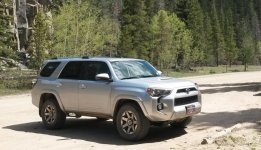
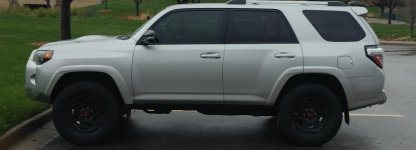
History of 4D.

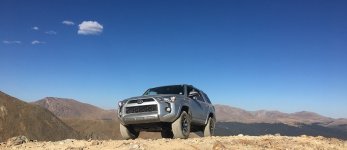
Trail edition with the rear locker.

Bought her brand new from the dealership. First vehicle I have purchased new.
 

Attachments

  • 20170603_145227 - Copy.jpg
    20170603_145227 - Copy.jpg
    89.1 KB · Views: 407
Last edited:
Register to hide this ad
List of modifications thus far:

-Storage compartment extension
-Entune stereo lockout override
-Brake light flasher (to prevent being rear ended, again)
-Instrument auto dimmer (Chinese edition)
-Tint -- 30% 3M Premium on front two windows only
my 2014 4runner Tint, thoughts and advice
-Front Daystar top hat spacers (Removed after I realized what a huge mistake it was)
-Front OME springs on stock shock absorber (strut assembly)
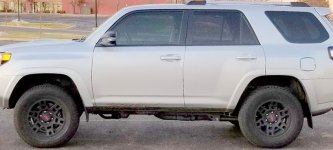
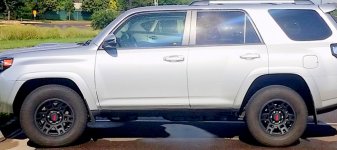
-Black TRD rims
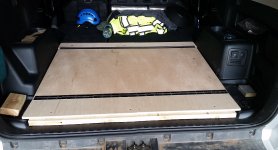
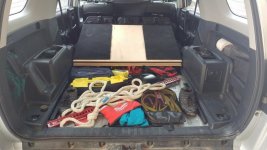
-Rear storage/leveling floor
-Front splash gaurds
Upgraded my inner fender splash shields
-285 70 R17 Bridgstone Dueler Revo 3
 
Last edited:
Storage compartment extension

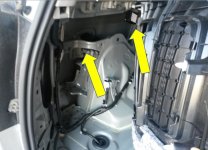
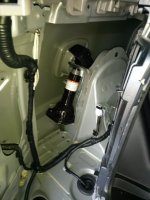
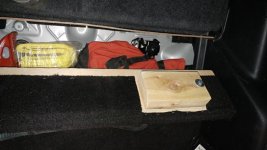
First modification I did was chop a cross brace out of the rear storage compartment. This allowed me to stuff more things way back there. I also relocated a relay box.

I used a compact hacksaw and cut through the spot welds. Filed all the sharp edges.
 

Attachments

  • Capture.JPG
    Capture.JPG
    77.5 KB · Views: 326
  • 20170818_160450.jpg
    20170818_160450.jpg
    111.7 KB · Views: 334
Last edited:
Curious what kind of stuff you are storing in the jack location

I have a warm insulated jacket, rain jacket, snow pants, some basic clothing, ratchet straps, first aid kit, and a bunch of other small stuff.

The area I was able to gain access to by removing the cross member allowed me to fit the jackets, pants and few other things. I don't store anything heavy back there as it could dent the outside body wall above the wheel well.
 
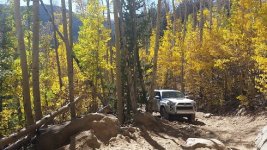
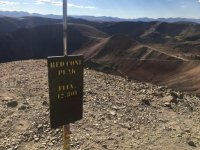
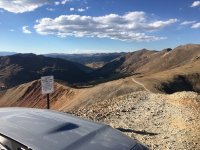
Redcone Pass

This was a great trail that was about as far as I would push my 4runner without any modifications or airing the tires down.

The downhill only part of this trail was the best! Not for the faint of heart.
 

Attachments

  • 20180915_145406.jpg
    20180915_145406.jpg
    112.6 KB · Views: 390
  • IMG_4330.jpg
    IMG_4330.jpg
    63.3 KB · Views: 407
  • IMG_4406.JPG
    IMG_4406.JPG
    136.6 KB · Views: 394
  • IMG_4393.JPG
    IMG_4393.JPG
    88.3 KB · Views: 393
Last edited:
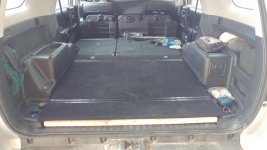
Leveling the rear cargo area and gaining some storage space

This the first generation of this project. I would eventually like to build a plate aluminum version. But a wood version is what this is and it works fantastic.

Bought everything at home depot and Lowes.
5/8” fancy plywood
2 Piano hinges
Black home depot utility carpet
Long metric bolts (to replace the cargo D ring bolts)

I do not own a table saw so all the cuts were done at Lowes with their fancy vertical table saw (Love that thing)
I used 5/8” plywood held together with piano hinges. I pre drilled all the screw holes for the hinges, laid down the carpet and screwed the hinges on top.
To attach it all to the truck, I utilized the existing cargo tie down attachment points. I shimmed it up with an additional strip of plywood and rough cut 2X4 pieces. I spent a considerable amount of time trying different combination until I got pretty close to level with the back seats when they were down. The back seats are not completely level from one side of the car to the other so I had to compromise.

My next additions:
Putting a latch somewhere to hold it closed when there is nothing on top of it.
Fabricating a divider between the back seats and the storage area. Right now, it is a thin flimsy piece of wood backing. It will eventually be aluminum.
 

Attachments

  • Attach.jpg
    Attach.jpg
    56.2 KB · Views: 335
  • no carpet.jpg
    no carpet.jpg
    124.6 KB · Views: 339
  • inside.jpg
    inside.jpg
    55.4 KB · Views: 340
  • almst done.jpg
    almst done.jpg
    50.2 KB · Views: 327
Last edited:
Front OME Springs on stock shock absorbers

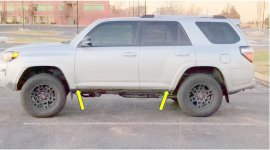
The goal of all this lifting business was to try and level the front end similar to the rear. Why you ask would I spend hundreds of dollars to just make it level? Simple, I am crazy. But I feel less crazy when I see so many people lifting their vehicles 4" with the same tire size. If you look at any thoroughbred off road machine, you notice that it is as low to the ground as possible with the biggest tires within reason. So basically, lifting is just for show, just like rims, bumpers, lights, and all the other junk we bolt to our rigs.

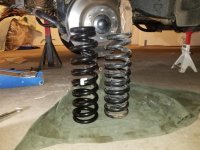
I originally installed some top hat spacers in the front and quickly regretted it because of the CV axle binding-top out and the teeth clenching spring bottom out. The silver lining was I got to drive around and feel the suspension lifted a little with the stock shock absorbers. With the spacer, it felt like it stiffened the suspension up slightly. Which worked out great because I felt the front suspension was softer than the rear. So this setup was top hat spacers, stock springs, stock shock absorbers.
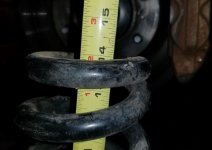
I looked into Dobinson springs and they had what I was looking for. A front spring with similar rate as my stock springs, but a little longer (to give me the slight lift I wanted). But Dobinson does not have a strong presence here in the states yet, so I looked at their Aussie neighbor Old Man Emu. They have a similar spring, and Slee Offroad, right up the street from me stocks them in their store! This was a no brainer. Slee is an excellent company and have been around for a while.

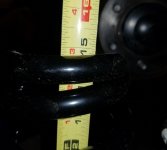
So I yanked those spacers off and installed the OME 2883 springs on my stock shock absorbers. I found a cool trick online for removing a spring from a coilover without a compressor. Just put a jack stand under the frame caddy corner to the wheel you are working on, jack up the suspension where you want to remove the spring, take the wheel off, loosen the three bolts at the top just a bit, then jack up the suspension until you see the weight come off the bolts. Then support frame under the wheel you are working on with another jack stand and slowly lower the lift. You will probably need to loosen the lower control arm (LCA) bolts to get them to swing open far enough. Look up some videos or pictures and it will explain it far better.

The stock measurements (no lift) at the running boards:
FP 18-1/8"
FD 19-1/4"
RP 19-1/8"
RD 19"

Then with my OME 2883 springs installed:
FP 19-1/2"
FD 19-1/2"
RP 19-1/4"
RD 19-1/8"
 

Attachments

  • Capture.jpg
    Capture.jpg
    54.9 KB · Views: 317
  • ba (1).jpg
    ba (1).jpg
    113.5 KB · Views: 321
  • ba (2).jpg
    ba (2).jpg
    112.9 KB · Views: 320
  • no (2).jpg
    no (2).jpg
    78.8 KB · Views: 314
  • no (3).jpg
    no (3).jpg
    42.5 KB · Views: 308
  • no (1).jpg
    no (1).jpg
    136.4 KB · Views: 320
Last edited:
285 75 R17 Bridgestone Dueler Revo 3

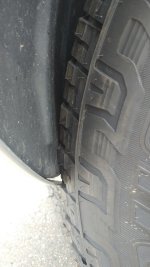
Just go some new 285 75 R17 Bridgestone Dueler Revo 3. Rubs on the front fender when reversing. Looks much better than than stock Dunlops. Got 70k out of the factory Dunlops down to the wear lines on three of the 4 tires.
 

Attachments

  • 0503211514.jpg
    0503211514.jpg
    56 KB · Views: 205
  • smlly.jpg
    smlly.jpg
    132.1 KB · Views: 200
Last edited:
Looks good! I'm similar to you and like to maintain smaller lifts on my 4Runner and Jeep. I lifted the 4Runner out of convenience since I wanted to replace the front shocks anyways. Plus the CV axles were almost reversed when stock. Now they sit just a tad the other way.

Looks like you're have rubbing though? How bad is it? Do you notice much of a difference with the larger tires in mileage?
 
Looks good! I'm similar to you and like to maintain smaller lifts on my 4Runner and Jeep. I lifted the 4Runner out of convenience since I wanted to replace the front shocks anyways. Plus the CV axles were almost reversed when stock. Now they sit just a tad the other way.

Looks like you're have rubbing though? How bad is it? Do you notice much of a difference with the larger tires in mileage?

The rubbing was on the front driver wheel well. The rubbing only happens when I am backing up, wheels cranked to the left, and on the brakes to stop before putting it in drive to move forward.
I had the alignment shop push my caster forward as much as possible since I was getting a little bit of rubbing on body mount when braking hard, turning, with the stock tires. I now get very rarely a small rub on the body mount with the bigger tires while hard braking and turning, but I get the front rub at low speed (which feels better to me).

In the 2 years that it has been rubbing, there is no visible damage or loose pieces flapping around. I just swapped my tires for a more aggressive tire pattern (Cooper Discoverer Rugged Terrain), which rub also, so time will tell if I need to trim.

I think my gas mileage took a 1-2 mpg hit. Really hard to know. I track my gas mileage every week, and it varies wildly. With my 285 tires I get anything from 22 mpg to 17 mpg. Variables are driving style (lead foot vs hyper mile), temperature, distance, driving conditions, etc. My factory Panasonic battery is on it's way out, and I have notice a hit with gas mileage. I might save money in gas in the long run if I just buck up and get a new battery! But I can be cheap bastard and will continue nurse this battery as long as possible.
 
Last edited:

Members online

Forum statistics

Threads
278,304
Messages
3,554,041
Members
248,016
Latest member
Advally Service

Trending content

Back
Top