AIC-100i Installation

slowginjoe

New member
As promised, here's some pictures and a write-up on my VAIS ipod interface install.

Tools that would be helpful:

- Phillips screw driver.
- 10mm socket with rachet and extension
- Flashlight
- Small flathead screwdriver to remove connectors from the dash parts when removing the dash
- Four 4x1/4" Pan Head Tapping Screws
- Drill and small drill bit for pilot holes.

It's really a simple task, but I went overboard on the pictures and details just in case. The whole process from start to finish took about one hour once I figured out where to mount the unit.

I chose this location because it seemed to be the best choice given the relatively short cables provided, it is out of sight for daily use, and it's easily accessible to plug in another auxilliary audio input.

*Before starting, it'd be helpful to read over this entire write-up first, and put the aic unit up against the mounting location you so get an idea of where it's going once in place.

First, remove the dash so you can access the back of your nav unit. Here's a great write-up on how to do it, so I don't need to write about that:

http://www.castulucci.com/projects/carpc/oemnaviaccess/

Once you have access to the back of the nav unit, remove the stock connector and plug in the VAIS Y-cable, then plug the stock connector into the open end of the VAIS Y-cable. (sorry, no pic of this, see VAIS install guide.)

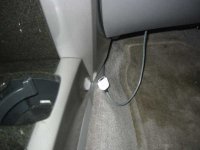
Route this cable down the center of the column toward the right side until it comes out on the side as shown in this pic:
 

Attachments
  • vais01.jpg
    vais01.jpg
    19.8 KB · Views: 742
Last edited:
Register to hide this ad
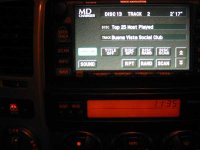
*Before going further, now may be a good time to hook up the aic and make sure it works before you do the full install. It won't hurt anything by turning on the ignition to 'acc' with the dash disconnected. If it doesn't show text in 'cd-changer mode', try reprogramming it to 'md-changer mode', and vice-versa. make sure the 'Title On' button is selected on the screen to be able to see text.

Okay.

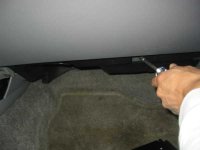
Now it's time to mount the AIC unit. Look underneath the glovebox and you will see a black panel. Take off the one screw in the front and grab a hold of the front edge of the panel and pull it downward. There are three pegs along the top of the panel that will pop out. Don't worry, they're not that fragile.
 

Attachments

  • vais02.jpg
    vais02.jpg
    13.1 KB · Views: 734
Last edited:
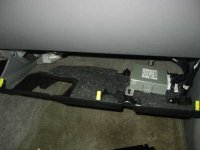
You can see the three yellow pegs here. They will give and the panel will come out with a little tug.
 

Attachments

  • vais04.jpg
    vais04.jpg
    17.7 KB · Views: 727
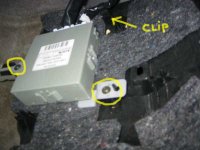
The little box attached to the inside of the panel is the computer for the 4 wheel drive. We don't want to disconnect the cables to this box, so remove the 2 screws and pull off the clip holding the cable to free this unit from the panel.
 

Attachments

  • vais05.jpg
    vais05.jpg
    23.3 KB · Views: 722
Last edited:
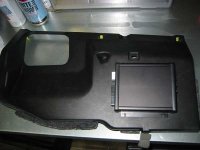
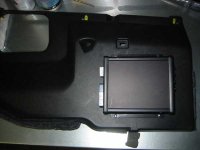
Now that you have the panel free, lay it somewhere and put the AIC unit on top of the side of the panel that normally faces down towards the floor. (or the outside of the panel). The picture shows where I put it. About the middle of the flat area is good. Too close to the right and your audio cable will hit the right rocker panel when it's under the dash. Too close to the left and it'll be right by the heater vent to the legs, why risk making the AIC hotter than it needs to be? Notice the plugs of the control cables face left, and the audio inputs face right. This positioning will make the most out of the short cables for installation in this location.
 

Attachments

  • vais06.jpg
    vais06.jpg
    19.3 KB · Views: 714
Last edited:
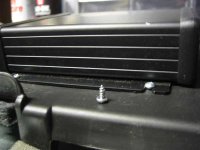
Once you think it's in a good spot, mark the 4 holes where the unit allows for screws. Drill pilot holes and install screws. The particular ones I used were 4x1/4" Pan Head Philips Tapping Screws. It's not necessary to go longer than 1/4" as they'll poke out the back of the panel and maybe interfere with the re-mounting of the 4 wheel drive computer.
 

Attachments

  • vais07.jpg
    vais07.jpg
    15.8 KB · Views: 712
Attach the 'loop' cable that connects one side of the aic unit to the ipod audio input.

Now's a good time to reconnect the 4x4 computer to the inside of the panel.

Open the glovebox and run the ipod interface cable down behind the glovebox (where you'll see other cables) until it comes out the bottom where the panel is supposed to be.

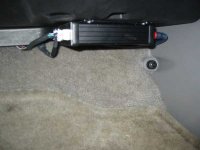
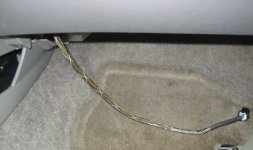
Now slide the panel roughly in place and connect both cables, one from the headunit, and the other from the ipod cable in the glovebox. Neatly tuck all 3 cables behind the panel as you put the panel back in place, aligning the back of the panel first and then snapping the 3 yellow pegs in place. I actually used a couple zip ties to control the 3 cables and have them come out under the panel right behind the aic unit. Reinstall screw on the front of the panel.

Now you can connect your ipod throught the cable in the glovebox and make sure everything still works. If it does, great. Now you can reassemble the dash by reversing the directions in the link in step one.
 

Attachments

  • vais09.jpg
    vais09.jpg
    18 KB · Views: 704
Last edited:
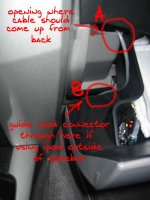
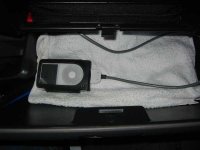
The cable should not get pinched behind the glovebox, there is an opening back there even when the glovebox is closed. Look at it and you'll see on the left side where there's a hole. 'A' in picture.

If the ipod is to be used outside the glovebox, the glovebox can still close fully, with the cable coming out the bottom of the door. Take a look at the inside of the door and you'll see how the cable can snake along the left side where there's an opening that comes out the bottom. 'B' in picture. (If you're mounting your ipod on the dash or something, and don't plan on ever keeping the ipod in the glovebox while in use, then you probably don't even need to route this wire into the glovebox. Route it under the glovebox from the headunit instead.)
 

Attachments

  • vais11.jpg
    vais11.jpg
    38.1 KB · Views: 709
Last edited:
AlexJet said:
Cool set-up. Why you didn't put the block inside of the black panel under the glove box?

There is no room inside the panel. It looks deceptively roomy inside that panel, but the panel is actually pretty form fitting to the curvature of the dash under there. Mounting it outside also allows easy connect and disconnect of other external audio input to the aic's aux-in port, for example the audio out from your laptop or portable dvd player to watch movies and hear the soundtrack out of your jbl surround sound system!
 
Last edited:

Members online

No members online now.

Forum statistics

Threads
278,306
Messages
3,554,045
Members
248,016
Latest member
Advally Service

Trending content

Back
Top