Ok, so this is probably pretty basic to the rest of you, but for me it was a something different.
I'm not going to rehash the other great airlift install posts on the forum; just tell you what I came across.
First, I swapped out the supplied hose with some vacuum tubing and real hose clamps. 12' from the parts store covered it. Bring your nipple valve to make sure it's a tight fit. That's what she said.
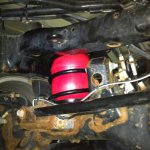
Anyway, the biggest lesson for me was to install the hose and clamp onto the air bag BEFORE you squeeze it into the coil. Tightening the clamp inside the coil is almost impossible.
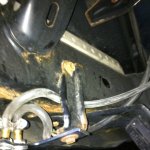
Going off of CJ3Flyr's advice, I ran separate hoses for each bag to adjust for uneven loads.
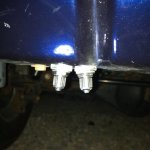
I installed the valves on the bottom lip of the bumper. Easy to get to, but out of the way and barely visible.
Other than that, it took me three hours. Mostly because I was already tired and it was dark. If I had to do it over, an hour start to finish.
See the attached pics.
Cheers.
I'm not going to rehash the other great airlift install posts on the forum; just tell you what I came across.
First, I swapped out the supplied hose with some vacuum tubing and real hose clamps. 12' from the parts store covered it. Bring your nipple valve to make sure it's a tight fit. That's what she said.
Anyway, the biggest lesson for me was to install the hose and clamp onto the air bag BEFORE you squeeze it into the coil. Tightening the clamp inside the coil is almost impossible.
Going off of CJ3Flyr's advice, I ran separate hoses for each bag to adjust for uneven loads.
I installed the valves on the bottom lip of the bumper. Easy to get to, but out of the way and barely visible.
Other than that, it took me three hours. Mostly because I was already tired and it was dark. If I had to do it over, an hour start to finish.
See the attached pics.
Cheers.
Attachments
Last edited: