Aussie Locker install on 99 2WD SR5

octanejunkie

Elite Member
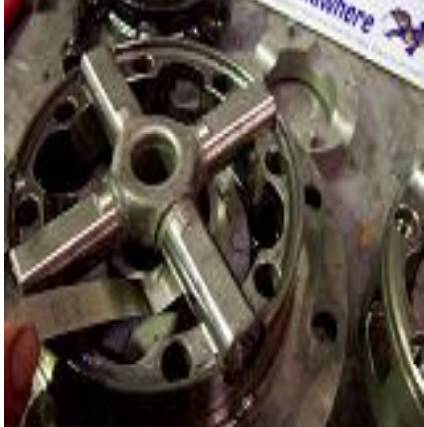
Did a bunch of accelerated research thanks to the interwebs and decided to purchase a lunchbox locker, specifically Aussie Locker XP-24930, from Northridge4x4 for $299 delivered

xd-24930-AUS.png


Factors for making this decision
1. winter driving in the mountains between CA and NV
2. light wheeling/overland adventures
3. it's cool to spool

Why a lunchbox locker and not a real diff?
1. expense, $300 is easier to swallow than 3x that
2. virtually no downtime, installs in 1 day
3. no special tools or "expertise" needed to re-setup a rear end/gear set
4. uses my existing 3rd member setup & specs and just replaces spider gears
5. it's not a hard core wheeler, it's my DD that sees the occasional need to lock the rear wheels

Why not an eLocker, dude?
1. cost, if I'm lucky a used one starts at $500
2. cost, potential issues with a used rear end could end up costing much more than the price of acquisition
3. it's manually operated, flip a switch, then it's on or off
4. use it or lose it, I've read that without use the mechanism (magnets) often fail
5. no warranty

Why the Aussie Locker and not another brand?
1. Research, anyone that actually owns an Aussie locker raves about it
2. Reputation, Torque-Masters stands behind their product with a 2-year warranty with no limitation on tire size or horsepower
3. 100% US made under strict and consistent conditions in an ISO certified facility
4. Quality, each unit is tested to tolerance and functionality
5. Materials, the aussie is made with 9310 hardened alloy steel which they claim is harder than any aftermarket axle shaft
6. Price, it is price comparable with all other lockers of it's class that don't have all the same features or warranty

I'll publish my research and reference threads shortly, and I'll have the locker in about 4 days, so the install posts will be shortly pending as I plan to throw it in next weekend, weather permitting.
 
Last edited:
Register to hide this ad
Research, still the best game in town

I started collecting installation information as part of my pre-purchase review process

I printed out all PDFs and will have a laptop nearby for additional reference as I do the work

Many on YT and some here refer to Zuk as da man, here is ZUK's Aussie Locker page
Toyota aussie locker install

I found another page right here on T4R.org by [MENTION=49657]gannonrt[/MENTION] from 2012
http://www.toyota-4runner.org/3rd-gen-t4rs/112152-aussie-locker-rear-differential-installation-write-up.html
This seems to the the one that outlines the procedure best, specific to my vehicle/rear end, so I will follow it and use all the other sources as corroborating reference

Torque-Masters themselves have a manual, obviously
http://www.aussielocker.com/downloads/aussielocker_installation_manual.pdf

They also have a page specific to the Toyota V6 installation
https://www.torqmasters.com/sites/default/files/product_manuals/XD-24930%20-%20Supplement%20-%20Toyota%20V6.pdf

One thing of note in the Torque-Masters Toyota V6 instructions that differs from all others worth noting is that they recommend not separating the carrier bearing adjuster from the carrier bearing cap and rather removing them as an assembly - this takes the guess work out of carrier bearing pre load adjustment on reinstall, but I will take all measurements as if I were disassembling these in case reassembling the caps and adjusters as a uni proves to be problematic. The two other methods of removing the caps and adjusters involve marking the relationship of the adjuster and the cap/housing and then either 1) unscrewing and counting turns or 2) measuring the depth of the adjuster to the cap/housing

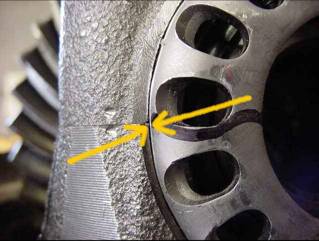
Another note worth mentioning, [MENTION=49657]gannonrt[/MENTION] deviated from all other instructions regarding removing the ring gear from the carrier and DID NOT DO SO to save a step. The ring gear has locking tabs to keep it's 10 bolts "staked" in place, removing the ring gear destroys these tabs. I will evaluate upon disassembly and I may opt to remove the ring gear so I can properly measure the locker cam gear gap. If I don't have those tabs then nothing to stop me, and probably nothing some locktite can't fix.

Regarding the cam gear gap: the wider the gap the quieter the operation of the locker, more slip too. The instructions say not to exceed 0.145"-0.165" but that gap can be as wide as 0.175" (0.180" maximal per email from Torque-Masters)
Torque-Masters also recommends 75-140W Hypoid gear oil if possible, but I will probably remain with 80-90W for now

And here is their manual for everyday locker living
https://www.torqmasters.com/sites/default/files/product_manuals/2014__Operation%20Guide.pdf

I knew I needed a rear diff housing gasket, so I got one from the local parts store, amazon link for show:
Fel-Pro RDS55431

Thanks to [MENTION=71326]Buckaroo[/MENTION] for coming through with FSM pages and torque specs
 

Attachments

Last edited:
Well, Saturday was install day, so I made a list of all the steps and an excel spreadsheet of all the fastener sizes and torque specs so I would be prepared and I annotated it during the work as a reference to reinstall/reverse the process.

Here is how it went, sorry no pics

Applied penetrating oil night before install on all bolts/nuts to be opened

Parked and chocked front tires

Put car in neutral and pulled negative battery cable

Removed brake cables from brake drums
-put the pins and retaining clips back in actuator on back of drums

Cleaned rear diff fill and drain plugs with wire brush and brake cleaner
Tested removal of rear diff fill plug before proceeding

Broke rear wheel lug nuts
Jacked up rear end, lowered onto jack stands and removed rear wheels and brake drums

Loosened the rear brake lines (10mm flare wrench)

Broke Axle flange bolts (14 mm)
-top rear is tricky with the brake line location, but a swivel socket clears it

Removed Axles

Broke Drive Shaft nuts (14 mm)
Suspended Drive Shaft from cross member with bailing wire

Opened 3rd member nuts and removed with lock washers (12 mm)

Removed 3rd member
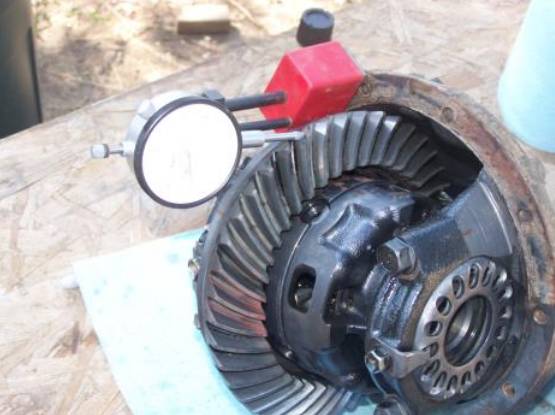
Measured gear lash in several spots on ring gear using a dial caliper and magnetic base
0.0011 noted in all locations

Marked Carrier Bearing Caps with punch
Opened Carrier Bearing Caps (17 mm)
Removed Bearing Caps with Adjuster with bolts, locks and races intact

Let carrier drip in a pan
Let housing drain upside down in a another pan

Split carrier in half, removing 8 carrier bolts (14 mm)
Disassembled carrier internals, marked/noted orientation of internals
Marked drive gears w sharpie (ring & pinion, respectively)
Marked thrust washers (ring & pinion, respectively)

Installed Aussie locker per instructions
-did not use spacers that came with it while taking measurements

Assembled locker in carrier with pins and springs
Reassembled carrier halves and tightened with 4 bolts
Took measurements on 2 sides looking for clearances stated (0.145” to 0.165”)

LARGEST CLEARANCE WAS 0.138” - TOO TIGHT

Measured thrust washers
-Pinion thrust washer 0.0375”
-Ring Gear thrust washer 0.0380”

I’m gonna need some thinner thrust washers ABORT ABORT

0.030 Thrust washers are available and will open the clearance/gap to 0.154

Reassembled carrier with original internals in original orientation

Reinstalled carrier into housing
-had to break apart one of the adjuster/race cup bearing cap assemblies
-marked adjuster cap in relation to carrier cap split (per Zuk instructions)

Tightened down caps in series to allow reinstall/adjustment of race and lash
Measured gear lash post install, same 0.0011 noted in several locations

Torqued bearing caps and measured lash again, same 0.0011

Cleaned gasket material off rear differential housing
-used a razorblades being careful not to gouge the surface

Mopped out remaining old oil from housing and any bits of gasket that may have fallen in

Installed new gasket, it was a tight fit, worked it down over the studs slowly and evenly as not to rip the gasket

Reinstalled 3rd member into housing
-which doesn’t require as much effort as one would suspect

Reassembled in reverse order and torqued everything back to spec

The biggest PITA was pumping the gear oil back into the rear end!

EDIT: ordered 0.030 Thrust Washers from Torq-Masters ($26 shipped) and will re-attempt the install in a few weeks
 
Last edited:
Awesome Write up!!
I want to do this as well. Glad to see that its not such a difficult task to do.
 
Awesome Write up!!
I want to do this as well. Glad to see that its not such a difficult task to do.

It's not difficult, but it is time consuming and kinda detail oriented. The stock thrust washers from Toyota are 0.042; mine measured out 0.038 and 0.0375 - which means they wore over 255K miles.

The clearance, or gap, between the cam gears is critical to the operation and manners of the locker. The tighter the gap the more prone it is to locking and staying locked; not great for a mostly-street driven vehicle.

The other factor is carrier housing wear, and there is no accounting for which wore more to anticipate which thickness washer you need. The next step Torq-Masters offers is 0.010, the is no twenty-thou for some reason.

Depending on your mileage, I would almost consider just ordering the 0.030 thrust washers (if you can return them unused if not needed) so you don't go through what I did - having to revert everything back to stock.

FWIW, the thread by [MENTION=49657]gannonrt[/MENTION] is great for visuals, but it lacks a few things (torque specs) but I mainly followed the instructions from Torq-Masters to the letter, with one exception

I recommend you do a search on here and YT for "Aussie Locker" and read it all like I did
 
Last edited:
LARGEST CLEARANCE WAS 0.138” - TOO TIGHT

Measured thrust washers
-Pinion thrust washer 0.0375”
-Ring Gear thrust washer 0.0380”

I’m gonna need some thinner thrust washers ABORT ABORT

0.030 Thrust washers are available and will open the clearance/gap to 0.154


I'm impressed. Most guys dropping in lunchbox lockers just put them in and call it a day. Way to go breaking out the caliper and checking all the numbers where good. Nice catch and I'm sure it will help the locker behave better.
 
I'm impressed. Most guys dropping in lunchbox lockers just put them in and call it a day. Way to go breaking out the caliper and checking all the numbers where good. Nice catch and I'm sure it will help the locker behave better.

I don't do anything half-assed, I throw the whole ass in whether the recipe calls for it or not :decision:

My old man was a tool and die designer and raised me right, plus I inherited all his tools, many of which I replaced with digital versions
 
I don't do anything half-assed, I throw the whole ass in whether the recipe calls for it or not :decision:

My old man was a tool and die designer and raised me right, plus I inherited all his tools, many of which I replaced with digital versions

I'm the same. If your gonna do it do it right, and if your not gonna do it right get the hell out of my way and let me do it. lol

I frame to the 1/16th. Guys on my crew hate me for it. I take the extra few seconds to make it as whole ass as framing can get. We side and trim out all our houses so when it gets to that stage those same haters thanks me cause it makes everything so much easier.
 
I frame to the 1/16th. Guys on my crew hate me for it. I take the extra few seconds to make it as whole ass as framing can get. We side and trim out all our houses so when it gets to that stage those same haters thanks me cause it makes everything so much easier.

I bet you use those little cardboard strips to fur the drywall out flush too *rolls eyes*

But I feel ya on quality work - I don't want to comeback to fix it again or get call backs. Pride in workmanship, especially on your DD, equals reliability and economy (saving money on re-repairs)
 
so what is the purpose of this thingy? how does it lock?

When there is an uneven distribution of torque to the rear wheels (in my case rear only) under load it will lock, and when the load is removed it will unlock. Like an LSD without friction plates but 100% distribution to both wheels (true 50/50) because it locks the axles together.

Powering through a turn will cause the wheels to lock. I've analyzed my driving style and recognize that I typically let off gas in turns for the most part, but I'm sure there will be an adjustment period learning how to drive with it.

Most folks get used to it pretty quick or forget it's there.
 
my rear is making noise at 335k plus. i am looking for a 4:10 but haven't found one yet, which is what is in it now. for a DD, i don't see this thing being for me, although it may be cheaper than a complete used rear.
 
I bet you use those little cardboard strips to fur the drywall out flush too *rolls eyes*
If 7/8" drywall was easily available, I wouldn't have had to do that on a recent project. Matching original (solid wood) wainscoting thickness is fun!

I'm in for driving impressions when you get this one done. I'm still gonna do truetracs though. :)

-Charlie
 
my rear is making noise at 335k plus. i am looking for a 4:10 but haven't found one yet, which is what is in it now. for a DD, i don't see this thing being for me, although it may be cheaper than a complete used rear.
If your rear end is making noise I would service it ASAP before it leaves you stranded or worse. Dropping a lunchbox locker in won't remedy issues with ring and pinion gears or bearing lash.

Good luck with your search!


Sent from my Nexus 5X using Tapatalk
 
I'm in for driving impressions when you get this one done. I'm still gonna do truetracs though.

Me too! Lol
I'm actually a limited slip guy on a budget this time around, so I'm trying this out due to the drop in nature of it. I will post pics next time I crack it open, but for 255K those gears looked pretty darn good. I'd consider myself lucky to get another 100K out of the factory original gears.

If and when I upgrade to 4WD I'd consider going LSD front and back at some convenient interval.

Sent from my Nexus 5X using Tapatalk
 
Lunchbox... NICE!

It's awesome to see something different once in a while. They definitely do take some getting used to though from what I've heard. I've never experienced one myself.

Looking forward to part deux!
 
Great success!

14c0f057abec6dabfc5be48cbbd0d904fef889a8781eee667984089207daf998.jpg


Well, the second time was a charm.

Picking up where this post left off, I repeated the disassembly of my rear axle and pulled the third member again today. It gets easier each time you do it, really.

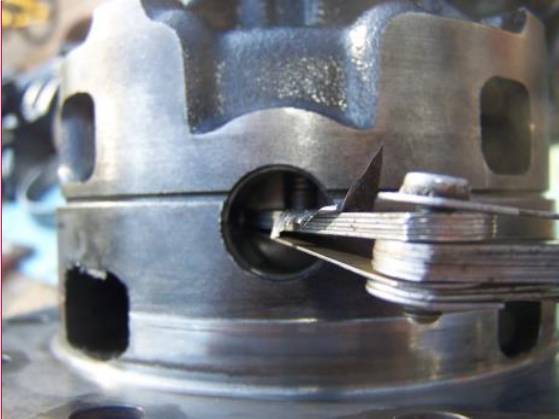
Dropped my new thrust washers behind the axle gears and measured for tolerance - 0.154" BINGO! Now the next measurement was the spacer ring to the cross shaft that the spider gears used to ride on. The tolerance there is supposed to be within 0.006"-0.020" and with my new 0.030" thrust washers I had a comfortable 0.015" measurement here - cousin, we in business!
2b51fe344c06133ae4c3f9f0aaeb7245.jpg

Measuring cross pin to spacer clearance, photo courtesy of Aussie Locker Toyota V6 instructions

Now, here is the secret sauce, the place where I deviated ever so slightly from the Aussie's instructions - I DID NOT REMOVE THE RING GEAR FROM THE CARRIER. After reading Toyota's instruction (boil the ring gear before install) and having to get those ring-gear bolt retainers, I found another way to measure the center clearance rather than using feelers - I used allen wrenches.

be871d51aea05b01e35b3f29235d3bdb.jpg

This is how I did not do it, lol, photo courtesy of Aussie Locker Toyota V6 instructions

Yup, between my buddy and I we had about 200 loose allen wrenches we had accumulated over the years, so I mic'd em till I found 4 (not 2 like aussie says) 0.153 and 0.155 allen wrenches. to use in lieu of feelers. I inserted the allen keys into the carrier, in line with the teeth of the ring gear, through the side holes in the carrier and into that center gap between the cam gears. I got 4 of the 0.153" wrenches in but could only get 2 of the 0.155" wrenches in the gap (180° opposite each other) and not very far - so I called it good at 0.154" and proceeded to assemble the carrier.

I lubed the snot out of all the internals with gear oil and reassembled the carrier. Torqued the bolts, thanks to [MENTION=71326]Buckaroo[/MENTION] for the torque spec sheet, and my buddy with a huge channellock wrench to hold the carrier while I torqued the 8 bolts to spec.

Then we lowered the carrier into the 3rd-member housing with the bearing cap and adjust assemblies still together but I didn't trust 2 halves of a threaded assembly to go together perfectly on 2 opposing sides with the pressure of the bearings pushing outwards against the races - so again I deviated from the instructions; kinda how Zuk shows it done.
d9d723e8ae10ec19cf5d6b57de535f9f.jpg

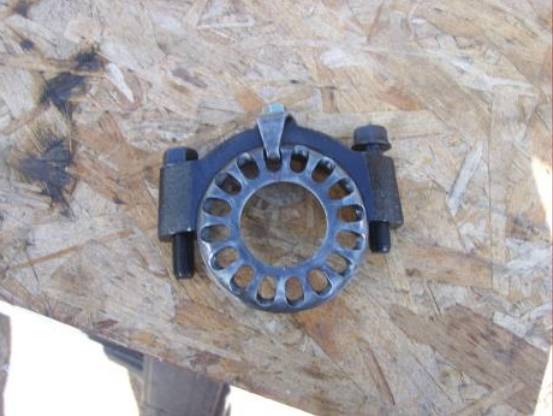
Bearing cap and adjuster assembly left assembled, photo courtesy of Aussie Locker Toyota V6 instructions

I had marked both bearing caps and noted the step between upper half and lower half - barely enough to get a chisel on to separate the two halves when we disassembled it. So I installed the pinion side (the lighter side of the carrier) bearing cap, race and adjuster as a unit with the carrier into the 3rd member by lowering it in while my buddy watched the threads of the adjuster align into the threads in the housing - hard to visualize until you do it. Once we were sure that side was not cross threaded, we tightened the cap screws down hand tight and focused on the ring gear side.
a78c35e2b709b330493f460bee42b1a1.jpg

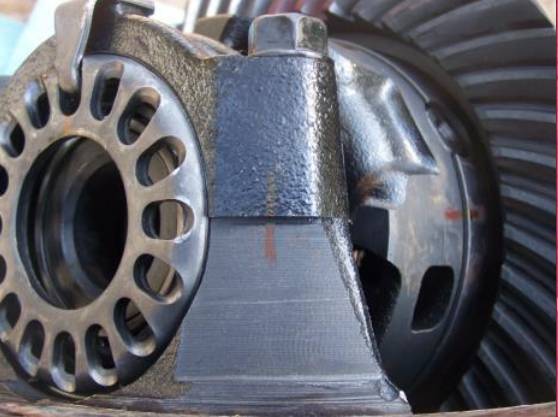
Example of marked cap and and base, I used a punch, photo courtesy of Aussie Locker Toyota V6 instructions

Similar to Zuk, we had marked where the adjuster cap aligned with one of the splits (bearing cap to bearing base) and we disassembled that cap and adjuster.
2b16822db8196355a1e93c1c4a1625ab.jpg

Adjuster cap marked at cap/base split, picture courtesy of ZUK

Lifting up on the ring gear side of the carrier but keeping pressure towards the pinion side race, we were able to get the ring gear race into the carrier base past the threads and fit the cap. We matched the gap and threads on both sides (left and right, or top and bottom) and tightened the cap screws hand tight. We had to tap the race in towards the bearing a few times as it is coned and the weight of the carrier bearing against the race pushes it outward, away from the bearing - it was quite the balancing act and there was no way someone is going to do this alone with out lots of experience or special tooling.

Once we were sure the threads in the bearing cap and base were aligned, I started spinning the adjuster COUNTERCLOCKWISE until I felt it jumping it's lands, this way you won't crossthread it. Turning clockwise until it was mostly in we progressively tightened the bearing cap screws to get the correct preload on the adjuster until we got our mark aligned with the split, and then some. At this point we tightened both caps to 35 foot pounds (what the torque wrench was set to from doing the 8 carrier LH bolts) and measured the ring gear to pinion lash with a dial caliper on a magnetic base. Working the ring gear a full 360° we too 4 measurements that all equalled 0.011" of lash - this is the same measurement we noted both before we disassembled the first time and when we put it back together the first time - so it had to be good, right?
efa0c8c34bc1b39b55f59b07f66baf29.jpg

Measuring gear lash, photo courtesy of Aussie Locker Toyota V6 instructions

Torqued the bearing caps to 63 foot pounds while my buddy held the 3rd member from spinning with those big channellocks from the last chapter and then torqued the adjuster lock screw to 9 foot pounds. Just to be crafty, we actually positioned the adjuster lock against the adjuster ring with no slack on the right side, the counterclockwise side, so there was no possibility that the adjuster would slip over time and allow the lash (0.011") to become greater. Now I was ready to muscle the 3rd member back into the rear end housing.

Last week's gasket was still good so it stayed in place and I hand tightened all the bolts around the 3rd member and reinstalled the drive shaft so we could test the locker function per Aussie's instructions. Long story short, it was good! Bolted everything back up, bled the brakes, torqued the axle flanges, 3rd member, diff drain plug, drive shaft and proceeded to refill the rear diff. This time I used this handy fluid transfer pump and with a 3/8" hose on each side of the pump the axle was filled in like 2 mins (vs 40 mins with a hand pump last time) The interesting thing about refilling the axle (yes I reused the same oil, for now) is that since the locker occupies more internal volume than the spider gears did, the rear end needed a bit less oil to fill it than came out - bonus af.

Torqued the fill plug to 27 foot pounds and reattached the e-brake cables to each wheel. Protip: you can't get a torque wrench and 24mm socket on the fill plug with the e-brake cable taught, so secure the e-brake last.

One more test of the locker with fluid in the diff and a recheck of all the steps and fasteners removed (to make sure we tightened and torqued em all) and we lowered the truck off the jack stands and torqued the lug nuts. Time for a test drive!

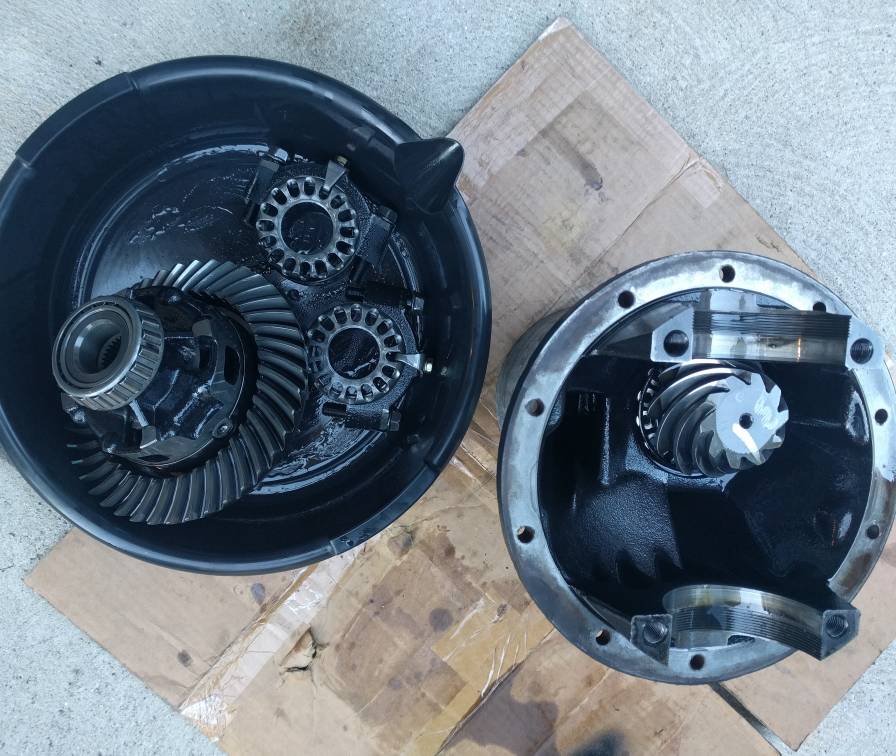
e6fb091e768c79999445b609c79825de.jpg

Third member major components disassembled

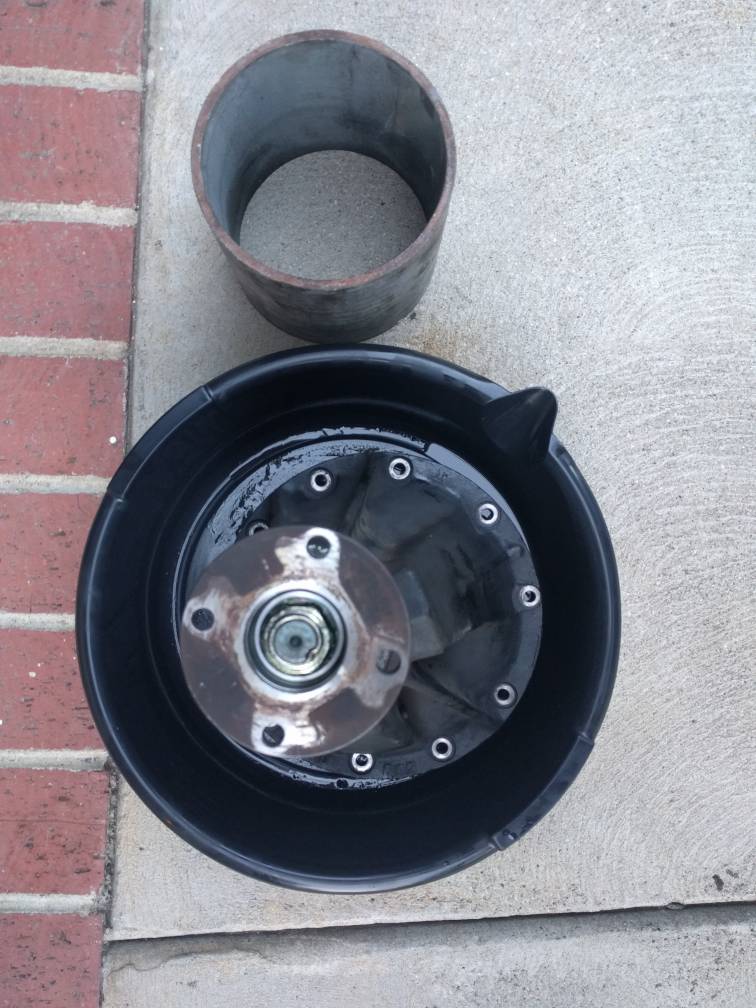
799fc5882a8b189d03b5c1165c1cf044.jpg

Third member housing and pinion with a section of big-ass pipe we used to stand the third member up in in lieu of a coffee can
 
Last edited:
Aussie Locker in my 2WD - first driving impressions

So after the install and a double check of all steps and fasteners fastened, the test drive is next!

My first drive was all about function. I drove around with the windows down and no radio - man, this thing clicks a bunch

Every turn 70° or greater turn you make the locker will click as the axle gears ratchet against the cam gears in both forward and reverse. Get used to this.

If you punch it in the middle of a turn, it will lock up and push out of the turn very slightly about 3/4 into turn and you will likely chirp a tire. It's easy to correct against this ON DRY ROADS, but I've yet to test it otherwise. A word of advice: until you are used to how it behaves when it locks under slip and load, go easy.

If you go into a turn hot, it will lock and feel like you are driving in 4 High - yes the sensation will be communicated through the steering wheel just like 4WD. Letting off the gas, and no OD, will lessen this sensation.

Loading and unloading the drive train, taking you foot off and putting it back on the gas, you will feel it release and engage, respectively. It is not locking, it is camming against itself and you are feeling the teeth engage on the drive side when you get on the gas and disengage on the coast side when you let off the gas. This is easy to get used to, and can be lessened by a softer pedal.

If you floor it off the line, and sometimes while rolling, it will lock, and probably spin one if not both tires. This probably puts a bunch of stress on the transmission and torque converter as they are not designed to launch hard - I advise against this, but I had to try.

The clicking is not very noticeable with the radio on and windows up, and again, this is mostly when turning tighter than 70° either forward or reverse. Torq Masters says using 75-140W gear oil will lessen this but that is not the best oil for subzero temperatures. I am running 80-90W for now and will probably change a different gear oil after the first 500 miles, just for grins and giggles.

I will post more driving impressions when I have more experience with it in different conditions, but I'm pretty sure I will be adjusting my driving style slightly to accommodate the click-turn, and minimize occurrences of unwanted lock.
 

Members online

Forum statistics

Threads
278,309
Messages
3,554,075
Members
248,016
Latest member
Advally Service

Trending content

Back
Top