

Run'n'Gun
New member
I just got my Borla Exhaust today from www.performancecenter.com. It was $844 plus tax shipped free via fedex. I ordered it over the phone cause I am going out of town tonight and wanted to make sure it got here before I left. It was a pretty painless procedure to get it in and aligned correctly. First off it sounds and looks awesome. It is nice and quiet at idle but when you get on the gas it sounds really nice. It is nice and tight sounding, not so hollow like a flowmaster 40 for example. I had a Dodge Dak with the 5.2 V8 with a 40 on it and it was pretty mean. It's hard to expain the difference, but this sounds much different.
First, spray some good oil on the two flanges on the factory exhaust. I use PB Blaster and it works great. Then unbolt the bolts with the springs on them attached to the front of the factory system and set them aside.
<a href="http://photobucket.com" target="_blank"><img src="http://i22.photobucket.com/albums/b316/grahamhebson/BorlaExhaustInstall001.jpg" border="0" alt="Photo Sharing and Video Hosting at Photobucket"></a>
<a href="http://photobucket.com" target="_blank"><img src="http://i22.photobucket.com/albums/b316/grahamhebson/BorlaExhaustInstall002.jpg" border="0" alt="Photo Sharing and Video Hosting at Photobucket"></a>
Second unbolt the rear flange above the rear axle so the whole front section is free and only secured by the rubber hangars.
<a href="http://photobucket.com" target="_blank"><img src="http://i22.photobucket.com/albums/b316/grahamhebson/BorlaExhaustInstall003.jpg" border="0" alt="Photo Sharing and Video Hosting at Photobucket"></a>
Then start removing the 2 sections from the hangars, I had my brother help me it makes it a lot easier with 2 people to hold the can and get it off the hangars. Leave the rubber hangars attached to the vehicle and slide the front section of the new exhaust into those it should fit nice and snug.
Then using the brackets provided by borla put on the rubber hangars they provide as well. Do this first before you bolt the hangars onto the frame behind the rear wheels. I had to drill a little bit out of the hole because it there was still a bit of rubber in there left over from manufacturing. It is kinda hard to get the hangars they give you on the brackets but a little soapy water, a vice, and a rubber mallet worked really well.
<a href="http://photobucket.com" target="_blank"><img src="http://i22.photobucket.com/albums/b316/grahamhebson/BorlaExhaustInstall008.jpg" border="0" alt="Photo Sharing and Video Hosting at Photobucket"></a>
Next slide the right pipe up and over the frame and onto the right side of the new can putting a clamp on first and bolt up the pipe to the hole on the frame. It was threaded on mine and there was no way to put the nut on so a little lock tigh and a good socket were necessary.
After that put on the short pipe right next to the right side pipe so it comes down by the spare and put a clamp on the joint. attach the long pipe to that and bolt up the left tip the same way as the right side, then tighten up the clamps making sure that all the tubes are seated all the way in and voila. A kick ass exhaust, better throttle response, and a lighter wallet cause you want to drive it hard.
<a href="http://photobucket.com" target="_blank"><img src="http://i22.photobucket.com/albums/b316/grahamhebson/BorlaExhaustInstall009.jpg" border="0" alt="Photo Sharing and Video Hosting at Photobucket"></a>
It says to take off the spare in the instructions but I didn't and it wasn't a problem. It took about an hour and fifteen minutes but now that I have done one it should take about half an hour to 45 minutes at most. As far as tools go you'll need a 14mm, 16mm socket and a deep 14mm socket, as well as a torque wrench and a measuring tape the get the spacing right.
First, spray some good oil on the two flanges on the factory exhaust. I use PB Blaster and it works great. Then unbolt the bolts with the springs on them attached to the front of the factory system and set them aside.
<a href="http://photobucket.com" target="_blank"><img src="http://i22.photobucket.com/albums/b316/grahamhebson/BorlaExhaustInstall001.jpg" border="0" alt="Photo Sharing and Video Hosting at Photobucket"></a>
<a href="http://photobucket.com" target="_blank"><img src="http://i22.photobucket.com/albums/b316/grahamhebson/BorlaExhaustInstall002.jpg" border="0" alt="Photo Sharing and Video Hosting at Photobucket"></a>
Second unbolt the rear flange above the rear axle so the whole front section is free and only secured by the rubber hangars.
<a href="http://photobucket.com" target="_blank"><img src="http://i22.photobucket.com/albums/b316/grahamhebson/BorlaExhaustInstall003.jpg" border="0" alt="Photo Sharing and Video Hosting at Photobucket"></a>
Then start removing the 2 sections from the hangars, I had my brother help me it makes it a lot easier with 2 people to hold the can and get it off the hangars. Leave the rubber hangars attached to the vehicle and slide the front section of the new exhaust into those it should fit nice and snug.
Then using the brackets provided by borla put on the rubber hangars they provide as well. Do this first before you bolt the hangars onto the frame behind the rear wheels. I had to drill a little bit out of the hole because it there was still a bit of rubber in there left over from manufacturing. It is kinda hard to get the hangars they give you on the brackets but a little soapy water, a vice, and a rubber mallet worked really well.
<a href="http://photobucket.com" target="_blank"><img src="http://i22.photobucket.com/albums/b316/grahamhebson/BorlaExhaustInstall008.jpg" border="0" alt="Photo Sharing and Video Hosting at Photobucket"></a>
Next slide the right pipe up and over the frame and onto the right side of the new can putting a clamp on first and bolt up the pipe to the hole on the frame. It was threaded on mine and there was no way to put the nut on so a little lock tigh and a good socket were necessary.
After that put on the short pipe right next to the right side pipe so it comes down by the spare and put a clamp on the joint. attach the long pipe to that and bolt up the left tip the same way as the right side, then tighten up the clamps making sure that all the tubes are seated all the way in and voila. A kick ass exhaust, better throttle response, and a lighter wallet cause you want to drive it hard.
<a href="http://photobucket.com" target="_blank"><img src="http://i22.photobucket.com/albums/b316/grahamhebson/BorlaExhaustInstall009.jpg" border="0" alt="Photo Sharing and Video Hosting at Photobucket"></a>
It says to take off the spare in the instructions but I didn't and it wasn't a problem. It took about an hour and fifteen minutes but now that I have done one it should take about half an hour to 45 minutes at most. As far as tools go you'll need a 14mm, 16mm socket and a deep 14mm socket, as well as a torque wrench and a measuring tape the get the spacing right.
 Turns out that sparks toyota only sent me one of the rear hangar assemblies, the left one actually... So the exhuast is on, but post muffler there is nothing there yet...
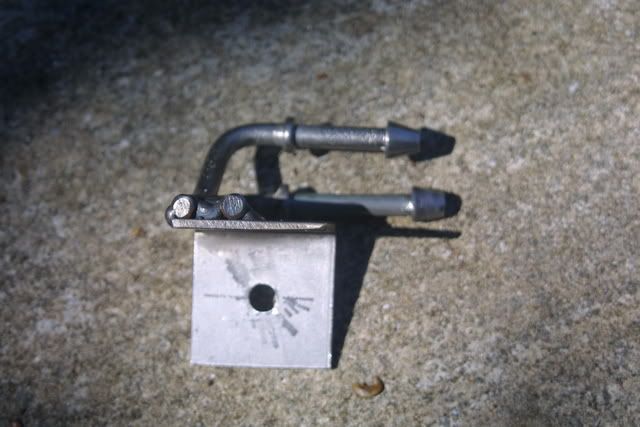

 but whatever, ill have it replaced at my next service (next day or so). Im just curious as to what it is. It connects to the side of the gas tank facing the exhaust (pic to follow). I havent gotten any indicator lights or anything weird.... im gonna try and zip tie it as far away as i can because i have to some shit to do.... have to drive. DO you think that wrappng a few layers of foil around the affected area would be helpful as a temp thing? The white piece in the pic i think sticks to the underside of the truck, there is another down the line closer to the gas tank....


