Building, Driving and Adventuring the MTN4RNR

LED light bar installation Part 1 of 3

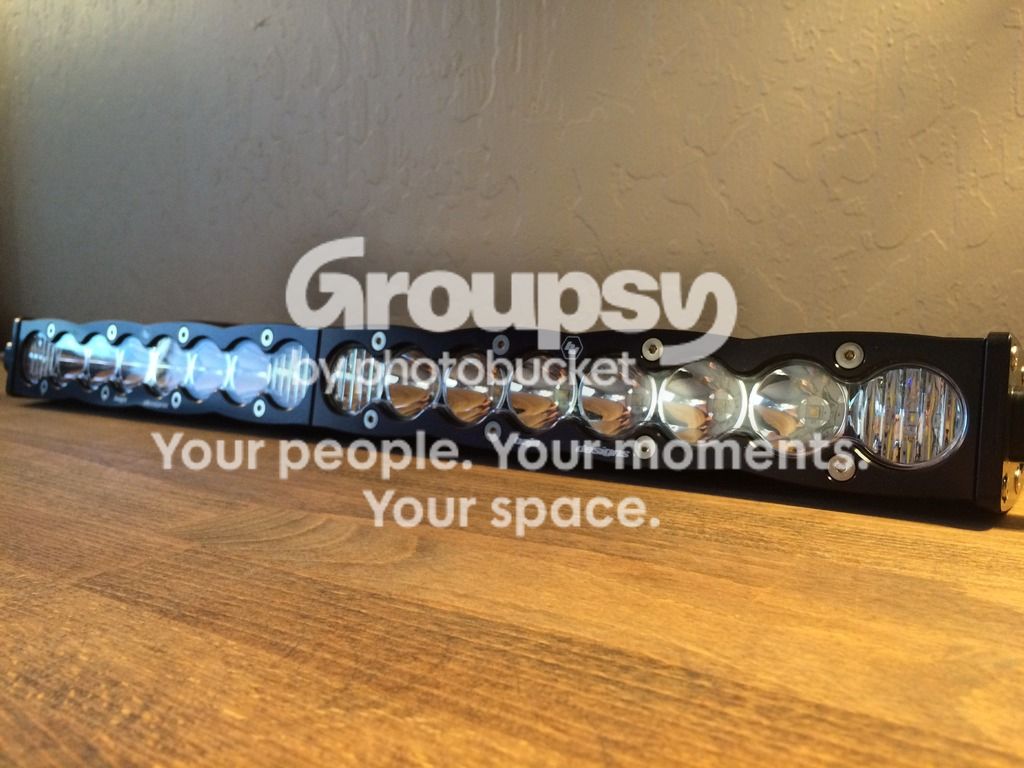
I have been wanting to add some extra fire power to the lighting arsenal of the 4Runner for a while. After the HID install, I found that the stock halogen high beams didn’t really match the low beam output, or color. And I no longer had the function of being able to ‘flash’ my high beams to be able to signal to other drivers because unless the low beams were on, flashing the stock high beams would cause the HID ballasts to flash as well, which is not good for long term reliability. So, aftermarket light bar it was. I decided on the S8 light bar from [MENTION=87816]Baja Designs[/MENTION] because their design is fantastic. Serviceable and exchangeable lenses, great light dispersion with the combo/driving lens, low beam matching 5k light output, and the separately wired amber back-lighting. I wanted a single row, because I wanted to keep it less noticeable. I decided on the upper grille because I wanted to keep it in-line with the headlights, not to block the radiator, and to have the back-lit feature be in the ‘marker light’ position. I bought the LED bar through Apollo Optics .
Switching is controlled by an OEM style switch for now until I add a few more accessories, then I will switch to a consolidated platform (likely a Switch-Pro). Without further delay...​

Parts used:
- Baja Designs S8 20” LED bar purchased from Apollo Optics
- Wiring harness from Apollo Optics
- OEM style “Driving Lights” switch from Slee Offroad
- TRD Pro upper grille
- Drill of choice
- Milwaukee #9 step drill bit
- Supplied hardware from Baja Designs
- Flexo PET wire sheathing
- Scotch Extreme Fasterners
- Mini-blade Add-a-fuse
- Shrink wrap
- Heat gun
- Weather resistant butt connectors
- Dielectric grease
- 14 ga. wire
- Electrical tape
- Zip ties
- Wire crimpers
- Wire strippers
- Alpine Beer Company - Duet

Install:
Remove front access cover.
DSC09092_zpsghvx60o0.jpg~original

Remove upper grille and bezel. Remove 2 upper plastic clips and pull outwards.
DSC09093_zpsvwr5je4p.jpg~original

TRD Pro grille vs. Trail/SR5 grille
DSC09095_zpsqxdoxkmo.jpg~original

Locate 2 existing stock holes (red) that will line up with brackets provided by Baja. Yellow holes noted could fit a set of the S2 lights from Baja based on measurements, but this is unconfirmed.
image_zpsdoftgcv3.png~original

Mock up placement for new LED bar using the stock holes.
DSC09102_zpsa2zmhmfx.jpg~original

Use a step drill to widen the mounting brackets by approximately ¼” per side, and also the holes on the grille support by approximately ⅛” per side. I didn’t measure these, but I would drill and test fit until I could get the bolts to fit through.
DSC09101_zpsgexg5jji.jpg~original

LED bar mocked up and bolted in.
DSC09106_zpssnbczi19.jpg~original

LED bar removed, grille mocked up.
DSC09096_zps3yvax5jm.jpg~original

LED bar installed with grille in place.
DSC09098_zpsazfzpij1.jpg~original

I left the painted bezel off until the install was finalized to reduce any chance of scratching or damaging it.

Bring in the wiring team…
DSC09171_zps5h8pt47z.jpg~original

I laid out the wiring harness as I planned on installing it and cut everything to length. I poked a hole in the existing firewall grommet and fed the unsheathed wire through to take a measurement first, then pulled it out and cut. Harness laid out.
DSC09173_zps0ys0t6sq.jpg~original

I then wrapped all lines in the Flexo PET sheathing to protect from wear and to consolidate multiple wires into one manageable run.
DSC09176_zpswsyjdg72.jpg~original

All connections made were with dielectric grease, weather resistant butt connectors, and shrink wrap. Thanks to [MENTION=65614]Antman[/MENTION] for the advice on how to make a proper connection using proper tools. This shows an un-shrunk (red wire) and a shrunk butt connector (black wire).
DSC09175_zpshnjsy59e.jpg~original

Connectors for the supplied male weather tight connector that comes with the S8 LED bar.
DSC09177_zpssbplpztu.jpg~original

Capped, sheathed, shrunk wrapped.
DSC09178_zpspemwiqdu.jpg~original

Laying out all sheathed wires.
DSC09179_zpsk2e71jxm.jpg~original

Hole in firewall grommet, and feeding the wires through.
DSC09180_zpsmwl027bb.jpg~original

DSC09185_zpsftohkjll.jpg~original

I chose the closest blank spot, and the easiest to turn on/off without looking to install the switch. This upper panel can be removed by pushing on the left side and the ‘top’ and using the tractional force to pull it towards you. Should pop pretty easily, but remember that there are connected wires behind it, so don’t pull too hard. Remove the blank piece by depressing the upper and lower ‘locks’ and pushing it out. Route the wires up through the blank hole. I used the vise-grips to hold the wires in place so they wouldn’t slip through the hole when I wasn’t looking.
DSC09187_zpsskton4gu.jpg~original

DSC09188_zpsokqgksdw.jpg~original


See part 2 below
 
Last edited:
LED light bar installation Part 2 of 3


Switch harness wired up to lighting harness. After testing the wires, I wired switch black to harness black, switch red to harness blue, switch green to harness red. This turns on the light when the button is in the on position, and also turns the ‘lights’ indicator on the switch when the light is on. I opt’d not to tie the switch into the dash lights because I plan on installing a Switch Pro at some point, and don’t want to mess with the OEM harness. Plus, not all of the stock switches are lit anyways, so it’s not out of place.
DSC09191_zpsecd7gwgo.jpg~original

DSC09192_zpsf0qcnsuq.jpg~original

I attached the Add-a-fuse to the wire connected to the amber back-light. I then plugged in 2 10A fuses, and replaced the stock 10A Tail light fuse with the Add-a-fuse. This makes the back-light come on with the parking lights/low beams.
DSC09193_zpsgqcmq46c.jpg~original

DSC09194_zpsepcvvvpo.jpg~original

Interior wiring secure and tucked away, back to the engine bay.
DSC09200_zpspkrj3nkp.jpg~original

Time to route some wiring. I attached the relay to the fender sheet metal with my favorite double 3M Extreme Fastener to allow for removal if I need to. I then routed the wires to the battery and the LED bar. Battery behind and then between the fuse panel. LED bar on the inner fender channel after removing the plastic covering.
DSC09202_zpso9uo6arh.jpg~original

DSC09204_zpsntwdurnx.jpg~original

DSC09205_zps03d0w12g.jpg~original

DSC09206_zpsgkuasubt.jpg~original

DSC09210_zpsvvyzcwbx.jpg~original


A quick switch test. Off.
DSC09221_zps4gyhh4k4.jpg~original

On.
DSC09222_zps7tc2esyh.jpg~original

Good to go!
Zip ties to hold everything in place. Wiring, DONE!

Light bar, wired and installed behind grille with painted bezel.
DSC09207_zpsnbf02b12.jpg~original

DSC09208_zpszeyyosra.jpg~original


I then turned on the low beams to show the pattern against my rustic back drop to aim the LED bar.
DSC09211_zpsd68utnae.jpg~original

LED bar on, I adjusted the angle so that the middle of the LED bar beam was at the top of the low beam cut off to emulate the high beam pattern.
DSC09214_zpsalpzxpf6.jpg~original


All plastics reinstalled under the hood.
DSC09218_zpsnf5zfart.jpg~original

DSC09219_zps8dwbk0p5.jpg~original


See part 3 below
 
Last edited:
LED light bar installation Part 3 of 3


Now for some comparisons.
Low beam HID’s and LED fogs.
IMG_6400_zpscwtbwqko.jpg~original

Low beam HID’s, fogs and the S8 LED bar.
IMG_6401_zpsrqub351y.jpg~original

Definitely a drastic improvement, and exactly what I was looking for.

Some head on shots.
DSC09142_zps5gsmpnf2.jpg~original

DSC09154_zpstrd4bdm2.jpg~original

DSC09159_zpsmon8gwj7.jpg~original


I am very pleased with the performance of the 20” S8. It accomplished exactly what I was looking to do, without drawing too much attention to it. Nick at Apollo Optics went above and beyond to make sure that I got what I needed to get the job done. Now all I need to add is the TRD Pro garnish to finish the job, but that can wait until the right opportunity comes along. This definitely won’t be the last Baja Designs light that goes on the 4Runner. Maybe a set of Amber Squadrons in the fog light position.... Hmmmm...

More to come…​
 
Last edited:
Is the mount on your dash bolted on or a sticky? Looks bolted. I just got my ram mount with sticky circle thing n hoping it will hold but yours might be better with the bolts esp that your looks to be inline with your dashboards lines. Thanks in advance.

Had the same question about the ram diamond mount - how did you attach? Specific type and depth/length of screw/bolt?

It's bolted on with a small metal backing plate to disperse the load across the trim panel. I don't remember the size of the bolts that I used. I took the diamond plate with me to the hardware store, found the correct diameter, then put it through the diamond plate, grabbed a lock nut to figure the length and added an eighth of an inch to account for the trim panel and the backing plate. I wish I could tell you how long it was. Most projects are very well thought out, some (like this) are trial and error...
 
Awesome write-up! That detailed wiring info, pics and full write-up will be super helpful for anyone installing lightbars in the future (including myself). Thanks for posting!
 
It's bolted on with a small metal backing plate to disperse the load across the trim panel. I don't remember the size of the bolts that I used. I took the diamond plate with me to the hardware store, found the correct diameter, then put it through the diamond plate, grabbed a lock nut to figure the length and added an eighth of an inch to account for the trim panel and the backing plate. I wish I could tell you how long it was. Most projects are very well thought out, some (like this) are trial and error...


Thank you[emoji1417]
 
Awesome write-up! That detailed wiring info, pics and full write-up will be super helpful for anyone installing lightbars in the future (including myself). Thanks for posting!

Thanks! The write-ups are always a bit of a process, but as always I am glad to help pass on information to those who need it :thumb3: Many of my mod's have been influenced by others, so I feel I should add to the knowledge bank! Now, lets see your install!
 
Max,
Where did you buy the add-a-fuse and what type/size is that?
I need to buy a few of these, hopefully locally.


Switch harness wired up to lighting harness. After testing the wires, I wired switch black to harness black, switch red to harness blue, switch green to harness red. This turns on the light when the button is in the on position, and also turns the ‘lights’ indicator on the switch when the light is on. I opt’d not to tie the switch into the dash lights because I plan on installing a Switch Pro at some point, and don’t want to mess with the OEM harness. Plus, not all of the stock switches are lit anyways, so it’s not out of place.
DSC09191_zpsecd7gwgo.jpg~original

DSC09192_zpsf0qcnsuq.jpg~original

I attached the Add-a-fuse to the wire connected to the amber back-light. I then plugged in 2 10A fuses, and replaced the stock 10A Tail light fuse with the Add-a-fuse. This makes the back-light come on with the parking lights/low beams.
DSC09193_zpsgqcmq46c.jpg~original

DSC09194_zpsepcvvvpo.jpg~original

Interior wiring secure and tucked away, back to the engine bay.
DSC09200_zpspkrj3nkp.jpg~original

Time to route some wiring. I attached the relay to the fender sheet metal with my favorite double 3M Extreme Fastener to allow for removal if I need to. I then routed the wires to the battery and the LED bar. Battery behind and then between the fuse panel. LED bar on the inner fender channel after removing the plastic covering.
DSC09202_zpso9uo6arh.jpg~original

DSC09204_zpsntwdurnx.jpg~original

DSC09205_zps03d0w12g.jpg~original

DSC09206_zpsgkuasubt.jpg~original

DSC09210_zpsvvyzcwbx.jpg~original


A quick switch test. Off.
DSC09221_zps4gyhh4k4.jpg~original

On.
DSC09222_zps7tc2esyh.jpg~original

Good to go!
Zip ties to hold everything in place. Wiring, DONE!

Light bar, wired and installed behind grille with painted bezel.
DSC09207_zpsnbf02b12.jpg~original

DSC09208_zpszeyyosra.jpg~original


I then turned on the low beams to show the pattern against my rustic back drop to aim the LED bar.
DSC09211_zpsd68utnae.jpg~original

LED bar on, I adjusted the angle so that the middle of the LED bar beam was at the top of the low beam cut off to emulate the high beam pattern.
DSC09214_zpsalpzxpf6.jpg~original


All plastics reinstalled under the hood.
DSC09218_zpsnf5zfart.jpg~original

DSC09219_zps8dwbk0p5.jpg~original


See part 3 below
 
Thanks Max.
I see now that this is the same size as the engine compartment fuses: mini low-profile.
I just ordered from Amazon.
i know that O-Reilly does not carry these from my last search, but i will check out autozone today.

No problem. Yeah you can run either the low profile mini-blade or the standard mini-blade. Makes no difference. Good luck!
 
Dude your write up inspires me that with my electric skills and your post I can definitely install my own light bar and save on cost of install!! Quoted $200 to $300 from a quality truck shop that I used before.
Thank you!!!
Now I have to fab a metal bracket like you showed for base of Ram mount! Again, Thanks man!!!
 
Dude your write up inspires me that with my electric skills and your post I can definitely install my own light bar and save on cost of install!! Quoted $200 to $300 from a quality truck shop that I used before.
Thank you!!!
Now I have to fab a metal bracket like you showed for base of Ram mount! Again, Thanks man!!!

This made me really happy to read. I'm glad that my install inspired you to want to install yourself! That's the best part of this forum. So many people with so many personal strengths, information is gathered and spread so easily and willingly that it makes the forum and its member more capable together. Kind of a random 'really cool' moment haha. Glad to help! If you need any help, let me know. :cheers:
 
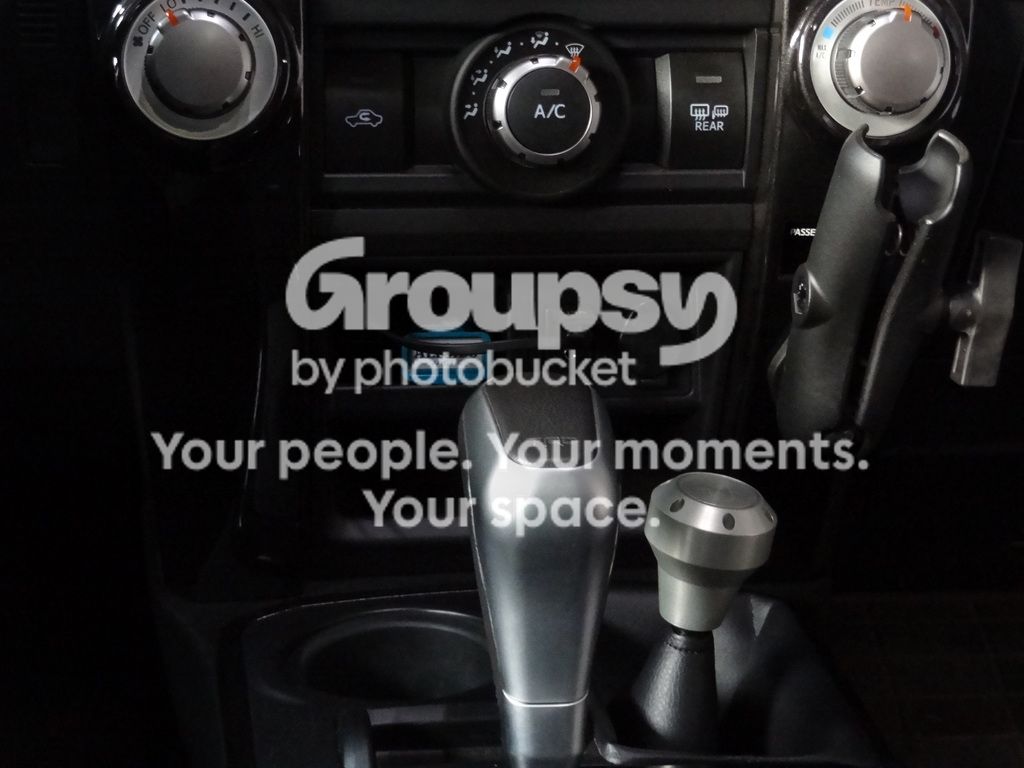
I added the Ellis Precision transfer case knob to compliment the faux aluminum look of the TRD shifter. The color in the aluminum is ever so slightly off, but I think I like it. I need to get some seat time this weekend to confirm, and I need to shift into 4wd. Sounds like I have a good weekend ahead of me :reddance:

DSC09233_zpsn4yeqvpo.jpg~original
 
Nice wiring on the LED, way better then mine!

Thanks man, a little bit of time and the right supplies makes the difference. It was a good learning experience for me for sure! Didn't blow anything up or short circuit anything, everything is good in my book :thumb3:
 

Forum statistics

Threads
278,316
Messages
3,554,110
Members
248,016
Latest member
Advally Service

Trending content

Back
Top