Cmparry85's 01 SR5 Build

Cmparry85

New member
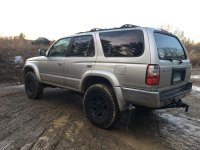
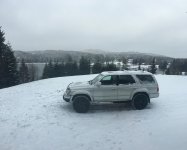
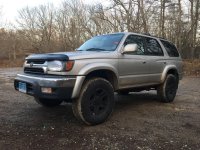
I've been getting tons of inspiration from alot of build threads on the forum and finally decided to start my own. It will also serve as a centralized location to track my progress. I own a 2001 SR5 in millennium silver. I recently(2016) bought the 4Runner with 170k miles on it and I am the second owner. The vehicle was well taking care of and I was able to get all maintenance records from the dealership it was taken too. My intentions for the 4Runner is first to maintain and build a dependable and fairly efficient daily driver(commute is about 1.5 hours a day) while at the same time doing some light mod work to end up with a very capable hunt/camping/roadtrip rig..bare with me as I try to keep the thread organized and offer plenty of pics.

Current Gear
Exterior
-Tires Toyo Open Country AT II's 265/75R-16
-Air Filter K&N
-Curt Roof Rack
-Black Euro style Headlights/Corner lights
-Recovery Gear 30k Tow Strap, Air Compr, Tire Repair Kit, Shackle Hitch

Suspension
-OME Lift kit 880/906
-OME Nitrocharger shocks 90004 Front, 60073 Rear

Interior
-Stereo JVC KW-R910BT Double Din, Hands Free, Bluetooth
-LED gauges/dash upgrade

Upgrades/Maintenance

-OME Lift kit Done at 203k
-Lower Ball Joints Done at 202k
-Timing Belt Repl Done at 202k
-Rebuilt gears in Rear Diff Done at 202k
-Brake calipers/Rotors/Pads Done at 199k
-Repl Rear Brake shoes Done at 199k
-Axle Bearings and seals Done at 199k
-Repl Transfer case OE used Done at 192k

Next in line: Walker Exhaust system with new O2 sensors, NGK plugs and cables, Lightbar/Fogs for Bumper


I have quickly learned that digging through the forum is dangerous and this list will most definitely be growing with time(and $$$).

Current pic as of February 12, 2018
 

Attachments
  • 6EBEAD18-1218-4988-A873-EC025152985F.jpg
    6EBEAD18-1218-4988-A873-EC025152985F.jpg
    137.4 KB · Views: 796
  • 8CADBBAF-ACC9-4A18-A144-4C17733D1964.jpg
    8CADBBAF-ACC9-4A18-A144-4C17733D1964.jpg
    136.1 KB · Views: 753
Last edited:
Register to hide this ad
Excellent starting point for your build. Will be keeping up with your progress.

Love those silver 3rd gens!
 
LED Interior swap

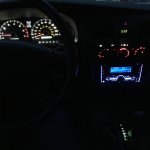
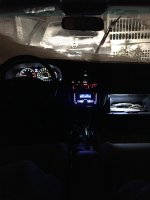
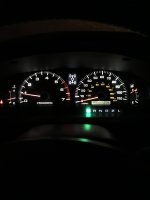
Did the LED interior swap the other day on the gauges, climate control, ect, rear window, rear defroster, key ring, glove box, ash tray, tranny shifter and dome lights..overall price was about $30 and imo was worth it..much better feel inside now compared to old green lights that consumed the interior. Used superbrightLEDs.com for all the bulbs. At the time they were out of the cool white in the size i needed for the climate control so i opted for the red which i think adds a nice pop of color.

sorry the pics arent super clear..really tough to be a professional photographer with an iPhone.
 

Attachments

  • IMG_0313.jpg
    IMG_0313.jpg
    123 KB · Views: 1,479
  • IMG_0320.jpg
    IMG_0320.jpg
    132.3 KB · Views: 1,500
  • IMG_0322.jpg
    IMG_0322.jpg
    104.6 KB · Views: 1,514
Those LEDs are sharp. How's the install? Not too bad? Thanks for sharing. Pretty green around here but already it is super cool seeing how much time y'all put into your vehicles.
 
Those LEDs are sharp. How's the install? Not too bad? Thanks for sharing. Pretty green around here but already it is super cool seeing how much time y'all put into your vehicles.

Not bad actually..the hardest part was the ect and rear window bulbs..all in all had them all replaced in under an hour.
 
Good deal. Thanks for the info. It looks like a decently common upgrade as I have seen many dashes on here since I joined that look a whole lot brighter than man.
 
Big fan of those Toyota 5 star wheels. Looks good!

Thanks Standard! I need to update my pics..since Ive since sprayed them black. Gives it that great aggressive look. I need to replace the spare though, she's pretty rusty from the salt/snow we have in New England..brutal stuff
 
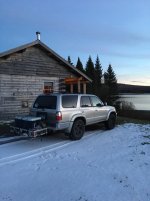
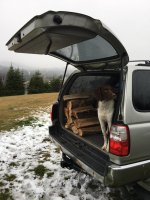
Some pics from our Nov 2017 trip up to North Woods NH. I feel as if my 4runner (and my birddog) are at home here.
 

Attachments

  • IMG_4802.jpg
    IMG_4802.jpg
    129.7 KB · Views: 809
  • IMG_4720.jpg
    IMG_4720.jpg
    129.8 KB · Views: 800
  • IMG_4779.jpg
    IMG_4779.jpg
    135.7 KB · Views: 799
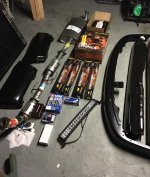
Got some goodies piling up in the basement. This weekend I will be installing the new OME 880/906s with OME shocks/struts as well. Looking forward to the new setup. Wondering how the current Toyo Open Country’s 265/75/16s will look with the mild lift. Luckily I’m in the market for new tires setup and have been debating 285/75/16s or 255/85/16s or just stick with the current size...Recommendations welcome!

After that, installing the new Walker Exhaust system, NGK plugs and wires..getting rid of the chrome bumpers and finding a location for the fog/led light bar.
 

Attachments

  • DD703ECE-0EEF-4171-BB01-463FBD578A6B.jpg
    DD703ECE-0EEF-4171-BB01-463FBD578A6B.jpg
    133.6 KB · Views: 364
Last edited:
Got some goodies piling up in the basement. This weekend I will be installing the new OME 880/906s with OME shocks/struts as well. Looking forward to the new setup. Wondering how the current Toyo Open Country’s 265/75/16s will look with the mild lift. Luckily I’m in the market for new tires setup and have been debating 285/75/16s or 255/85/16s or just stick with the current size...Recommendations welcome!

After that, installing the new Walker Exhaust system, NGK plugs and wires..getting rid of the chrome bumpers and finding a location for the fog/led light bar.

Looks great !! What part numbers did you use for your Walker exhaust? Is it the same as suggested on their website? Gotta do mine too !!!
 
Looks great !! What part numbers did you use for your Walker exhaust? Is it the same as suggested on their website? Gotta do mine too !!!

Yea I used the ones on their website. Pretty straightforward. After reading some past forum posts regarding the fit, seems like it will be pretty direct fit. I’ll report otherwise after installation.
 
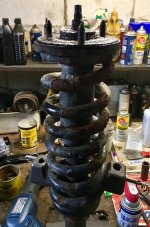
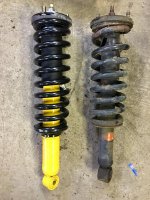
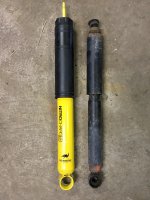
Installed OME 880/906 lift kt paired with OME Nitrocharger shocks on the corners.

Me and a buddy installed the OME 96024 kit over the weekend. I decided to go with the 880/906 setup which consists of a mild lift, 1.5” in the front and 2” in the rear. I prefer a touch of rake and figured it would level out with any significant weight in the back. I usually carry about 100lbs of dogs and some basic gear daily, and more during longer trips. I wasn’t looking for a huge lift as it doesn’t fit my needs. The kit came with the Nitrocharger sport front shocks, 90004 and I went with the Nitrocharger 60073 for the rear shocks which are soft valving. I went the 60073s because comfort on long trips was my number one priority, and I do not run a heavy bumper or spare off the back. I have logged a couple hundred miles on the new suspension and ride has significantly improved. I would rate the prior stock coils/shocks as good. They weren’t in horrible condition and still had a good bit of life left in them I believe, I was just ready for an upgrade. Handling has improved as far as cornering, especially at higher speeds. I do not experience the rear end drop at acceleration or nose dive when braking nearly as much now. This thing absorbs small and large bumps in the road/trails like a charm now. The ride is no where as stiff as I was preparing myself for after reading a ton of mixed reviews on these. Overall I am incredibly happy with the money spent on these, about $950 after shipping and taxes. There is a discount in the Toytech vendor part of this forum which was also pretty cool. Some lessons learned from the install..which took much longer than we expected. I should have purchased new top mounts for the front. My 4Runner has lived in and endured the salty New England winters for the past 17 years and that showed its ugly face in the hardware. After messing around trying to get bolts off intact we finally decided to just cut them off which sent us to Napa to buy new mounts which set us back a couple hours. Once off the front install went rather quick. I did not experience any issues getting the arm down low enough to get the new assembly in however 2 people made this much easier than 1. The rear was much easier but again, not having spare hardware on hand set us back time as we needed new bolts. I will say the rear upper mounts for the shocks is incredibly tough to get too and remove..especially if your battling rusty hardware the whole time..Lesson taking away, PB blaster and WD40 are your best friends. Overall I am very excited about this setup and look forward to loading her down and taking it on the next trip. Next up..tires and wheels(with a negative offset) to fill the space a little better.
 

Attachments

  • 5BE2C2BE-2A21-402E-990F-8ED43813B234.jpg
    5BE2C2BE-2A21-402E-990F-8ED43813B234.jpg
    139 KB · Views: 331
  • 4134687F-4FC1-4923-AD3C-E1169A3345A2.jpg
    4134687F-4FC1-4923-AD3C-E1169A3345A2.jpg
    138.6 KB · Views: 325
  • 305130BD-6212-41BE-B5B4-7B9F7CBB6B21.jpg
    305130BD-6212-41BE-B5B4-7B9F7CBB6B21.jpg
    134.1 KB · Views: 342

Members online

No members online now.

Forum statistics

Threads
278,309
Messages
3,554,070
Members
248,016
Latest member
Advally Service

Trending content

Back
Top