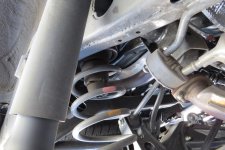
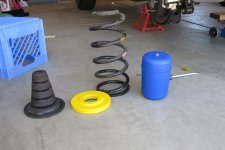
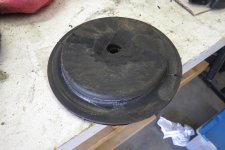
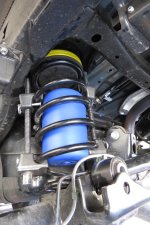
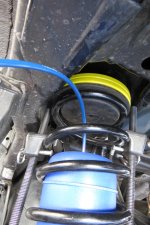
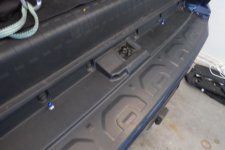
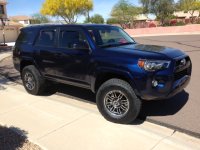
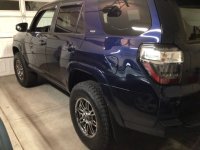
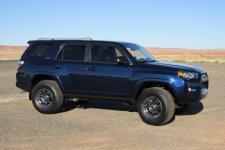
CoilRite bags and OME shims installed today

T4Rife

New member
I had installed Bilstein 5100s on the front of my 2014 SR5 last month. While I ended up nose-high by 1/2", I was extremely impressed by the improved ride quality.

Yesterday, I got my bonus at work and my dear sweet wife (whom I do not deserve) approved a new set of rims on 285 Nittos. I literally went out for groceries, and came home with new wheels and tires.

This morning I finished the lift project by installing CoilRite bags and a pair of OME shims on each side. The effect is amazing, and I ride almost level now (1/4" tail high). I plan to use the bags for the left-side lean, and for towing my 3500# popup camper.

I don't get on this site much, but you've all been a real big help when I need it. I took lots of photos this morning with a nice camera. I'd be happy to post the procedure tomorrow, if this is something that you are interested in.

I've got to say, I had a blast with this mod. I can highly recommend it for bang-for-the-buck.
 
Register to hide this ad
Sounds like just the suspension mod I need - pics please!
I am not interested in "levelling", I like a slight downward rake, and that is better for when I add weight in the back. Like you, I want it for occasional heavy trailering.
I am not really expecting the Bilsteins to improve the handling much, since road manners are already very impressive (2015 TE with KDSS).
 
Sounds like just the suspension mod I need - pics please!
I am not interested in "levelling", I like a slight downward rake, and that is better for when I add weight in the back. Like you, I want it for occasional heavy trailering.
I am not really expecting the Bilsteins to improve the handling much, since road manners are already very impressive (2015 TE with KDSS).

Agreed. I am deeply impressed at the ride in my TE kdss. I too am planning on trailering and doing some heavy loads, pics and a review would be most helpful.
 
How I installed the CoilRite bags and OME shims

First of all, why am I using these products.

For the bags, I was initially looking at AirLift1000, but I couldn't find a listing that actually showed compatibility for the 2014. I did see on this site that others had just ordered for the 2013 kit, but I figured if I did that, and encountered problems, then AirLift may call foul. Firestone listed the CoilRite bags for 2014, and the system overall looked much stronger. I was not disappointed.

For the shims, I had heard about them on this site, but they are hard to find. I finally found them on a reorder site called BilsteinLifts.com, for about $17 each. These guys are a bunch of boobs, and their customer service is worse than a band of crickets. I waited a good 6 weeks before I even heard back from them. Just as I was about to call AmEx, they showed up at the door. The one cool part was the single customer review on the site, describing exactly what I wanted to do.

And here's my disclaimer: I have no authority upon or business attempting vehicle disassembly/assembly. This activity is inherently dangerous and should be contracted to trained professionals. Following my instructions will only prove that you may be as foolish as me, and no judge will ever rule in your favor. Please exercise caution, wear protective equipment, bring a buddy, and please to do not consume alcohol until after the successful test drive.

Okay, here we go. The CoilRite instructions are the typical Google Translate Chinese to English that we've all become used to. I recommend using air tools if you have them. I also found the new ratcheting box wrenches to be helpful. You'll need to borrow a spring compressor from the local auto parts store.

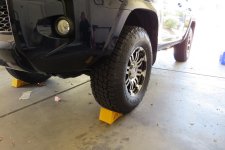
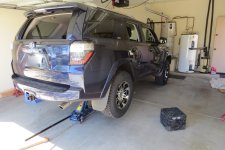
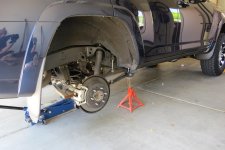
Remove the spare tire following the instructions in the owners manual. You'll notice in the pics that I did not do this initially. It was a mistake. I needed to remove it to ease the run of the air lines to the rear. Chock your front wheels and place your floor jack under the center of the rear axle. Raise the rear end about 8"-12".
IMG_0676.jpg
IMG_0677.jpg


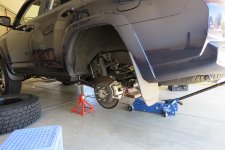
Use suitable jack stands to support the vehicle forward of the axle. Remove the rear wheels.
IMG_0678.jpg
IMG_0679.jpg
IMG_0680.jpg

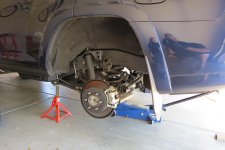
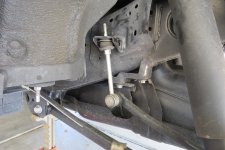
Detach the sway bar from the frame on each side, and allow to hang freely.
IMG_0681.jpg
IMG_0682.jpg

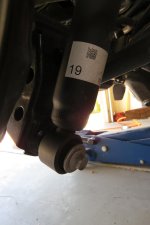
Remove the lower attachment bolt for each shock absorber, and remove from the lower mount, to hang freely.
IMG_0684.jpg

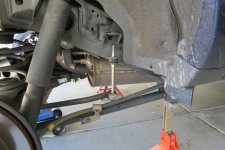
Remove the driver's side bolt for the panhard rod. It's the straight rod, just rear and above the axle. It mounts a little higher on the passenger side. Once the bolt is removed, carefully lift the bar away from the axle and allow to hang freely. !!! Watchout for the brake lines here !!!

The posting tool tells me I have reached the max for attachments.

To be continued...
 

Attachments

  • IMG_0676.jpg
    IMG_0676.jpg
    130.4 KB · Views: 1,476
  • IMG_0678.jpg
    IMG_0678.jpg
    131.8 KB · Views: 1,396
  • IMG_0679.jpg
    IMG_0679.jpg
    131.9 KB · Views: 1,413
  • IMG_0680.jpg
    IMG_0680.jpg
    129.7 KB · Views: 1,310
  • IMG_0681.jpg
    IMG_0681.jpg
    133.9 KB · Views: 1,323
  • IMG_0682.jpg
    IMG_0682.jpg
    133.6 KB · Views: 1,333
  • IMG_0684.jpg
    IMG_0684.jpg
    111.4 KB · Views: 1,309
  • IMG_0677.jpg
    IMG_0677.jpg
    134.3 KB · Views: 2,477
Last edited:
Continuation of installation instructions...

Here's a shot of what we are after - the coil spring and overload bumper.
IMG_0683.jpg

Now use the floor jack to lift the axle a few inches. Place a jack stand under the passenger side of the axle, as far right as practical. Lower that floor jack. The objective is to lower the driver side enough to easily remove the coil spring and overload bumper. It took me a light tugs and twists, using a large slot screwdriver for some leverage.

Here's a pic of what we will be assembling...
IMG_0685.jpg

Here's the part where we take a big gulp. The overload bumper needs to be significantly modified. Remove the bottom 4 sections with a hacksaw, and use a rotary tool to smooth it out. I am not making this up.
IMG_0686.jpg

Attach a spring compressor to the coil spring, and compress the spring to a point sufficient to insert the modified bumper and the shim(s). This takes a little trial and error. Once I had the compressor positioned well (arms roughly opposite, at locations that do not interfere too much with coil install position), and the spring compressed enough, I placed the airbag in the coil, feeder side up. I placed the coil in position. Then, one at a time, I slipped the bumper and the shims above the spring. I evenly backed off the compressor and removed in from the coils. There is still enough play to wiggle things to alignment, even with two shims installed.
IMG_0688.jpg


Cut the provided hose into two sections of equal length. Use a sharp blade for a clean straight cut. DO NOT use wire cutters/dikes to cut the line. This will interfere with the press-to-connect fittings at the bag and valve. From the side of the coil, firmly press one end of the line into the connector of the bag.
IMG_0689.jpg

Then snake the other end of the line thru the holes in the bumper and shims. It's then a matter of patience and creativity to work the line to the rear, locating a suitable install location for the valves.

Raise the axle again and move the jack stand from the passenger side of the axle to the driver side. Repeat the instructions for the passenger side. The kit from Firestone includes heat sheilding for the air line. USE IT!!!


Here is a shot of my valve positioning...
IMG_0690.jpg

Raise the axle and remove the jack stand from the driver side. Reattach and secure the shocks, sway bar, and panhard rod. Install the wheels and lower the vehicle from the jack stands located at the frame. Replace the spare tire.

I took it for a test drive, and picked up a small compressor and digital valve from the parts store. The ride quality is amazing. The left side lean is very easy to correct (use a level to confirm). Make sure you ride with at least 5 lbs in each bag at all times.

Good luck, and let me know if this helps.
 

Attachments

  • IMG_0683.jpg
    IMG_0683.jpg
    131.4 KB · Views: 1,340
  • IMG_0685.jpg
    IMG_0685.jpg
    130.8 KB · Views: 1,310
  • IMG_0686.jpg
    IMG_0686.jpg
    134.8 KB · Views: 1,317
  • IMG_0690.jpg
    IMG_0690.jpg
    122.2 KB · Views: 1,370
  • IMG_0688.jpg
    IMG_0688.jpg
    137.2 KB · Views: 1,969
  • IMG_0689.jpg
    IMG_0689.jpg
    137.7 KB · Views: 1,350
Last edited:
dual solar hot water?

The tank on the right is the collector. The pump (far right) runs distilled water to the rooftop panel, then to the collector for heat exchange to cold tap water. Once heated, the thermostatic mixer valve opens to feed the normal gas water heater on the left, which almost never has to light up.
 
my dad is in AZ and runs the same sort of setup.... his whole house is solar now, awesome

We just had Solar City install panels on the roof. It takes up the whole west side, and looks very cool. Once the power company inspections are done, we go live, pushing power to the grid.
 
BilsteinLifts.com wants a review

I gave them one, and it's pending approval. If, for whatever reason, no one ever sees it on that site - here it is:

This product was exactly what I was looking for, and the reason happened to be the same as the only other reviewer, the only other person foolish enough to do business with this reorder shop. The customer service is worse than a band of crickets. The pay-only phone line answers with some canned greeting, not even a company name. After six weeks of nothing, I am about to cancel the charge. Then I get a notice that the part is on back order. Now I am really pissed. The next day, I get a notice that the items will ship the following Monday. The following Tuesday, I get a notice that the items have shipped. I got what I ordered in a plain brown box, no brand packaging whatsoever. The parts were covered in soot, but otherwise in useable condition. Next time, I’ll just order straight from ARE. This shop is shady at worst, incompetent at best. Do yourself a favor and buy nothing from these boobs.

love,
T4Rife
 
Great write up and very timely as I am about to do the same install. Do you happen to have the torque specs for the sway bar, lower shock mount, and panhard rod bolts?

How long did it take you from start to finish? I am guessing 2 hours, but need to plan accordingly... Turns out life with kids means endless time juggling. ��
 
About four hours total work time

Hey, I do not have those torque specs. I just noted how tight it was during disassembly and guess-timated. Don't do what I did. Find the specs online and post them to the thread!
 
Update on my install

The ride is great, really great. I love driving past the 4runners that still have "polio-wheels".

The first wheelset installed has 25mm positive offset, which is too dang close to the control arm. I am working to get a set of 0mm offset rims, and Discount Tire responds well to unhappy customers. I'll have the new rims checked out tomorrow.

I've also decided that the stock rear shocks need to be replaced by 5100s, which are now sitting on my workbench. The stocks are a little bouncy.

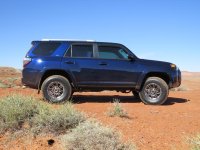
So far, this is my recommendation on my accidental lift - set your front 5100s to 1.75. Oops, that's too high. Get some OME shims (2 per side) installed on the rear, with the superior CoilRite bags. Air up left to 11lbs, right to 5lbs. There goes the left-side lean (checked with level). Front to back is about 0.5" butt high.

Men and Women have since approached me multiple times, saying "Oh shit. Just like that. I want one.". My wife is amused, not yet impressed.

Gas mileage is still not pinned. I am creeping up through 17.2, after enjoying steady 18.6 prior to the mod. I think a cat-back exhaust may seal the deal.

I'll post some pics later, during my road trip to CO from AZ. It looks fantastic, and is a sure cure for polio.
 
Last edited:
Some pics with the new rims

I got the 0mm offset rims installed today. I tried not to squeal like a girlie when I saw them. I didn't think they would look as good as what I installed originally, but they a way way better.

I took a couple pics with my iPhone 5C - I'll try to take some real pics during the road trip next week.

Let me know what you think, or if you have any questions.

IMG_0351.JPG
IMG_0352.JPG
 

Attachments

  • IMG_0352.JPG
    IMG_0352.JPG
    105.6 KB · Views: 483
  • IMG_0351.JPG
    IMG_0351.JPG
    126.2 KB · Views: 539
Please let me know what you think

I have now replaced the 25mm offset wheels with 0mm offset. The new wheels are AR901's, with the PVD finish (came out like "black chrome").

I couldn't be happier with the look. My acceleration took a hit, but the gas mileage doesn't seem to be a huge difference. Any advice on performance mods?

There was some rubbing up front, and a little plastic surgery did the trick.

It rubs a bit every now and then, but just to remind me that I went big enough.
 

Attachments

  • IMG_0762.jpg
    IMG_0762.jpg
    135.5 KB · Views: 1,148
  • IMG_0778.jpg
    IMG_0778.jpg
    137.4 KB · Views: 500
I have now replaced the 25mm offset wheels with 0mm offset. The new wheels are AR901's, with the PVD finish (came out like "black chrome").

I couldn't be happier with the look. My acceleration took a hit, but the gas mileage doesn't seem to be a huge difference. Any advice on performance mods?

There was some rubbing up front, and a little plastic surgery did the trick.

It rubs a bit every now and then, but just to remind me that I went big enough.

Looks good! I don't normally like chrome, but you pulled it off nicely!

Performance wise, just look up some of the other threads floating around this forum. It's a touchy subject, and not one you likely want to clutter your build thread with.
 

Members online

No members online now.

Forum statistics

Threads
278,316
Messages
3,554,121
Members
248,016
Latest member
Advally Service

Trending content

Back
Top