DIY Rear Brakes

46runner

Member
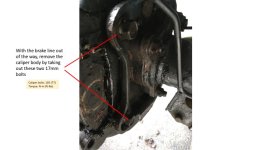
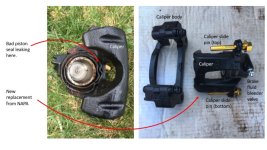
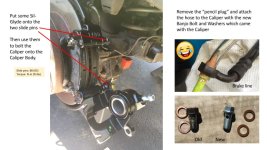
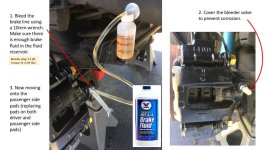
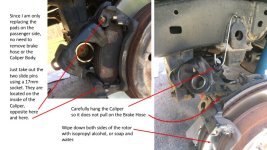
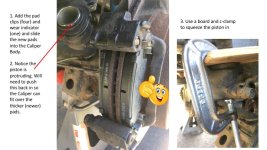
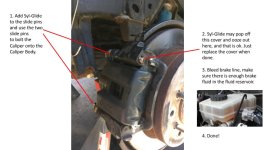
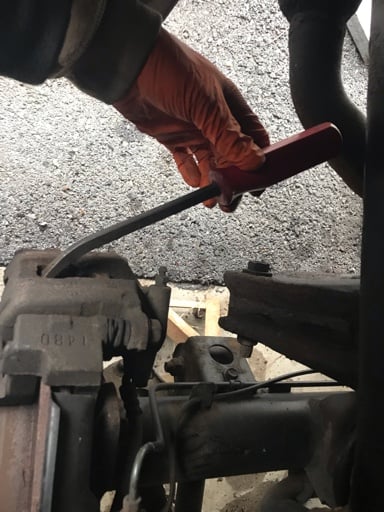
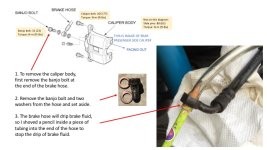
DIY Replacing one rear brake caliper, both sets of rear brake pads, and greasing the caliper slide pins. 2004 4RUNNER SR5 V8 with 156k miles. I had previously replaced the rear calipers, rotors and pads in 2014.
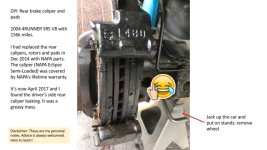
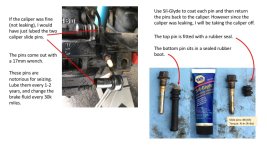
Slide01.jpg

Slide02.jpg

Slide03.jpg

Slide04.jpg

Slide05.jpg

Slide06.jpg

to be continued below...
 

Attachments
  • Slide01.jpg
    Slide01.jpg
    78.9 KB · Views: 8,783
  • Slide02.jpg
    Slide02.jpg
    86 KB · Views: 7,664
  • Slide03.jpg
    Slide03.jpg
    69.2 KB · Views: 7,683
  • Slide04.jpg
    Slide04.jpg
    52.3 KB · Views: 7,352
  • Slide05.jpg
    Slide05.jpg
    94.7 KB · Views: 7,307
  • Slide06.jpg
    Slide06.jpg
    45.8 KB · Views: 7,227
Last edited:
Register to hide this ad
DIY Rear Brakes, post 2 of 2.

...continued

Slide07.jpg

Slide08.jpg

Slide09.jpg

Slide10.jpg

Slide11.jpg

Slide12.jpg
 

Attachments

  • Slide07.jpg
    Slide07.jpg
    66.7 KB · Views: 7,626
  • Slide08.jpg
    Slide08.jpg
    89 KB · Views: 7,564
  • Slide09.jpg
    Slide09.jpg
    93.5 KB · Views: 7,133
  • Slide10.jpg
    Slide10.jpg
    99.8 KB · Views: 7,416
  • Slide11.jpg
    Slide11.jpg
    87.9 KB · Views: 7,266
  • Slide12.jpg
    Slide12.jpg
    66.7 KB · Views: 8,244
Last edited:
Great work. Thanks for putting it together.

I just use the old brake pad and C Clamp to push the piston back in. No need to find a random wood board around the garage.
 
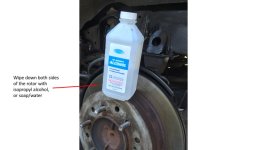
As for wiping the rotors down with alcohol. I wouldn't even bother. Just pick up a can or two of brake cleaner and call it a day.


Sent from my iPhone using Tapatalk
 
Beautiful write up!

An easy way to push the rear piston in (if you don’t have a C clamp) is to insert a screwdriver into the inspection slot between the outer pad and the caliper and slowly pull outward.

Do this before you disassemble or remove the caliper and make sure the piston is moving smoothly.

Mine probably need replacing and were not moving smoothly so I worked them in and out some by repeatedly pushing the piston in with my pry method and pumping the brakes to push the piston back out.

After I get the piston moving freely, then I remove the caliper.

ba302274c55b21132eabee00f9cfe384.jpg


Sent from my iPhone using Tapatalk
 
Last edited:
I too used this thread recently. It was a good writeup. I previously tried cleaning the caliper, changing the pads and lubing the pins. I found that the piston was not fully releasing when I came off the brakes. The rebuilt caliper is such an improvement that I would not try working on an old caliper again. New pads fit so tight on all my old calipers and with the rebuild just slide right in.
 
Another tip, flush the brake fluid. Don’t just bleed it. Most say it is only good two years and is probably holding moisture and causing some of our seizing problems.

It can easily be done by yourself.

Start vehicle and place an appropriate length board/stick/whatever between the front of the seat and the brake pedal so it keeps the pedal depressed. Leave vehicle running.

Crack bleeder and enjoy a constant flow of fluid. Top off reservoir as needed.


Sent from my iPhone using Tapatalk
 
Great write-up! Thank you. Newbie question:

I successfully replaced the rear calipers, brake pads and adjusted the emergency brake.

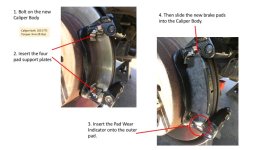
The original pads did not have a brake wear indicator installed and the new pads didn't have instructions on where to place the clips (I assembled without them). Can't find much online about where to install these either, they are NOT attached to the pads already, they are separate in the pad kit.

Do these go inside the pad mounting clips similar to figure 8 in the attached link? https://www.autozone.com/repairguides/Toyota-Cressida-and-Van-1983-1990/Front-Disc-Brakes/Disc-Brake-Pads/_/P-0900c15280081b17

Thanks for any insights...
 
Great write-up! Thank you. Newbie question:


I successfully replaced the rear calipers, brake pads and adjusted the emergency brake.


The original pads did not have a brake wear indicator installed and the new pads didn't have instructions on where to place the clips (I assembled without them). Can't find much online about where to install these either, they are NOT attached to the pads already, they are separate in the pad kit.


Do these go inside the pad mounting clips similar to figure 8 in the attached link? https://www.autozone.com/repairguid...c-Brakes/Disc-Brake-Pads/_/P-0900c15280081b17


Thanks for any insights...
Something that helps is disassembling one side at a time. You can refer to the other side for reassembly (assuming it was previously assembled correctly)

Sent from my SM-G955U using Tapatalk
 
Guess I’ll add another tip since I watched so many brake job videos the other day and none of them used any silicone grease on anything except for maybe the back of the pads.

Don’t be scared, put a light coat of silicone grease on the sliding/contact points of the pads, the pad plates and the tabs on the pads that go into them.

https://m.youtube.com/watch?v=bLaQGWtd1O4

Sent from my iPhone using Tapatalk
 
Last edited:
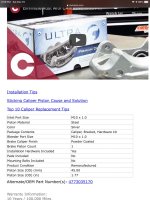
It is time for new brakes, starting with the rears. I replaced the calipers, rotors and flex hose. I dont know if it makes any difference, but I installed Stop-Tech Stainless brake hoses. When I ordered the rear calipers, I intially bought the Nugeon coated calipers on Rockauto. When they arrived neither boxhad the correct caliper in them. WTF! How can the supplier screw up this bad? So I shipped them back and ordered Cardone coated calipers. As I was reading their specs, it caught me eye that the Cardone Ultra calipers have a 10yr 100k mile warranty. So this was a good mistake by rockauto. I ended up with a better set of calipers. I know members complain of repeatedly having to replace the seized calipers every few years. Check them out. The price was $80 with shipping for the pair.

And I will say that these are the easiest brakes I have ever bled. Crack the bleeder, turn key to on, press and hold brake pedal for 5 seconds, key off, check container for fluid level, repeat for 5 seconds, key off, close bleeder. FYI, I run the hose on the catch cup straight up from the bleeder screw so air bubbles will not re-enter the caliper. It Makes this a one man job. It took all of 15 seconds per caliper. If that.
 

Attachments

  • 68BACE36-2A97-4641-929A-ED49FE275662.jpg
    68BACE36-2A97-4641-929A-ED49FE275662.jpg
    127.5 KB · Views: 419
Last edited:

Members online

Forum statistics

Threads
278,310
Messages
3,554,080
Members
248,016
Latest member
Advally Service

Trending content

Back
Top