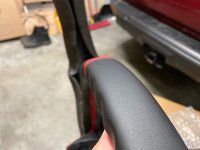
Just got this steering wheel in yesterday and decided to do a detailed DIY and short review. I know there are other steering wheel removal DIYs but hopefully this one is helpful as well!
Here is the wheel I purchased off eBay

Tools needed for this project:
T30 Socket
19mm Socket
10mm wrench/ratchet
Misc ratchet extensions
Pliers
Steering wheel puller tool
Philips screw driver
Flat head pocket screw driver
Ratchet
Cordless impact (Optional)
Painters tape (Options)

Step 1: Make sure the steering wheel is centered as best as possible. Then disconnect battery and wait approx 10-15 mins for residual power to completely drain before proceeding to step 2. I also flipped the window switches and door locks a few times.

Step 2: Removal small trim caps on both sides of steering wheel to reveal Torx screws. I found a small flat head pocket screw driver worked best for this.


Step 3: Using a T30 socket, remove the Torx screw on both sides of steering wheel. Using my cordless impact made quick work of this. The torx screw wont fall out, so don't worry.


Step 4: At this point, you should be able to wiggle the airbag towards you. Be careful not to pull hard, as the cables behind are still connected.

Step 5: At the back of the air bag, you will find 3 cables. One ground, one orange and one black SRS connector. I began by disconnect the ground, then proceeded to the SRS connectors. You will need to pry under and up on the SRS connectors to release them. A pick works best for this.


Step 6: Once airbag is completely removed, place off to the side and move onto disconnecting the 2 white connectors at the top center of the wheel.

Step 7: Using a 19mm socket, remove the center nut for the steering wheel. Cordless impact works best if working alone. Otherwise, I'd recommend a 2nd set of hands to hold the steering wheel while using a ratchet to remove the nut.

Step 8: Using a steering wheel puller/pulley puller, remove the steering wheel from its post. I used a harbor freight kit that I purchased for approx $13 using the 20% off coupon. Image of kit posted above. The kit uses 2 bolts that thread into the existing holes on your steering wheel + 1 center bolt that helps release the steering wheel as you turn it.


Step 9: Optional step, but I taped the clock spring/roll connector/spiral cable to ensure it stayed centered.
Step 10: Now its time to remove the controls and shroud to swap over to the new steering wheel. Remove the 8 philips head screws. At that point, everything the steering wheel controls and cruise control switch can be removed fairly easily. The back shroud is also easily removed by applying slight pressure at the top and bottom of the plastic cover (not pictured)


Here is the wheel I purchased off eBay
Tools needed for this project:
T30 Socket
19mm Socket
10mm wrench/ratchet
Misc ratchet extensions
Pliers
Steering wheel puller tool
Philips screw driver
Flat head pocket screw driver
Ratchet
Cordless impact (Optional)
Painters tape (Options)
Step 1: Make sure the steering wheel is centered as best as possible. Then disconnect battery and wait approx 10-15 mins for residual power to completely drain before proceeding to step 2. I also flipped the window switches and door locks a few times.
Step 2: Removal small trim caps on both sides of steering wheel to reveal Torx screws. I found a small flat head pocket screw driver worked best for this.
Step 3: Using a T30 socket, remove the Torx screw on both sides of steering wheel. Using my cordless impact made quick work of this. The torx screw wont fall out, so don't worry.
Step 4: At this point, you should be able to wiggle the airbag towards you. Be careful not to pull hard, as the cables behind are still connected.
Step 5: At the back of the air bag, you will find 3 cables. One ground, one orange and one black SRS connector. I began by disconnect the ground, then proceeded to the SRS connectors. You will need to pry under and up on the SRS connectors to release them. A pick works best for this.
Step 6: Once airbag is completely removed, place off to the side and move onto disconnecting the 2 white connectors at the top center of the wheel.
Step 7: Using a 19mm socket, remove the center nut for the steering wheel. Cordless impact works best if working alone. Otherwise, I'd recommend a 2nd set of hands to hold the steering wheel while using a ratchet to remove the nut.
Step 8: Using a steering wheel puller/pulley puller, remove the steering wheel from its post. I used a harbor freight kit that I purchased for approx $13 using the 20% off coupon. Image of kit posted above. The kit uses 2 bolts that thread into the existing holes on your steering wheel + 1 center bolt that helps release the steering wheel as you turn it.
Step 9: Optional step, but I taped the clock spring/roll connector/spiral cable to ensure it stayed centered.
Step 10: Now its time to remove the controls and shroud to swap over to the new steering wheel. Remove the 8 philips head screws. At that point, everything the steering wheel controls and cruise control switch can be removed fairly easily. The back shroud is also easily removed by applying slight pressure at the top and bottom of the plastic cover (not pictured)