
LV4RNRTRAIL
New member
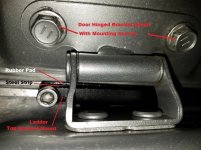
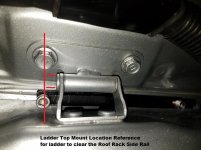
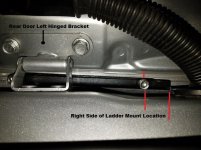
Ecotechne Ladder Top Mount location as shown, and can also mount this Ladder Top Mount... up to one inch to the left if desired depending on the roof rack you are using. I suggest to take your vehicle to the dealership or an experienced professional that knows how to properly install these rear doors to our 4Runners. This installation process can be very dangerous in many ways if not done properly. If you have never done this install, I do not recommend you do it. Do what some others have done... pay to have it done. I did this install solo a few times now, I do not recommend doing it solo. This install is not as easy as replacing the Door Lift Supports, no way. I assume No responsibility or Liability to anyone for damages or injury herein. I am only posting in this thread the results (Outcome) of my install. What can help.. May or may not work for you.
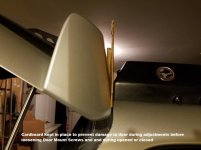
Do not remove the Door Hinged Mounting Bracket Screws at anytime ... only loosen the screws less than half way out, only if the A Frame Ladder is supporting the weight of the Rear Door, and the Lift Support(s) are removed. Support the bottom of the Rear Door opened with at least a 220Lbs Plus Weight Rated High Quality A Frame Ladder, that the Rear Door bottom can rest on when the door is raised opened. Do not step on the Ladder or bump it at anytime when the A Frame Ladder is supporting the weight of the Rear Door. When the Top Ladder Bracket is placed on the on Rear Door Edge, place cardboard strips between the Top Ladder Bracket and the top body rear roof edge to hold the Ladder Top Bracket temporarily in place. Before closing the rear door, fully tighten the Door Hinged Bracket Screws, and be sure the new Lift Supports are properly installed before attempting to remove the A Frame Ladder, and before lowering the Rear Door at all times. When everything is functioning properly with the Rear Door opened and closed safely, Open the Rear Door up again, loosely assemble the rest of the ladder to the vehicle, position the ladder and tighten it down. Make sure the vehicle is on a level surface to do the install. Hope this helps.
Do not remove the Door Hinged Mounting Bracket Screws at anytime ... only loosen the screws less than half way out, only if the A Frame Ladder is supporting the weight of the Rear Door, and the Lift Support(s) are removed. Support the bottom of the Rear Door opened with at least a 220Lbs Plus Weight Rated High Quality A Frame Ladder, that the Rear Door bottom can rest on when the door is raised opened. Do not step on the Ladder or bump it at anytime when the A Frame Ladder is supporting the weight of the Rear Door. When the Top Ladder Bracket is placed on the on Rear Door Edge, place cardboard strips between the Top Ladder Bracket and the top body rear roof edge to hold the Ladder Top Bracket temporarily in place. Before closing the rear door, fully tighten the Door Hinged Bracket Screws, and be sure the new Lift Supports are properly installed before attempting to remove the A Frame Ladder, and before lowering the Rear Door at all times. When everything is functioning properly with the Rear Door opened and closed safely, Open the Rear Door up again, loosely assemble the rest of the ladder to the vehicle, position the ladder and tighten it down. Make sure the vehicle is on a level surface to do the install. Hope this helps.
Attachments
-
 ET ladder install plus 073 4R.jpg84.7 KB · Views: 964
 -
 ET ladder install plus 075 4R.jpg71.7 KB · Views: 905
 -
 ET ladder install plus 061 4R.jpg78.9 KB · Views: 946
 -
 ET ladder install plus 038 4R.jpg67.4 KB · Views: 936
 -
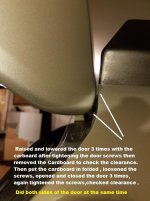 ET ladder install plus 039 4R.jpg63.2 KB · Views: 912
 -
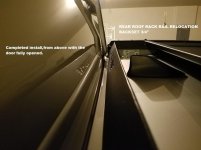 Door Open 022 4R.jpg56 KB · Views: 926
 -
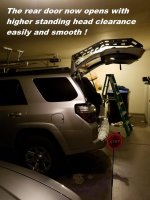 Door opened 092.jpg69.8 KB · Views: 1,435
 -
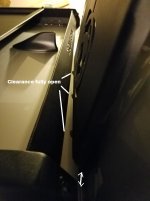 Door Opened 067 4R.jpg132.8 KB · Views: 895
Last edited:


