Factory Navigation Override and Unlock Bypass Mod

The 12V Constant mod does not hinder this at all. I have done the 12V Constant (and 115V Constant) mods as well. The reason you dont want constant power is in case you leave the switch on by accident, then if wired up to an ignition source it will automatically power down when you shut off the vehicle. You can get ignition power at the Cigarette Lighter (pink with light blue stripe wire) in the console and you done even have to have that option for the wire to be there.

Thanks J.A. When I put in my order, can I throw you some extra bucks to get 4 of your switches rather than 1 or buying the Ozniums on my own? Let me know (by PM if needed) how much it'd be.
 
Last edited:
JA,

What gauge wires did you use for the module install and the switches? The only wires I have on hand are 14 aw and they seem almost twice as thick as the factory wires. The wire I have is leftover from the constant 12v power mod. No problem buying new wire, but I want to make sure I get the right one.

I...ASSUME...I should use the same gauge as whatever the factory wires are?
 
Last edited:
JA,

What gauge wires did you use for the module install and the switches? The only wires I have on hand are 14 aw and they seem almost twice as thick as the factory wires. The wire I have is leftover from the constant 12v power mod. No problem buying new wire, but I want to make sure I get the right one.

I...ASSUME...I should use the same gauge as whatever the factory wires are?

Use anything between 18-22awg. I think I used 20 gauge. 14 would work but is harder to work with due to the disparity to the factory wiring like you noticed.
 
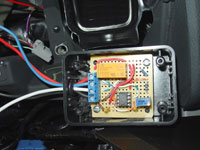
I put out a teaser post around a month ago about a mod i did to unlock the factory navigation features while the vehicle is in motion. I know a few of you were waiting for the full write up to be completed perhaps to build something similar yourself. Well I finally finished it...

Toyota 4Runner Factory Navigation Override and Unblock Bypass Module

I am so much happier about the purchase of the nav system now that I can actually use all its features while on the move. The mod comes in handy even more than I originally anticipated.

Take a look and let me know if you have any specific questions that perhaps I did not provide enough detail on or that did not come across clear enough.


Happy Holidays!
t7700.gif


JA,

I did most of the install yesterday. My electronics are in pieces while I try to figure out the last piece--wiring it to the switch.

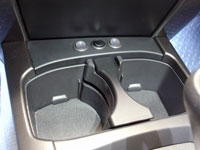
The switch holes are drilled and they fit perfectly (I used the same spot on the center cover that you did).

The switches on Oznium's website say they come pre-wired, but I recall you mentioned that you switched to another vendor.

So what I have are the switches with 3 prongs on the bottom (2 silver and 1 bronze), plus the 3 little red thingies each switch came with.

I assume I have to slide the flat end of the red things onto each of the prongs. That part looks easy enough.

How do I connect a wire into the round part of the red thingy? Do I just strip a little wire, feed it through, and crimp the whole thing?

Also, your instructions on your website say:

"Install a single pole single throw 12 volt switch somewhere on the dashboard or center console. Wire one terminal of this switch to a 12v positive power source that only has power when the ignition is on. Wire the other side to the override module, screw terminal #1."

So one terminal goes to a 12V power supply. Another one goes to the bypass module.

What about the third terminal? Do I need to run a ground on these switches too? Your instructions didn't say to, but Oznium's site said the switches need a ground wire.


dt
 
JA,

I did most of the install yesterday. My electronics are in pieces while I try to figure out the last piece--wiring it to the switch.

The switch holes are drilled and they fit perfectly (I used the same spot on the center cover that you did).

The switches on Oznium's website say they come pre-wired, but I recall you mentioned that you switched to another vendor.

So what I have are the switches with 3 prongs on the bottom (2 silver and 1 bronze), plus the 3 little red thingies each switch came with.

I assume I have to slide the flat end of the red things onto each of the prongs. That part looks easy enough.

How do I connect a wire into the round part of the red thingy? Do I just strip a little wire, feed it through, and crimp the whole thing?

Also, your instructions on your website say:

"Install a single pole single throw 12 volt switch somewhere on the dashboard or center console. Wire one terminal of this switch to a 12v positive power source that only has power when the ignition is on. Wire the other side to the override module, screw terminal #1."

So one terminal goes to a 12V power supply. Another one goes to the bypass module.

What about the third terminal? Do I need to run a ground on these switches too? Your instructions didn't say to, but Oznium's site said the switches need a ground wire.


dt

tn_module2.jpg

No, the switches I include are not pre-wired. I add in the correct fully insulated with strain relief crimp connectors to be used. You simply strip off 1/4" of wire insulation, insert into the round end and crimp down. Before crimping make sure the insulated wire is up into the strain relief part and crimp that too.


Correct, one terminal goes to a 12V power supply. Another one goes to the bypass module. The third (prong #3) is the ground for the led indicator to work. The wiring diagram i included shows which prongs to wire to each of these three items.

Anything else just let me know.
 
tn_module2.jpg

No, the switches I include are not pre-wired. I add in the correct fully insulated with strain relief crimp connectors to be used. You simply strip off 1/4" of wire insulation, insert into the round end and crimp down. Before crimping make sure the insulated wire is up into the strain relief part and crimp that too.


Correct, one terminal goes to a 12V power supply. Another one goes to the bypass module. The third (prong #3) is the ground for the led indicator to work. The wiring diagram i included shows which prongs to wire to each of these three items.

Anything else just let me know.


All went well. I finished wiring the switch and re-assembling my car late last night. It was fun doing it in the dark with a flashlight :)

(I have a 2 year old. Sufficient time for the entire install start-to-finish is impossible to come by, so you gotta do it whenever you can to get it done!)

It works brilliantly, and your instructions were eminently helpful. The only reason it took me a while to get through it (all told, about 6 hours) is because I have precious little experience with all of this stuff. And so it's disconcerting not having experience and digging behind your electronics to start cutting wires. I probably stared at the purple wire for a good 5 minutes, double checking the instructions 10 times before convincing myself I wasn't about to snip the wrong one! It's not like there's an undo button. For someone like me, this is more than just minor surgery on the car. But it was all told really easy to do; just took my time and worked out each step carefully.

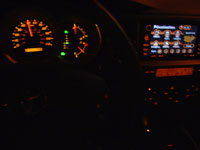
In any event, it worked out great. When I got to the diagnostics screen, the pulse count was correct, but the speed was alternating between 3mph and 4mph. I assume this is normal behavior? Since the the car's threshold for nav disabling is 5mph, it hasn't shown up as a problem, but I do want to make sure I didn't do something wrong.

Also, there's a one or two second pause between flicking the switch on and when the disabled nav functions are re-enabled. I assume also that that pause is expected behavior?

The hardest part of the whole thing was figuring out the exactly right locations to drill the switch hole. It's an oddly shaped piece of plastic, and there are other pieces beneath if that you don't want to bump into with your switch. I had a few millimeters of clearance, but made it work out.


dt
 
Responses in Red below, thanks for the update on the successful install!

All went well. I finished wiring the switch and re-assembling my car late last night. It was fun doing it in the dark with a flashlight :)
Awsome! Have done many late night mods like that as well.

(I have a 2 year old. Sufficient time for the entire install start-to-finish is impossible to come by, so you gotta do it whenever you can to get it done!)
Was in the same boat a couple years ago, time is not going to get any better as they get older...


It works brilliantly, and your instructions were eminently helpful. The only reason it took me a while to get through it (all told, about 6 hours) is because I have precious little experience with all of this stuff. And so it's disconcerting not having experience and digging behind your electronics to start cutting wires. I probably stared at the purple wire for a good 5 minutes, double checking the instructions 10 times before convincing myself I wasn't about to snip the wrong one! It's not like there's an undo button. For someone like me, this is more than just minor surgery on the car. But it was all told really easy to do; just took my time and worked out each step carefully.
You could always just crimp connect or solder the wire back together, good as new. Honestly. Dealer will never notice it especially with some tape on it. I do realize that though this is a big step for someone to get over...cutting into a $35+k vehicle, but after the first time it is no biggie. Other companies manufacturing nav overrides realize that as well and they include an entire custom harness just so you dont have to cut ONE simple wire...but they charge you more than DOUBLE our price for that perceived fear.

In any event, it worked out great. When I got to the diagnostics screen, the pulse count was correct, but the speed was alternating between 3mph and 4mph. I assume this is normal behavior? Since the the car's threshold for nav disabling is 5mph, it hasn't shown up as a problem, but I do want to make sure I didn't do something wrong.
Nope, that is the correct outcome. You want the speed sensor to show 3-4mph while you are moving at any speed. That is how the system gets fooled into unlocking. What you dont want is zero mph, because the system then detects that you are indeed moving and re-locks you out.

Also, there's a one or two second pause between flicking the switch on and when the disabled nav functions are re-enabled. I assume also that that pause is expected behavior?
Again, that is the correct operating behavior. No way in getting around the 1-2 second delay for the reactivation.

The hardest part of the whole thing was figuring out the exactly right locations to drill the switch hole. It's an oddly shaped piece of plastic, and there are other pieces beneath if that you don't want to bump into with your switch. I had a few millimeters of clearance, but made it work out.
Measure twice, cut once!

dt

Thanks again!
 

Members online

Forum statistics

Threads
278,312
Messages
3,554,089
Members
248,016
Latest member
Advally Service

Trending content

Back
Top