JWaldz
Moderator
First off I want to say, if you haven't joined a local offroad club you should. I couldn't ask for a better more supportive and dependable family of friends. They've helped me a lot. So, a big shout out to my good friend Josh from ARTTORA who has helped me with this and many other projects.
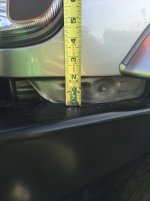
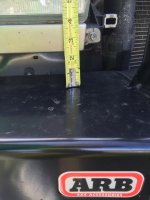
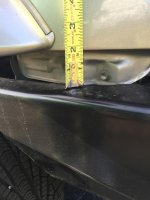
Anyways, I finally arranged for to fix the hideous almost 3" gap between the body and arb bumper caused from the bodylift. Since I went with 2" bl I wasn't able to just drill new holes in the bumper itself so we had to cut, grind, and weld. Pretty straight forward. Just cut behind the crush ripples on the bracket and be sure not to cut the 2 braces off. Grind off all all the excess powdercoat to get a good contact with the weld and measure how far you need to bring it up. Tack it in to place and begin welding. We opted to cut a couple small pieces of some scrap metal to fit in the slots on the upper and lower back part of the bracket where the new gap was created (behind the crush ripples). This increases rigidity.
I only took a couple pics cus the info is already out there. If you wanna follow the write-up I did here's the link.


I went out immediately afterwards to test the flex of the bumper and see how close it would be touching the limited flares. Sitting flat there is roughly a .25" gap under the fenders and roughly .50" all the rest of the way around.. Which I'm more than happy with. Flexed out (mostly) it seems to be just a hair under the flare so all is well! I'm happy.
Pics for fun...


Anyways, I finally arranged for to fix the hideous almost 3" gap between the body and arb bumper caused from the bodylift. Since I went with 2" bl I wasn't able to just drill new holes in the bumper itself so we had to cut, grind, and weld. Pretty straight forward. Just cut behind the crush ripples on the bracket and be sure not to cut the 2 braces off. Grind off all all the excess powdercoat to get a good contact with the weld and measure how far you need to bring it up. Tack it in to place and begin welding. We opted to cut a couple small pieces of some scrap metal to fit in the slots on the upper and lower back part of the bracket where the new gap was created (behind the crush ripples). This increases rigidity.
I only took a couple pics cus the info is already out there. If you wanna follow the write-up I did here's the link.
I went out immediately afterwards to test the flex of the bumper and see how close it would be touching the limited flares. Sitting flat there is roughly a .25" gap under the fenders and roughly .50" all the rest of the way around.. Which I'm more than happy with. Flexed out (mostly) it seems to be just a hair under the flare
so all is well! I'm happy.Pics for fun...
Last edited: