Front suspension upgrade - LCA bushing swap, Bilstein 6112

alia176

Senior Member
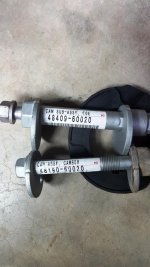
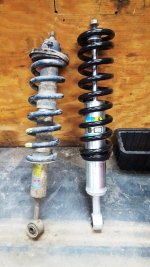
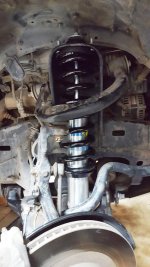
This post is about the front suspension upgrade: LCA bushing swap with Moog and the installation of 6112s. This vehicle is a Southwest vehicle so rust is minimal. However, the passenger side LCA experienced a seized alignment (toe) hardware. Apparently the front hardware is for Toe and the rear is for Camber. A quick strip to the local dealership for new hardware was required.

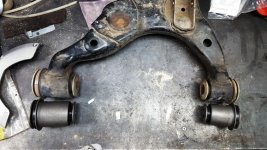
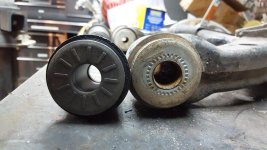
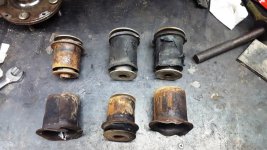
Pressing out the old bushings required the use of a hydraulic bottle jack and a MAP gas torch. Youtube has vids on this. Due to the shape of the LCA, I wasn't able to place it on the 20T press or use the typical BJ press tool. The UCA may allow the use of the BJ press tool, not sure.

This vehicle has 320xxx miles now and I installed a set of FJC suspension two years ago and I think that suspension had around 100xxx miles on them. That was much better than the original 280xxx miles tired suspension.

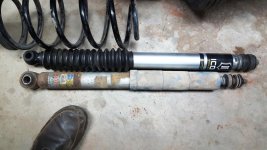
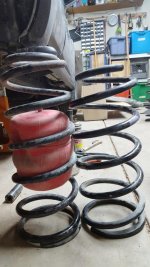
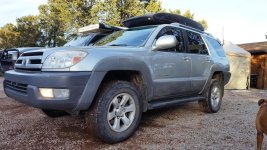
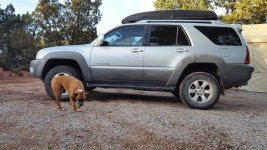
I installed 6112s up front along with 2" Icon VS2.0+Icon springs in the rear. Rear suspension were purchased from members of this board. The total lift was 2" all around, even though there is a noticeable rake. I'm ok with the rake as the vehicle will sink in the rear when we go camping/wheeling.

Per Bilstein's instructions, driver side spring perch was set at #3 from the bottom, pass side set at #1 from the bottom. This results in 2" lift with a stock vehicle (no bumper/winch/etc)

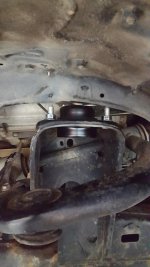
I moved the Air Lift air bags from the previous rear springs to the Icon springs, although I may not to use them. I figured I already have them, might as well use them. Swapping the air bags over took the most amount of time.

New items:
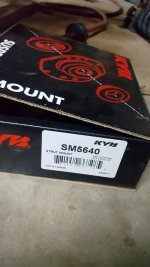
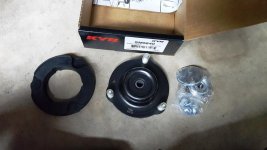
Front strut top hat from KYB/Amazon
New Moog LCA bushings
New alignment hardware at one location
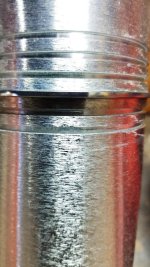
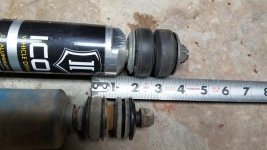
Bilstein 6112 updated with more grooves
Icon VS 2.0 rear shocks
Icon 2" rear springs

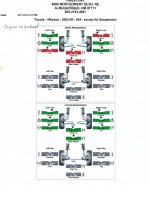
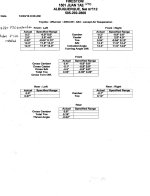
EDIT: my last post has alignment sheets scanned in.
 

Attachments

  • 20161224_193416.jpg
    20161224_193416.jpg
    83.6 KB · Views: 1,737
  • 20161226_100058.jpg
    20161226_100058.jpg
    101.5 KB · Views: 1,652
  • 20161224_193509.jpg
    20161224_193509.jpg
    87.9 KB · Views: 1,676
  • 20161226_100545.jpg
    20161226_100545.jpg
    123.3 KB · Views: 2,084
  • 20161224_191721.jpg
    20161224_191721.jpg
    89.8 KB · Views: 1,661
  • 20161227_055802.jpg
    20161227_055802.jpg
    62.7 KB · Views: 1,659
  • 20161227_055336.jpg
    20161227_055336.jpg
    71.4 KB · Views: 1,661
  • 20161227_055346.jpg
    20161227_055346.jpg
    68.4 KB · Views: 1,718
Last edited:
Register to hide this ad
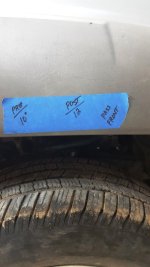
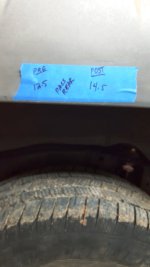
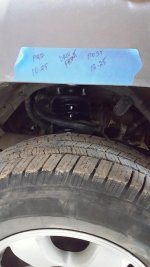
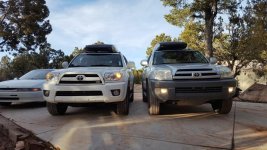
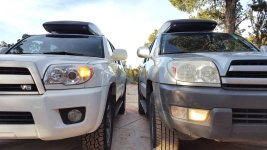
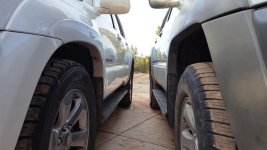
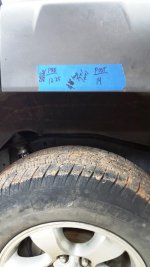
Some more pics for your amusement. The measurements were taken from the fender lip to the top edge of the rims. Fuel tank was 3/4 full.
 

Attachments

  • 20161226_100559.jpg
    20161226_100559.jpg
    84.1 KB · Views: 1,727
  • 20161227_202729.jpg
    20161227_202729.jpg
    79.2 KB · Views: 1,652
  • 20161228_054137.jpg
    20161228_054137.jpg
    59.6 KB · Views: 1,598
  • 20161228_054144.jpg
    20161228_054144.jpg
    110 KB · Views: 1,657
  • 20161228_054157.jpg
    20161228_054157.jpg
    67.8 KB · Views: 1,538
  • 20161228_054208.jpg
    20161228_054208.jpg
    63.9 KB · Views: 1,544
  • photo-29.jpg
    photo-29.jpg
    100.5 KB · Views: 1,632
  • photo-30.jpg
    photo-30.jpg
    84.2 KB · Views: 1,606
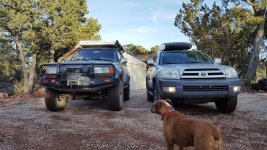
Height comparison with my GF's 2008 Limited V8 with XREAS. When the hidden winch goes on, I'll raise the front to compensate. The last picture is my 80 series on 4" lift and 315s.

Driving impression:

The very first thing I noticed that wind noise was louder from the rear doors. My guess is that the additional height from the rear is causing the air to go somewhere it has never been. My 11 year old told me that "it's really loud back here dad"!!!

The sway control is much tighter now and the ride quality is sweet. She handles the speed bumps with ease. The ride is supple on the road and very nice. I haven't had a chance to go wheeling yet.

Caster was 2.6 deg before and now at 1.7 deg so she feels a little "wandary" to me. Steering wheel doesn't return to center as quickly. I'll keep an eye out for an used set of UCA to bring the caster back to spec. Camber is spot on.

Removal of the frozen LCA bushings:

Using the bottle jack and the heat method is a good way to remove the old bushings. Unfortunately, two bushings came out without their outer sleeves so that required a more "creative" approach. You can use a sawzall to cut the sleeves in multiple locations then simply punch it out. I happen to have a die that was used to push the sleeve out with the bottle jack.

One of the LCA was stuck due to the frozen alignment hardware. I used a sawzall for a little bit but this took way too long. So, I resorted to a pneumatic right angle die grinder with a 5" cut off wheel. This was a very effective means of cutting through frozen hardware just be sure to wear your PPE. You can see this stuck hardware on the top left bushing in the pic.

Be patient, drink a beer or two and think through this process. It can be rather frustrating to have a frozen bushing.
 

Attachments

  • 20170107_053620.jpg
    20170107_053620.jpg
    105.4 KB · Views: 1,738
  • 20161230_155317.jpg
    20161230_155317.jpg
    111.4 KB · Views: 1,612
  • 20161230_155325.jpg
    20161230_155325.jpg
    89.9 KB · Views: 1,556
  • 20161230_155422.jpg
    20161230_155422.jpg
    63.5 KB · Views: 1,577
  • 20161230_155726.jpg
    20161230_155726.jpg
    131 KB · Views: 1,616
  • 20161230_155735.jpg
    20161230_155735.jpg
    136.7 KB · Views: 1,574
  • 20161230_155708.jpg
    20161230_155708.jpg
    136.5 KB · Views: 1,569
Last edited:
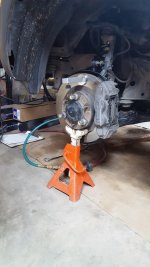
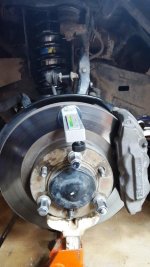
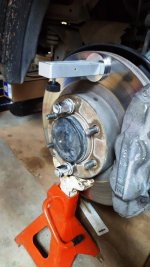
Finally, tightening up suspension hardware. This needs to be done with the weight of the vehicle on the suspension. I achieved this by placing couple of lug nuts on the studs and tightening up the rotor. Lowered the vehicle until the jack stand was fully supporting the weight of the vehicle then I torqued everything down. I still have another jack stand under the cross member but not touching just for safety.

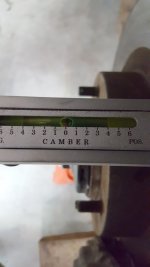
I also use a magnetic camber gauge to set it to zero before I started the whole process. After everything was done, I tried to adjust the alignment hardware so that I was close to reading zero on the same gauge. This is mainly for the drive to the alignment shop w/o wearing out the tires too much.

I am a huge fan of Firestone's lifetime alignment service. I got a free alignment on Friday then went back to the same shop on Monday and compared the printouts. Firestone often has internet promo on this service so keep your eyes open on their site.
 

Attachments

  • 20161227_055006.jpg
    20161227_055006.jpg
    73.6 KB · Views: 1,571
  • 20161227_055026.jpg
    20161227_055026.jpg
    84.7 KB · Views: 1,590
  • 20161225_121706.jpg
    20161225_121706.jpg
    79 KB · Views: 1,548
  • 20161225_121701.jpg
    20161225_121701.jpg
    113.8 KB · Views: 1,576
Thank you SO MUCH for taking the time to take all of those pictures. I've been trying to better understand the different components of my front suspension and this clears up so many questions I had in my head.
 
Nice write-up! I need to do the LCA bushings on my 4th gen one of these days. I've been running the 6112's for about 6 months and I really like them. I'm also running the Icon rear coils but I'm using Fox shocks instead and I like them as well.
 
You're welcome, hope it helps.

I uploaded some alignment printouts for your amusement.
 

Attachments

  • Alignment 2_11_16 as purchased jpeg.jpg
    Alignment 2_11_16 as purchased jpeg.jpg
    80.9 KB · Views: 1,659
  • Alignment 12_23_16 after FJC suspension Jpeg.jpg
    Alignment 12_23_16 after FJC suspension Jpeg.jpg
    116.2 KB · Views: 1,710
Last edited:
Hi, thanks for the great write up! I have an 03 V8 and just ordered the 6112s. Could you please measure from hub center to fender to gave me a good idea of where I need to set my coils?
 
Hi, thanks for the great write up! I have an 03 V8 and just ordered the 6112s. Could you please measure from hub center to fender to gave me a good idea of where I need to set my coils?

Hmm, didn't I do this on post #2 above? I'd suggest using the rim lip vs the rim center because trying to estimate where the center on the hub cap is not really very precise.

I've since changed my tires but I can get you the height numbers if you still want them. The suspension has had some time to settle for a bit since the install.
 
Last edited:
Hmm, didn't I do this on post #2 above? I'd suggest using the rim lip vs the rim center because trying to estimate where the center on the hub cap is not really very precise.

I've since changed my tires but I can get you the height numbers if you still want them. The suspension has had some time to settle for a bit since the install.

My mistake, I guess you did. I missed the line above the pics explaining the measurements. I would appreciate another measurement if you think it has settled, but I can use the ones above to get pretty close. Thanks much.
Dan
 

Members online

Forum statistics

Threads
278,316
Messages
3,554,120
Members
248,016
Latest member
Advally Service

Trending content

Back
Top