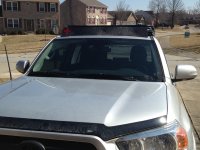
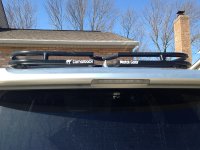
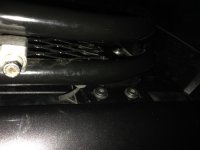
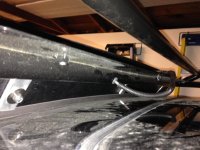
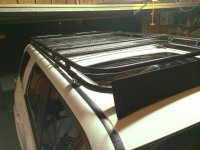
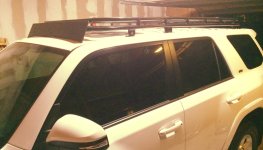
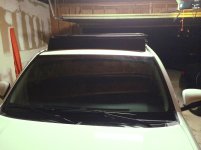
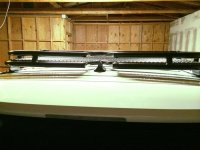
FS 5th Gen. Full Length Roof Racks by drabbits

Thank you to [MENTION=68079]drabbits[/MENTION] [MENTION=55815]Okki[/MENTION] [MENTION=68685]Ducmonsta[/MENTION] [MENTION=50210]KVA[/MENTION] etc etc for helping figure out how tall my truck would be with this rack on it.

Thanks for the accurate info guys!

y3ynegar.jpg
 
[MENTION=68079]drabbits[/MENTION] just picked up my rack - thanks Alex. Now have to wait 3 weeks to get my 4Runner from the body shop. Sheesh.
 
Re-adjusted the fairing and gave Alex a shout out on the back. Already received a bunch of compliments on the rack. It's awesome!
 

Attachments

  • fairing.JPG
    fairing.JPG
    121.6 KB · Views: 1,336
  • shoutout.JPG
    shoutout.JPG
    127 KB · Views: 1,181
Re-adjusted the fairing and gave Alex a shout out on the back. Already received a bunch of compliments on the rack. It's awesome!

A couple of questions:

1) Do you notice any change in Sat reception? I ask, because I kept getting bad reception with my 2010 in rural NM/CO areas and noticed that when I moved my rear crossbar forward away from the antenna, reception improved. Maybe a one-off, but...

2) What is the mfg of your bug deflector?
 
A couple of questions:

1) Do you notice any change in Sat reception? I ask, because I kept getting bad reception with my 2010 in rural NM/CO areas and noticed that when I moved my rear crossbar forward away from the antenna, reception improved. Maybe a one-off, but...

2) What is the mfg of your bug deflector?

1) I don't really use sat radio, so I couldn't really tell you. Sorry!

2) It's an AVS aeroskin. Not really a bug deflector though. More of a additional layer over the leading edge to protect paint from rocks and such.
 
VERY COOL [MENTION=102688]BrickSwindle[/MENTION] !

We came up with a new sticker design and we'll be slowly shipping them out to everyone!
 
VERY COOL [MENTION=102688]BrickSwindle[/MENTION] !

We came up with a new sticker design and we'll be slowly shipping them out to everyone!

I'll make sure to pick one up when I'm able to drop by to build the light bar mount :-) Will have the light bar in hand very shortly.
 
Hey OP, or anyone who has a rack...

Does the rack come with ports/sites/holes in it to run wiring for rack lights?

If not, did anyone run them inside? or just zip tie them to the sides of rack?

Cheers
 
Hey OP, or anyone who has a rack...

Does the rack come with ports/sites/holes in it to run wiring for rack lights?

If not, did anyone run them inside? or just zip tie them to the sides of rack?

Cheers

The standard rack does not, but you can always to talk Alex about adding them. You could also ask him about about adding custom mounting brackets if you already have your lights picked out. I went with the standard rack just due to the uncertainity of the light setup I would eventually go with. Zip tie would be fine. Just be sure your connections are solid and sealed, and you thread all your wiring through some of that black weatherproofing electrical tubing and you should be good to go.
 
The standard rack does not, but you can always to talk Alex about adding them. You could also ask him about about adding custom mounting brackets if you already have your lights picked out. I went with the standard rack just due to the uncertainity of the light setup I would eventually go with. Zip tie would be fine. Just be sure your connections are solid and sealed, and you thread all your wiring through some of that black weatherproofing electrical tubing and you should be good to go.

Cheers,
thanks boss
 
Hey OP, or anyone who has a rack...

Does the rack come with ports/sites/holes in it to run wiring for rack lights?

If not, did anyone run them inside? or just zip tie them to the sides of rack?

Cheers

Standard one does not. I did respond somewhere with what I did which was very easy and copied most other folks in what they do sans the fact I had to drill the holes. Some quick tips:

  • unbolt the rack from the four post mounts - no need to remove from the roof
  • make sure you figure out what size hole you're drilling beforehand - I match the size to the guage wire and available grommets
  • mark and drill your holes (hopfully before you moved it - lol - no going back now
  • once the holes are drilled I used some standard hardwire to fish through the holes and feed towards the other end - once at the other end I made a simple hook another piece of wire to pull the wire through
  • with the wire now safely through each hole (in one side and out the other) attach your pre-run wire and pull the correct end to feed through the rack
  • add grommets, shrink tube, whatever you like and you're done
  • now add the deutsch plug

Here's the starting end
photo 5.jpg

...and the front of the rack (excuse the dirt)
photo6.jpg
 

Attachments

  • photo 5.jpg
    photo 5.jpg
    123.7 KB · Views: 1,793
  • photo6.jpg
    photo6.jpg
    123.2 KB · Views: 1,774
Very happy with the rack! Thanks Alex!

I will try to take better pictures soon.
 

Attachments

  • CamelBack Rack 3.jpg
    CamelBack Rack 3.jpg
    136.4 KB · Views: 2,406
  • CamelBack Rack.jpg
    CamelBack Rack.jpg
    137.7 KB · Views: 2,679
  • CamelBack Rack 2.jpg
    CamelBack Rack 2.jpg
    131.3 KB · Views: 1,681
  • CamelBack Rack 4.jpg
    CamelBack Rack 4.jpg
    134 KB · Views: 1,917
Just picked up and re-installed my roof rack with [MENTION=68079]drabbits[/MENTION] yesterday. He had it powder-coated for me (originally just rattle canned) and I have to say we should have done this the first time around. Looks so much better! Will have no questions in the future about durability with this new gloss black powder-coating. Here are a few pics:
<a href="https://www.flickr.com/photos/93778443@N04/13472260975" title="Roof Rack Pt. 2 by TPatt88, on Flickr"><img src="https://farm4.staticflickr.com/3693/13472260975_690c93c8cb.jpg" width="500" height="333" alt="Roof Rack Pt. 2"></a>
<a href="https://www.flickr.com/photos/93778443@N04/13472261175" title="Roof Rack Pt. 2 by TPatt88, on Flickr"><img src="https://farm8.staticflickr.com/7224/13472261175_a63867b687.jpg" width="500" height="333" alt="Roof Rack Pt. 2"></a>
<a href="https://www.flickr.com/photos/93778443@N04/13472248055" title="Roof Rack Pt. 2 by TPatt88, on Flickr"><img src="https://farm8.staticflickr.com/7317/13472248055_7994791ca0.jpg" width="333" height="500" alt="Roof Rack Pt. 2"></a>
<a href="https://www.flickr.com/photos/93778443@N04/13472606944" title="Roof Rack Pt. 2 by TPatt88, on Flickr"><img src="https://farm4.staticflickr.com/3793/13472606944_f88252e95e.jpg" width="500" height="333" alt="Roof Rack Pt. 2"></a>
<a href="https://www.flickr.com/photos/93778443@N04/13472607204" title="Roof Rack Pt. 2 by TPatt88, on Flickr"><img src="https://farm6.staticflickr.com/5178/13472607204_638f22991c.jpg" width="500" height="333" alt="Roof Rack Pt. 2"></a>
The little man and Mrs. (me standing on roof rack)
<a href="https://www.flickr.com/photos/93778443@N04/13472255375" title="Roof Rack Pt. 2 by TPatt88, on Flickr"><img src="https://farm8.staticflickr.com/7062/13472255375_11f336ac3c.jpg" width="500" height="333" alt="Roof Rack Pt. 2"></a>
STICKERS!!!
<a href="https://www.flickr.com/photos/93778443@N04/13472614024" title="Roof Rack Pt. 2 by TPatt88, on Flickr"><img src="https://farm8.staticflickr.com/7025/13472614024_3248a90bcb.jpg" width="500" height="333" alt="Roof Rack Pt. 2"></a>
<a href="https://www.flickr.com/photos/93778443@N04/13472613814" title="Roof Rack Pt. 2 by TPatt88, on Flickr"><img src="https://farm4.staticflickr.com/3678/13472613814_63eebbfb90.jpg" width="500" height="333" alt="Roof Rack Pt. 2"></a>
<a href="https://www.flickr.com/photos/93778443@N04/13472367793" title="Roof Rack Pt. 2 by TPatt88, on Flickr"><img src="https://farm3.staticflickr.com/2826/13472367793_4b9c0edbee.jpg" width="500" height="333" alt="Roof Rack Pt. 2"></a>

 

Members online

No members online now.

Forum statistics

Threads
278,317
Messages
3,554,129
Members
248,016
Latest member
Advally Service

Trending content

Back
Top