Silver4RunnerV8
New member
Hi folks,
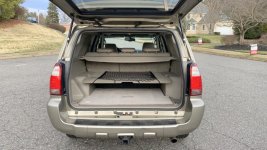
I wanted to share my sleeping platform build for my 2003 Toyota 4Runner with the forum. After a lot of searching, I took elements from different builds in order to come up with mine. The main things I wanted to achieve with this build were to:

It's also modular, so you can choose to convert only 2/3rds (or 1/3rd) of the rear into a bed if you want:

I don’t have receipts of everything spent but I believe this project cost around $150 once all was said and done. I chose to use nicer, more expensive plywood choices as well. I missed taking photos of some steps but let me know if you've questions. As always, please double check all measurements if you decide to undergo this yourself and build at your own risk!
Materials

Here's a rough drawing of the components:

Hope this was helpful and let me know if you have any questions. Cheers!
I wanted to share my sleeping platform build for my 2003 Toyota 4Runner with the forum. After a lot of searching, I took elements from different builds in order to come up with mine. The main things I wanted to achieve with this build were to:
- Retain the rear seats when the platform WAS NOT set up.
- Maximize sleeping space when the platform WAS set up.
- Not modify any factory equipment so the platform could be removed if desired.
It's also modular, so you can choose to convert only 2/3rds (or 1/3rd) of the rear into a bed if you want:
I don’t have receipts of everything spent but I believe this project cost around $150 once all was said and done. I chose to use nicer, more expensive plywood choices as well. I missed taking photos of some steps but let me know if you've questions. As always, please double check all measurements if you decide to undergo this yourself and build at your own risk!
Materials
- 1.5x sheets of Plywood (I wasn’t able to get the dimensions I wanted from a single 96” x 48” sheet of plywood. f you want to make your platform a little smaller, and save money you can get by with using 1 sheet.)
- One 2 x 12 x 12 (used to build the frame of the platform- green figure in drawing)
- RV/Outdoor Carpet
- 1x Closet Organizer Rail
- 3x Closet Organizer Shelf Supports
- Appropriate Wood Screws
- Small screws (to attach carpet to plywood sheets)
- Door latch (to hold sheets #1 and #2 together)
- 4x Turnbuckles and 4x Eye Screws (to secure platform frame to vehicle floor)
- 2x Smaller Turnbuckles and 2x Smaller Eye Screws (to secure Sheets #1 and #2 to Sheet #3 when platform is in use)
Here's a rough drawing of the components:
- Cut your plywood to the following dimensions and attach carpet using small screws:
- Sheet #1: 38” x 23” (cutout must be made for seat latch)
- Sheet #2: 31” x 38” (cutout must be made for seat latch)
- Sheet #3: 37” x 54” (must round 2 corners to make it fit)
- Cut the 2 x 12 x 12 in to 3 pieces of lengths: 42”, 35.5”, 35.5”. Screw and glue these pieces together to create a base for your platform.

- Move base into car and secure Sheet #3 to the base using wood screws.


- Cut closet organizer rail and attach to sleeping platform in appropriate locations, making sure that the shelf supports will support the plywood when installed.


- Attach eyelets to all sheets in appropriate locations. The turnbuckles for Sheets 1 & 2 connect to the metal rings that the rear seat back clips into.

- Attach door latch to Sheets #1 and #2.
- Secure platform base using turnbuckles.

- Place Sheets #2 & #3 on top of Sheet #1 for storage.


- Get out there and put it to use!
Hope this was helpful and let me know if you have any questions. Cheers!
Last edited: