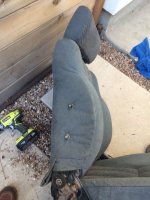
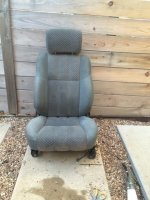
Gen1 4Runner Seat Rebuild (demoed by an 8 year old)

alpinecowboy

New member
Hey gang
I am tearing into the old worn out interior my 88 4runner rebuild.

Like most old toyotas, my driver seat is shot and my passenger seat was pristine. To fix this, I purchased a matching set of front seats from a local toyota parts source (Thanks Jason at CruiserYard!) from which I would make a single good driver seat.

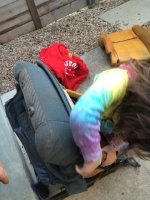
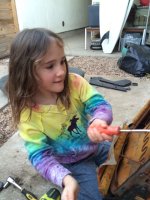
Long story short, neither I nor my 8 year old daughter have any upholstery experience. Not even a set of seat covers. That said, together she and I had these seats torn down, covers cleaned, foam swapped and mounted and the new covers on in about 2 hours of total work.

I let her do most of the hard work.

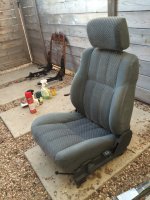
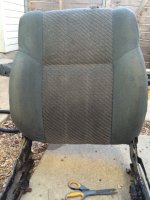
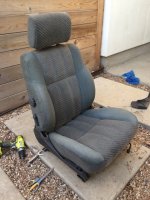
I'll try to get a before picture up, but here is the new driver's seat that we have... tear free, stain free and with cushy, untorn foam:
 

Attachments
  • IMG_6574.jpg
    IMG_6574.jpg
    108 KB · Views: 450
  • IMG_6575.jpg
    IMG_6575.jpg
    116.2 KB · Views: 469
Last edited:
Register to hide this ad
seat replacement how to w pics

As mentioned above, we have no experience in upholstery work so this was "figure it out as you go along"... that said the job was pretty easy and didn't take a lot of time. The pictures below go in order of the steps listed. I wasn't sure how best to do the how to portion so feel free to hit me with questions.

The basic idea is that this allows you to get a good driver seat at the very least if you only have one set of seats and are willing to sacrifice the passenger seat a bit and "transfer" the tears to your passenger side. If you can get a second set of seats as I did, then you can create not only a new driver seat but also a new passenger seat that has all the comfort adjustments (bolsters, lumbar, front lift) of the driver side. This is done by switching out the upper frame on the passenger side before and then repeating all the install process the same as the drivers from there. Worst case, just pulling the seat covers and taking them into an upholstery shop fully removed and ready-to-sew will save you a ton of $$ should you decide to repair the covers (as I may on one set).

Cheap, nice, OEM repair/rebuild.

Ok, here goes (process is the same for both driver and passenger seat)

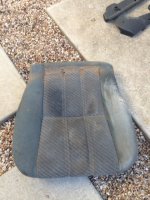
NOTE: Your lower seat cushions are totally hot-swappable from driver to passenger side so that is really just a matter cleaning them with a pressure washer. The upper cushions are the ones that need a little more work. These we will "skin" from the foam and swap from passenger side and onto the driver side frame... trust me, it will make sense...:

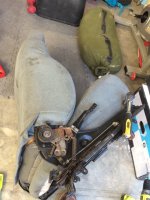
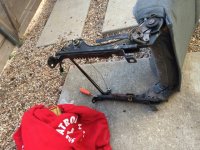
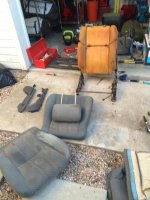
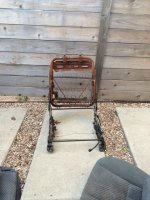
1) With seats out of truck, remove plastic trim covers from both sides of the seats and the rails (if any) with a phillips head driver. Set them aside. Then remove the lower seat cushions from the lower seat frame by removing the 2 bolts on each side. The cushion should just lift out.

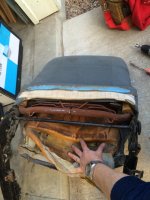
2) With the lower cushion removed, also remove any additional hardware from the seat such as knobs etc. These are held in place with little pressure clips that you can pry out using a flat head. Then, Flip the seats over and lift the upholstery trim cover to reveal five or so metal press rings. These secure the upholstery bars to the frame of the seat.

3) Using a medium to narrowish head flat-head screwdriver, gently pry these rings open one at a time enough to "unhook" them from the frame. Tip: Try to leave them on the metal bars though - it will make install quicker.

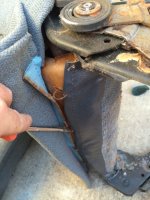
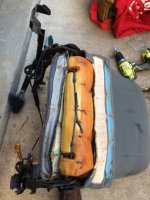
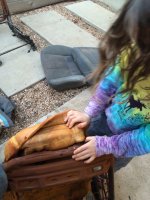
4) Continue gently peeling up the seat cover and the foam, revealing more press rings retaining more rubber internal seat straps. Use screwdriver to remove those as well and keep "skinning" the seat (It's a lot like skinning a deer fyi - if you do this right and take it easy it's mess free and you won't do any damage to the foam or the cover)

5) As you roll the seat cover up over the foam, you will encounter additional rings on the front and back of the seat. As above pry those loose while retaining them on the upholstery seat cover rods for reinstallation.
 

Attachments

  • IMG_6514.jpg
    IMG_6514.jpg
    101.7 KB · Views: 449
  • IMG_6515.jpg
    IMG_6515.jpg
    133.7 KB · Views: 449
  • IMG_6517.jpg
    IMG_6517.jpg
    104.3 KB · Views: 454
  • IMG_6518.jpg
    IMG_6518.jpg
    98.4 KB · Views: 419
  • IMG_6520.jpg
    IMG_6520.jpg
    99.6 KB · Views: 417
  • IMG_6523.jpg
    IMG_6523.jpg
    104.7 KB · Views: 411
  • IMG_6528.jpg
    IMG_6528.jpg
    102 KB · Views: 464
  • IMG_6529.jpg
    IMG_6529.jpg
    105 KB · Views: 443
Last edited:
more pics from how to

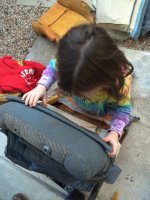
6) Clearing the side bolsters will take a little bit of effort - you can see Hannah working at it - but she still took her time not to tear the foam or the cover... nice and easy and...

7) Voila'... at the top... good luck getting the covers over the headrest mounts. It took a little bit of work with a flat head screwdriver to gently get ours to clear.

8) After that, we took the covers to the carwash for an good old pressure washing inside and out. The seat bottoms will just bolt back in so that swap is easy. The upper cushion is the part that requires re-skinning using the passenger seat components.

9) The frames of both sides are very similar except for the extra adjustments in the drivers side. The foams are perfect matches. We sprayed 3M High strength adhesive on our passenger side foam and attached that to the drivers side frame.

10) Then, Hannah began the process of reinstalling the passenger side seat cover (with no tears) onto the foam so that we would have a new, tear-free drivers seat.

11) It's pretty much the reverse of the install - I used needlenose pliers to just reclose all the little press rings back on the upholstery attachment points - it was very easy to get it back on the seat frame.

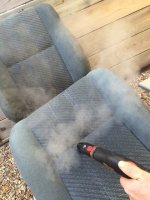
12) After installing, we used a steamer to do two things: 1) To even out the fabric of the cover and insure a good fit and 2) steam helps revitalize worn out old seat foam (https://www.youtube.com/watch?v=5rndD6tzZPo) - huge success in both cases. Foam is cushier and the seat cover is nice and snug.The foam is super easy to remove - I forgot to include peeling it off in the above steps.

Just push it off from the "inside" through the frame to help it peel off - don't tug or pull on it more than you need to. It should peel out pretty easily once you get started so if you find yourself struggling back off and see if it is hung on something... no sense tearing it.
 

Attachments

  • IMG_6527.jpg
    IMG_6527.jpg
    103.7 KB · Views: 432
  • IMG_6532.jpg
    IMG_6532.jpg
    97.8 KB · Views: 424
  • IMG_6521.jpg
    IMG_6521.jpg
    92 KB · Views: 411
  • IMG_6536.jpg
    IMG_6536.jpg
    107.2 KB · Views: 419
  • IMG_6530.jpg
    IMG_6530.jpg
    107.6 KB · Views: 420
  • IMG_6531.jpg
    IMG_6531.jpg
    103.6 KB · Views: 425
  • IMG_6553.jpg
    IMG_6553.jpg
    117.6 KB · Views: 429
  • IMG_6559.jpg
    IMG_6559.jpg
    110.8 KB · Views: 472
Last edited:
Final how to pics

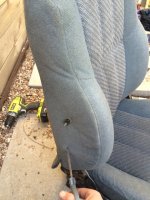
13) I cut two small holes in the seat cover to accommodate the adjustment mounts for the bolster and lumbar adjustments (passenger seat sides have no holes for these - very easy to do)

14) Ready to mount the knobs (note: the press clips are easier installing than removing - you can premount the little wishbone clips to the knobs and then 'pop' the knobs on - you don't have to try and press them back on the reverse of install.

15) And done!

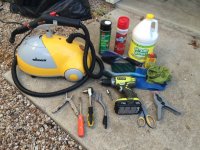
16) Tools used... nothing too tricky!
 

Attachments

  • IMG_6564.jpg
    IMG_6564.jpg
    121.3 KB · Views: 429
  • IMG_6565.jpg
    IMG_6565.jpg
    98.4 KB · Views: 423
  • IMG_6563.jpg
    IMG_6563.jpg
    105 KB · Views: 452
  • IMG_6576.jpg
    IMG_6576.jpg
    134.7 KB · Views: 428
Last edited:

Members online

Forum statistics

Threads
278,316
Messages
3,554,124
Members
248,016
Latest member
Advally Service

Trending content

Back
Top